Uncredited photos on this page taken by: Nathan Holth. Unless stated in a caption, all photos are Copyright with All Rights Reserved. Learn about reuse of our photos.
![]()
Overview Photos
![]()


Views beside bridge from southwest quadrant.
![]()


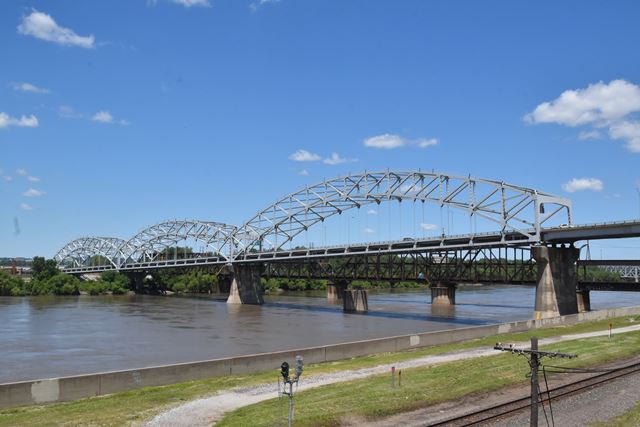


Elevation from southwest quadrant.
![]()
![]()
![]()
Panoramic elevation from southwest quadrant.
![]()


Elevation of northern arch span from southwest quadrant.
![]()

Elevation of center arch span from southwest quadrant.
![]()


Elevation of southern arch span from southwest quadrant.
![]()

View of river.
![]()


Views beside bridge from northwest quadrant.
![]()

Views on approaching Broadway facing north.
![]()


Views driving northbound on southern approach.
![]()


Views driving northbound on southern arch span.
![]()


Views driving northbound on center arch span.
![]()


Views driving northbound on northern arch span.
![]()


Views driving northbound on northern approach.
![]()


Views driving northbound on main arch spans.
![]()


Photo Credit: Clark Vance and John Marvig
Main Plaque. This plaque is easy to miss if you are not looking for it in this unusual location. The plaque hides between two trees, mounted on the concrete retaining wall for the north approach, on the east side of the north roundabout that intersects Harlem Avenue. Coordinates: 39.116779, -94.590741.
![]()
Main Span Detail Photos
![]()


Arch overview.
![]()


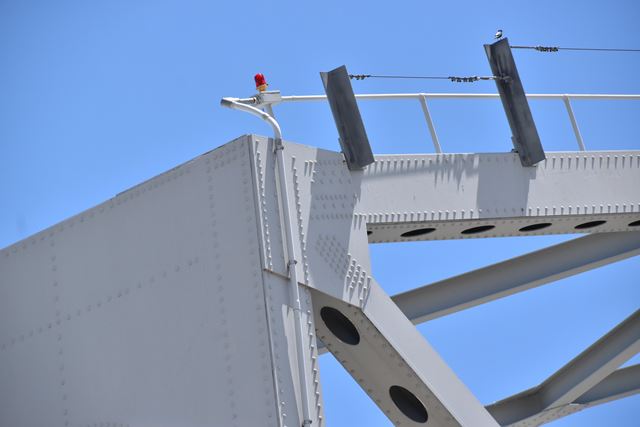
Portal.
![]()

Hanger cables.
![]()
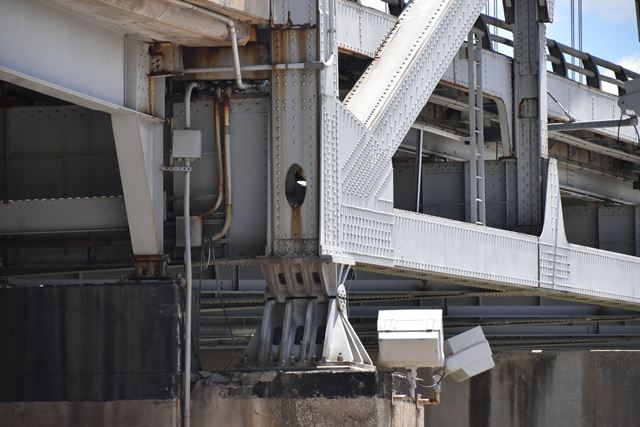
End posts.
![]()
Bearings.
![]()


Arch top chord connections.
![]()
Hanger connections to arch rib.
![]()


Bottom chord (tie) connections.
![]()


Hanger connection to floor beams.
![]()
Top chord.
![]()

Arch rib.
![]()


Bottom chord (tie).
![]()


Arch members.
![]()
Railing.
![]()

View looking toward deck stringer.
![]()
Northern Approach System Photos
![]()

View beside northern approach spans.
![]()

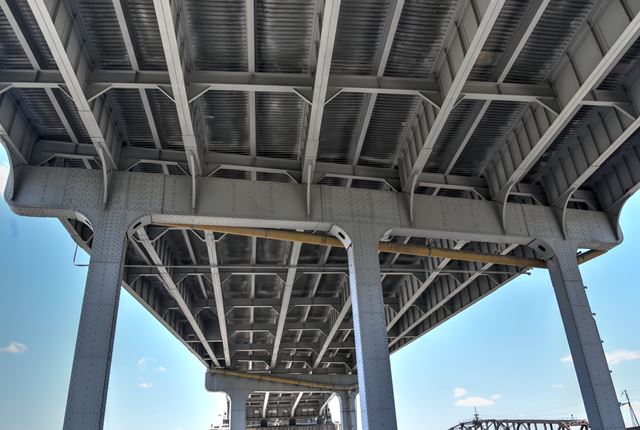
View under northern approach spans.
![]()
Bearings for northern approach stringers. These rest next to the bearings for the main arch.
![]()
Southern Approach System Photos
![]()
Approach girder overviews.
![]()


Unusual girder details where the bridge widens for where the toll plaza was once located.
![]()

Cantilever detail on approach girder.
![]()


Bearing for cantilevered girder.
![]()


Approach span bearings on bents.
![]()


Approach span superstructure girder details.
![]()

Approach girders and diaphragms.
![]()
Views under southern approach spans facing south.
![]()


Views under southern approach spans near main span facing south.
![]()


Views under southern approach spans near main span facing north.
![]()


Bent 5, one of the unique bents on the southern approach. This one is much like a rigid-frame structure, and spreads out to fit around the road and railroad below.
![]()


Bent 5 column.
![]()


Bent 5 details.
![]()


Bent 2, one of the unique bents on the southern approach. This one is noted for its asymmetrical cross-girder, which has a "kink" in it, forming a sort of off-center camber in the beam. The steel cross-girder is supported by concrete columns.
![]()
Details of Bent 2.
![]()


Bent 1, one of the unique bents on the southern approach. This one is noted for its unusual cross-girder, which is cantilevered beyond the column on the east end only. Also note the curved detail at the ends of the cross girder... at the east end the bottom corner is curved, while at the west end it is the top corner which is curved. The steel cross-girder is supported by concrete columns.
![]()


West elevation of South Approach Unit 1. This unusual approach span forms a "Y" and has very unusual through girders to suit this arrangement. The variable depth girders are sloped, with the southern end being far more deep than the northern end.
![]()
![]()
Panoramic west elevation of South Approach Unit 1.
![]()


View beside South Approach Unit 1.
![]()


Views under South Approach Unit 1.
![]()


Details of the South Approach Unit 1 girder.
![]()


Views of other southern approach span bents.
![]()


Details of other southern bents.
![]()
GoPro CarCam Photos
![]()


GoPro CarCam Photos, Northbound Crossing: Approaching roadway.
![]()


GoPro CarCam Photos, Northbound Crossing: Views on southern approach spans.
![]()


GoPro CarCam Photos, Northbound Crossing: Views on southern arch span.
![]()


GoPro CarCam Photos, Northbound Crossing: Views on center arch span.
![]()


GoPro CarCam Photos, Northbound Crossing: Views on northern arch span.
![]()


GoPro CarCam Photos, Northbound Crossing: Views on northern approach spans and ramp system.
![]()


GoPro CarCam Photos, Northbound Crossing: Views on roundabout at northern end. Plaque is located here on the approach wall to the right in the first photos here.
![]()


GoPro CarCam Photos. Views under northern approach spans.
![]()


GoPro CarCam Photos. Views beside bridge from northwest quadrant.
![]()
![]()

![]()