
Uncredited photos on this page taken by: Nathan Holth. Unless stated in a caption, all photos are Copyright with All Rights Reserved. Learn about reuse of our photos.
![]()
Details Viewed From On Bridge In Vicinity of Anchor Arm
![]()


Portal views facing north.
![]()


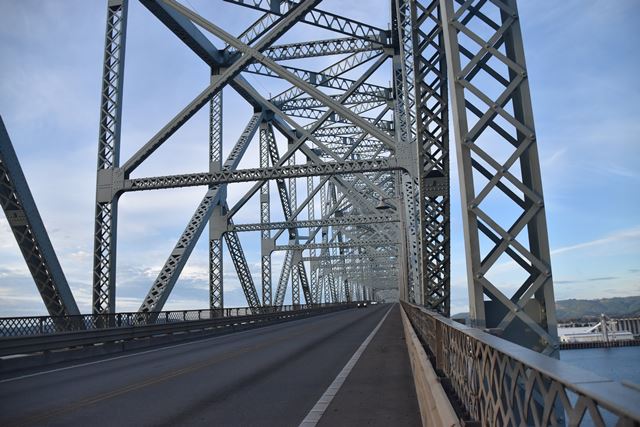
Views on south anchor arm facing north.
![]()


Views on south anchor arm facing south.
![]()

Anchor arm truss web.
![]()


Top chord connections.
![]()


Bottom chord connections.
![]()


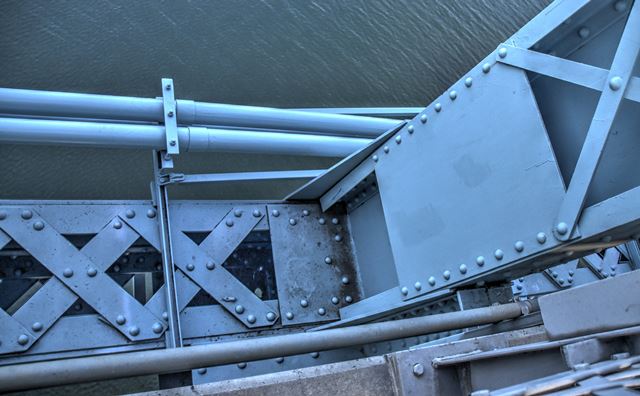
Intermediate connections.
![]()
Top chord.
![]()


Bottom chord.
![]()
End post.
![]()


Diagonal member overview.
![]()
Diagonal member details.
![]()

Vertical member overview.
![]()

Vertical member details.
![]()


Portal bracing.
![]()


Sway bracing.
![]()


View showing diagonal member with a top chord connection in the background.
![]()
Details Near Main Post and Adjacent Heavy Diagonal Members
![]()


Top chord connection with heavy diagonal on anchor arm side.
![]()


Top chord connection with heavy diagonal on cantilever arm side.
![]()


Strut located at top chord connection with heavy diagonal.
![]()
Sway bracing at heavy diagonal members.
![]()

Heavy diagonal member overview on anchor arm side.
![]()


Heavy diagonal member details on anchor arm side.
![]()

Overview of heavy diagonal member on cantilever arm side, which is smaller in size.
![]()


Detail of heavy diagonal member on cantilever arm side, which is smaller in size.
![]()


Sway bracing and overview of heavy diagonal member on cantilever arm side.
![]()


Looking up under heavy diagonal member on cantilever arm side.
![]()


Looking up under heavy diagonal member on anchor arm side.
![]()


Intermediate connections on anchor arm heavy diagonal member.
![]()


Sway bracing connection to cantilever arm heavy diagonal member.
![]()

Intermediate connection on cantilever arm heavy diagonal member.
![]()


Main post overview.
![]()


Main post sway bracing.
![]()


Looking up at main post and associated sway bracing.
![]()


Top chord connections at main post. Note pin connection. Pins measure 20 inches in diameter.
![]()


Main post and heavy diagonal bottom chord connection.
![]()


Intermediate connection to main post.
![]()


Main post detail.
![]()
Details Viewed From On Bridge In Vicinity of Cantilever Arm
![]()
Views on bridge in vicinity of cantilever arm facing south.
![]()


Views on bridge in vicinity of cantilever arm facing north.
![]()


Cantilever arm truss web.
![]()
Top chord connections.
![]()


Intermediate connections.
![]()
Sway bracing.
![]()


Diagonal member overviews.
![]()


Diagonal member details.
![]()


Bottom chord.
![]()
Details Viewed From On Bridge At Transition From Cantilever Arm To Suspended Span
![]()


Portal views on end of cantilever arm facing north toward suspended span.
![]()


Portal views on cantilever arm facing south.
![]()


View showing from left to right, end diagonal of cantilever arm, vertical hanger for suspended span, and suspended span end post.
![]()


Top chord link between cantilever arm (left) and suspended span (right).
![]()


Top chord connection with pin for hanger of suspended span.
![]()


Top chord connections at end post of suspended span, showing pin-connected link to cantilever arm to the left.
![]()


Bottom chord connection with pin for hanger of suspended span.
![]()


Hanger details.
![]()


Bottom chord detail at end of suspended span. Note casting inside. Temporary pins and holes were originally located in this vicinity to aid in erection, and were patched over with plate after erection was complete.
![]()


Expansion joint.
![]()
Details Viewed From On Bridge On Suspended Span
![]()


Views on suspended span facing north.
![]()
Views on suspended span facing south. View at end of suspended span.
![]()


Suspended span truss web.
![]()


Top chord connections.
![]()


Suspended span portal bracing.
![]()
Sway bracing.
![]()


Sway bracing connections to vertical members.
![]()


Upper lateral bracing.
![]()


Vertical members.
![]()


Diagonal members.
![]()
Suspended span end post.
![]()
![]()

![]()


