
Uncredited photos on this page taken by: Nathan Holth. Unless stated in a caption, all photos are Copyright with All Rights Reserved. Learn about reuse of our photos.
![]()


Original / Full Size
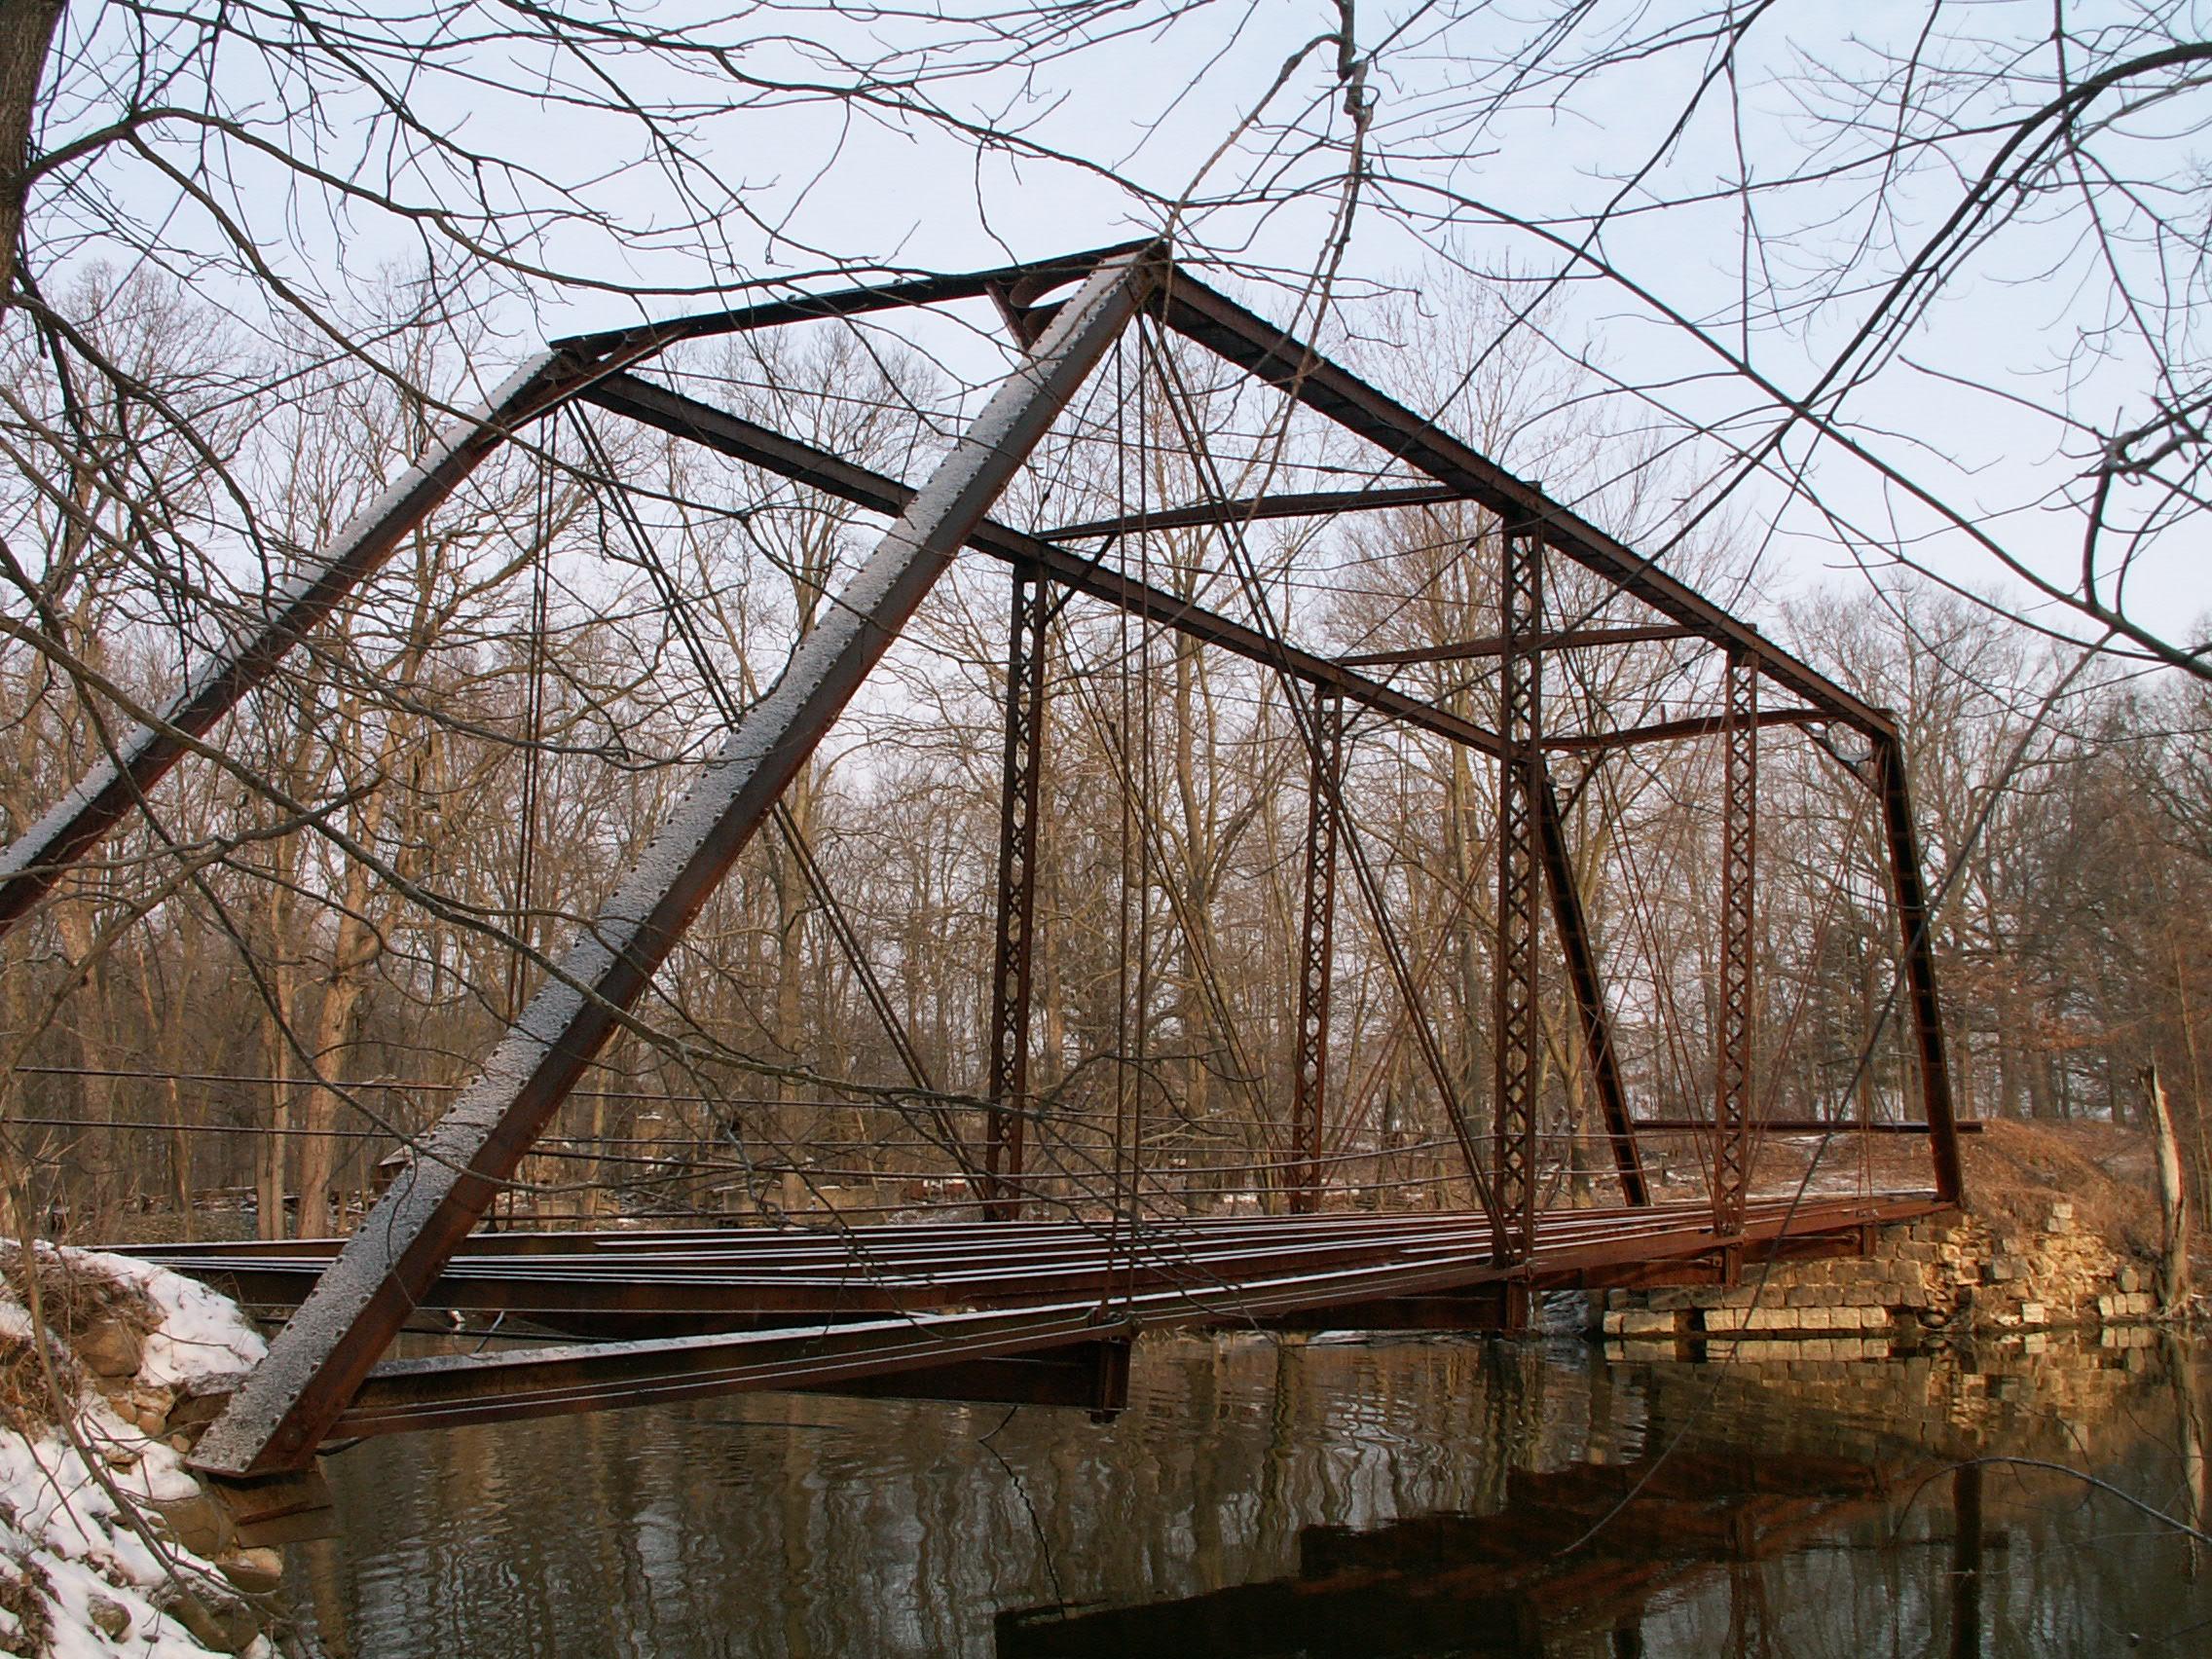
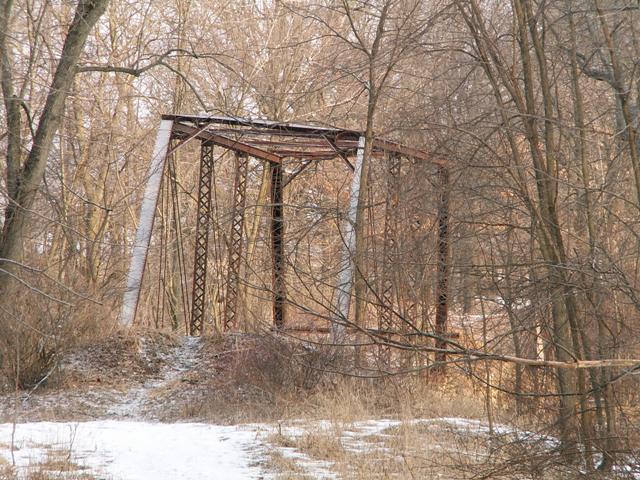
Portal views facing north show how twisted this bridge has become.
![]()


Original / Full Size
Views from the southeast quadrant.
![]()


Original / Full Size
Portal views on bridge.
![]()

Original / Full Size
East elevation.
![]()

Original / Full Size
Looking south under the bridge tells the story very clearly. Note the crumbling abutments, and the twist of the floor beams. Note that the floor beams are built-up and have an interesting shape to them that tends to show up on older pin-connected truss bridges.
![]()

Original / Full Size
A view of the bracing, looking north. Note the twisting of the portal bracing.
![]()


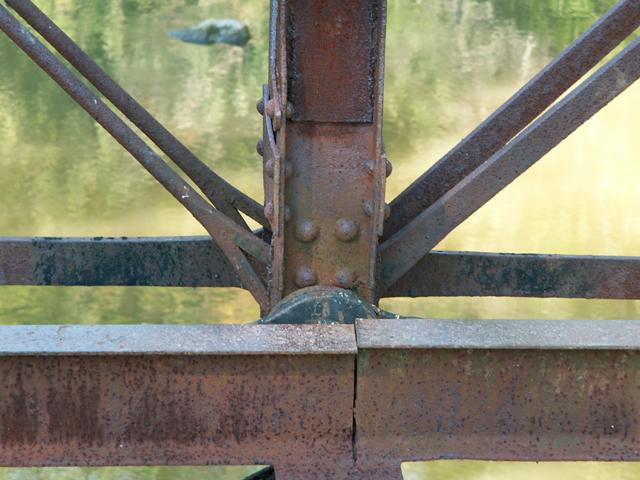
Top chord connections.
![]()


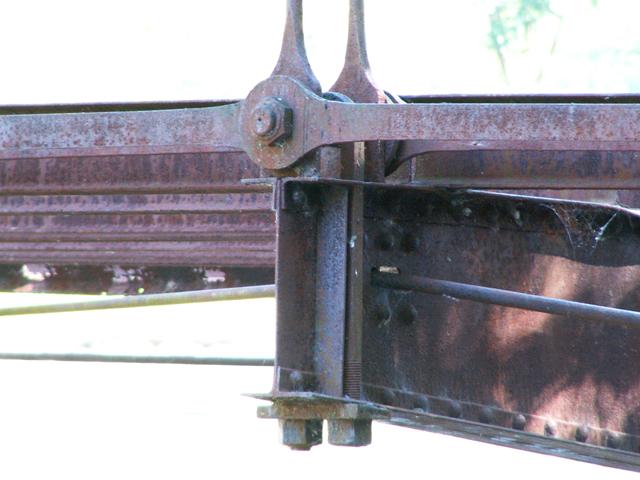
Bottom chord connections.
![]()

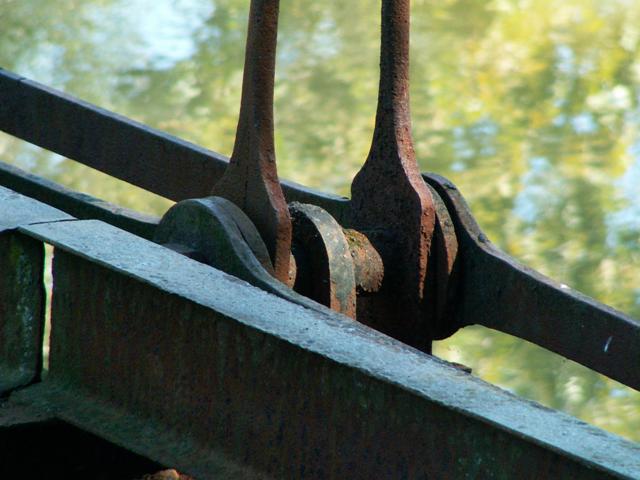
Turnbuckles.
![]()
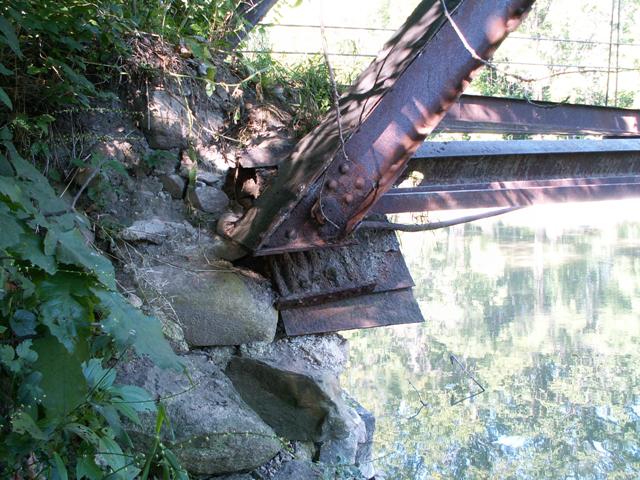


Southeast foot of bridge, showing how the bridge's support is gone. Also note the roller bearing nest.
![]()

The north side of the bridge has lifted slightly.
![]()


Floor beams.
![]()
Looking south under the bridge tells the story very clearly. Note the crumbling abutments, and the twist of the floor beams. Note that the floor beams are built-up and have an interesting shape to them that tends to show up on older pin-connected truss bridges.
![]()


Views of top chord.
![]()


Railing system on bridge.
![]()

Vertical member.
![]()


View of deck stringers.
![]()


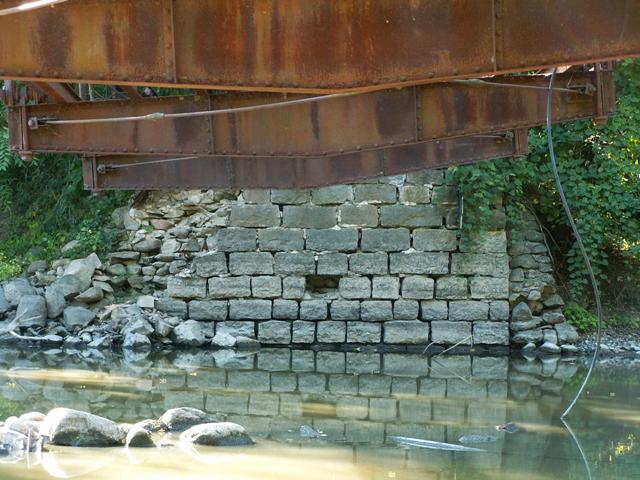
Views of abutment.
![]()


East elevation.
![]()
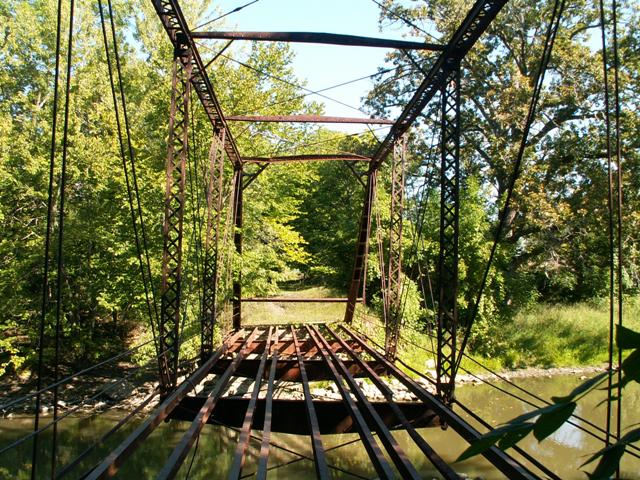

Portal views on bridge.
![]()


Various views on bridge.
![]()
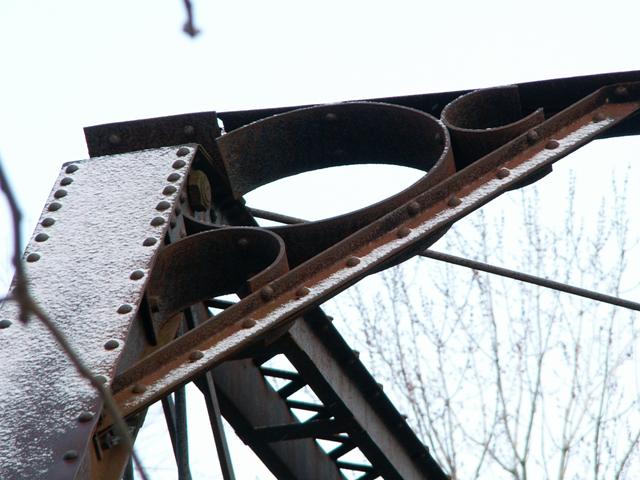


Portal bracing decoration.
![]()

Bottom chord.
![]()


Portal views facing north show how twisted this bridge has become.
![]()


Portal views facing north.
![]()


Views from the southeast quadrant.
![]()


View from southwest quadrant.
![]()
![]()
| Back |
| Home |
| Top |

![]()