

View Information About HSR Ratings
This is one of the longest simple-span truss bridges in all of Canada and dates to 1898. Many sources improperly report this bridge's construction date, builders, and engineers because the truss bridge seen today sits on the site of (and reuses portions of the stone piers of) a famous bridge that was among the greatest iron bridges in the world when completed. However, bridge historians do not date bridges on the basis of a partial substructure reuse, they date bridges on the basis of the main superstructure, which in this case is the trusses that to 1898, with some newer additions discussed later. The history of the bridge at this site is as follows. Robert Stephenson and other British engineers and builders who designed and built a unique tubular girder bridge at Conwy, Wales, UK in 1849, were hired by Canada to build the same type of bridge, albeit much longer, which was a single-track railway bridge erected between 1854-59 and became the first Victoria Bridge. Please visit HistoricBridges.org's Conwy Railway Bridge page to learn more about these important engineers in bridge history. The original Victoria Bridge was 9,144 feet long with the total length of the iron bridge proper being 6,592 feet, and consisting of 24 approach spans of 242-247 feet in length, and a single main span of 330 feet. In 1897-1898, this tubular girder bridge was replaced with a new truss bridge. The existing stone piers were reused, with new stonework added to the upstream side to support the wider truss bridge (the single-track girder bridge was replaced with a double-track truss bridge). During construction, the trusses were erected around the tubular girders, before being removed after the trusses were completed. Railway traffic was able to be maintained during construction. The new truss bridge continued to offer a double-track deck for railway traffic in between the truss lines, while the large floorbeams cantilevered outward beyond the truss lines to provide a highway deck and a streetcar deck on the outside of each truss line. The truss bridge as originally designed was renamed the Victoria Jubilee Bridge. It consisted of 24 ten panel pin-connected Pratt through truss spans of 254 feet each, and one pin-connected Pennsylvania through truss main span of 348 feet. Several companies fabricated the truss spans: Dominion Bridge Company of Montréal, Québec fabricated six spans, Union Bridge Company of New York, New York fabricated nine spans, and the Detroit Bridge and Iron Works of Detroit, Michigan fabricated ten spans. The Detroit Bridge and Iron Works of Detroit, Michigan performed on-site erection for all truss spans, and as such they had the biggest role in building the bridge by far.
Streetcar traffic ended on the bridge in 1956. After this, the outside decks were used only for vehicular traffic.
The biggest change to this bridge in its history, one which turned this relatively simple (if long) bridge into one of the most unusual bridges in Canada, took place as a result of the creation of the St. Lawrence Seaway. At the location of this bridge, a canal and the St. Lambert Locks had to be constructed for the seaway. To accommodate this, a number of major changes were made to the bridge, completed in 1958. At the east end of the original bridge a plate girder lift span was constructed for vehicular traffic. The easternmost through truss span appears to have been demolished to make room for this lift span. In addition to this lift span, a bypass route called the St. Lambert Diversion was created, branching to the south of the original bridge was created near the east end of the bridge. The idea of the St. Lambert Diversion was that if a ship was passing under the main bridge's lift span, traffic could avoid waiting for the bridge to lower and instead go around the ship using the St. Lambert Diversion (which also had its own lift span). To create the St. Lambert Diversion Bridge, several through truss spans (rivet-connected Warren through truss spans, most of which measure about 300 feet) and girder spans were erected on a curve away from the main bridge, which carry the railroad, which required a gentle curve, then crossing the canal with a double-deck truss vertical lift bridge, carrying highway traffic below, and railway traffic above. Because construction of the St. Lambert Diversion required the railway tracks to cross over where the south cantilevered highway deck was located, a special plate girder "flyover" had to be built to carry the south highway deck over the railroad tracks. The highway does not use the St. Lambert Diversion, because cars can make a tighter curve than trains, highway traffic reaches the St. Lambert Diversion lift bridge via simple curved ramps on the ground near the east end of the bridge along the canal. The construction of the lift bridges for both the main bridge and the St. Lambert Diversion were undertaken with the thought that the St. Lawrence Seaway would eventually be expanded to include a second parallel canal at this location. Thus, while 2nd lift span were not built outright, some extra design features of the were included to make the installation of a future second vertical lift bridge easier. With the St. Lambert Diversion, an "extra" truss span identical to the lift span is present immediately to the east, along with the "stub" of a lift tower. For both the main bridge lift span and the St. Lambert Diversion, the easternmost tower is much more massive than the west tower, so that if the second left span was built, the east tower could serve both lift spans. To date, this has never happened, so only a single operable lift span is present at the ends of the bridge at this time.
HistoricBridges.org is proud to offer an enormous photo gallery documenting the many parts of this enormous bridge. Please proceed to the photo galleries to see hundreds of photos of this bridge. Below, in this narrative, you will find a few of these photos that further illustrate the general features of the bridge, followed by historical photos of both the tubular bridge and the trusss bridge.
Note: The total bridge length given by HistoricBridges.org is the approximate length from the west end to the east end past the lift span on the main bridge.
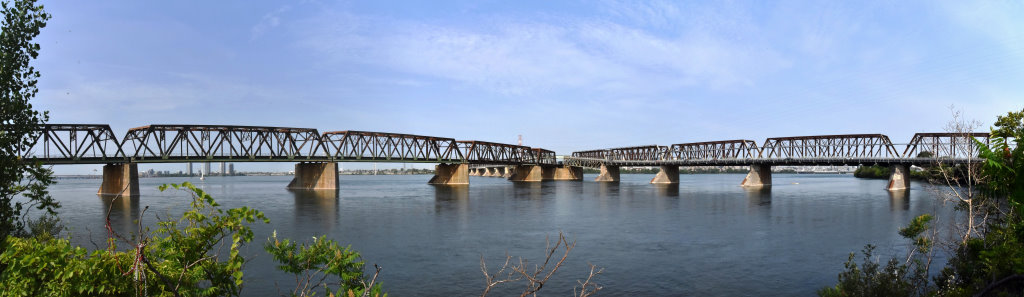
Above: The Saint-Lambert Diversion shown to the left, the original truss bridge to the right, and the flyover in the distance. Partially obscured are the western original truss spans including the main span.

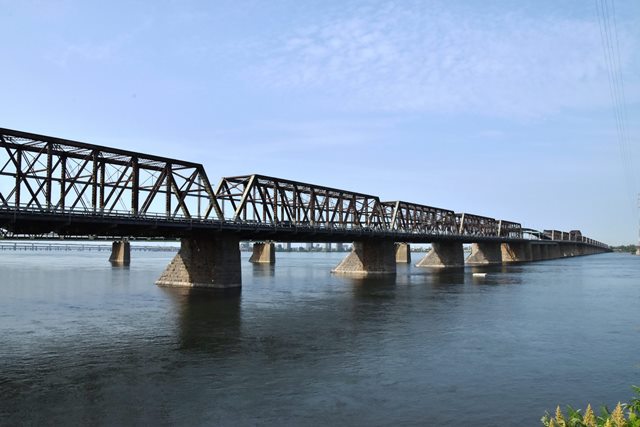
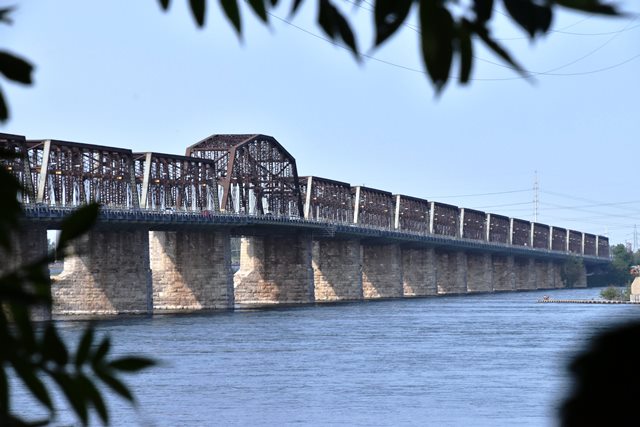
Above: The main span of the bridge.
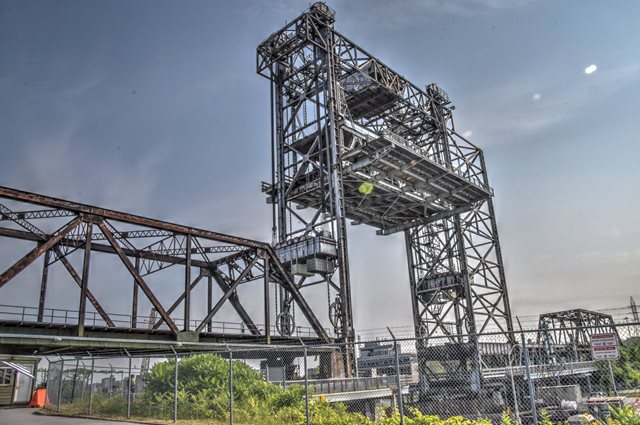
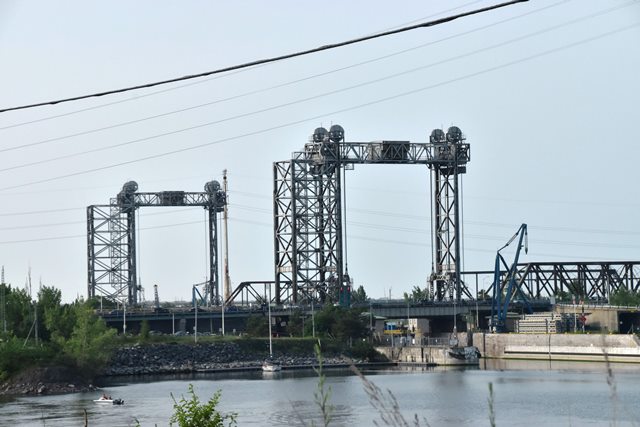
Above: The Saint-Lambert Diversion lift span, shown in raised position.
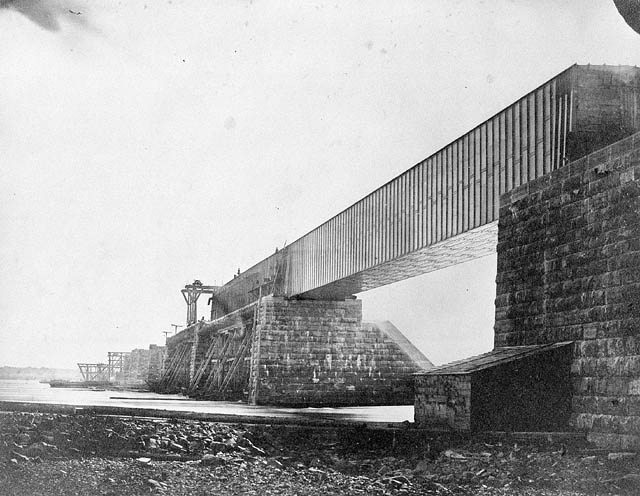
Above: Historical photo showing construction of the original tubular bridge.

Above: The original tubular girder bridge.

Above: The original tubular girder bridge.

Above: The original tubular girder bridge.

Above: Historical photo showing bridge construction. The trusses were erected around the original tubular girders.
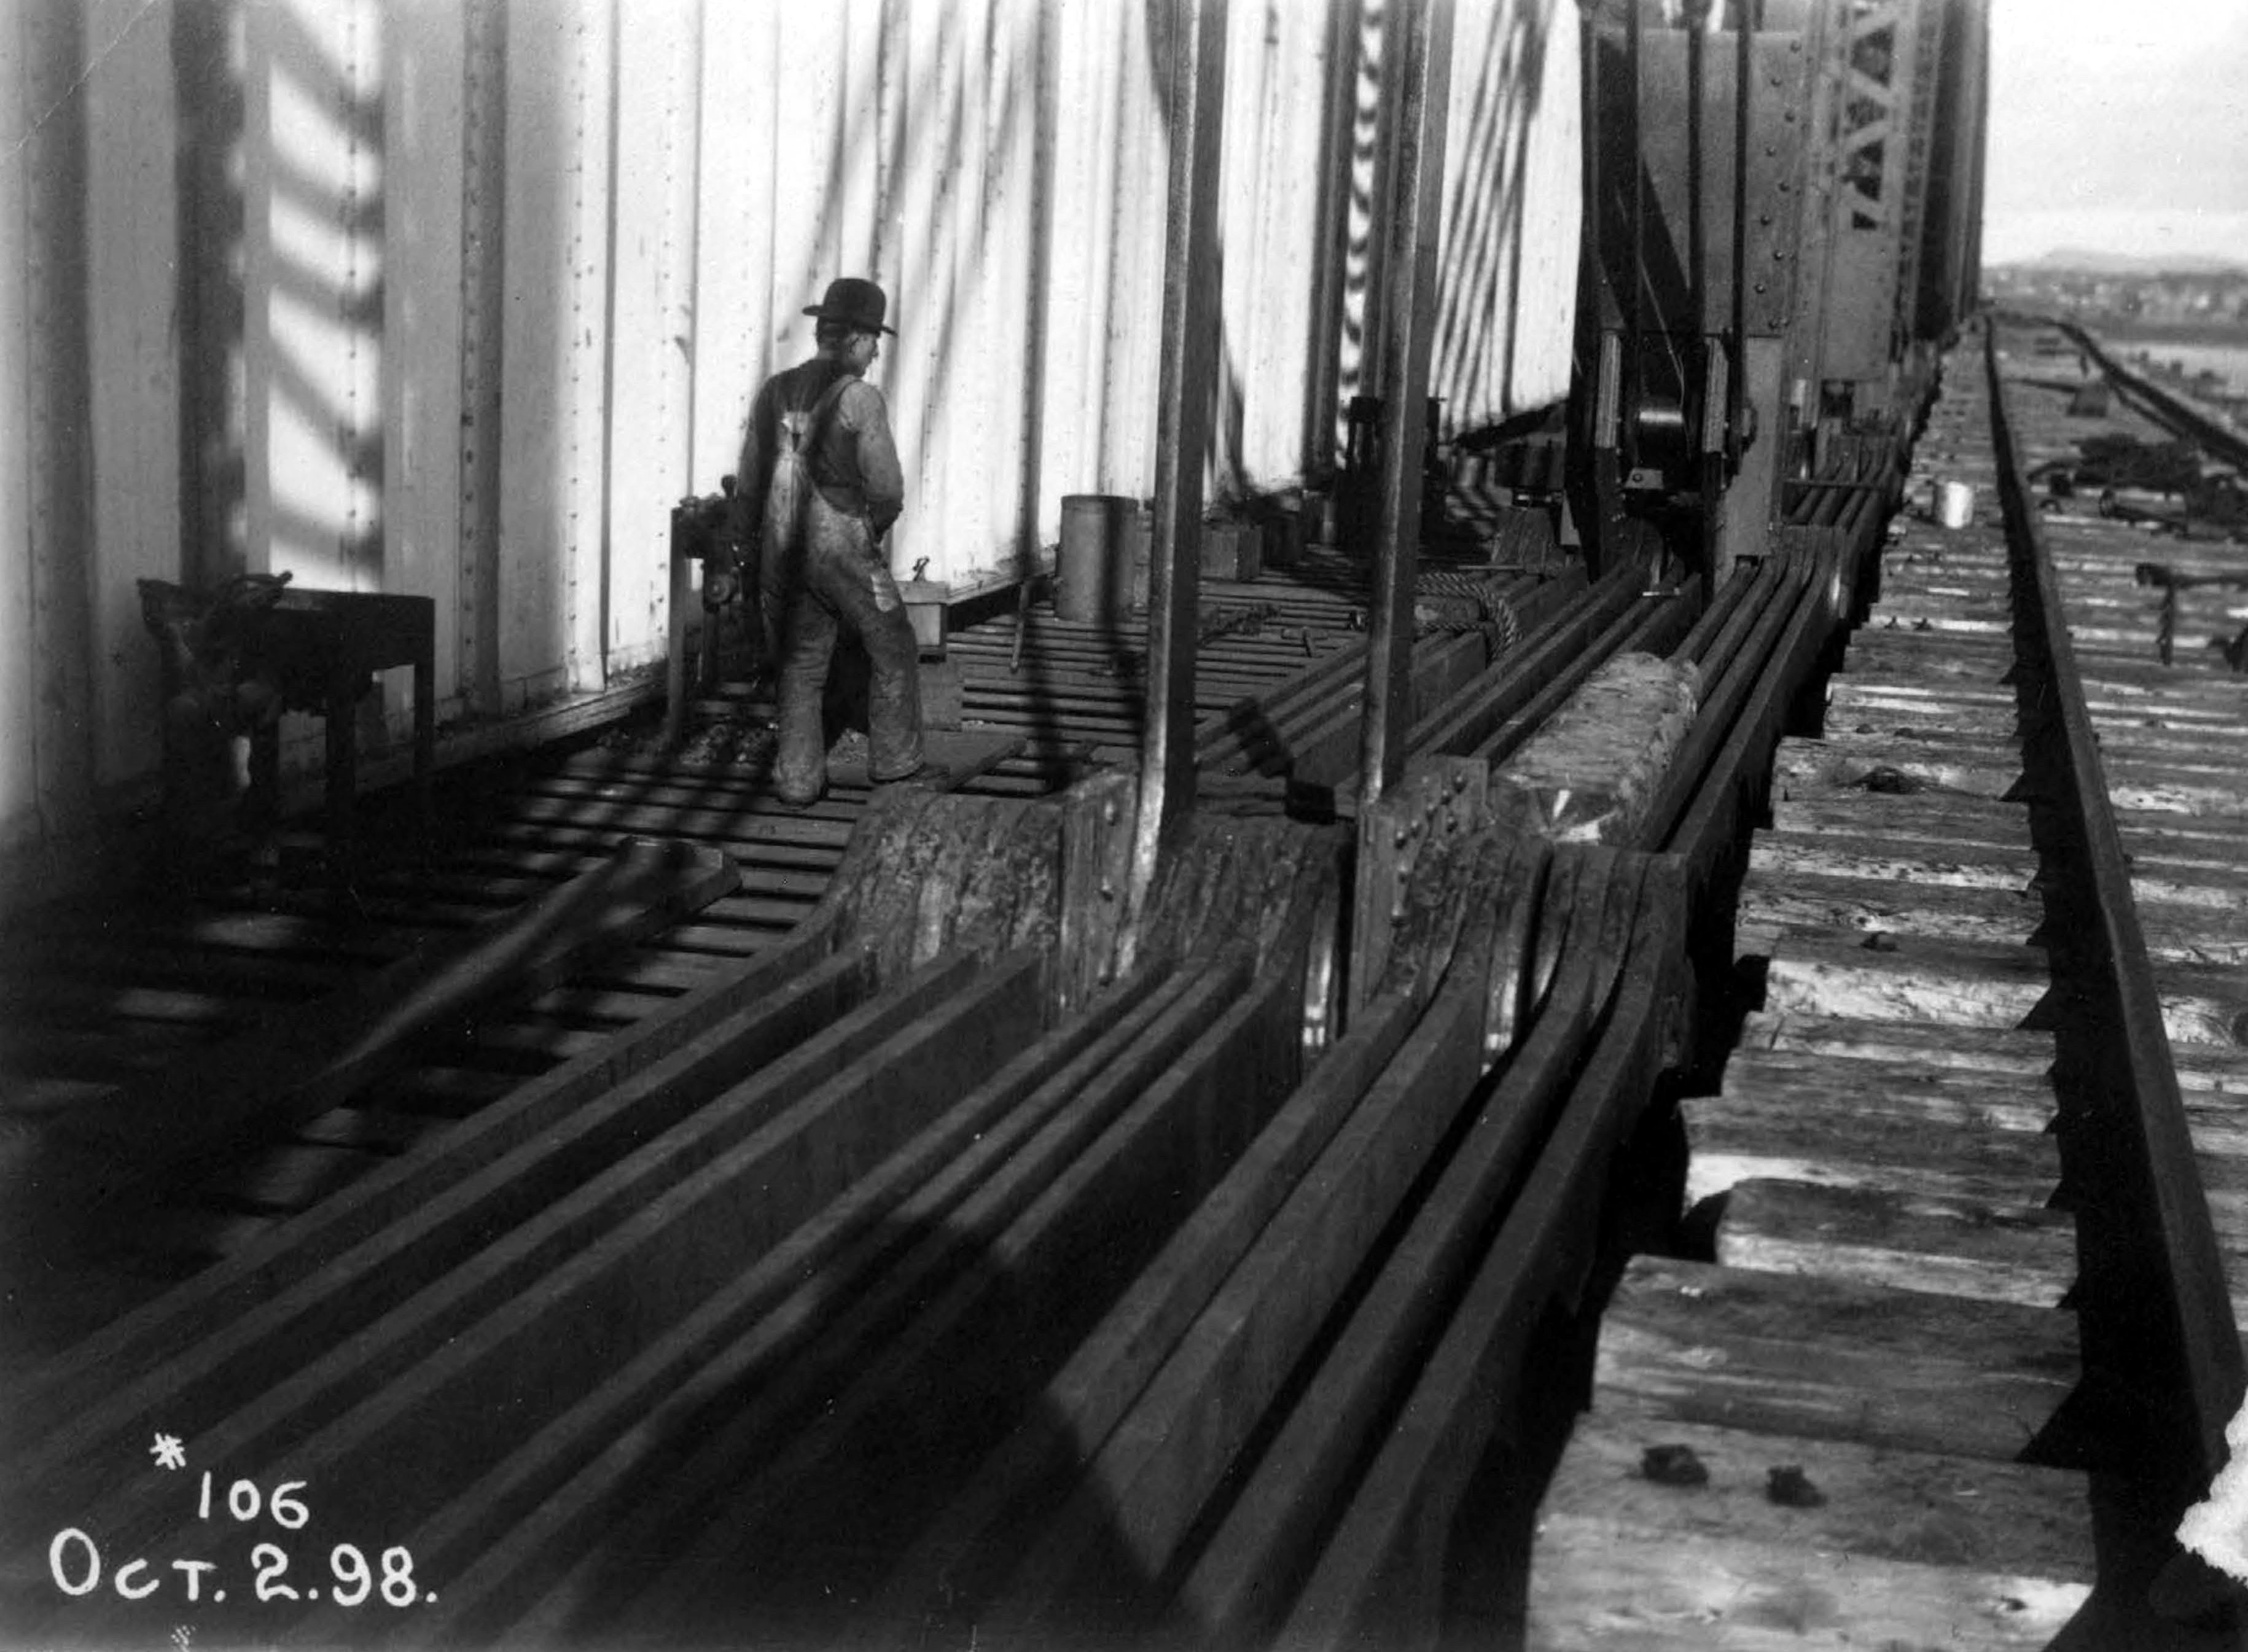
Above: Historical photo showing bridge construction. The trusses were erected around the original tubular girders.

Above: Historical photo showing bridge construction. The trusses were erected around the original tubular girders.

Above: Historical photo showing bridge construction. The trusses were erected around the original tubular girders.

Above: Historical photo showing workers who built the bridge.

Above: The newly completed truss bridge. Note this photo show the original design of the end portal bracing, which no longer remains. Two large plaques, also missing, can be seen on the end posts.

Above: Historical photo showing the streetcar use of one side of the bridge when the bridge was completed.

Above: The newly completed truss bridge, showing the main span.
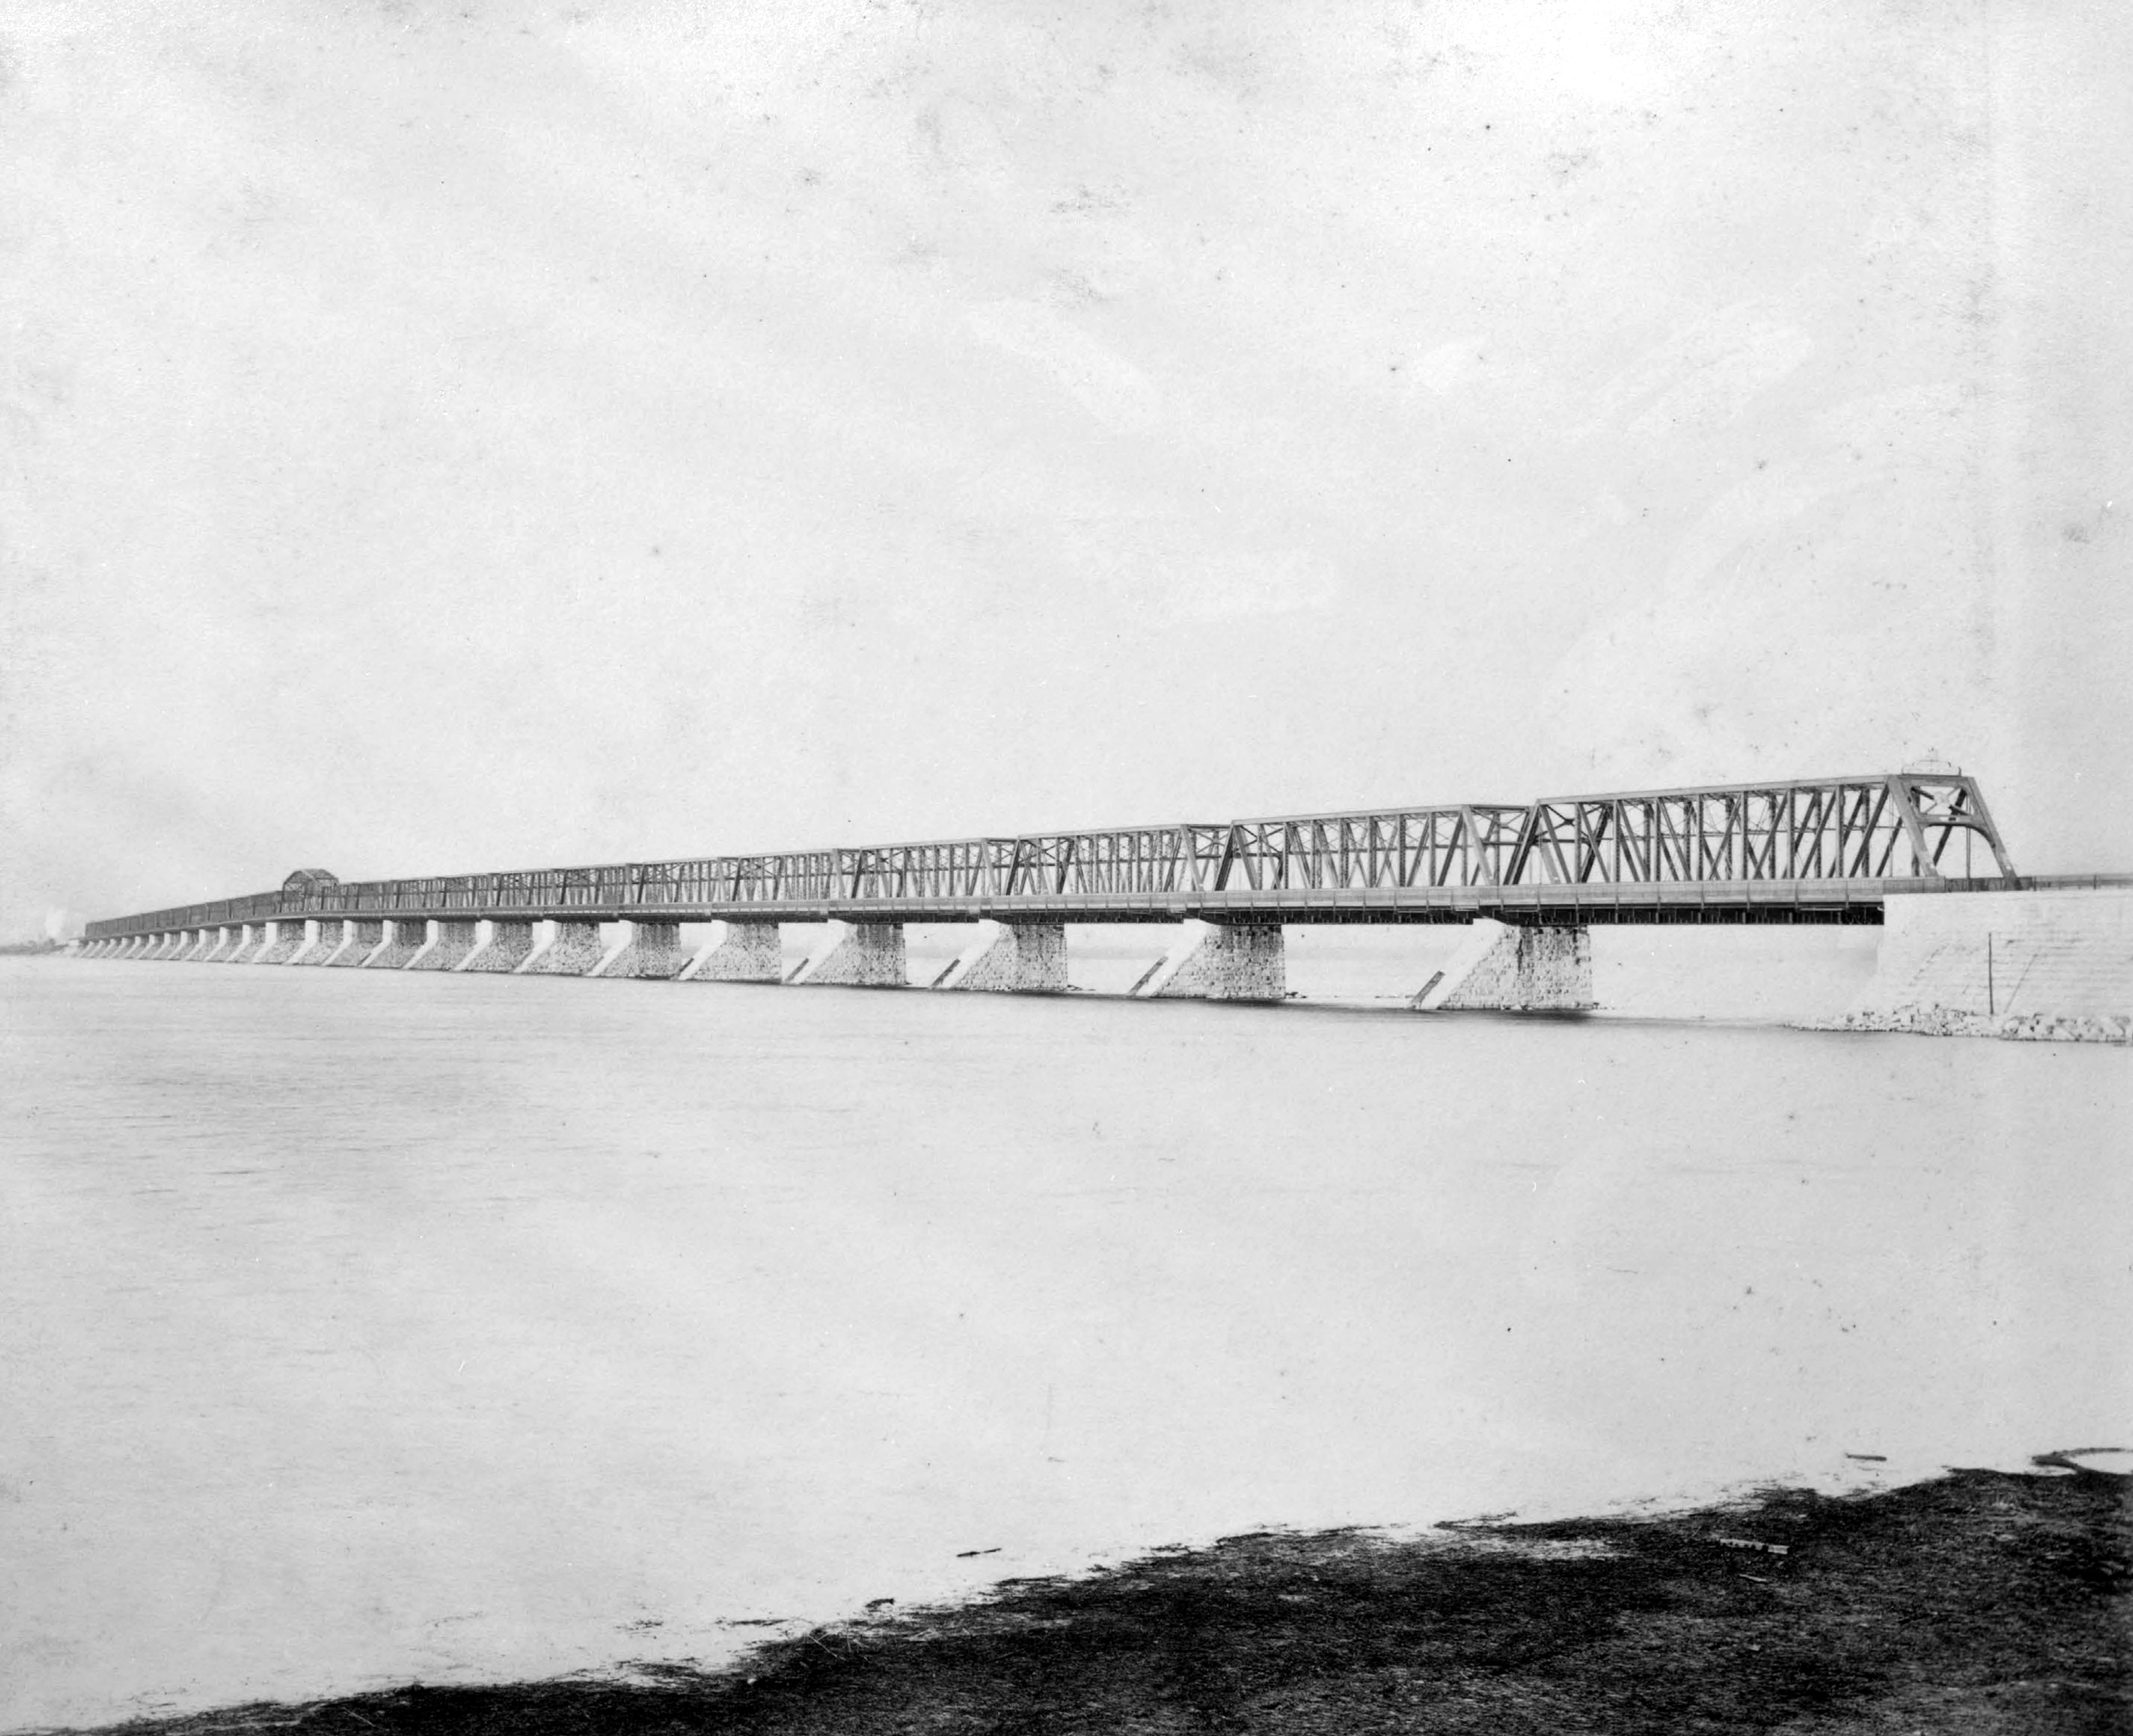
Above: The newly completed truss bridge.
![]()
![]()

![]()
![]()
![]()
![]()
![]()

![]()
![]()
![]()
Coordinates (Latitude, Longitude):
Search For Additional Bridge Listings:
Additional Maps:
Google Streetview (If Available)
GeoHack (Additional Links and Coordinates)
Apple Maps (Via DuckDuckGo Search)
Apple Maps (Apple devices only)
Android: Open Location In Your Map or GPS App
Flickr Gallery (Find Nearby Photos)
Wikimedia Commons (Find Nearby Photos)
Directions Via Sygic For Android
Directions Via Sygic For iOS and Android Dolphin Browser

© Copyright 2003-2026, HistoricBridges.org. All Rights Reserved. Disclaimer: HistoricBridges.org is a volunteer group of private citizens. HistoricBridges.org is NOT a government agency, does not represent or work with any governmental agencies, nor is it in any way associated with any government agency or any non-profit organization. While we strive for accuracy in our factual content, HistoricBridges.org offers no guarantee of accuracy. Information is provided "as is" without warranty of any kind, either expressed or implied. Information could include technical inaccuracies or errors of omission. Opinions and commentary are the opinions of the respective HistoricBridges.org member who made them and do not necessarily represent the views of anyone else, including any outside photographers whose images may appear on the page in which the commentary appears. HistoricBridges.org does not bear any responsibility for any consequences resulting from the use of this or any other HistoricBridges.org information. Owners and users of bridges have the responsibility of correctly following all applicable laws, rules, and regulations, regardless of any HistoricBridges.org information.
![]()