Uncredited photos on this page taken by: Nathan Holth. Unless stated in a caption, all photos are Copyright with All Rights Reserved. Learn about reuse of our photos.
![]()
![]()
![]()

![]()
![]()
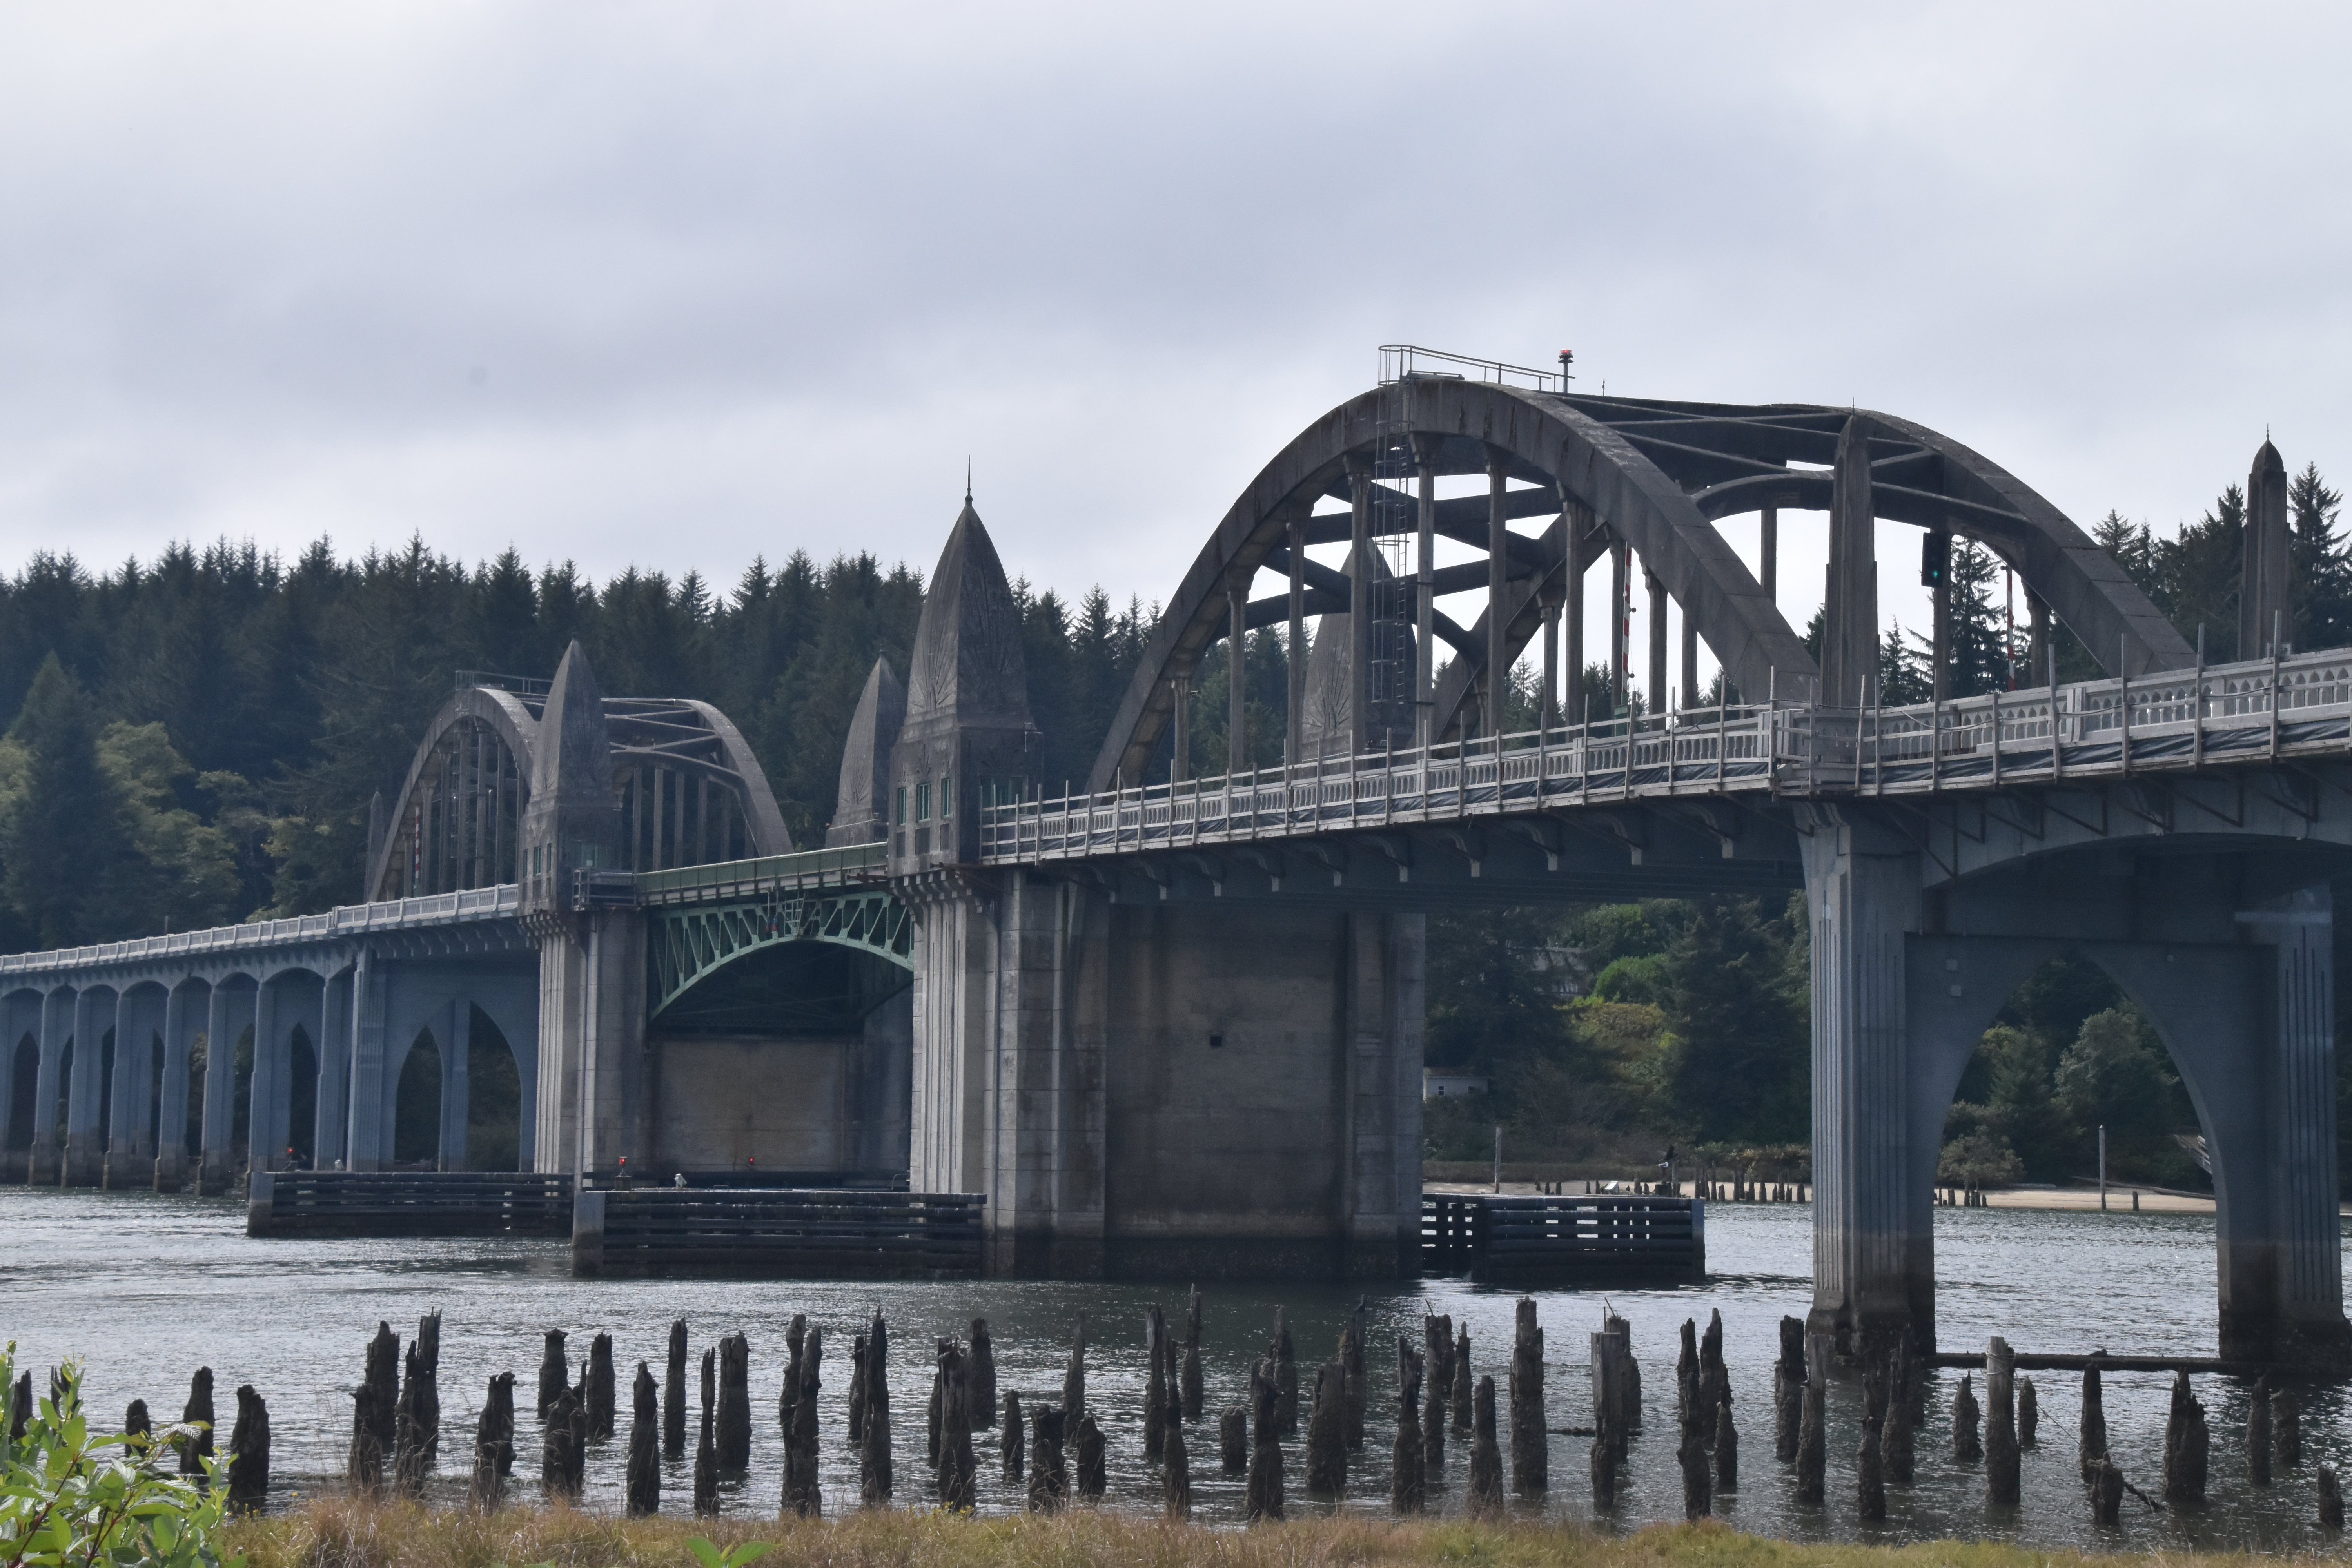
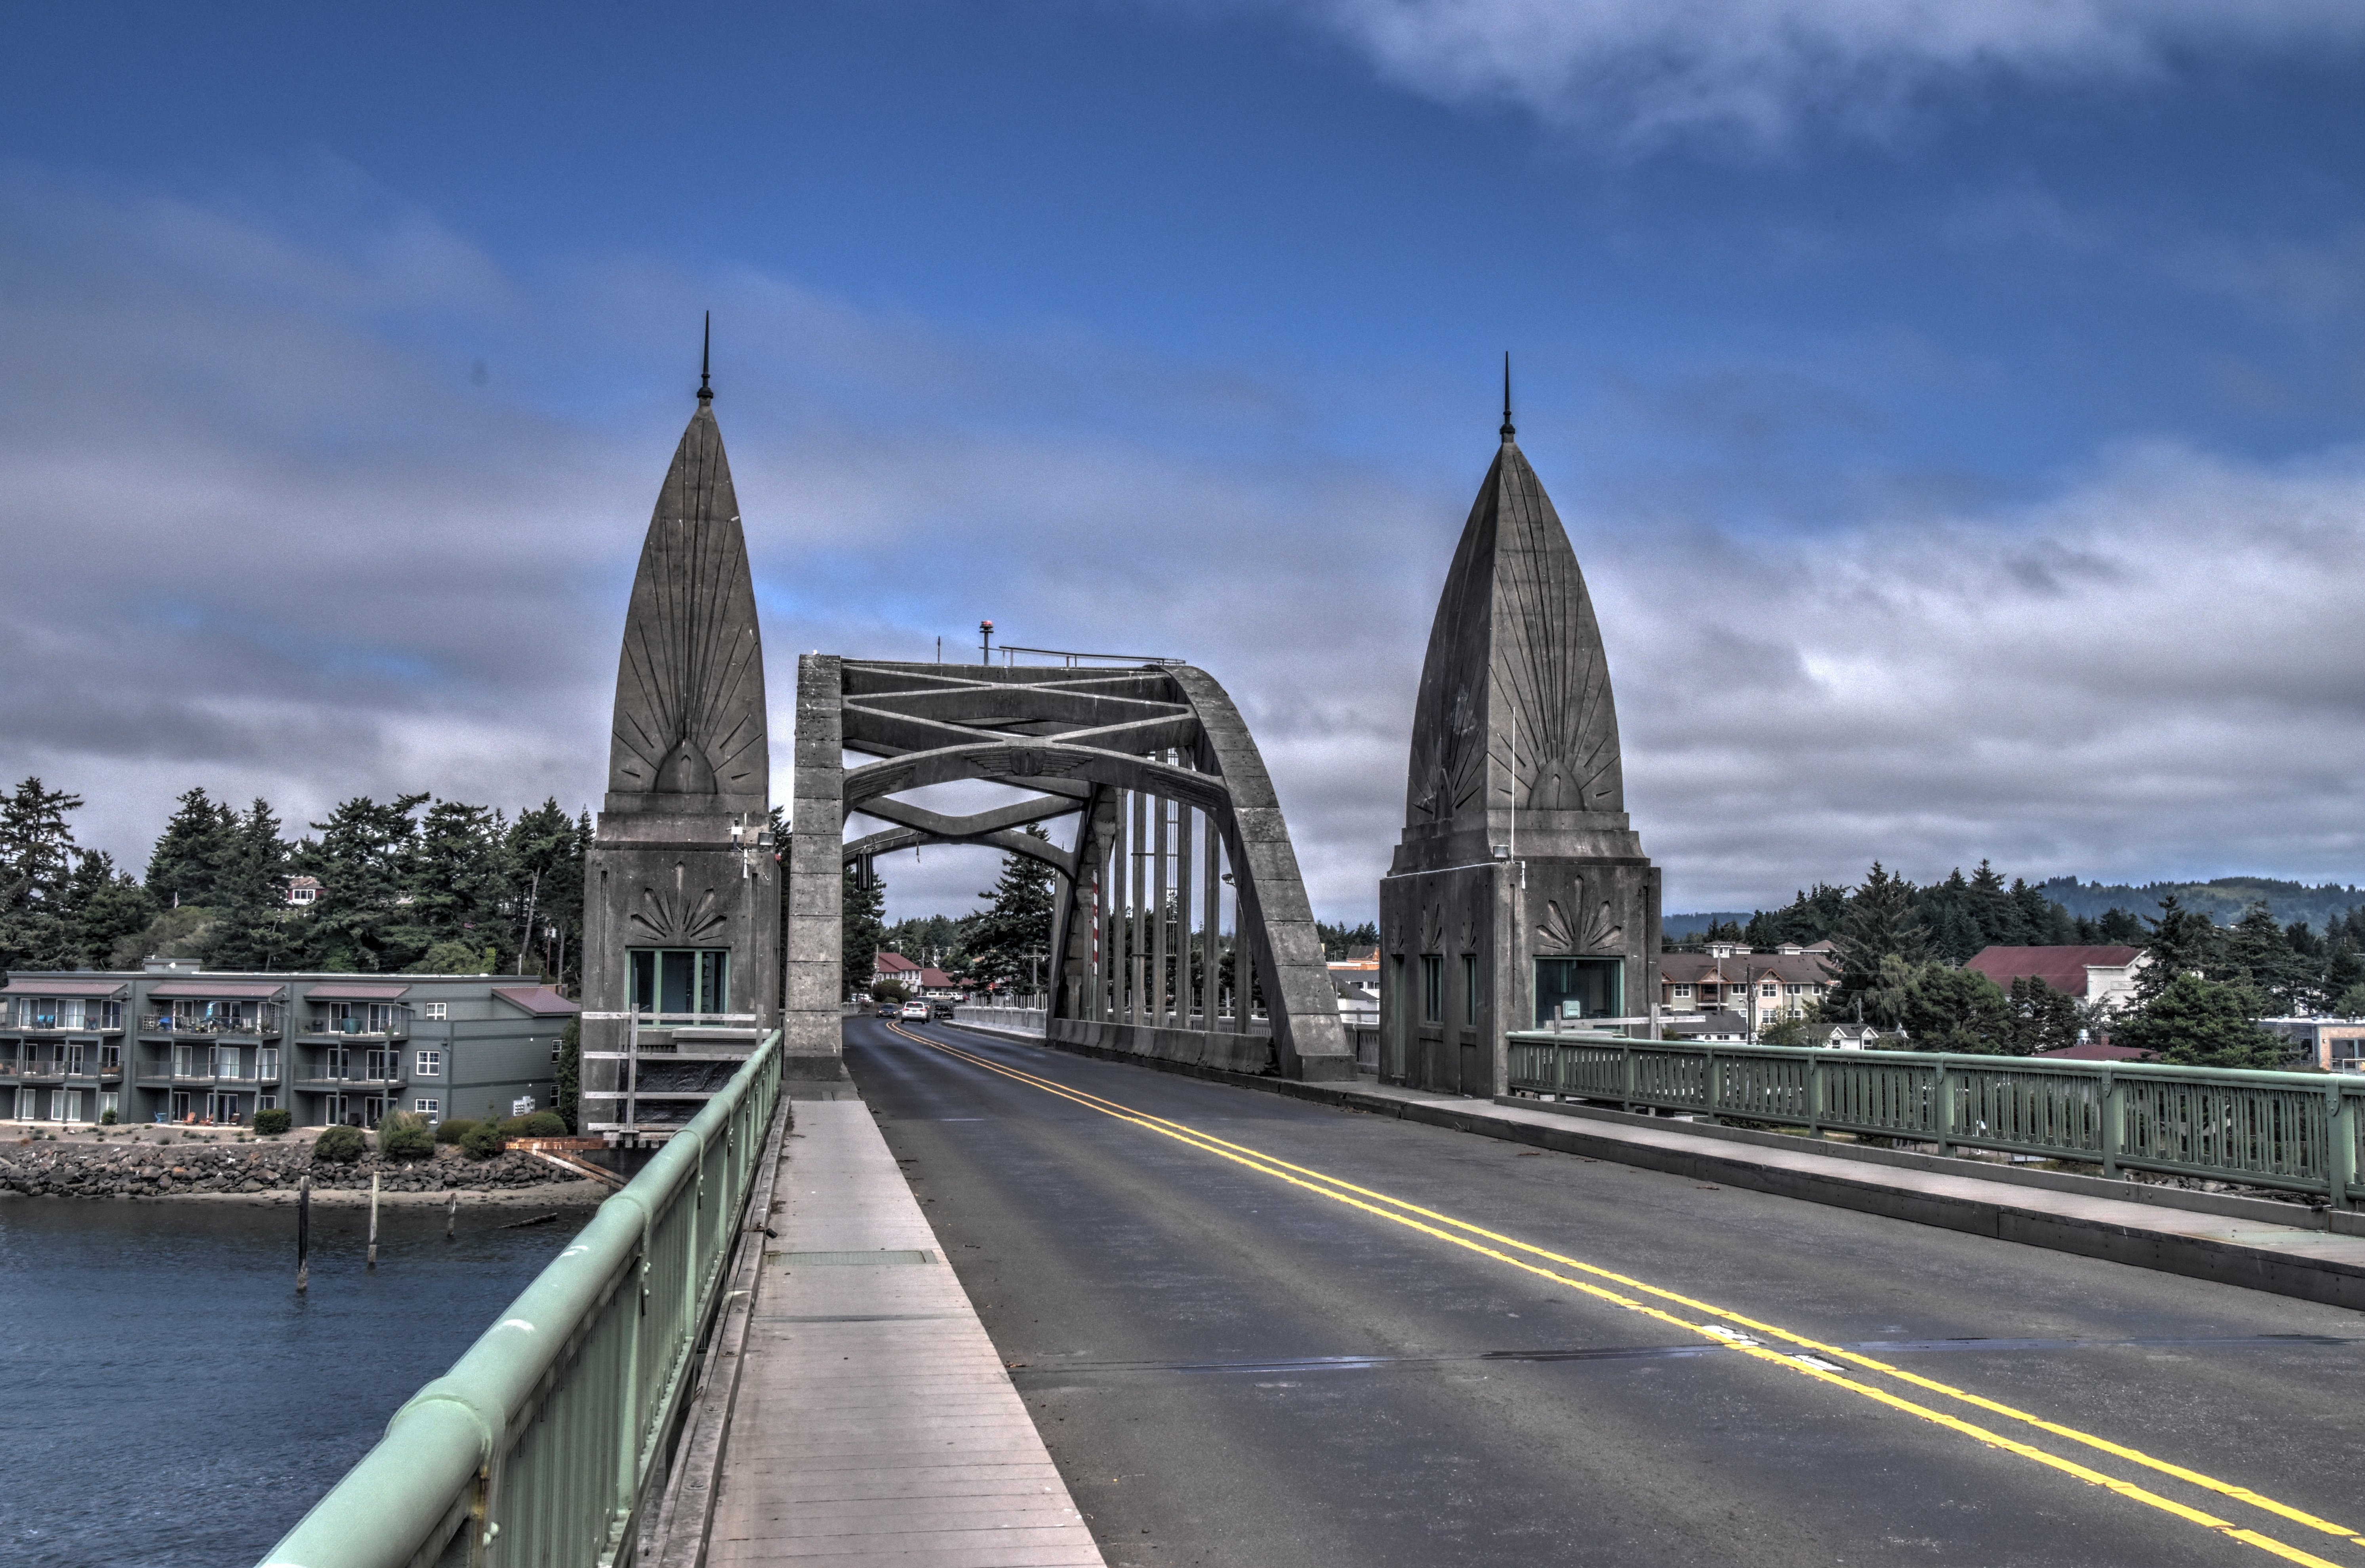
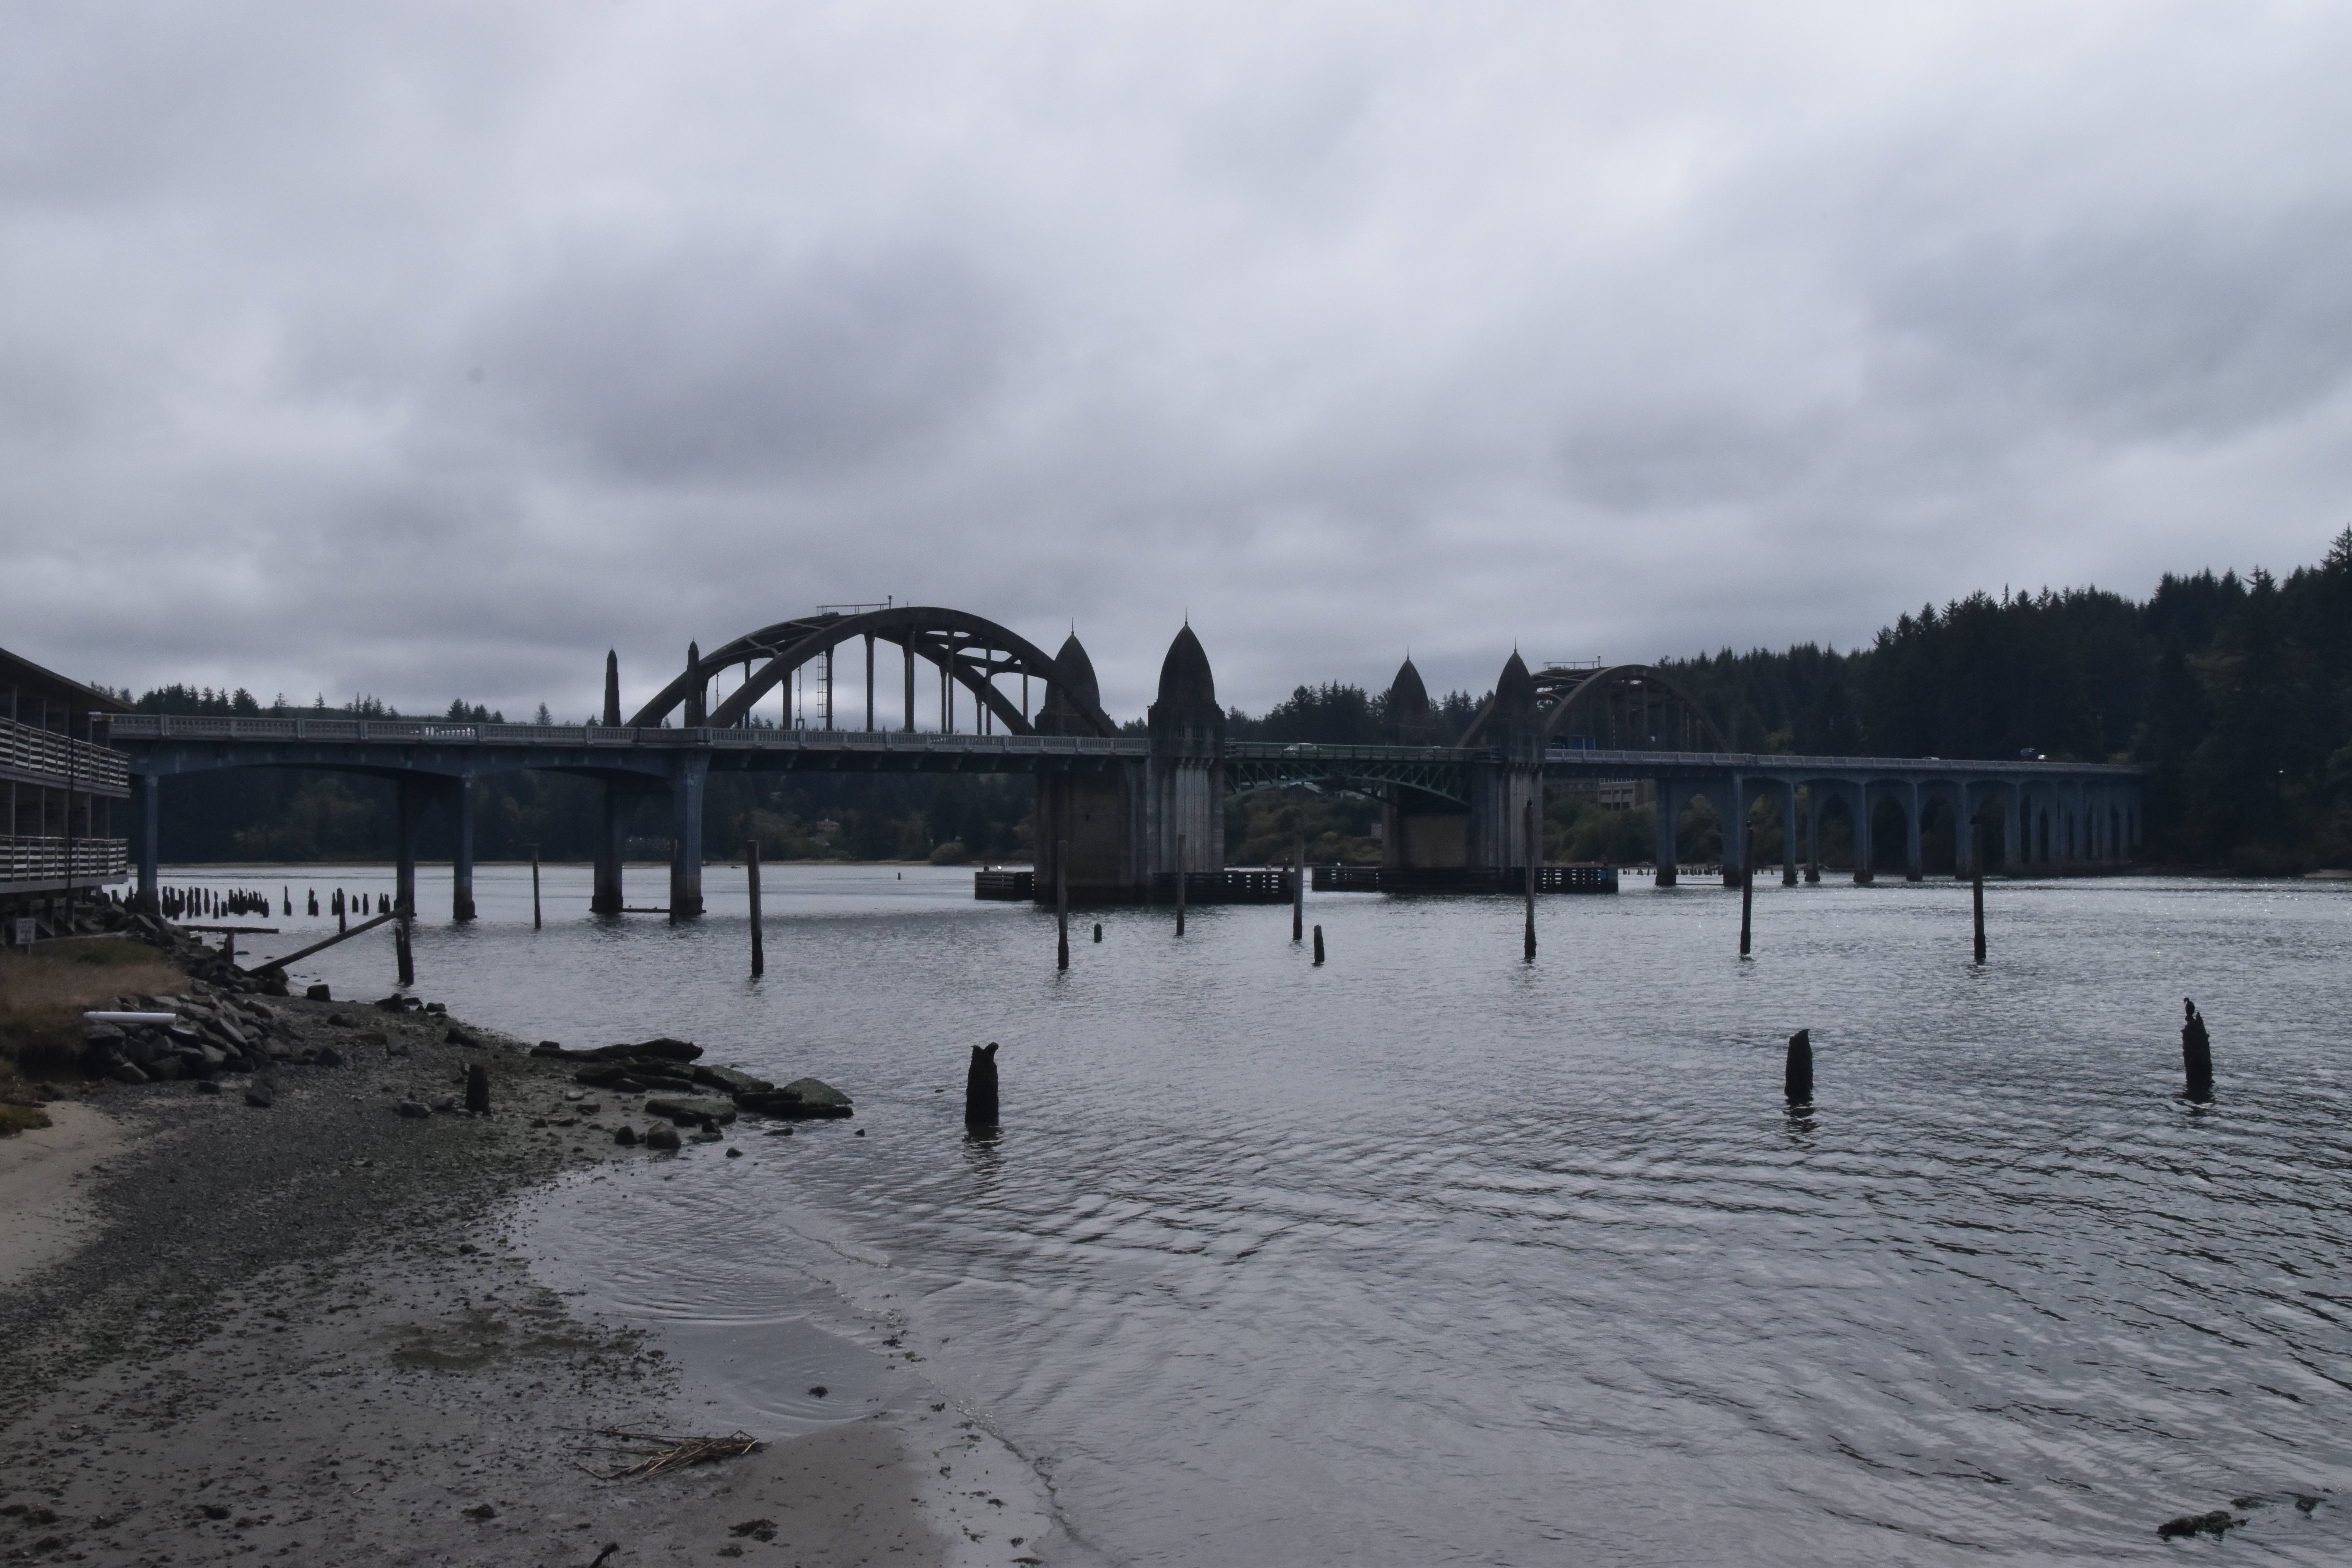
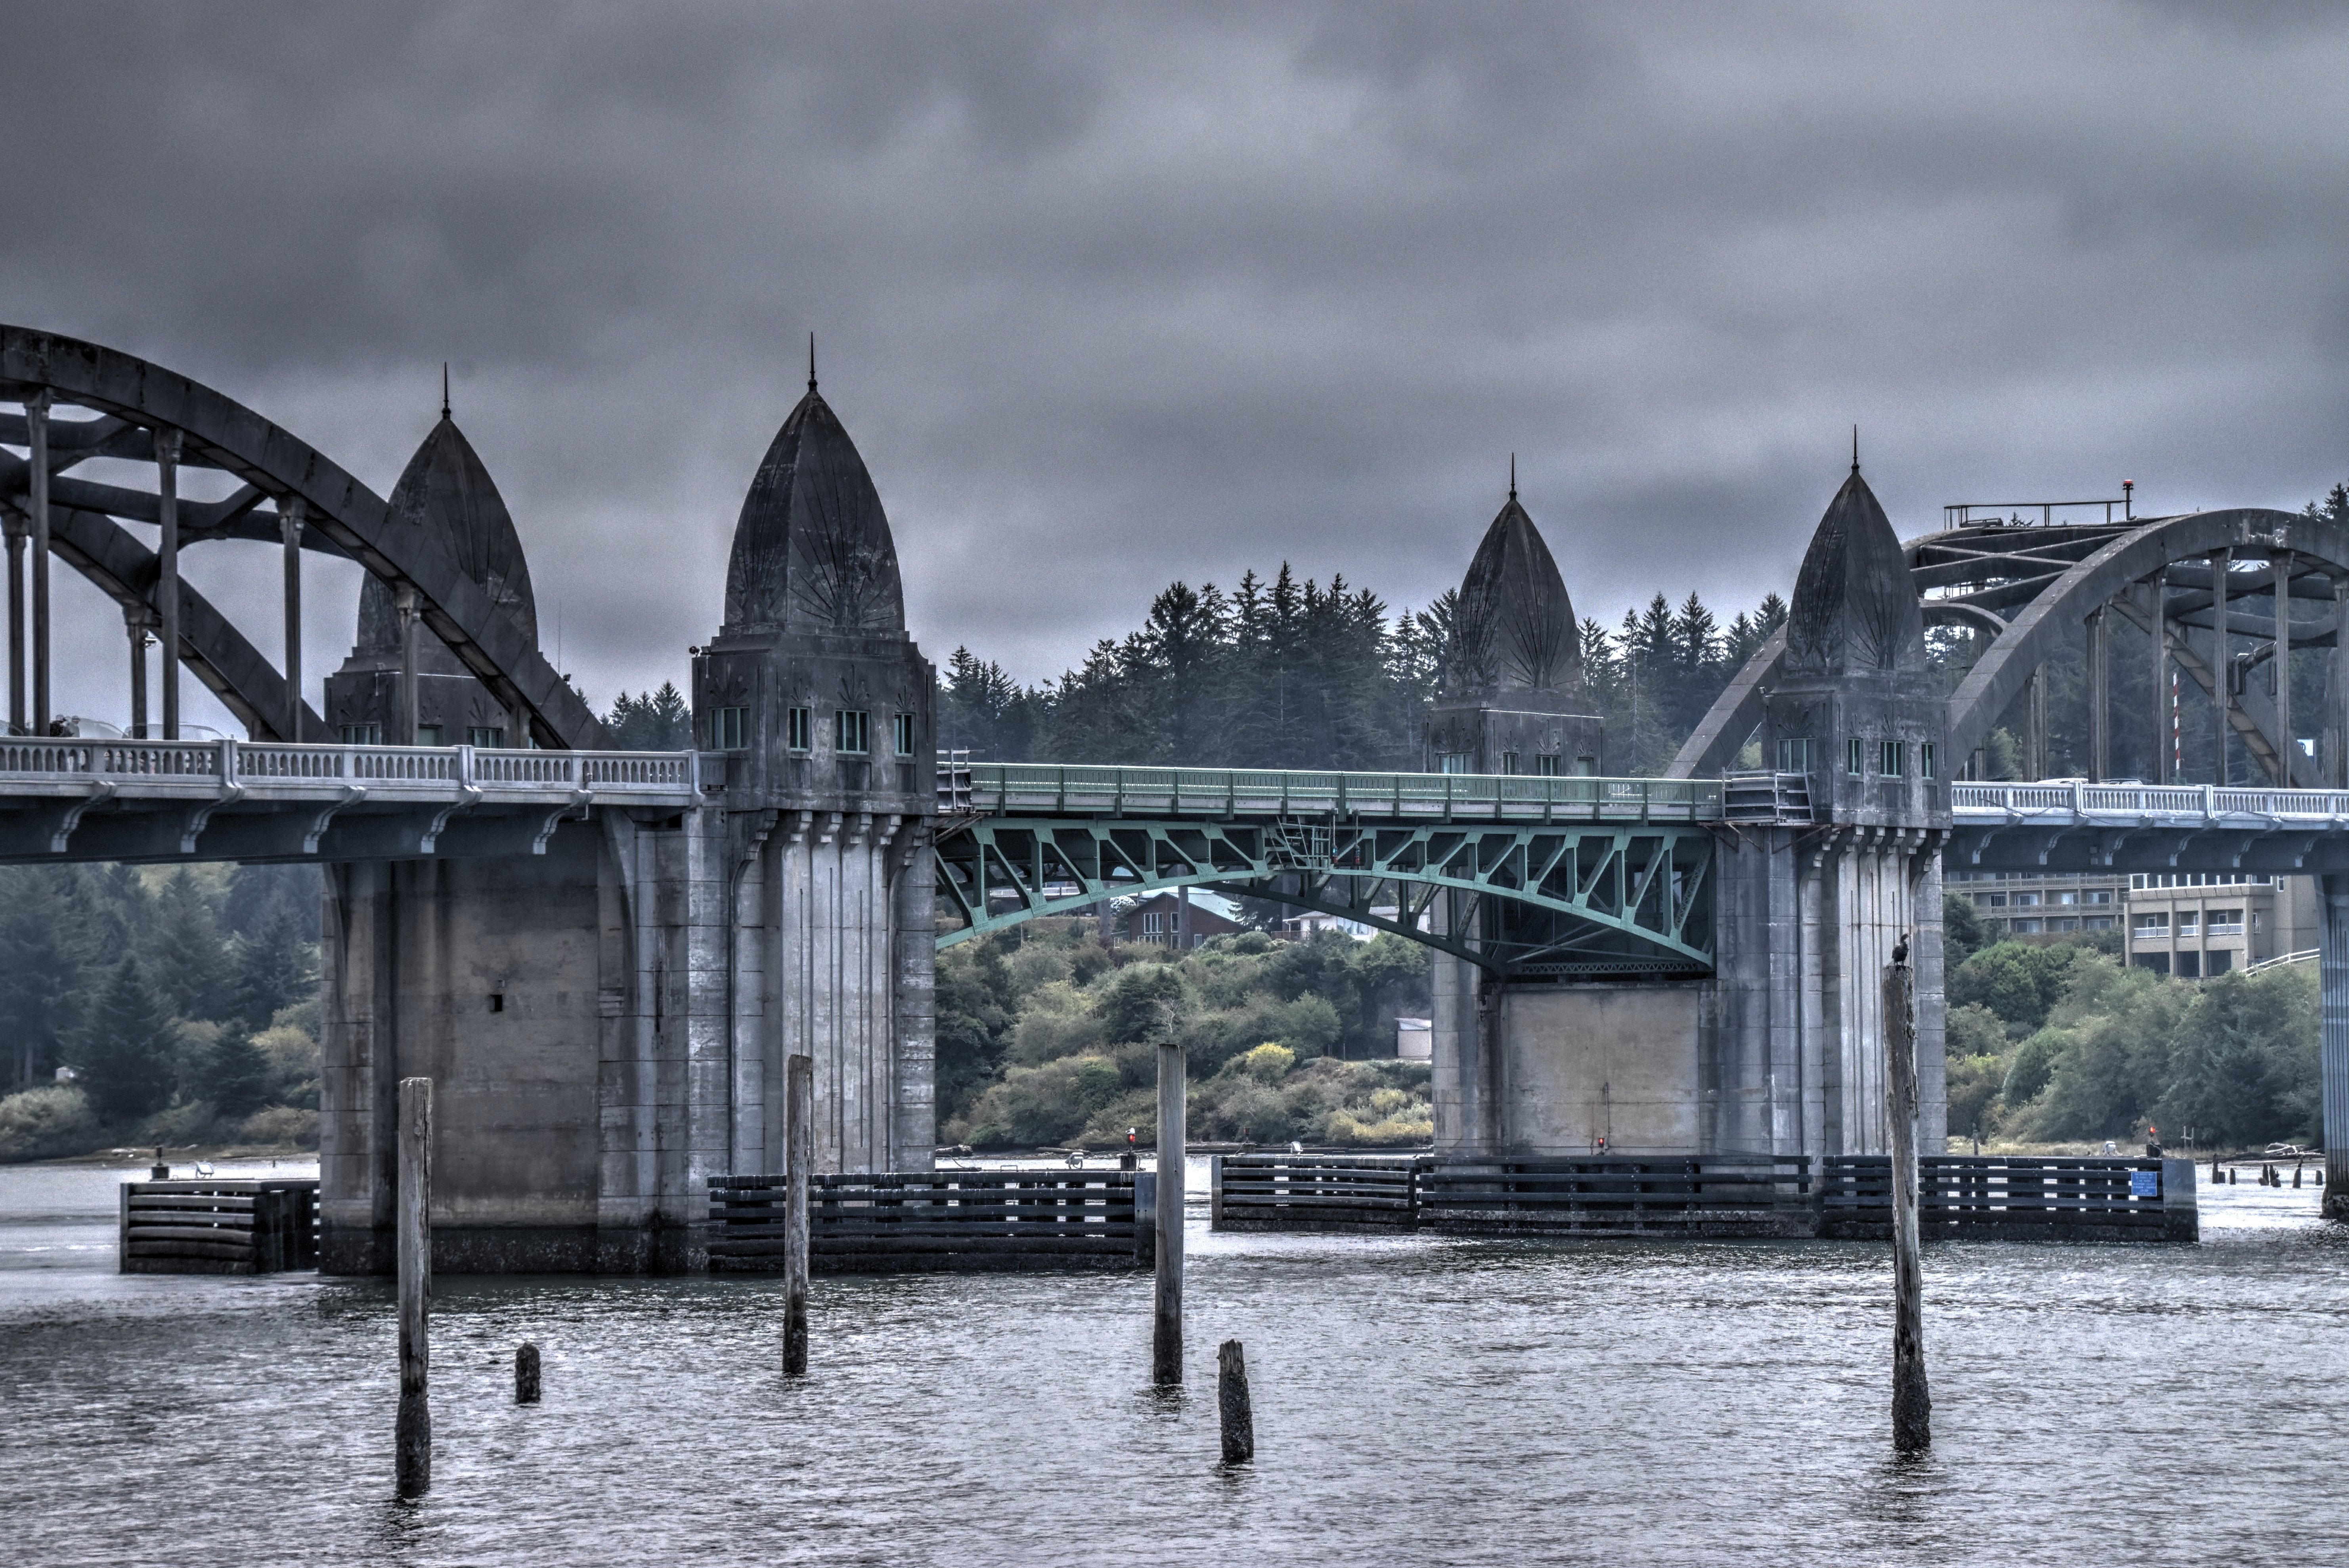
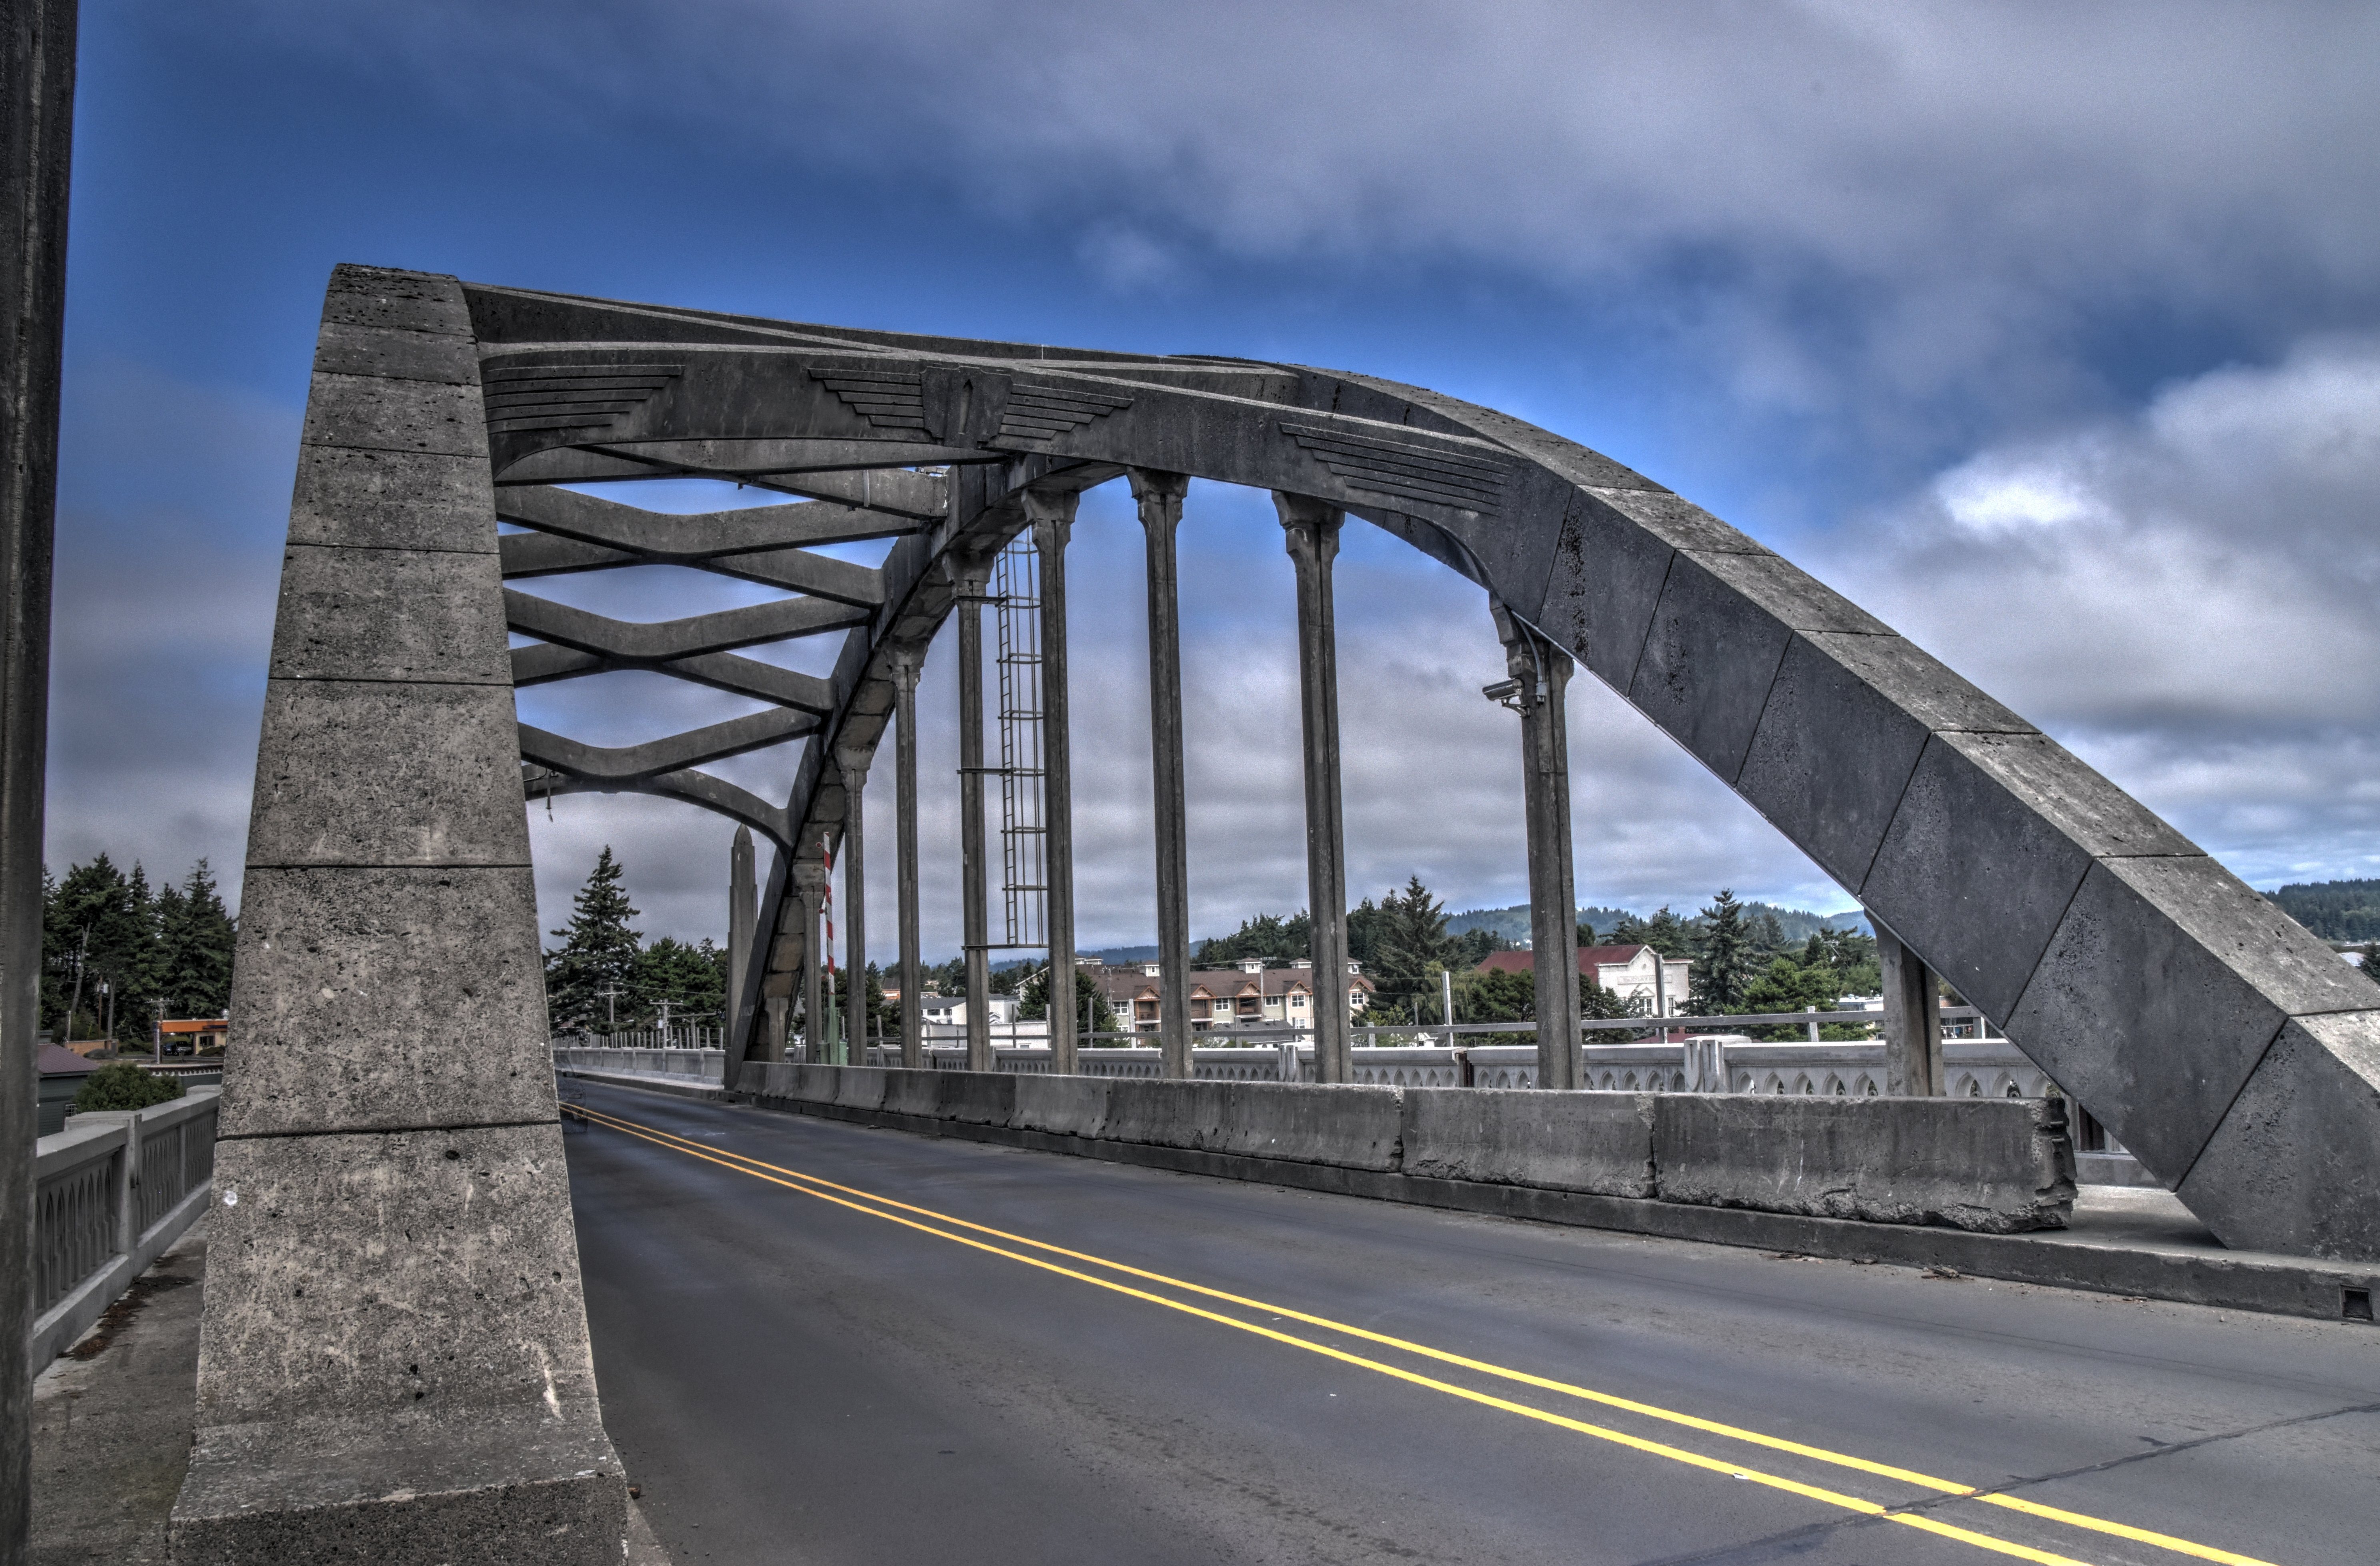
Panoramic elevation from northeast quadrant.
![]()


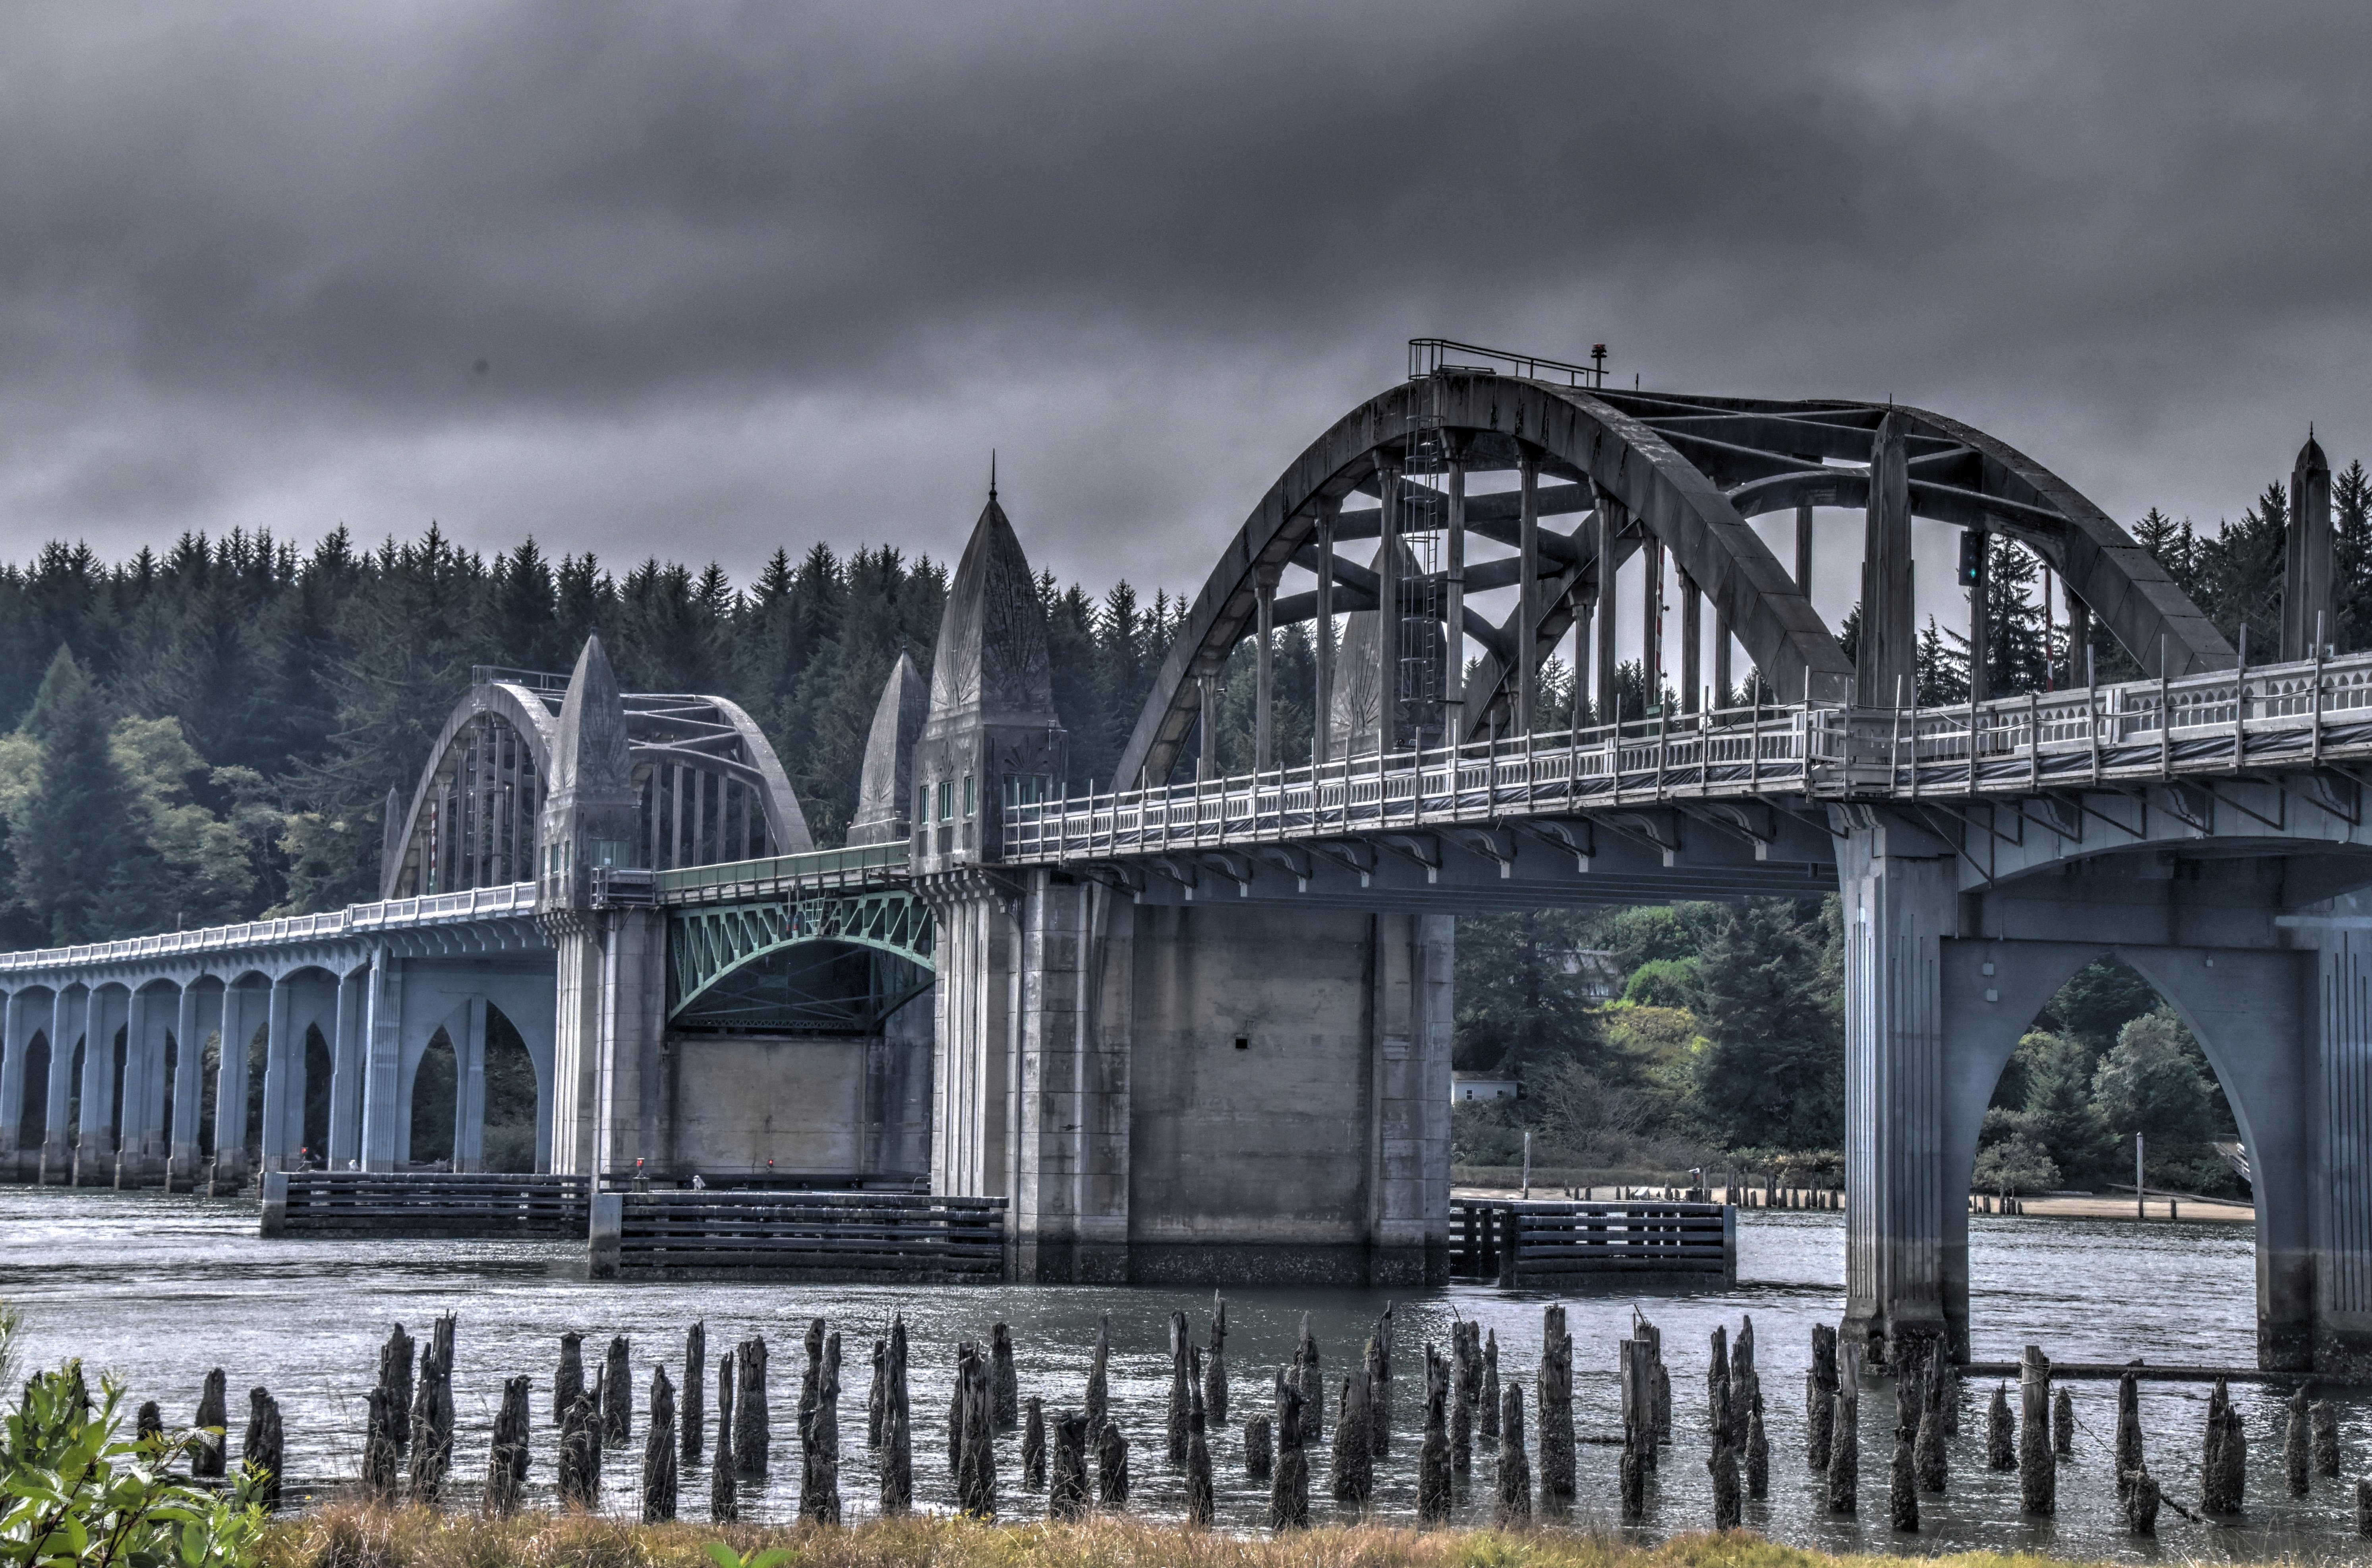
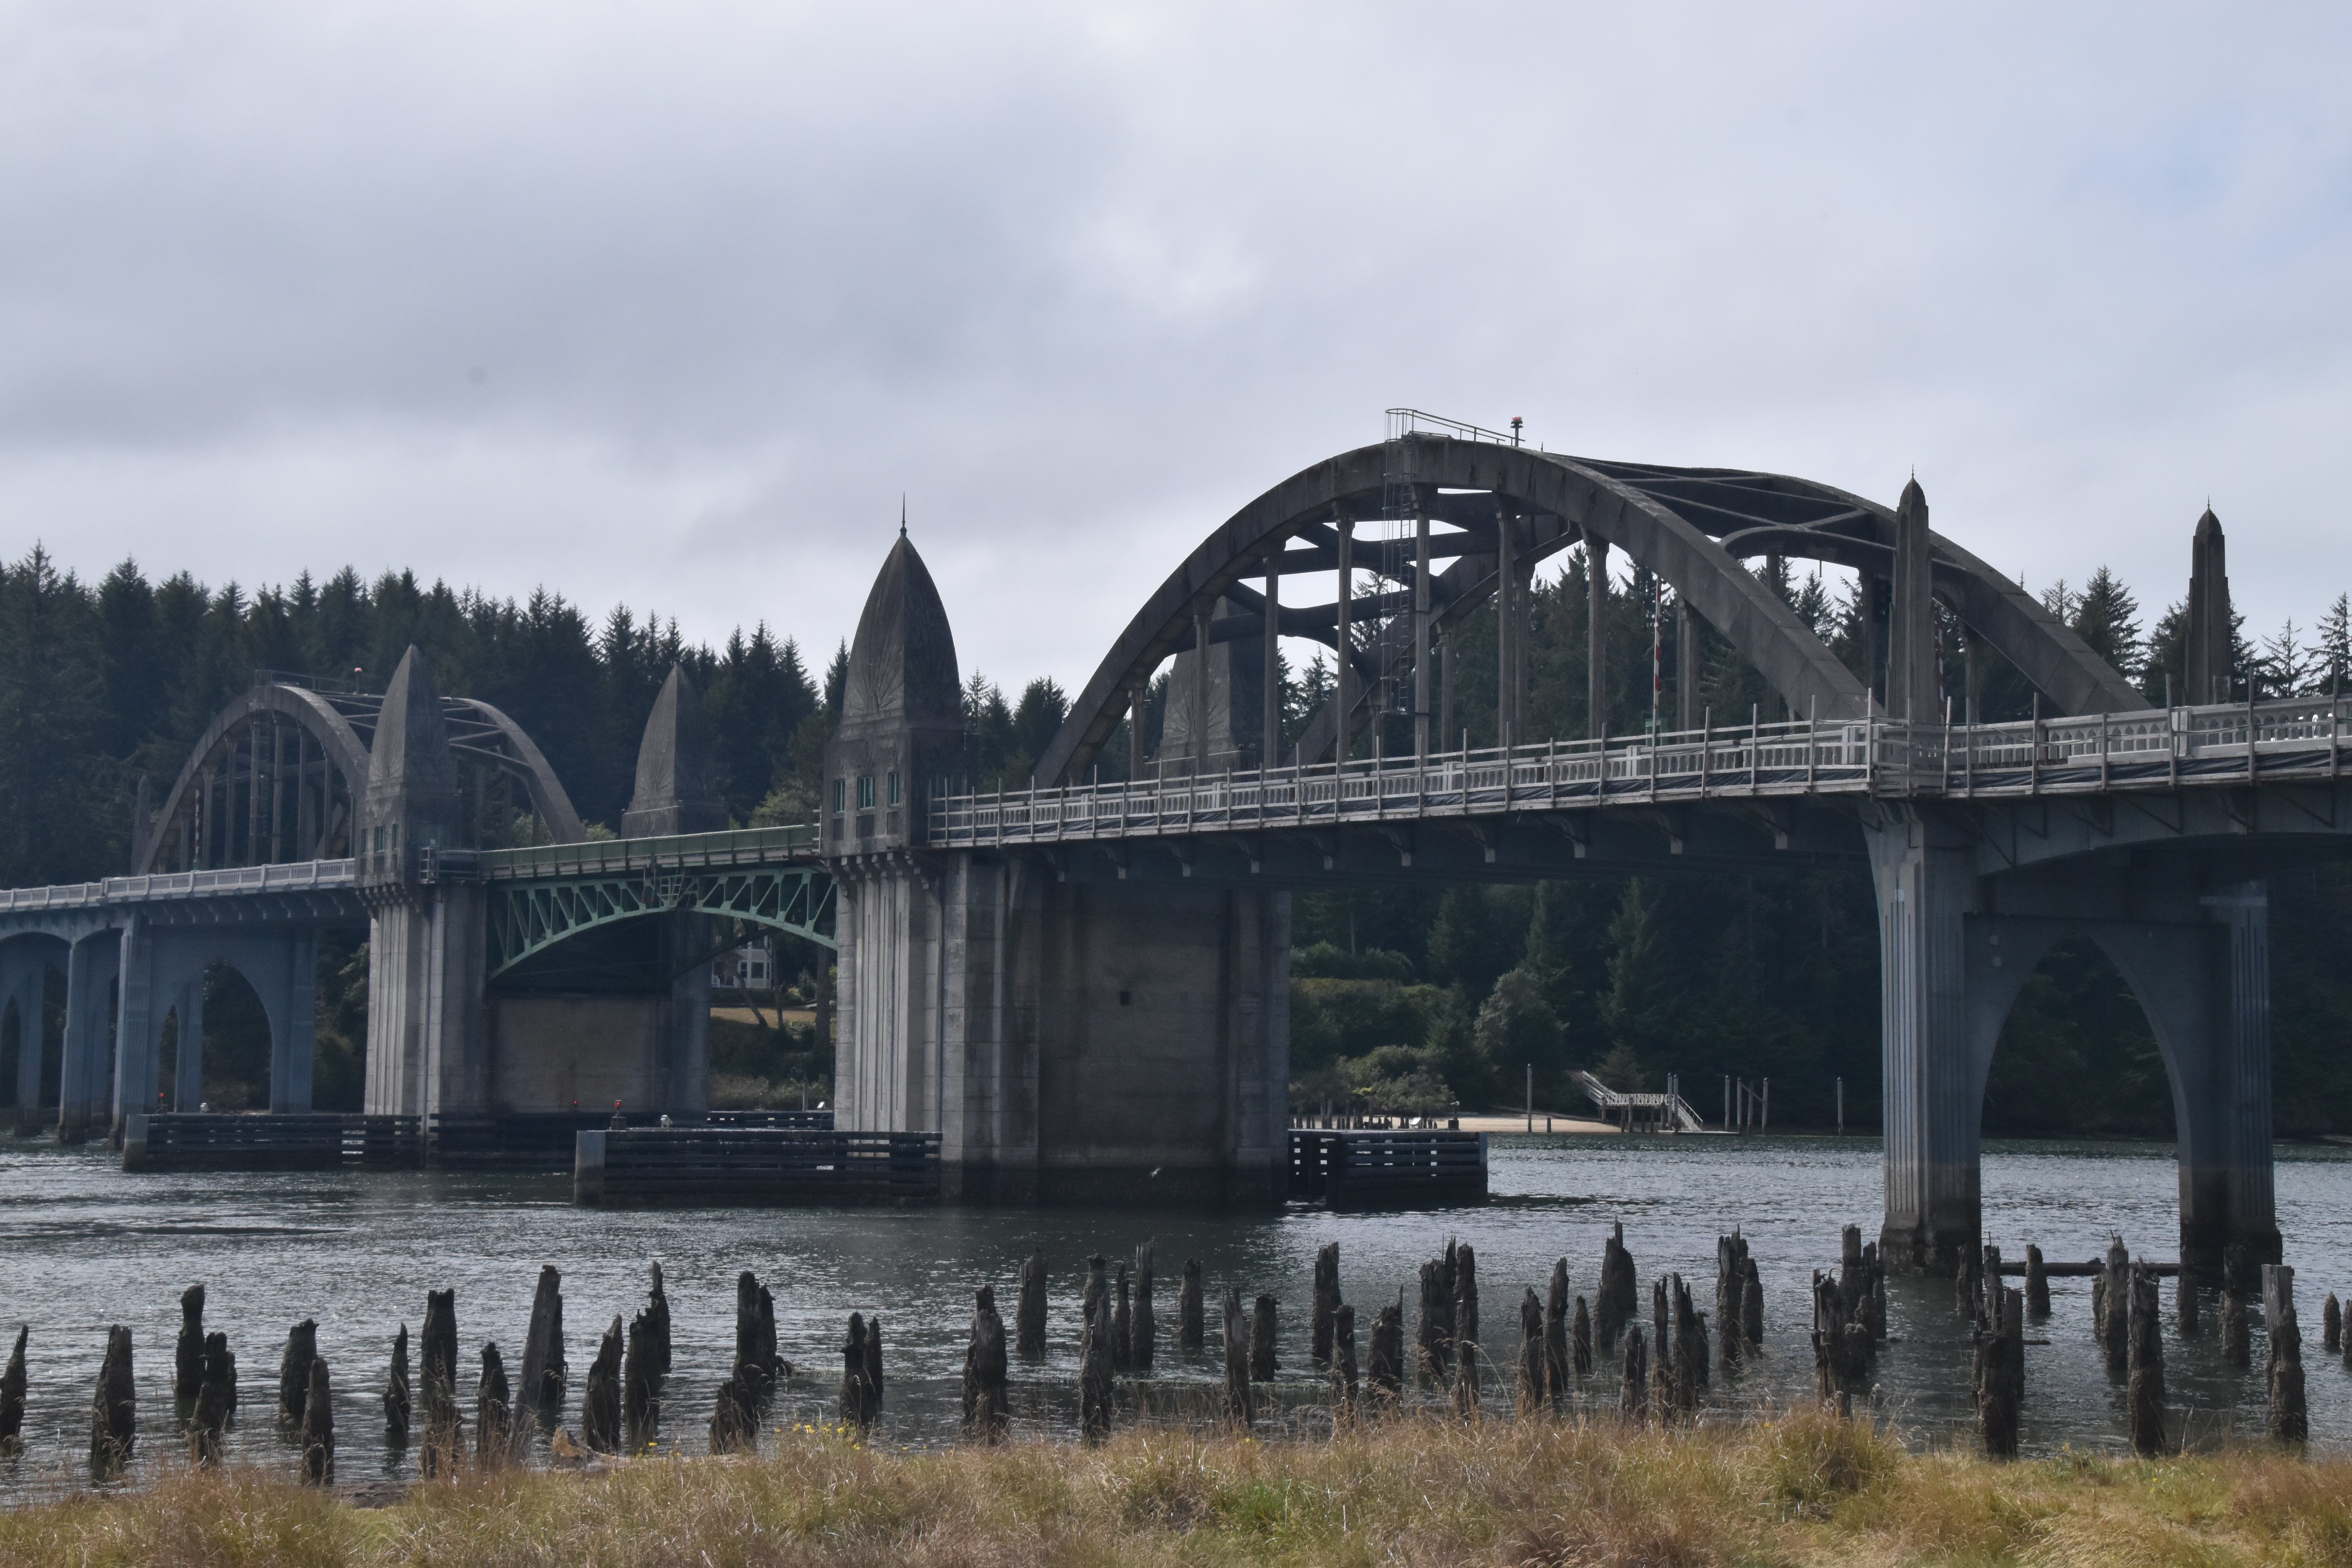
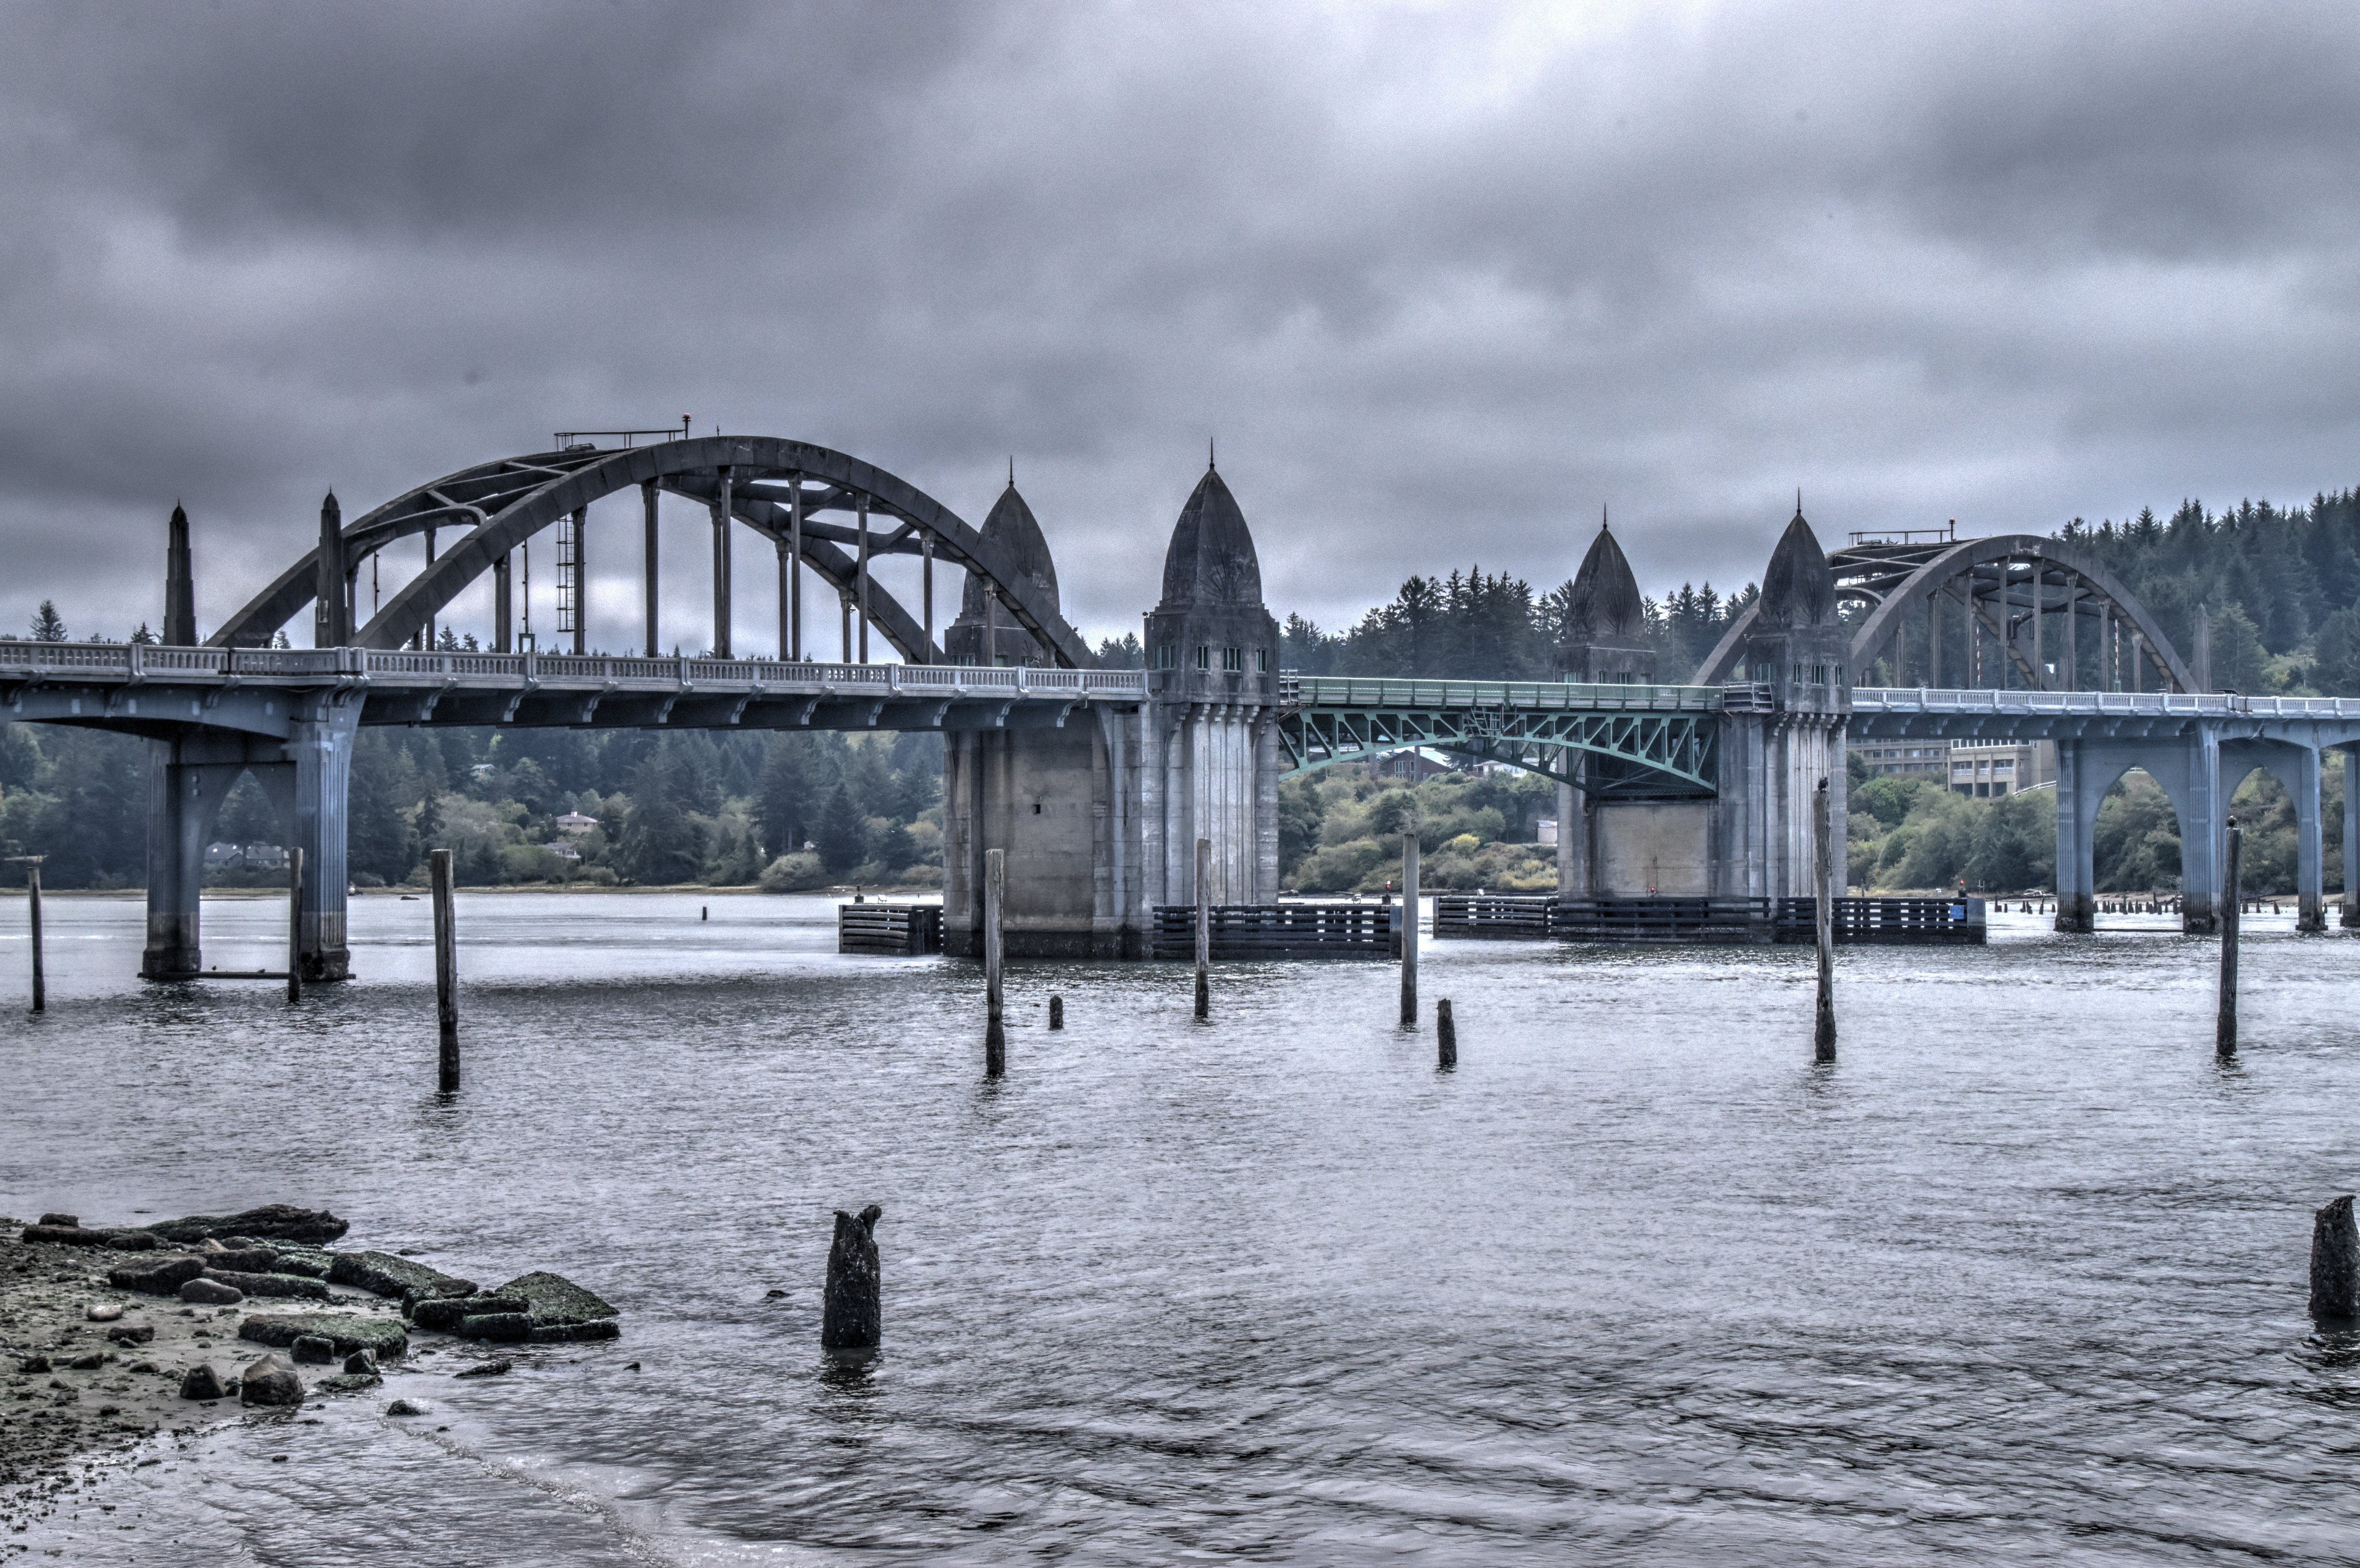
Elevation from northeast quadrant.
![]()


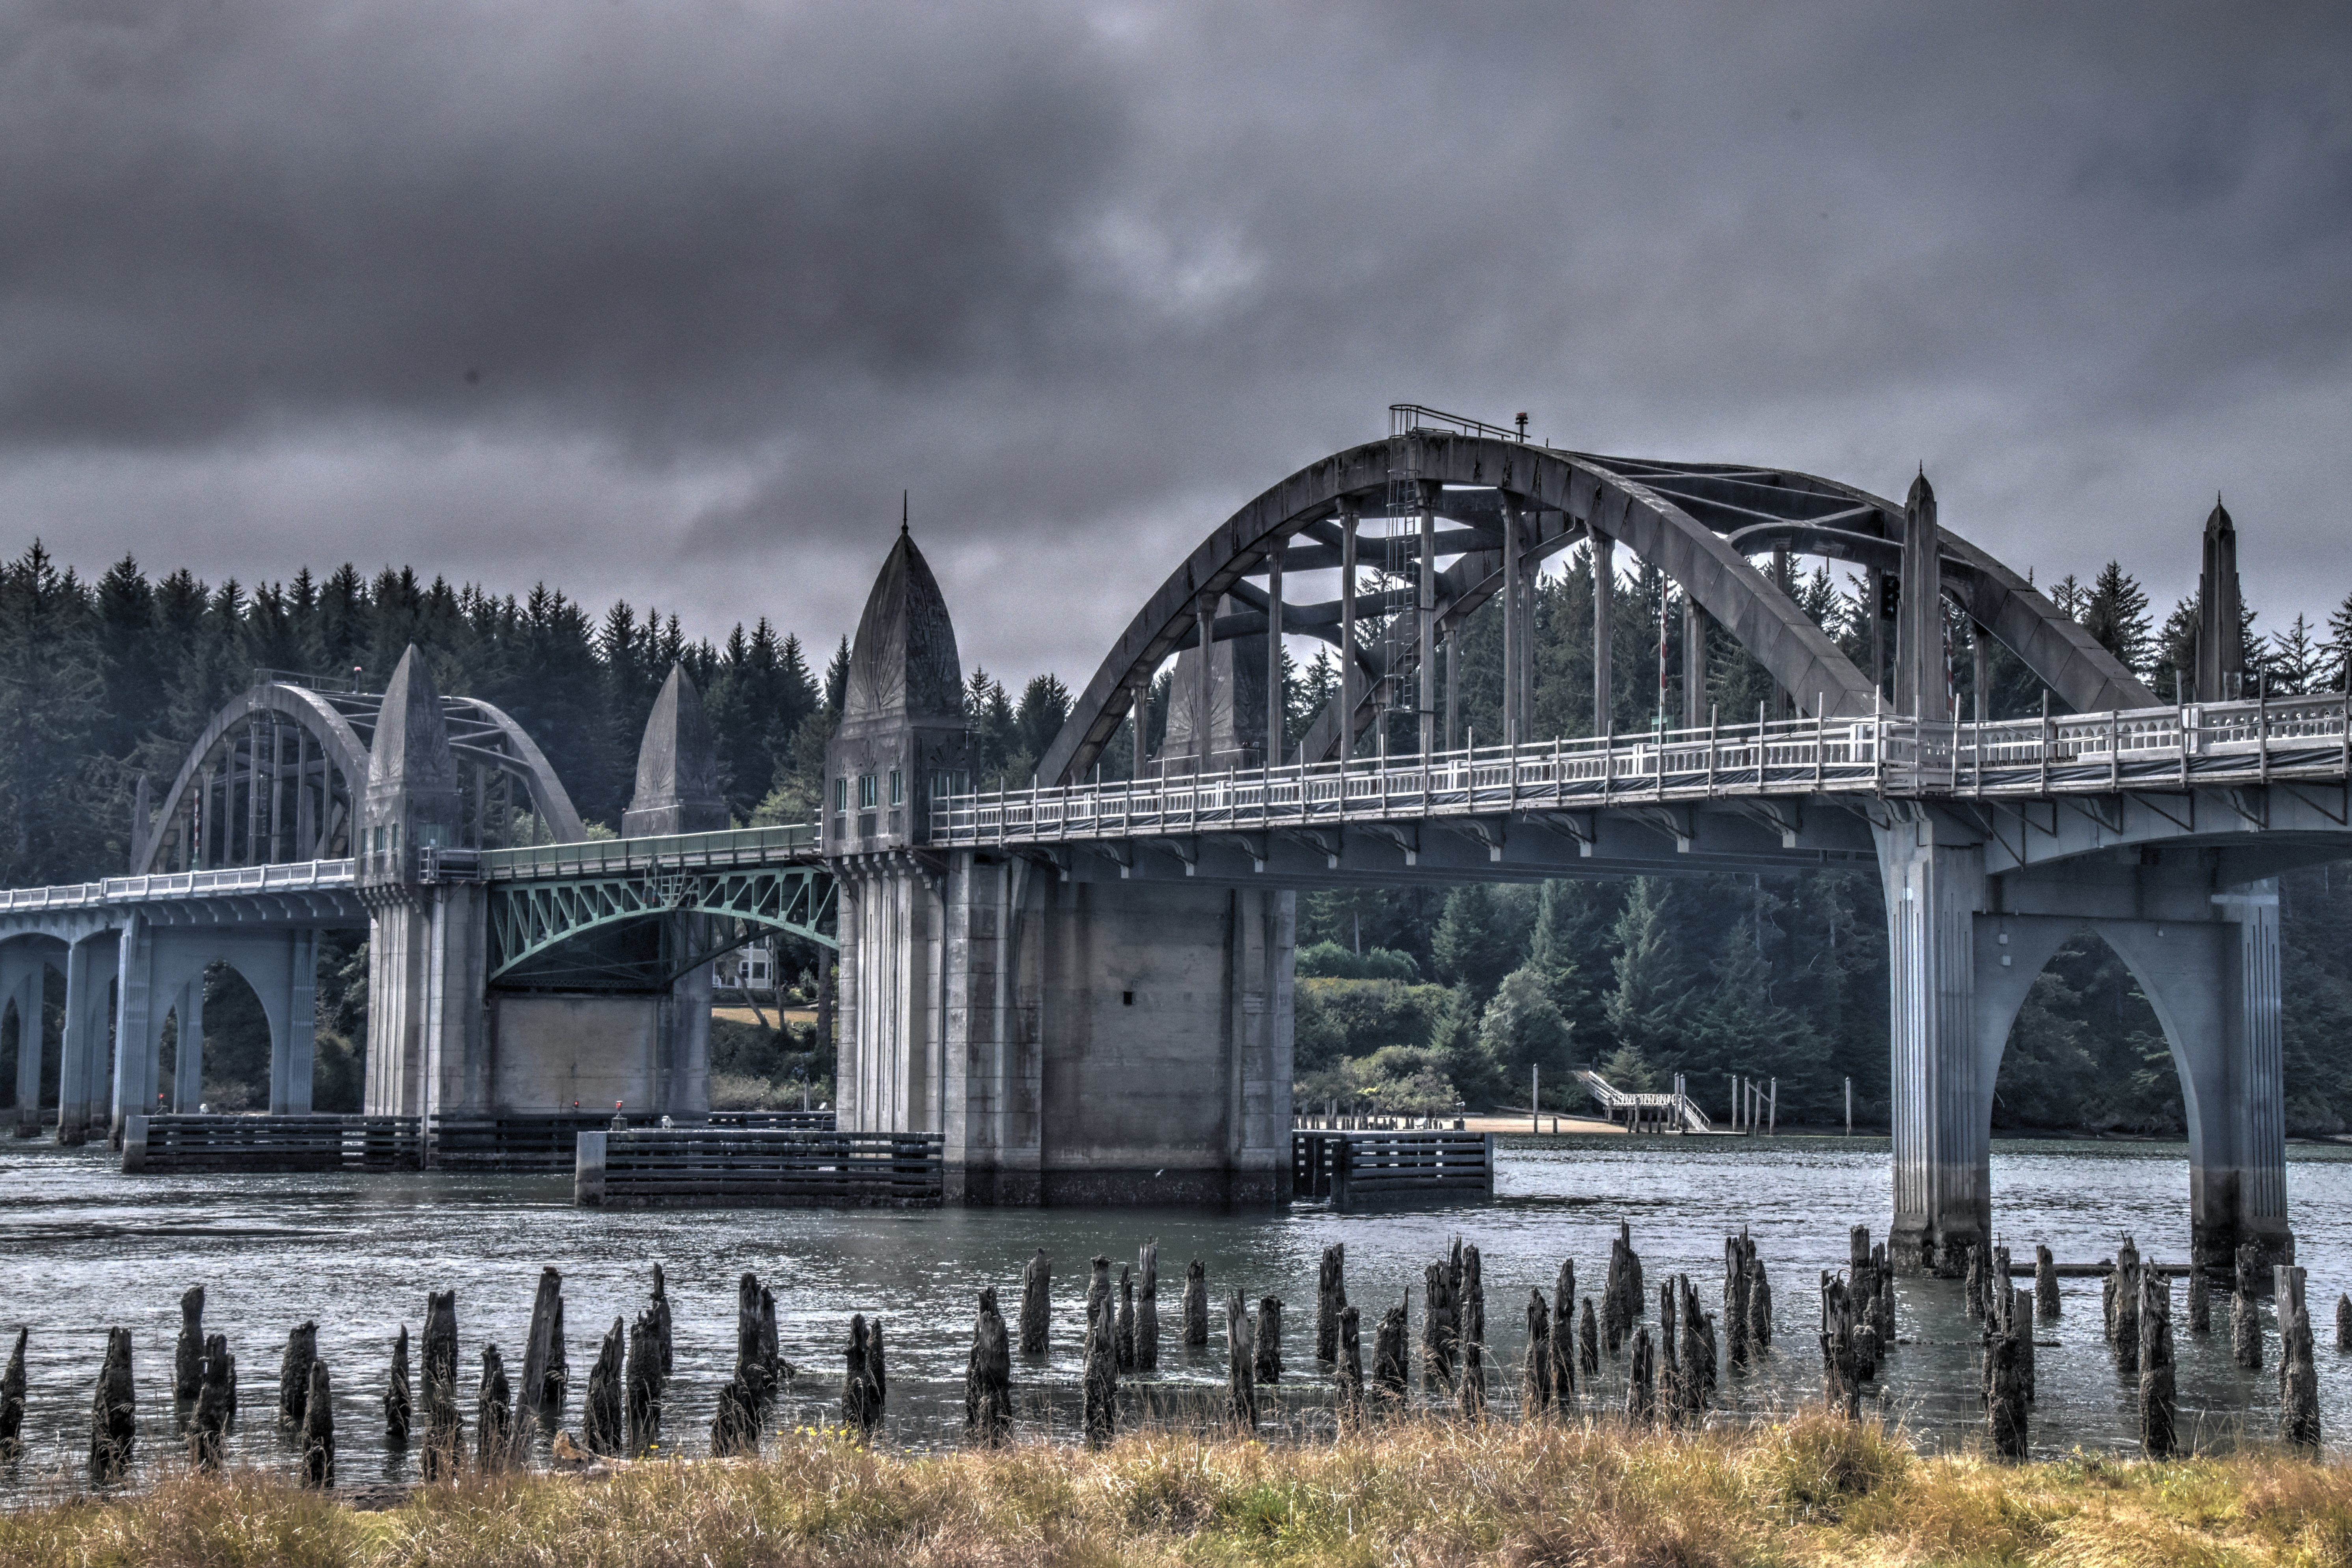
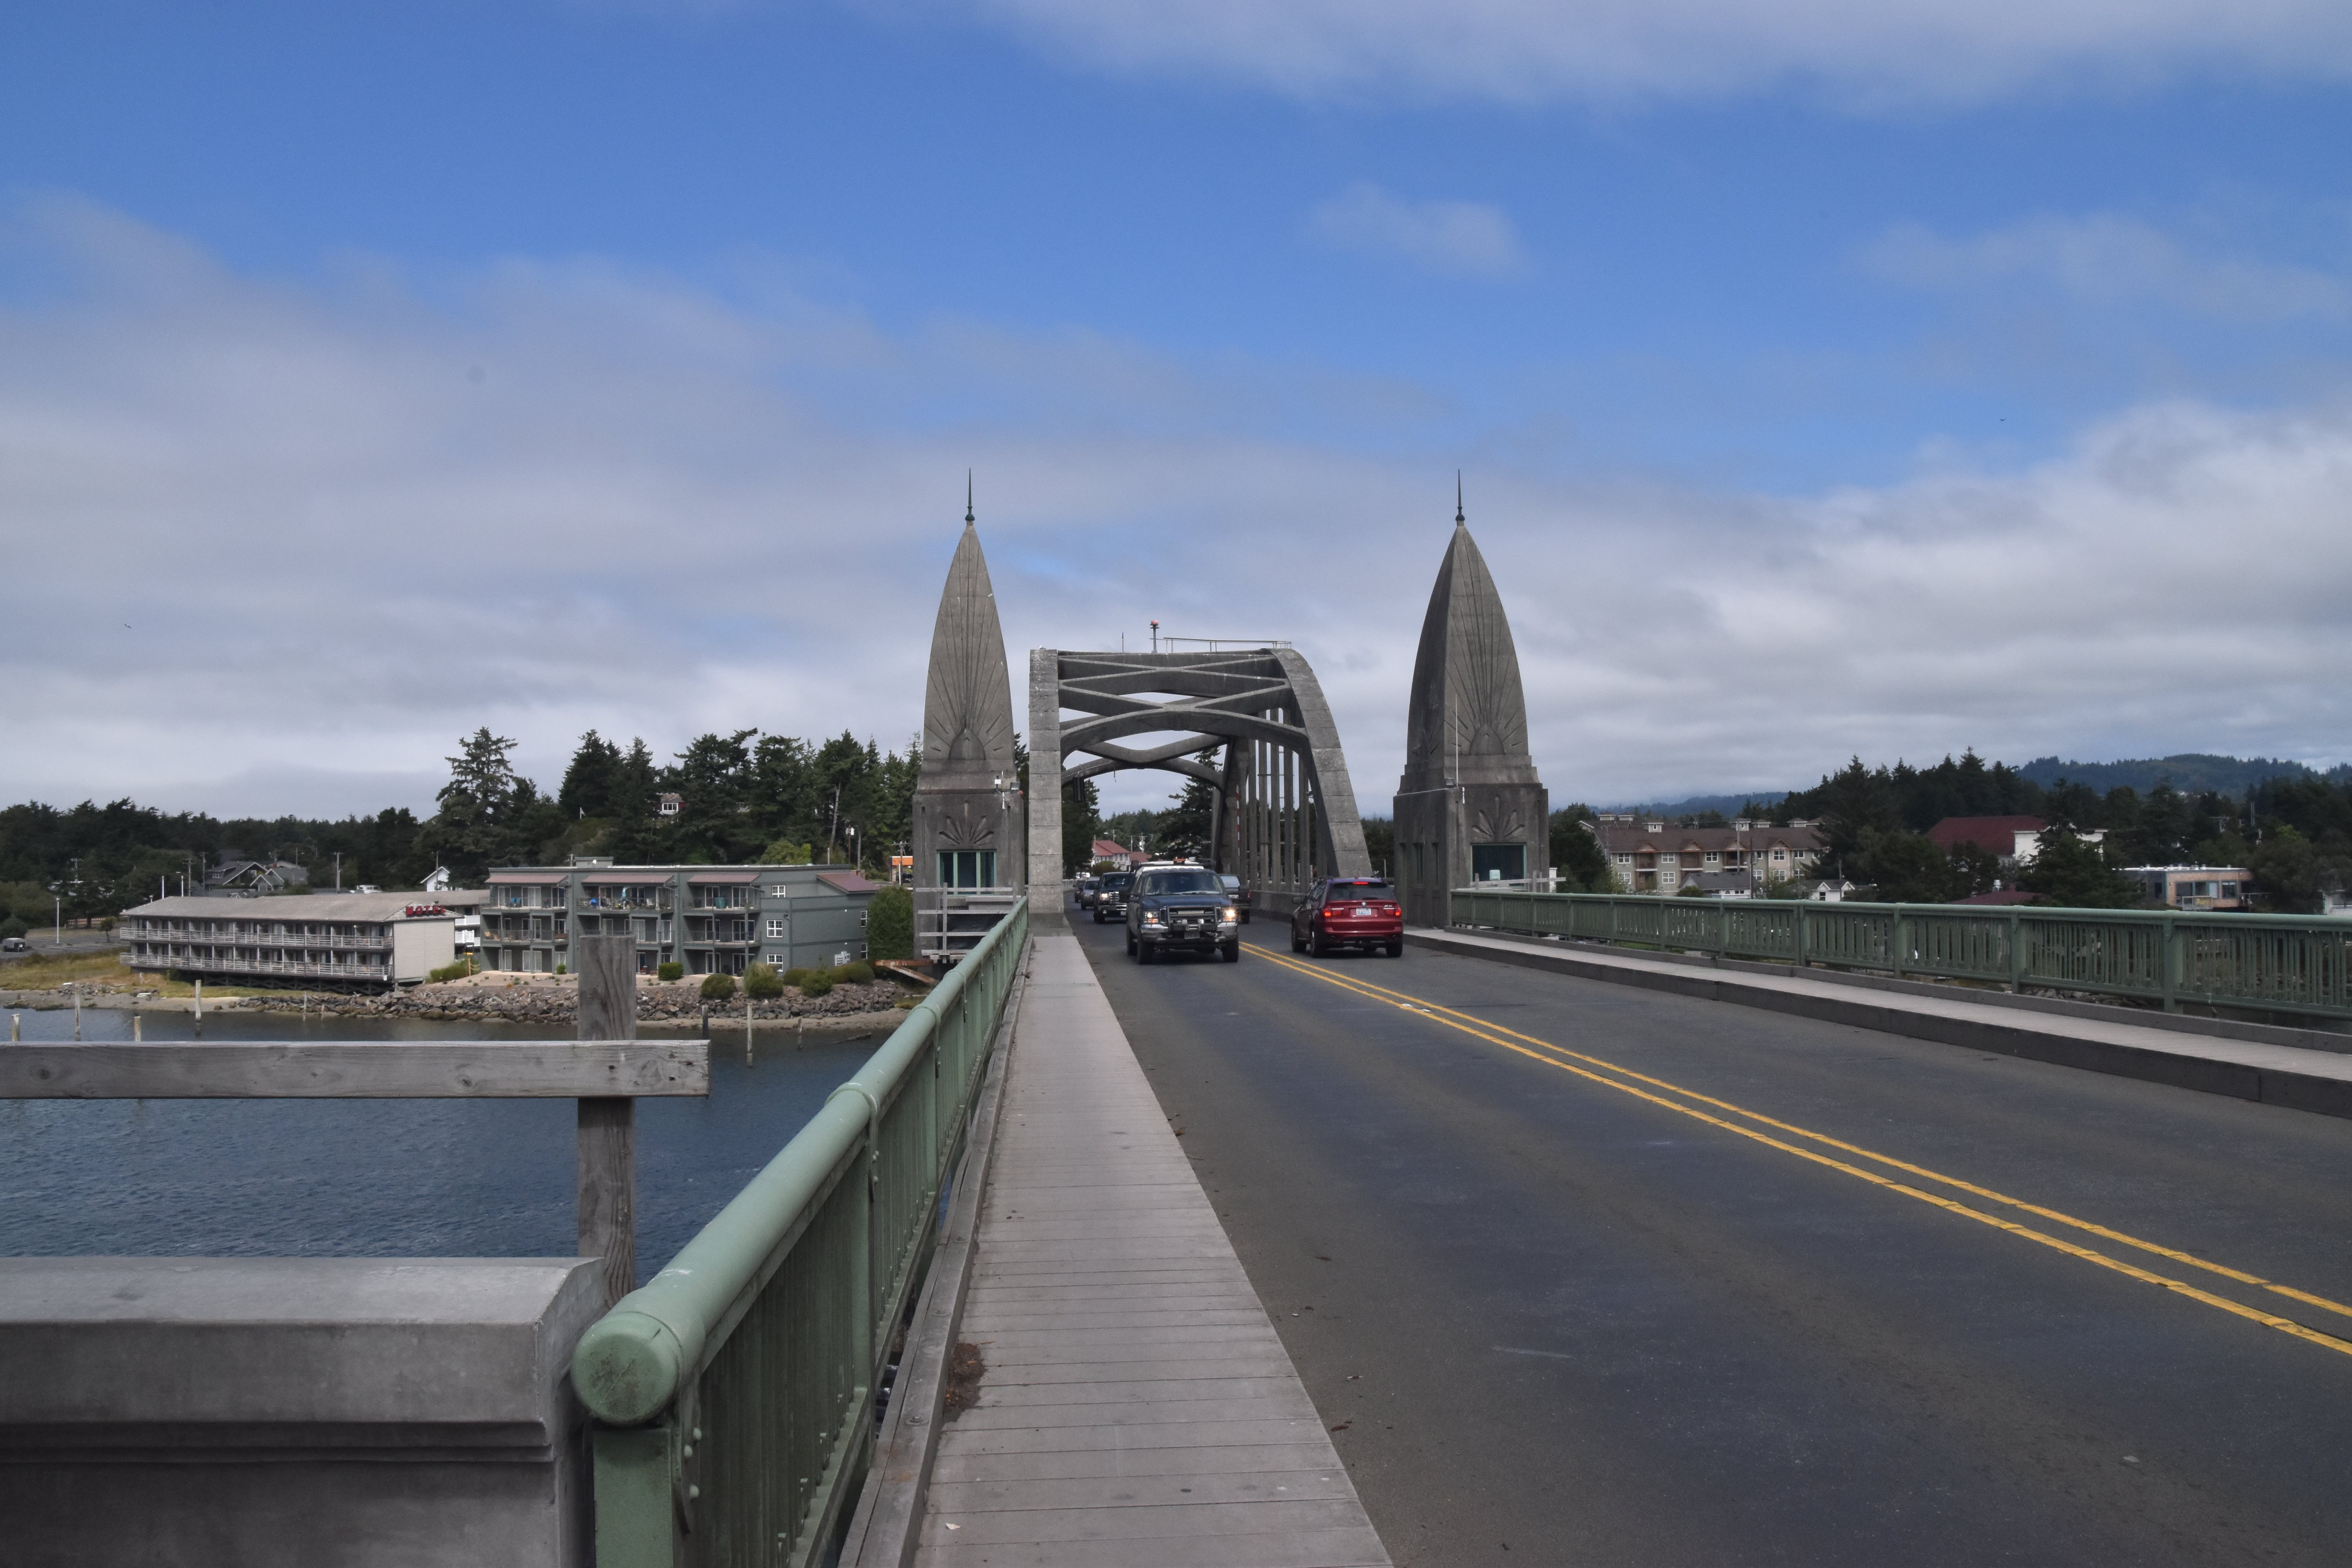
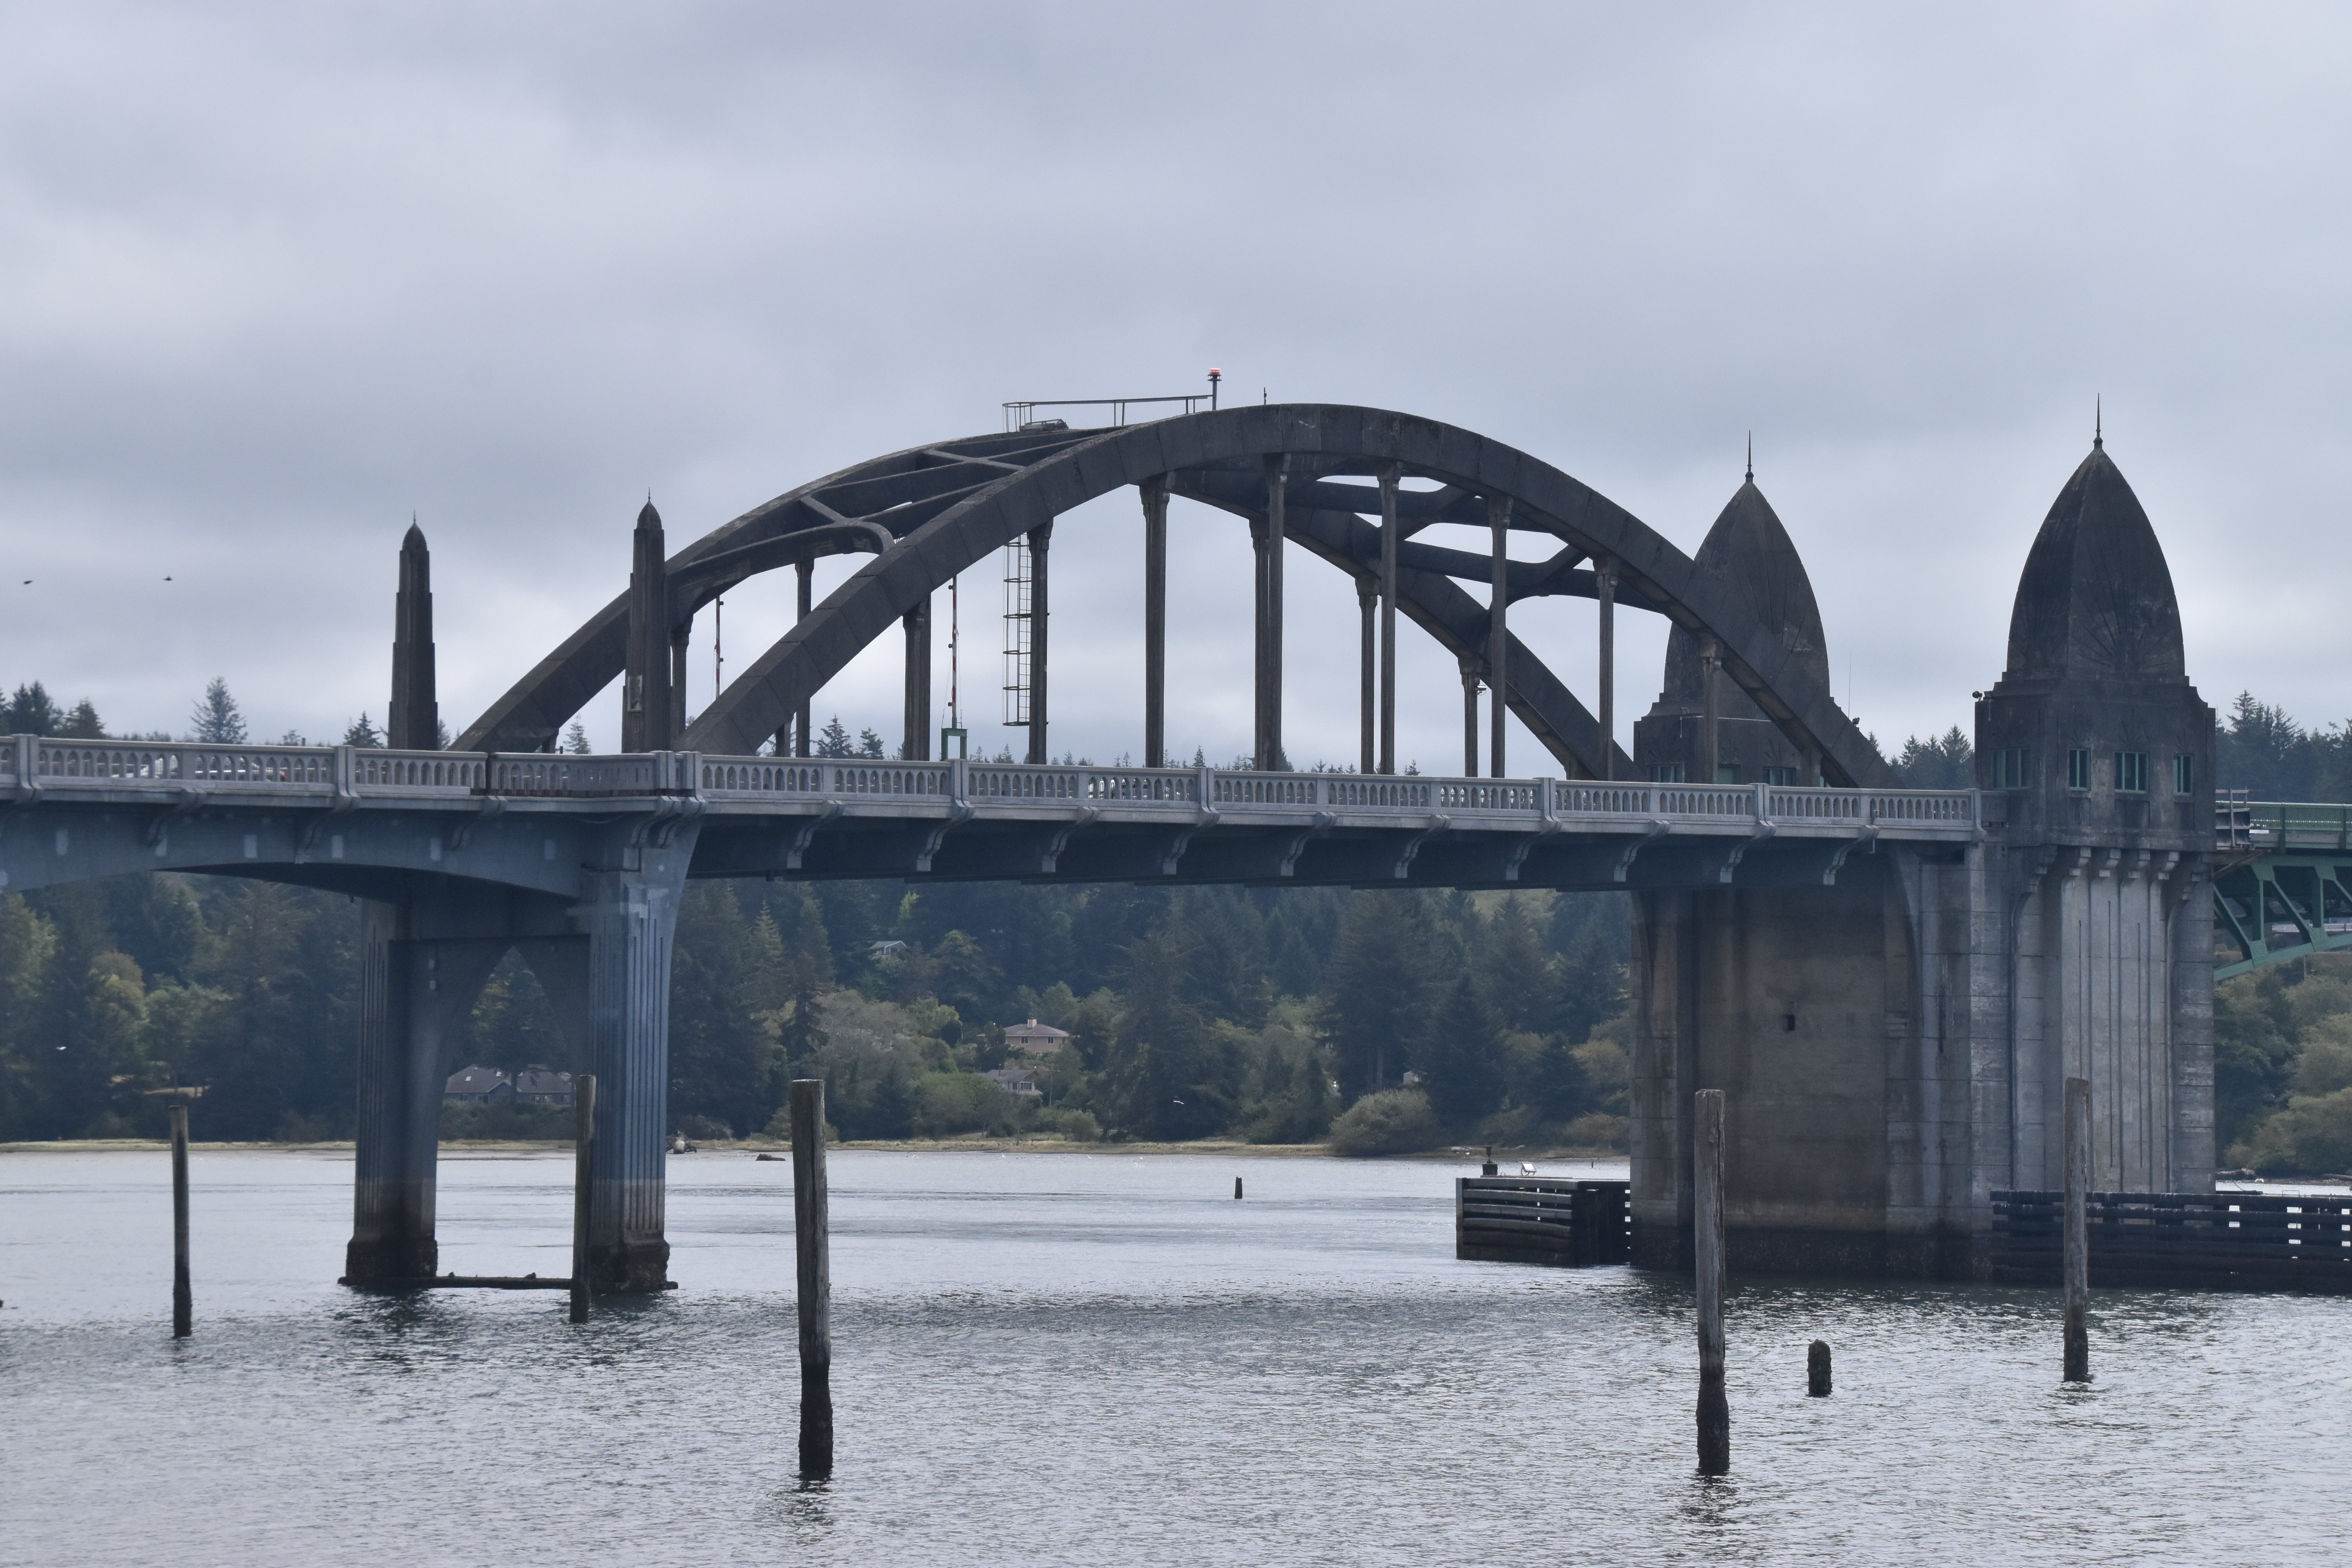
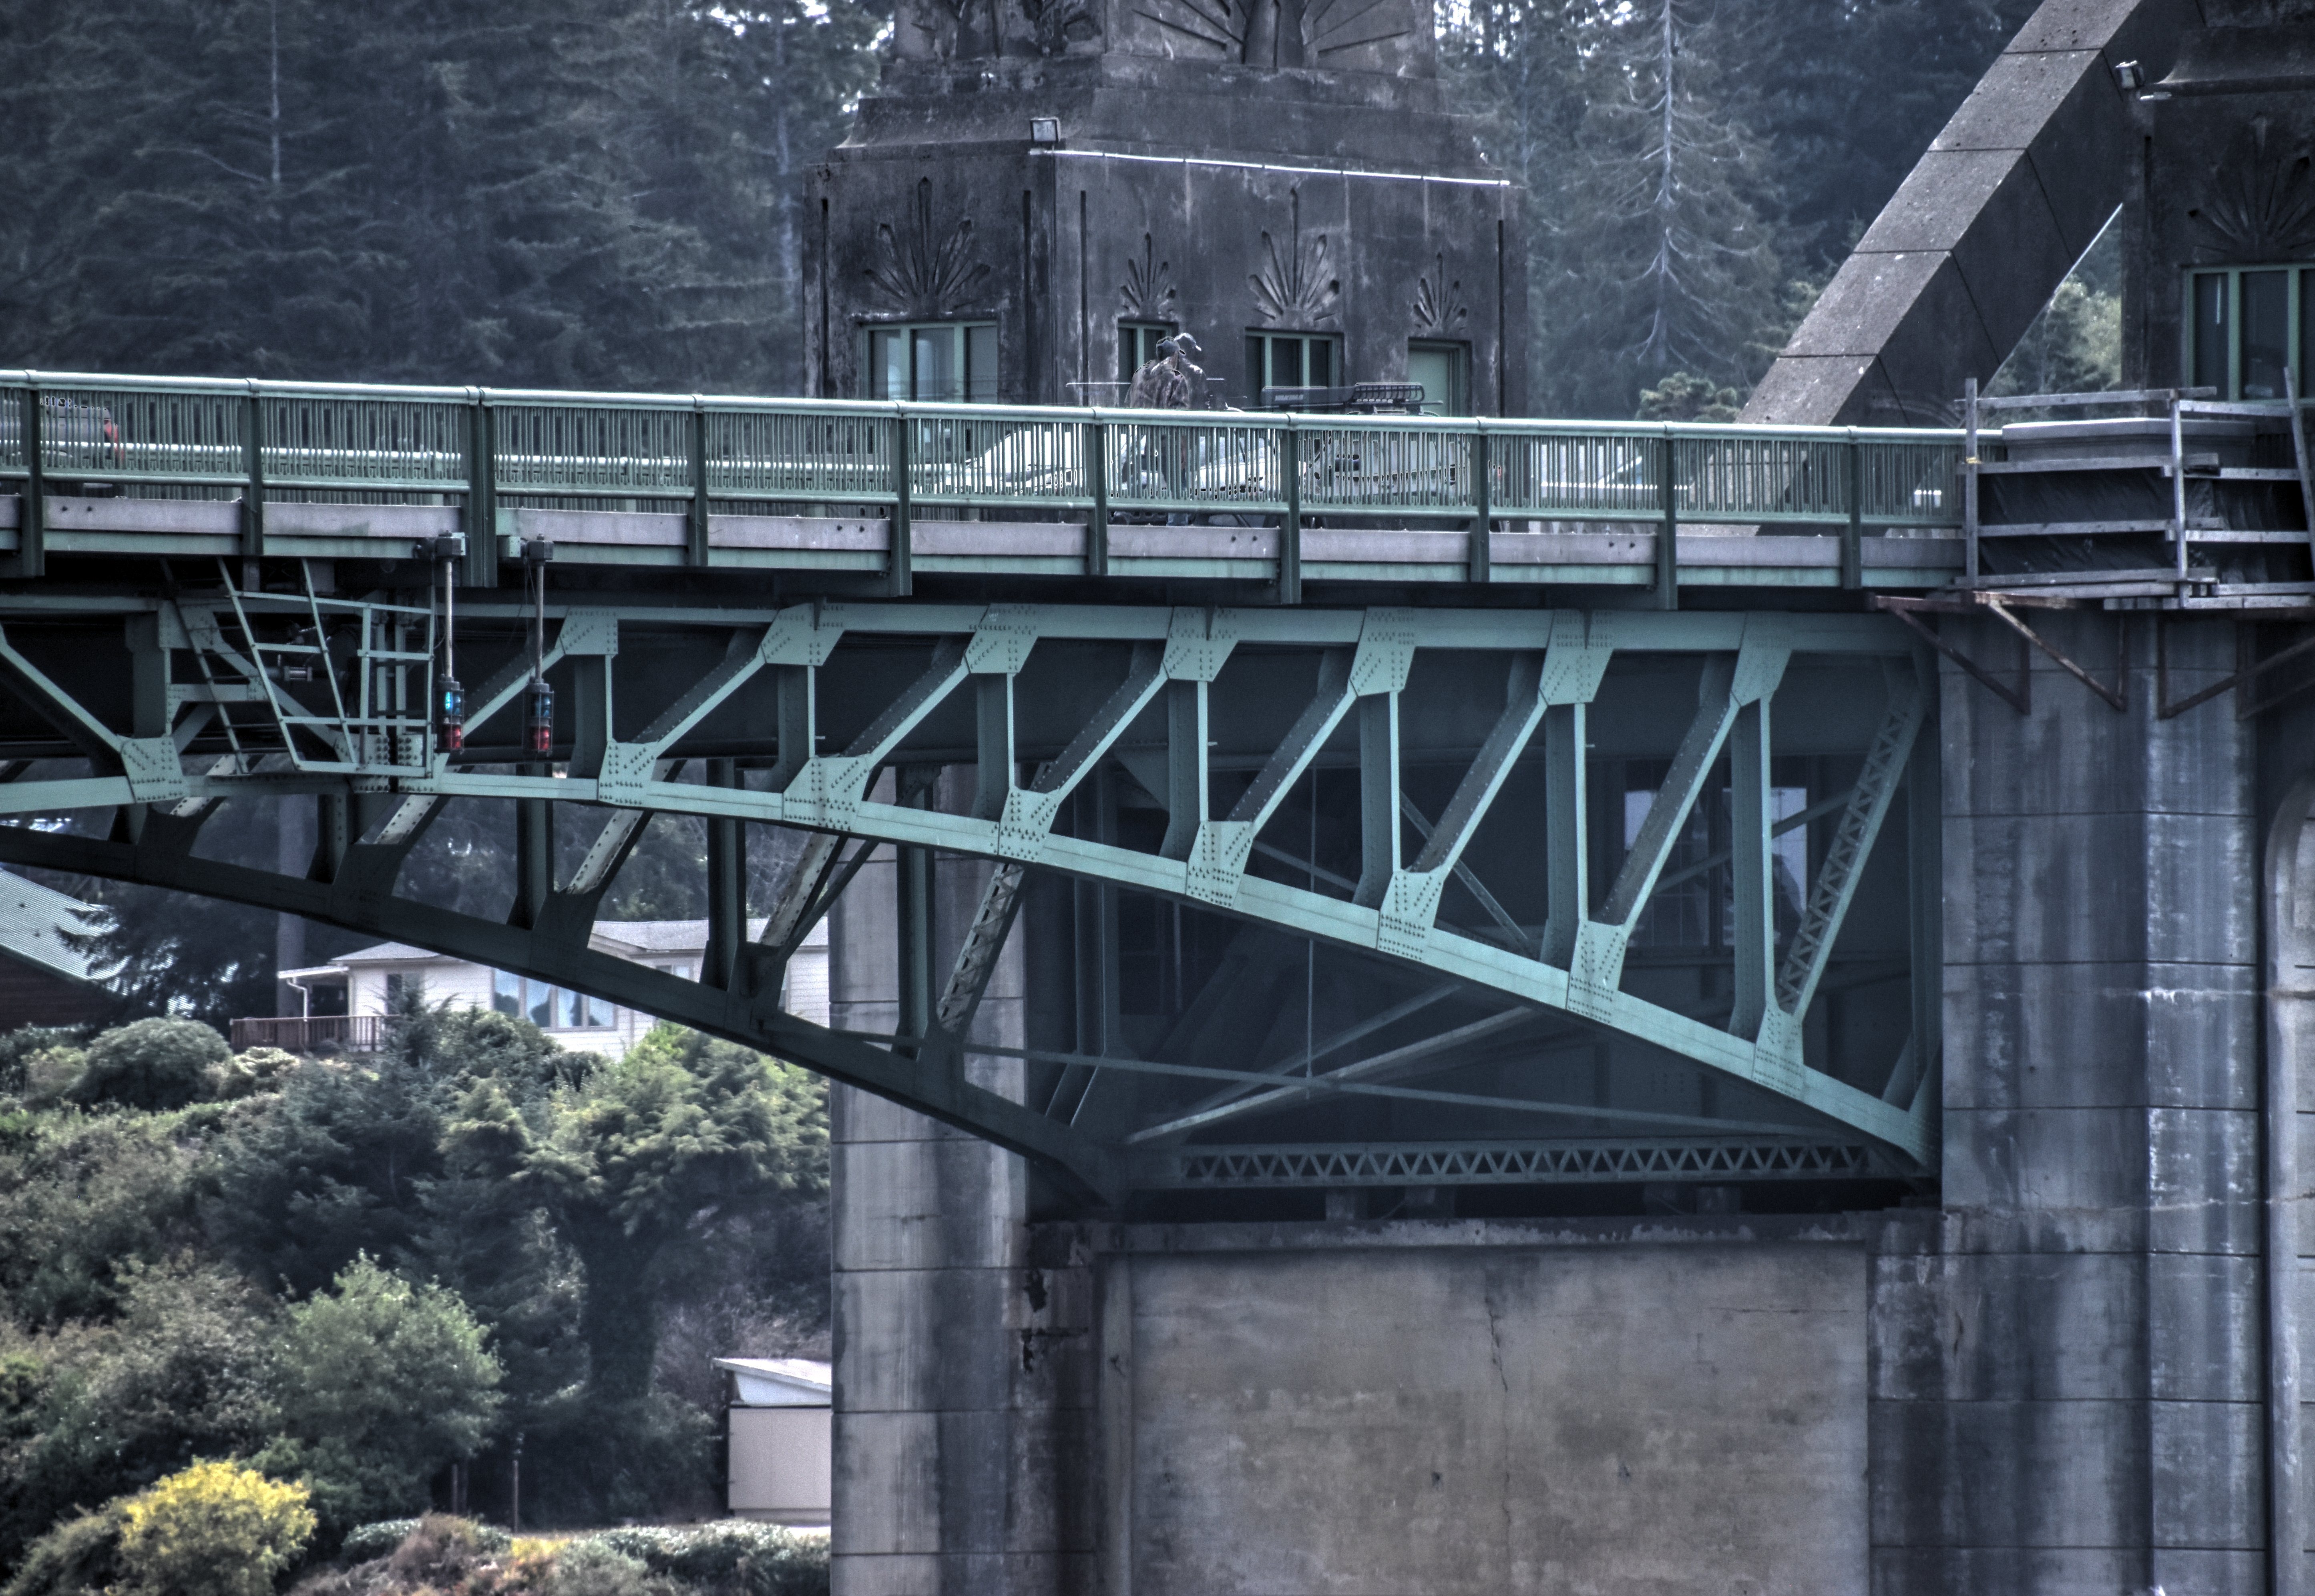
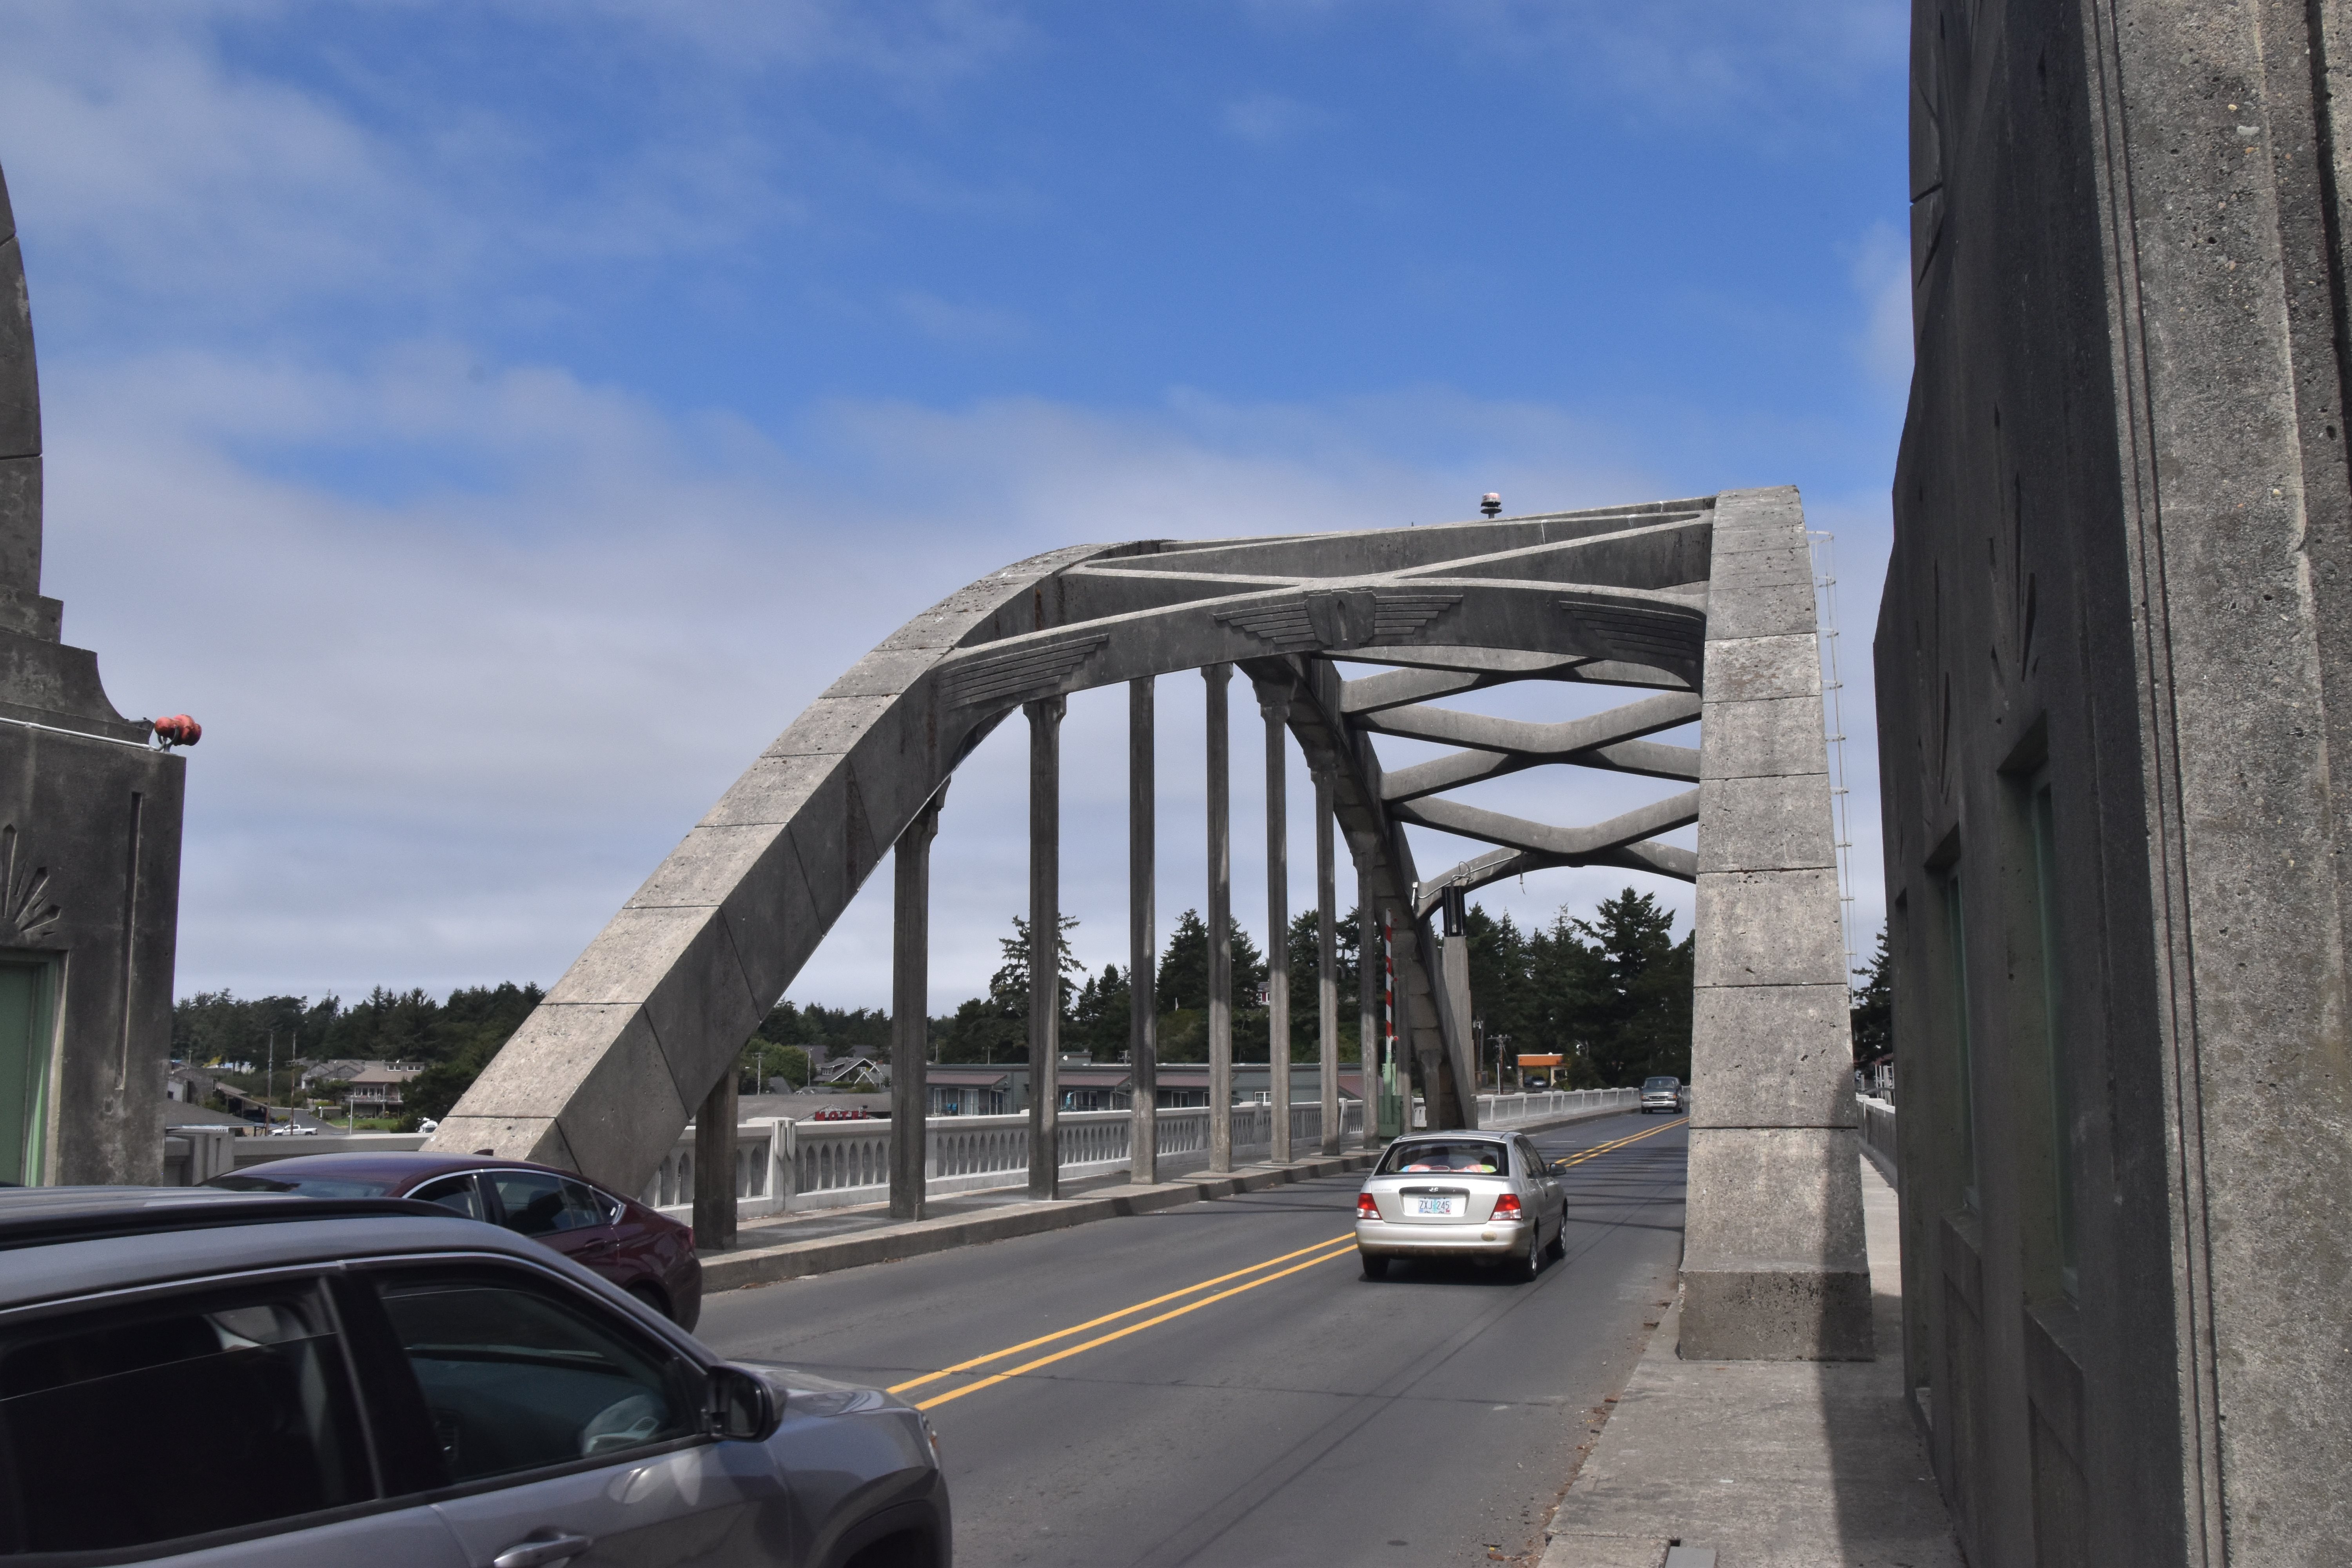
Elevation from northeast quadrant showing arch and bascule spans.
![]()


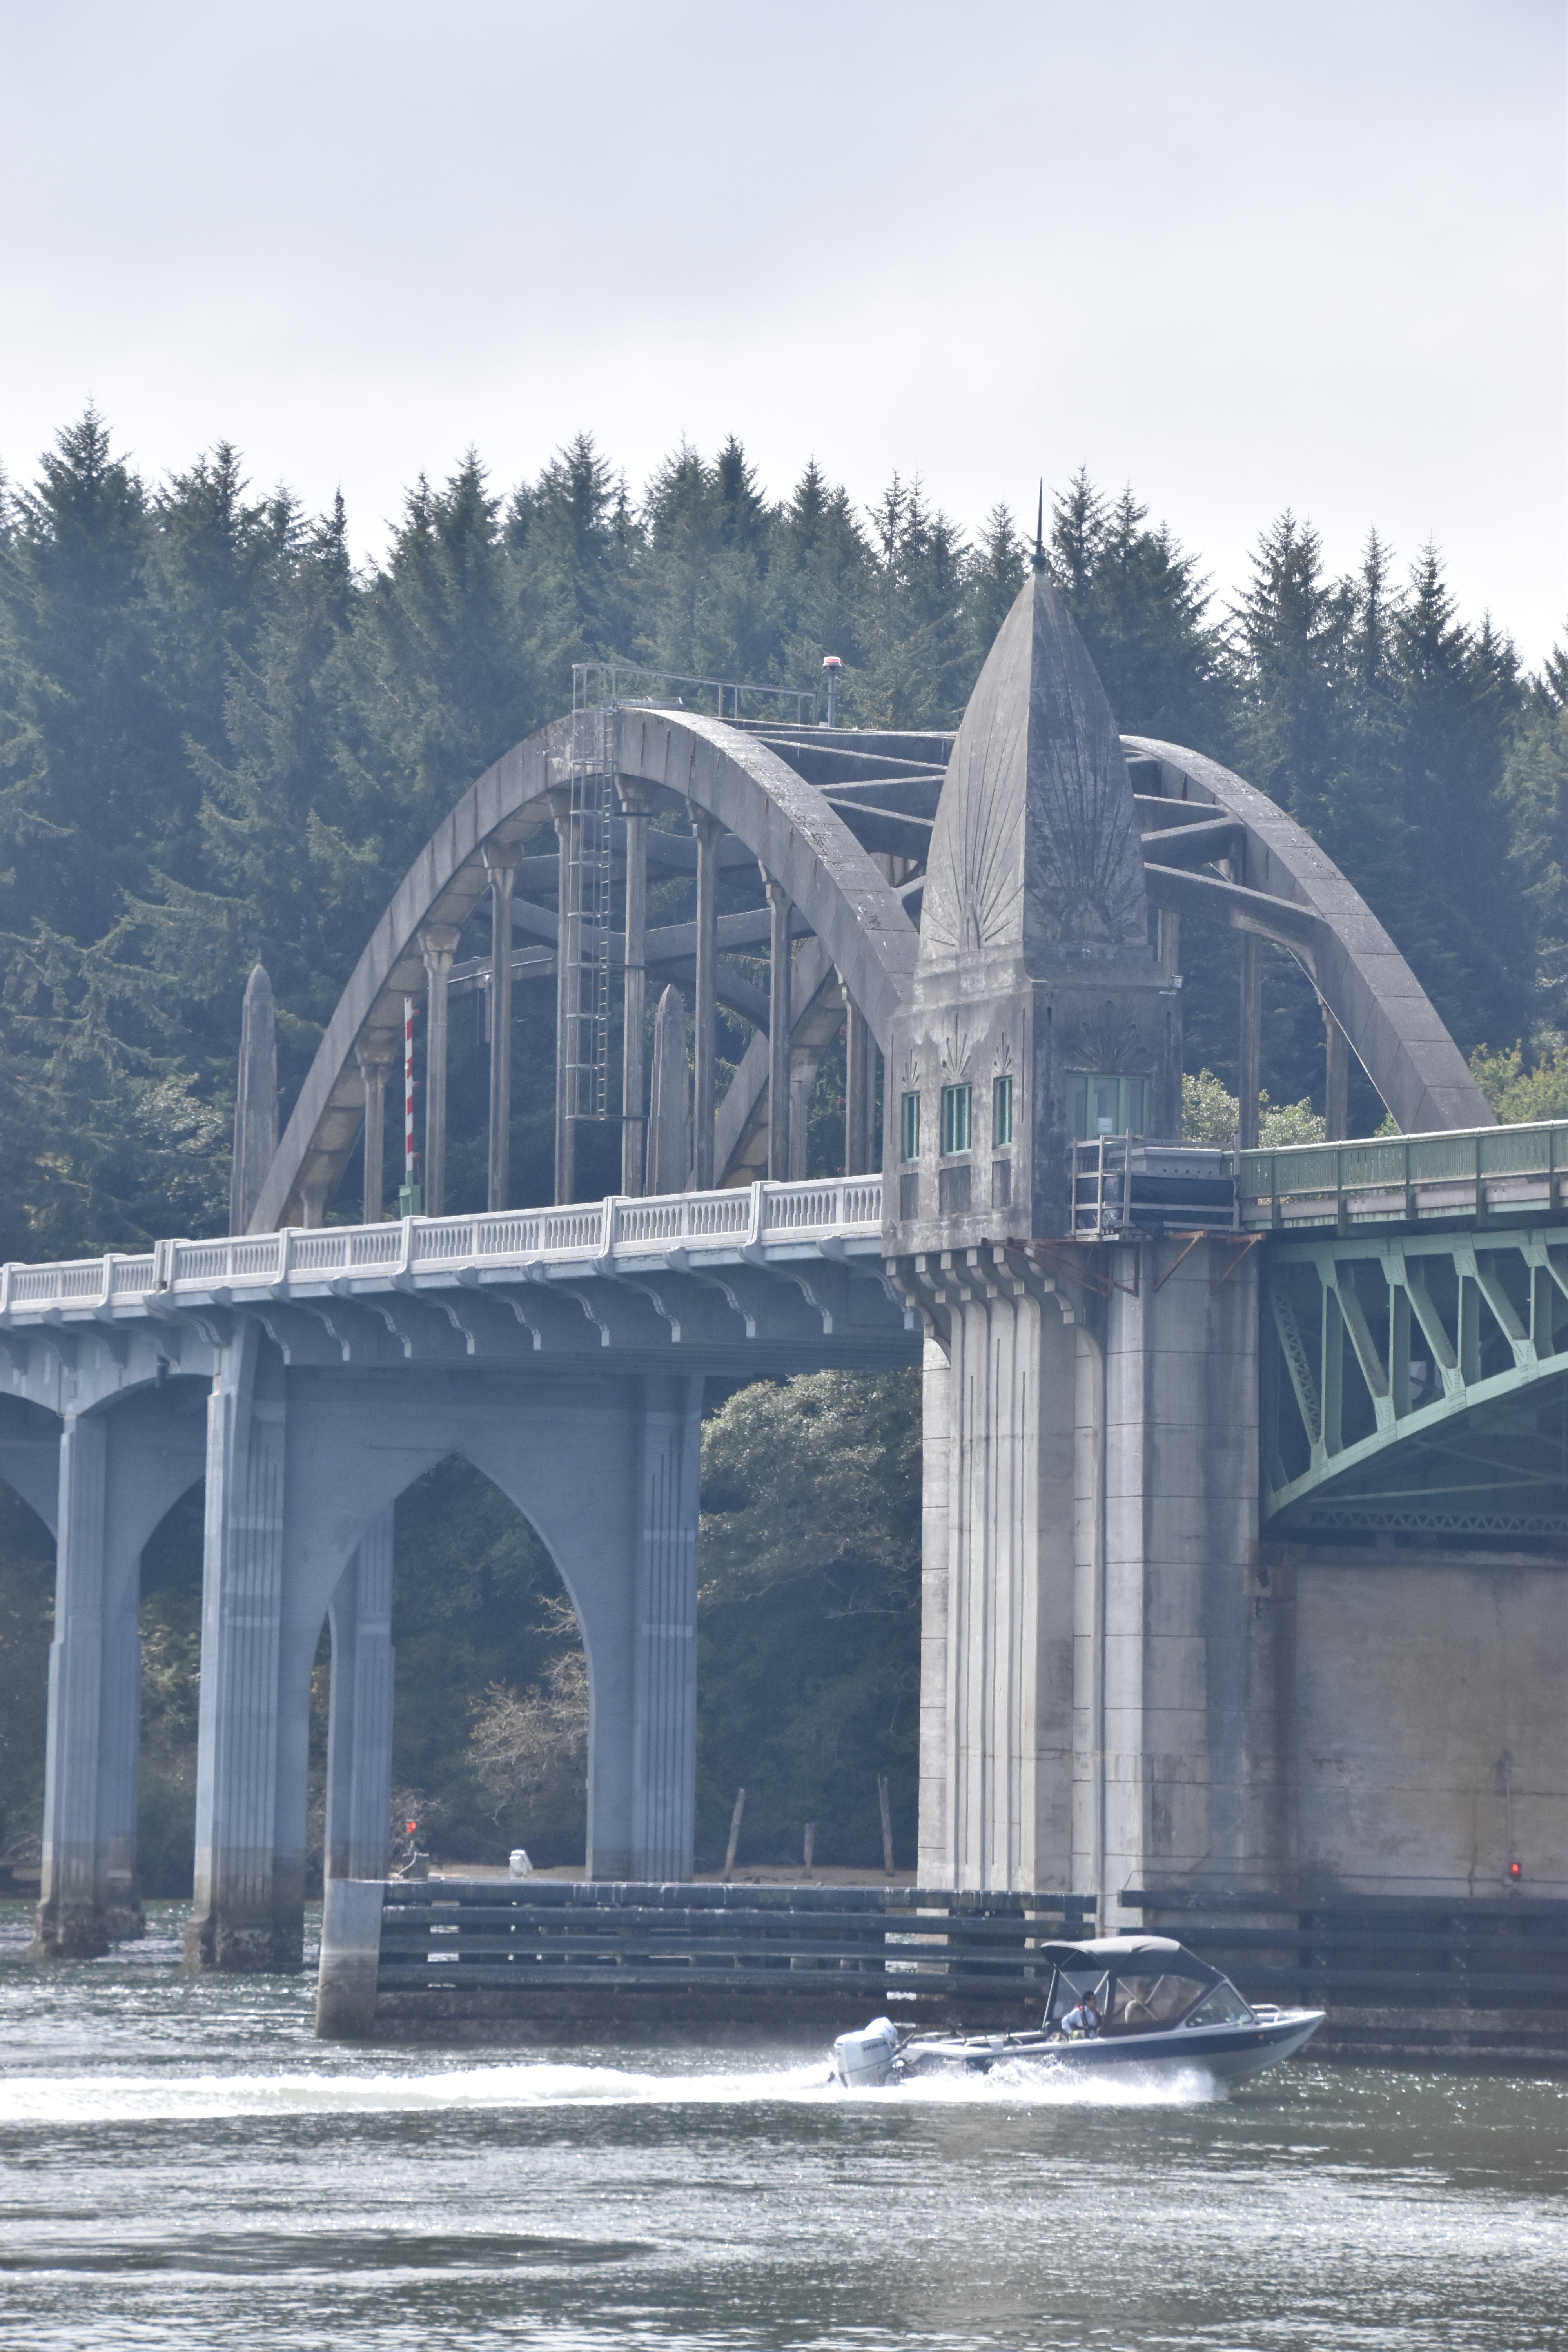
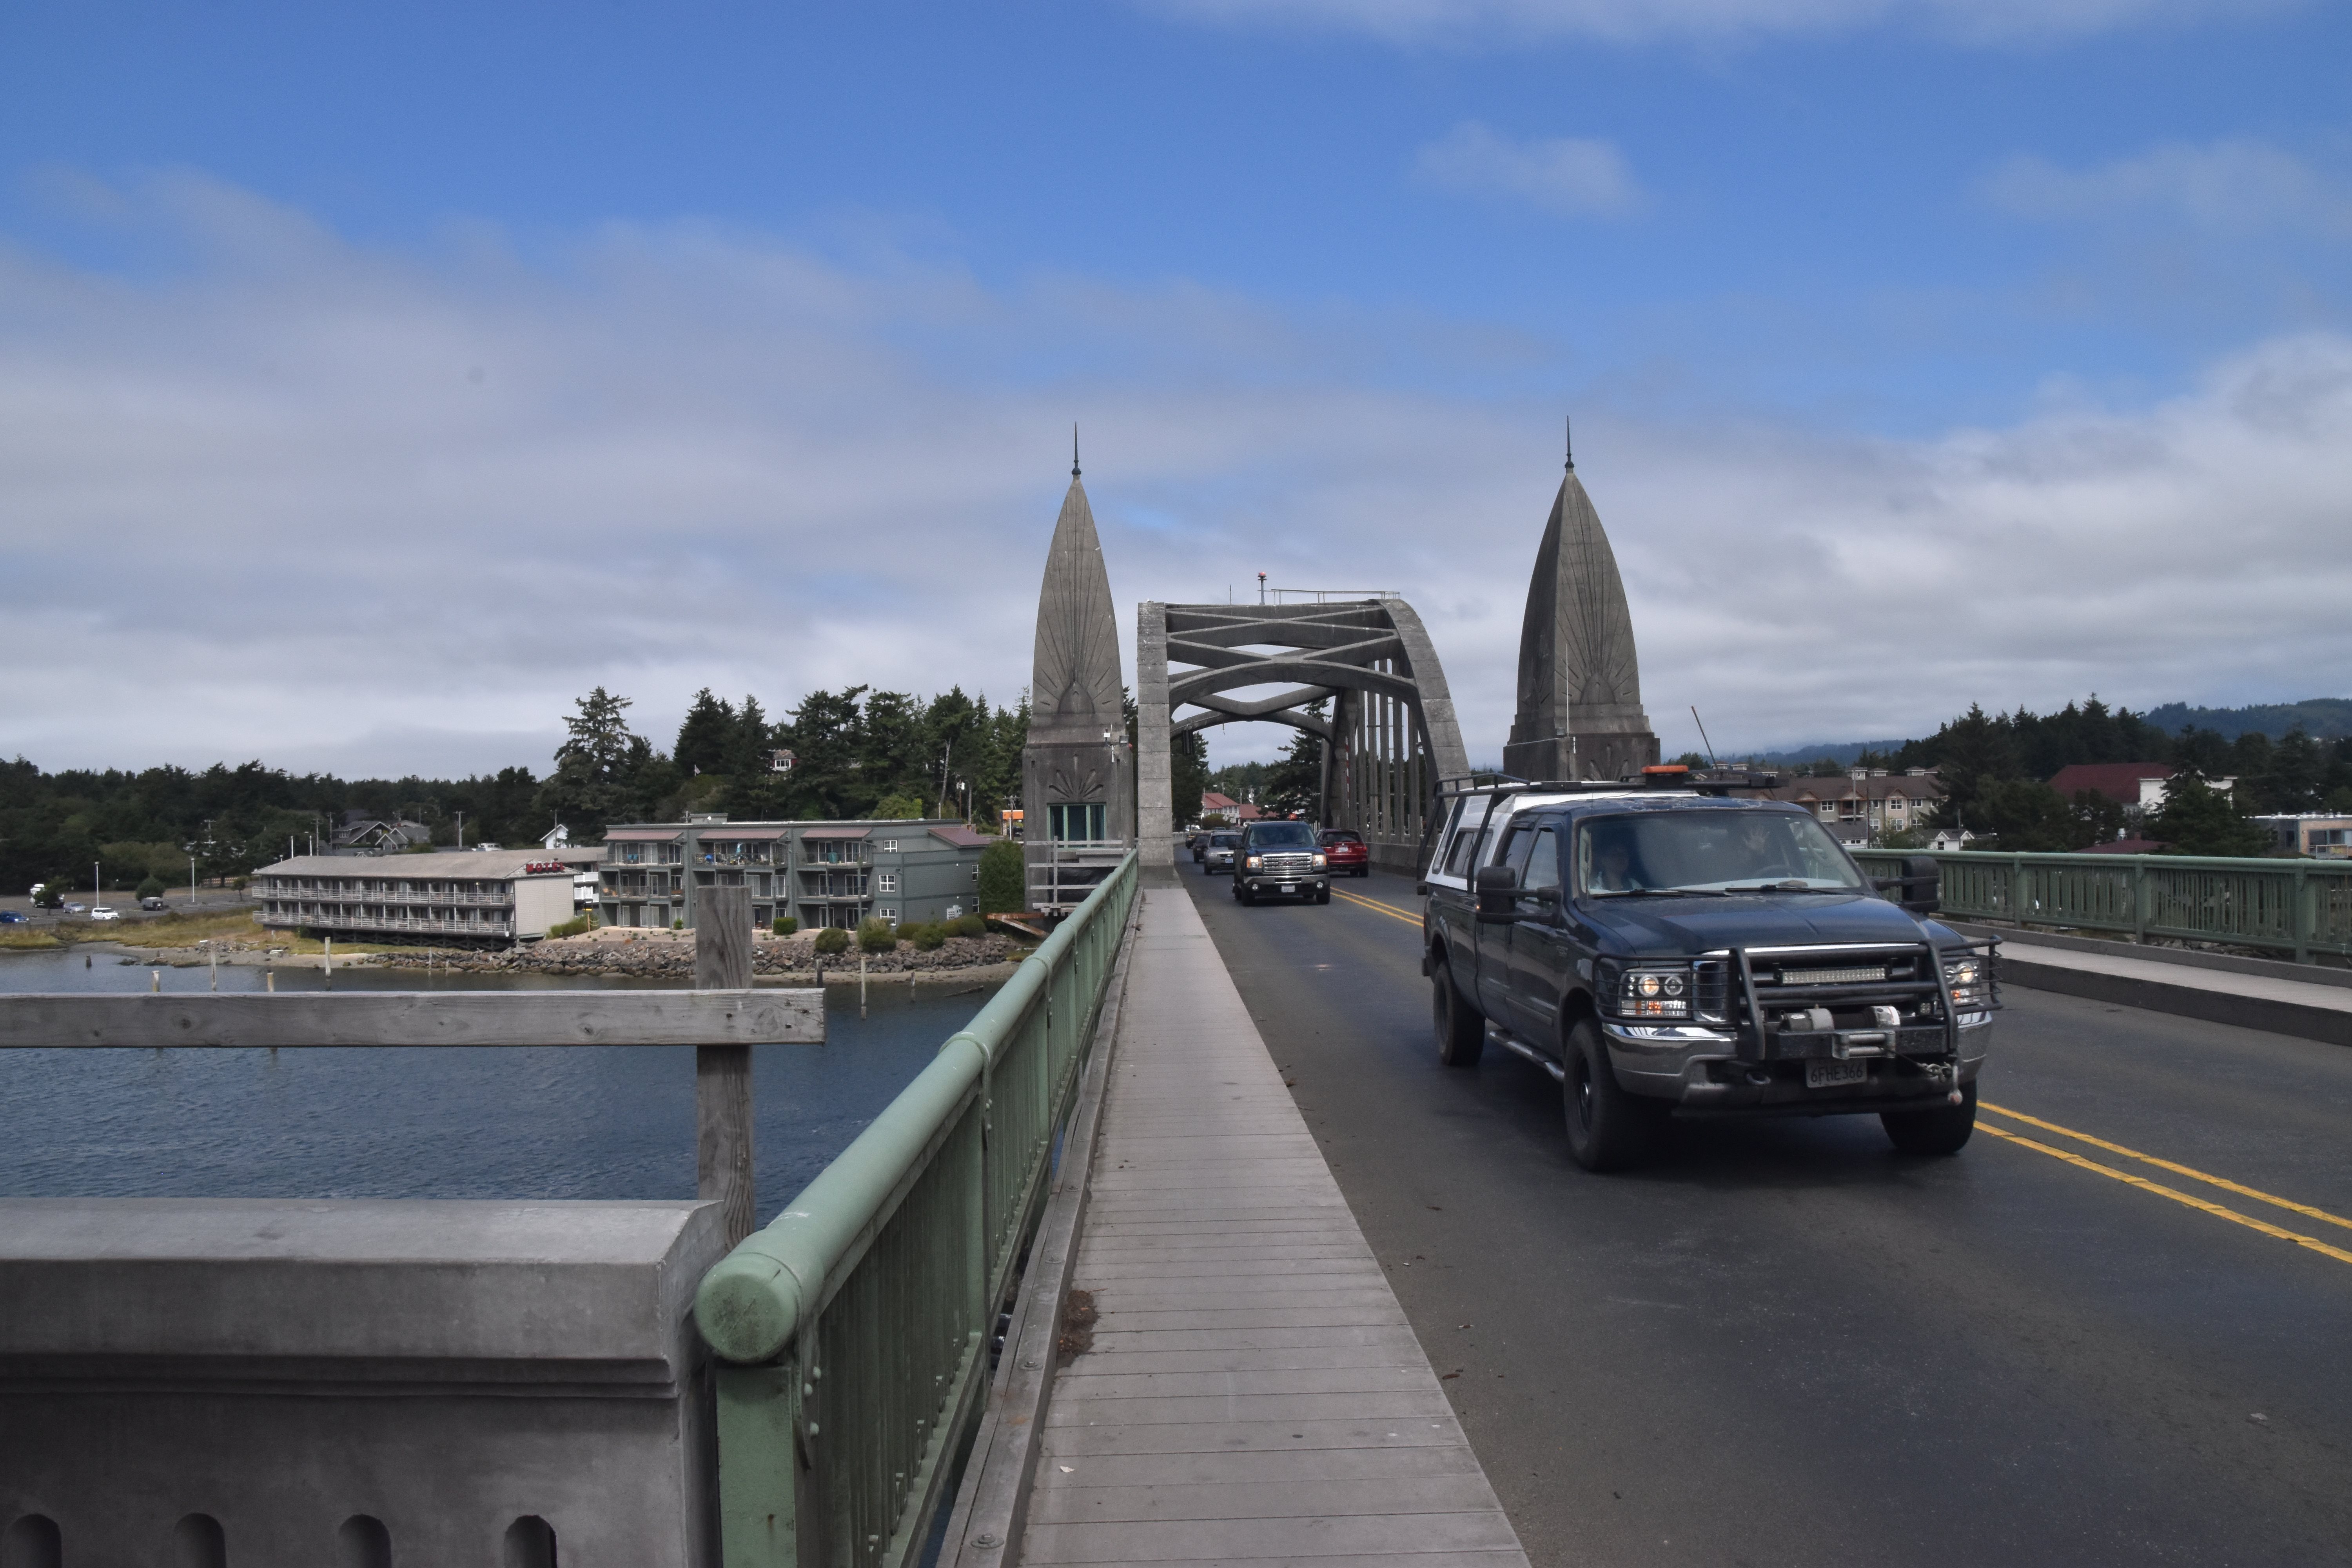
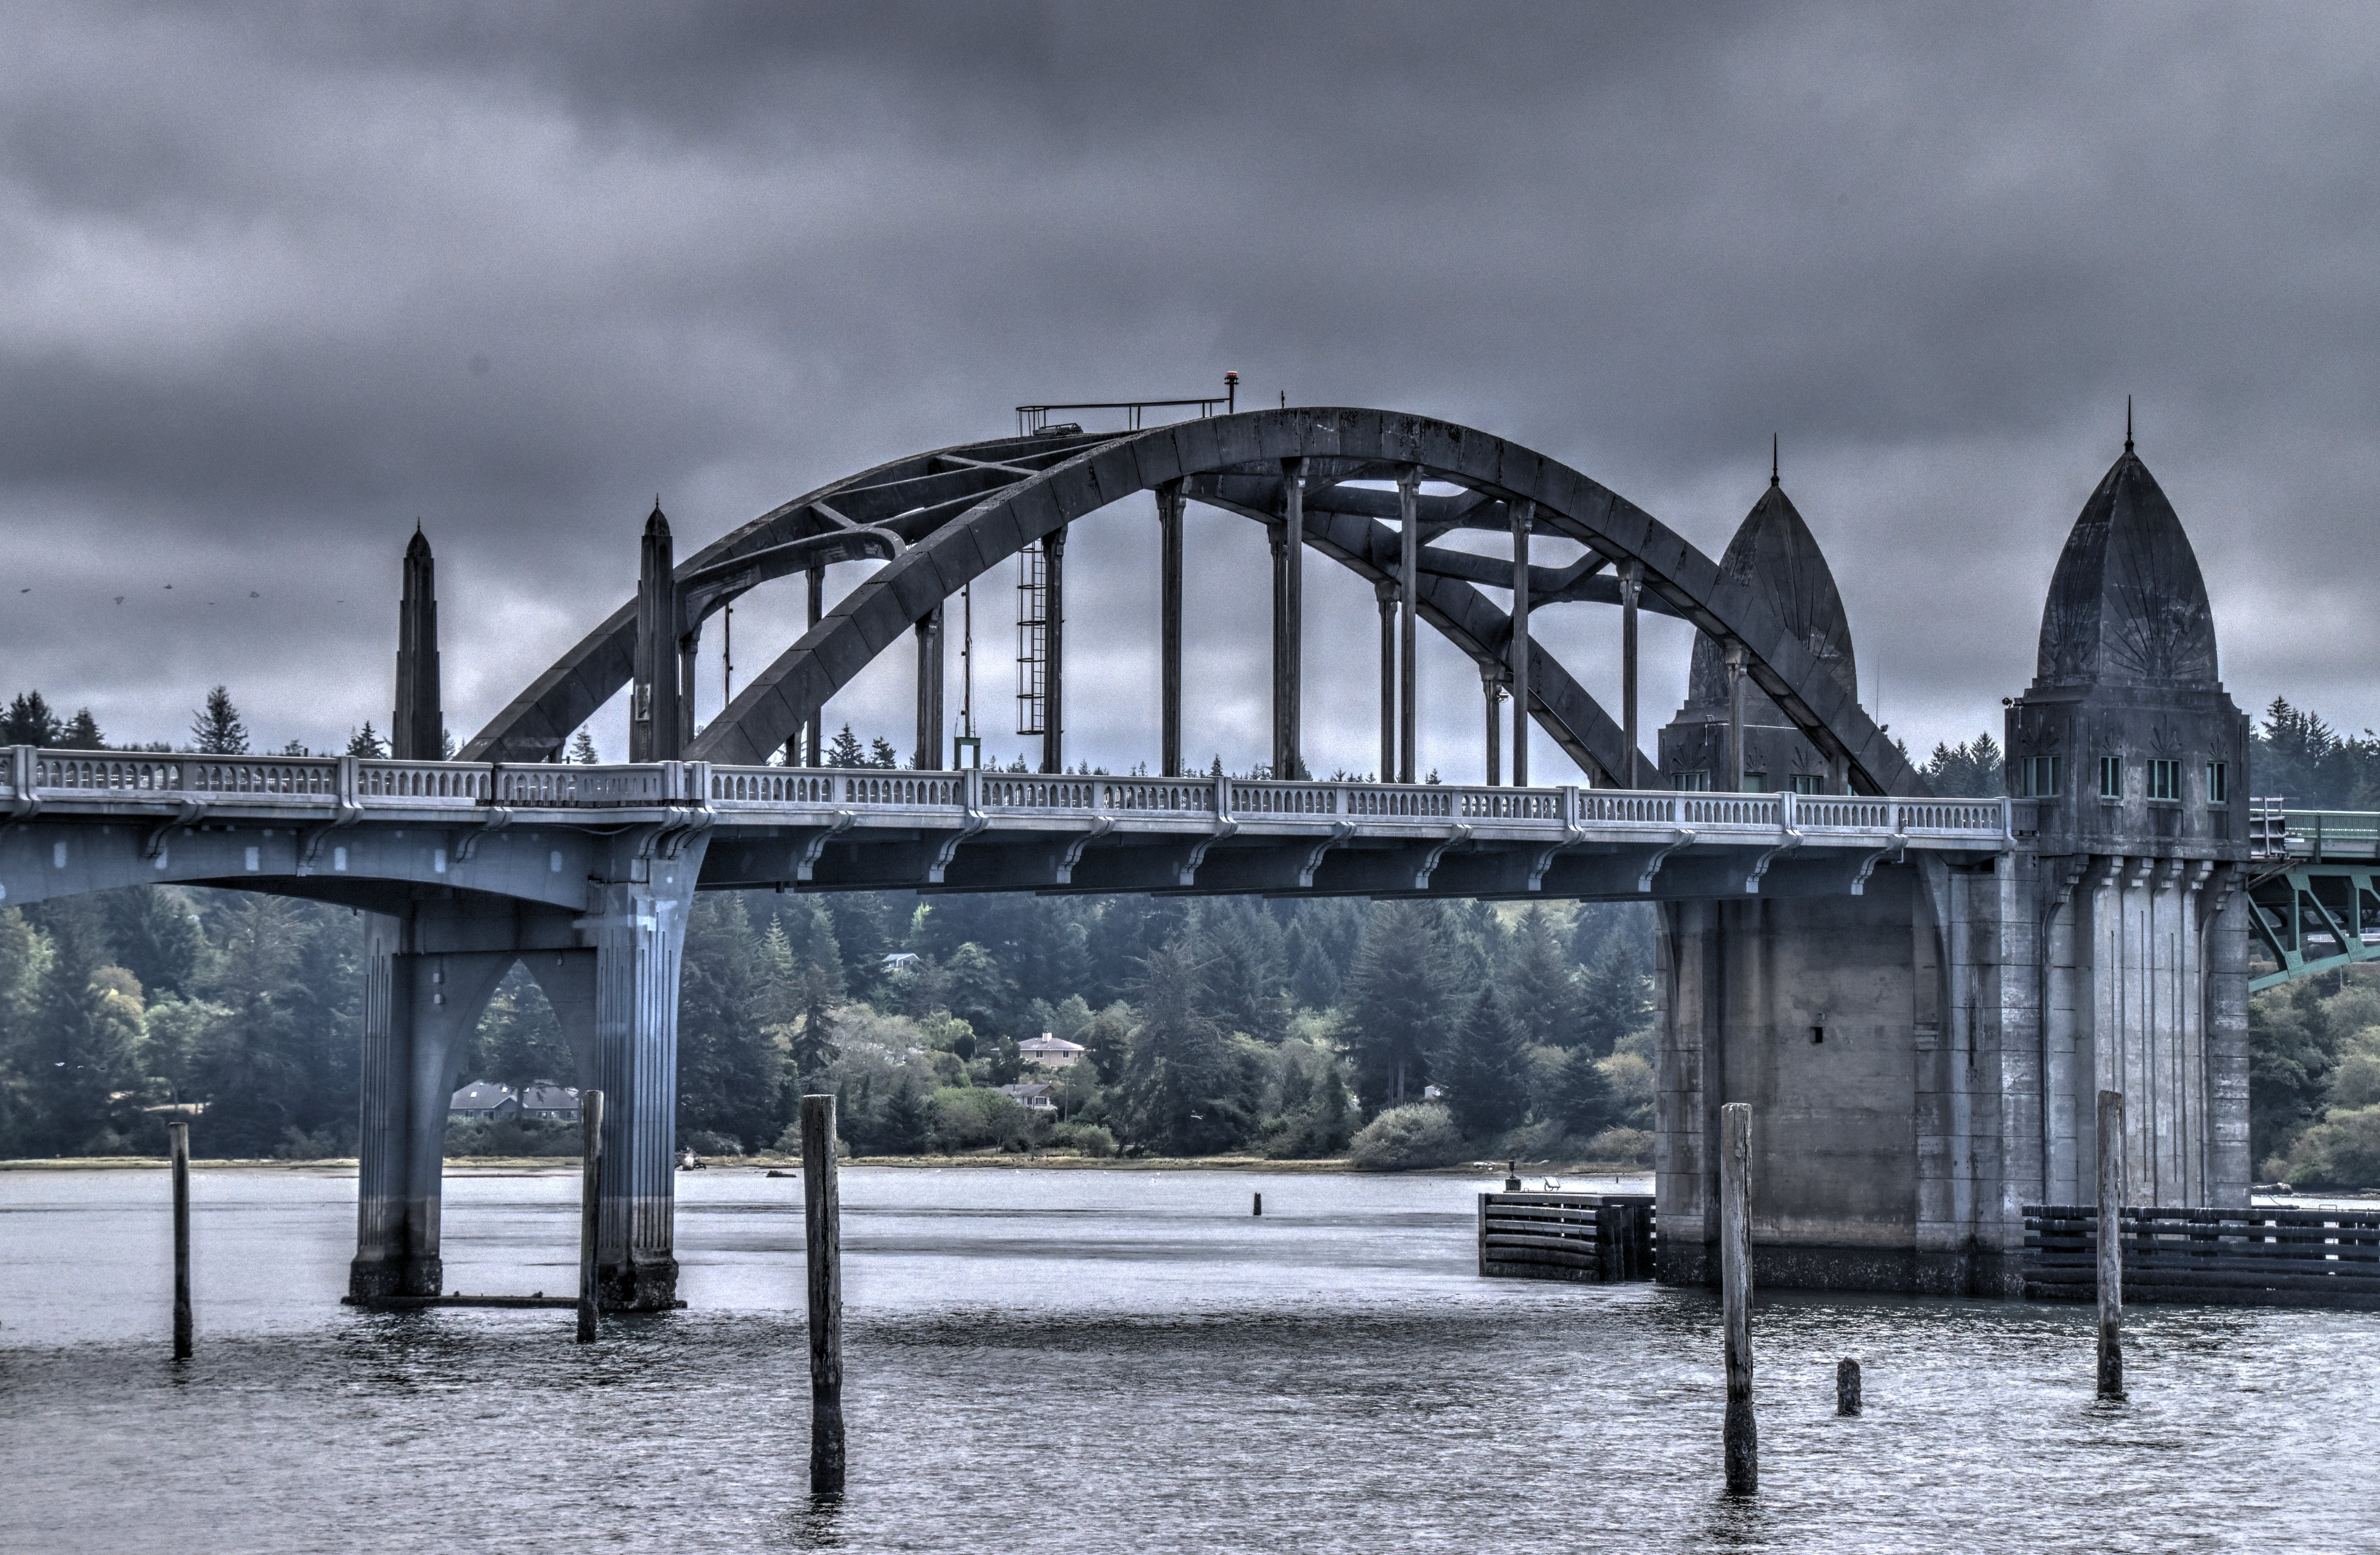
Elevation of bascule span from northeast quadrant.
![]()
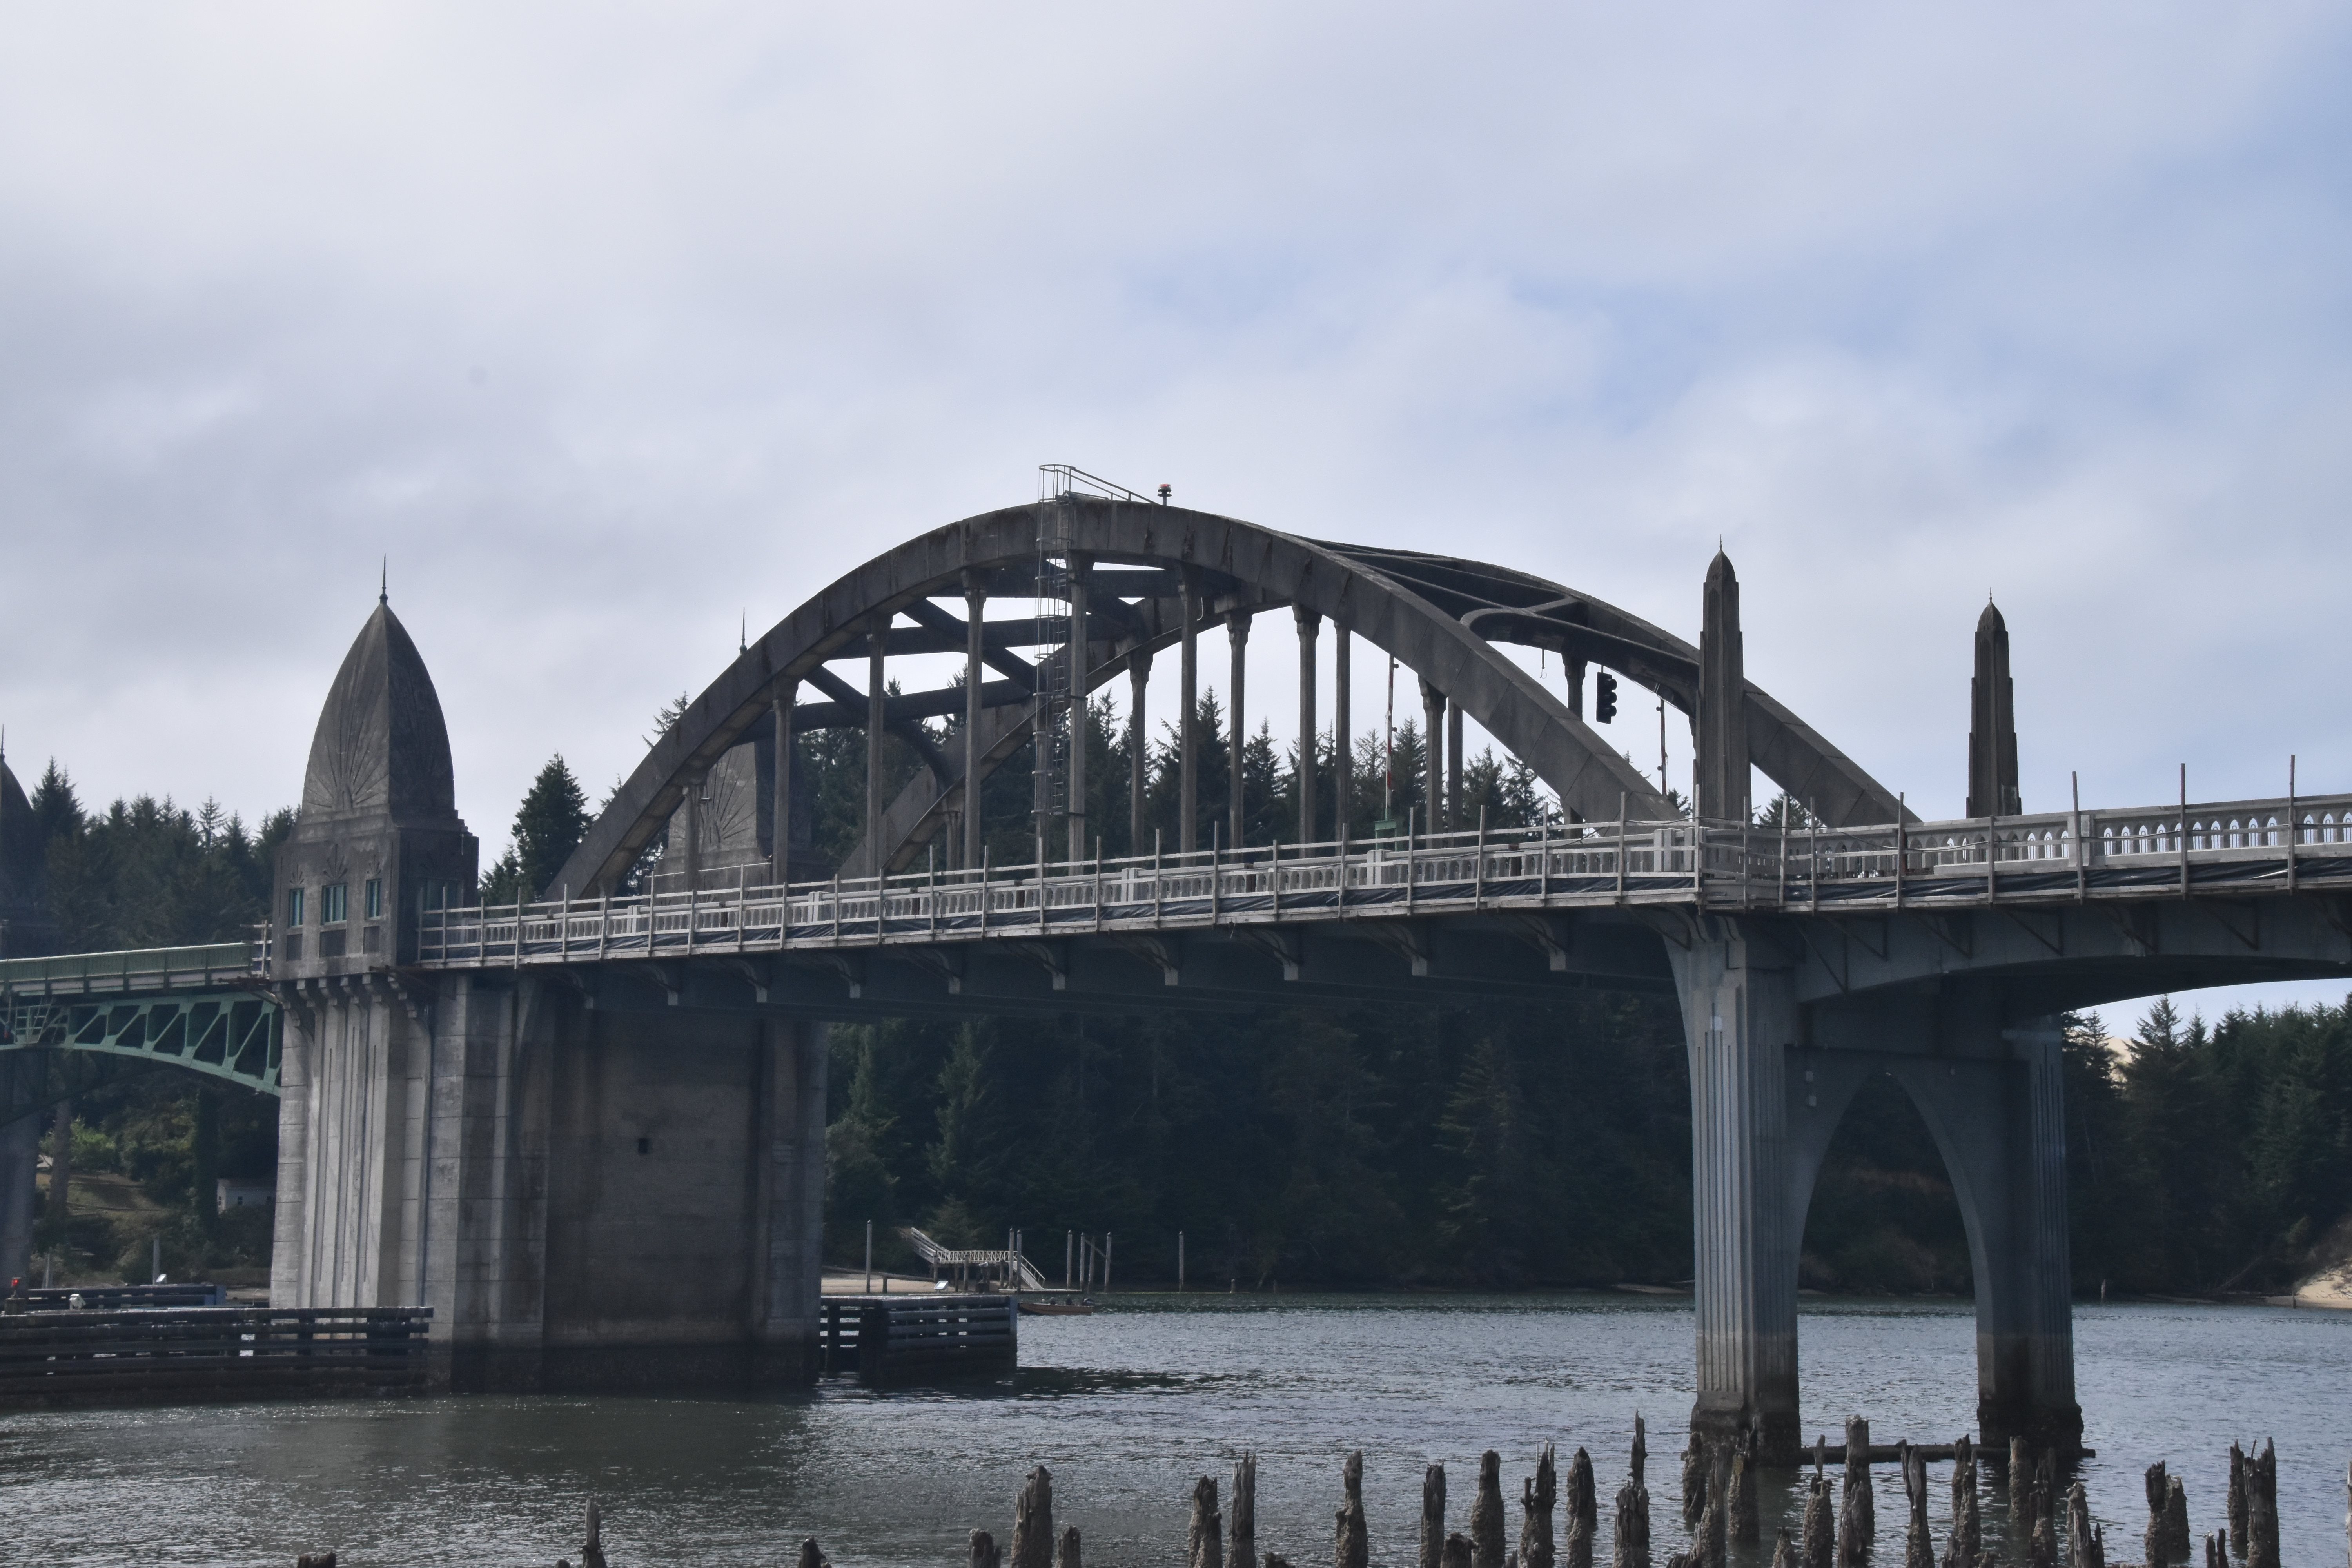


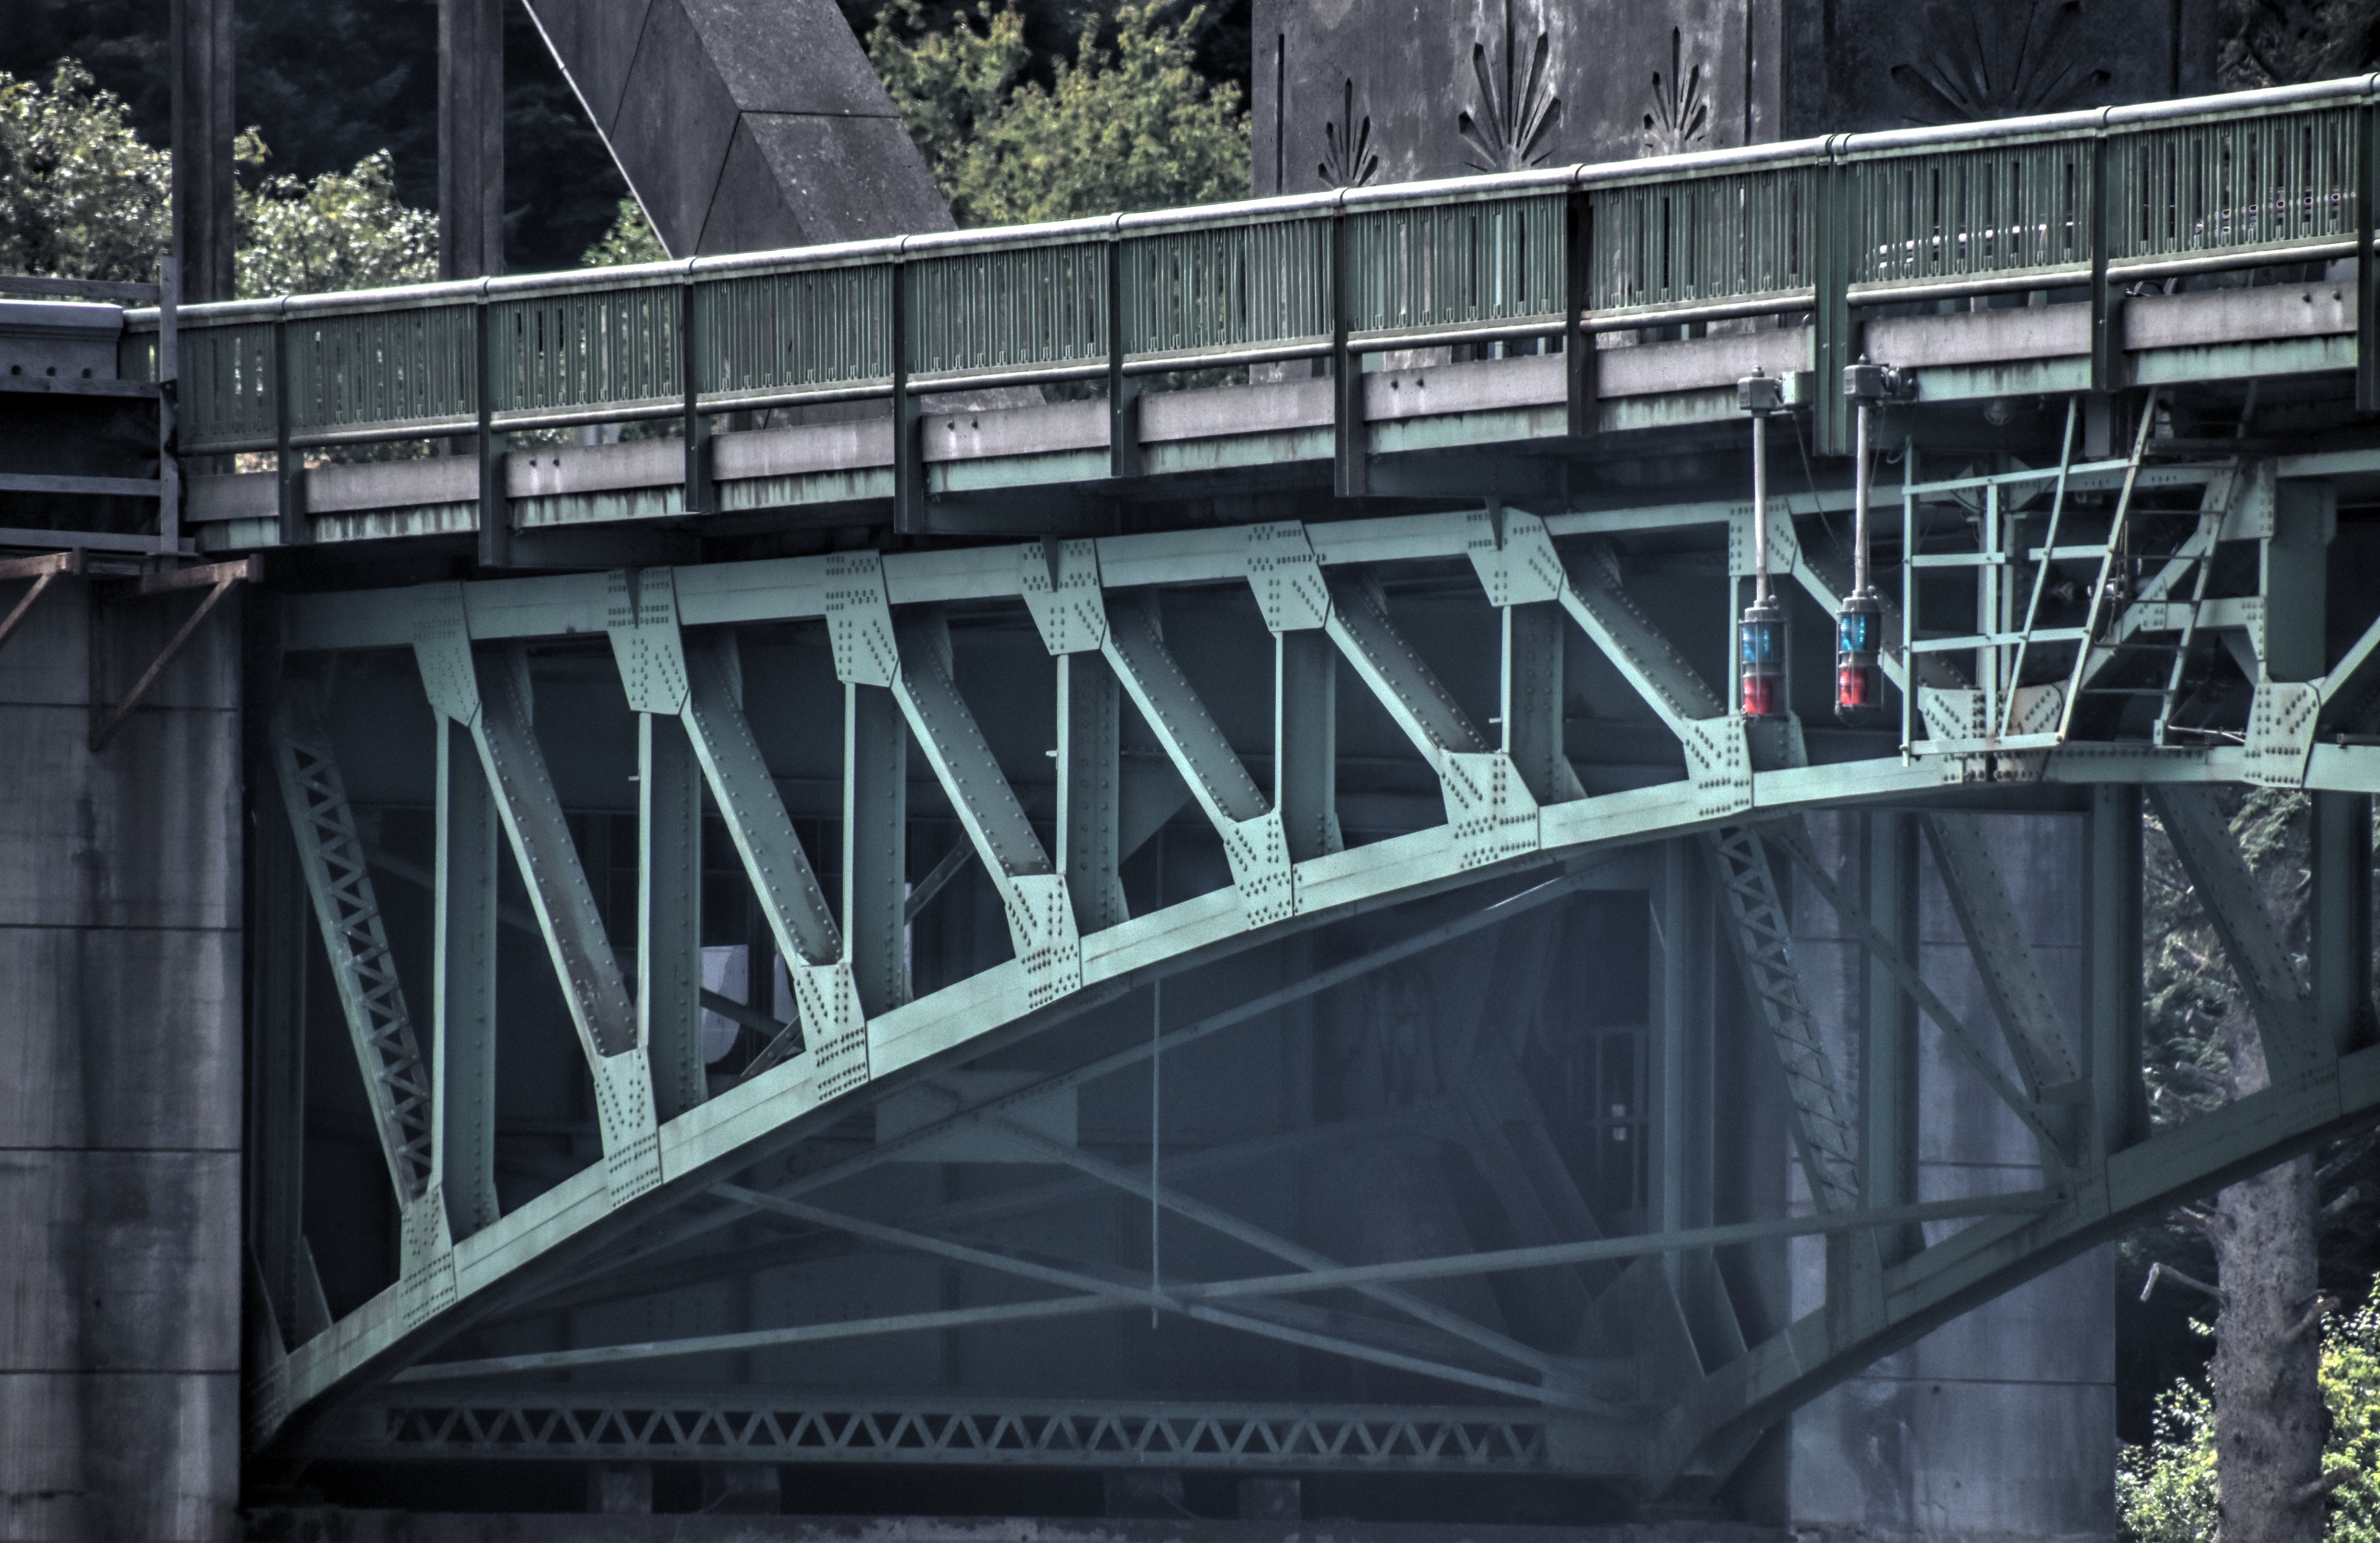
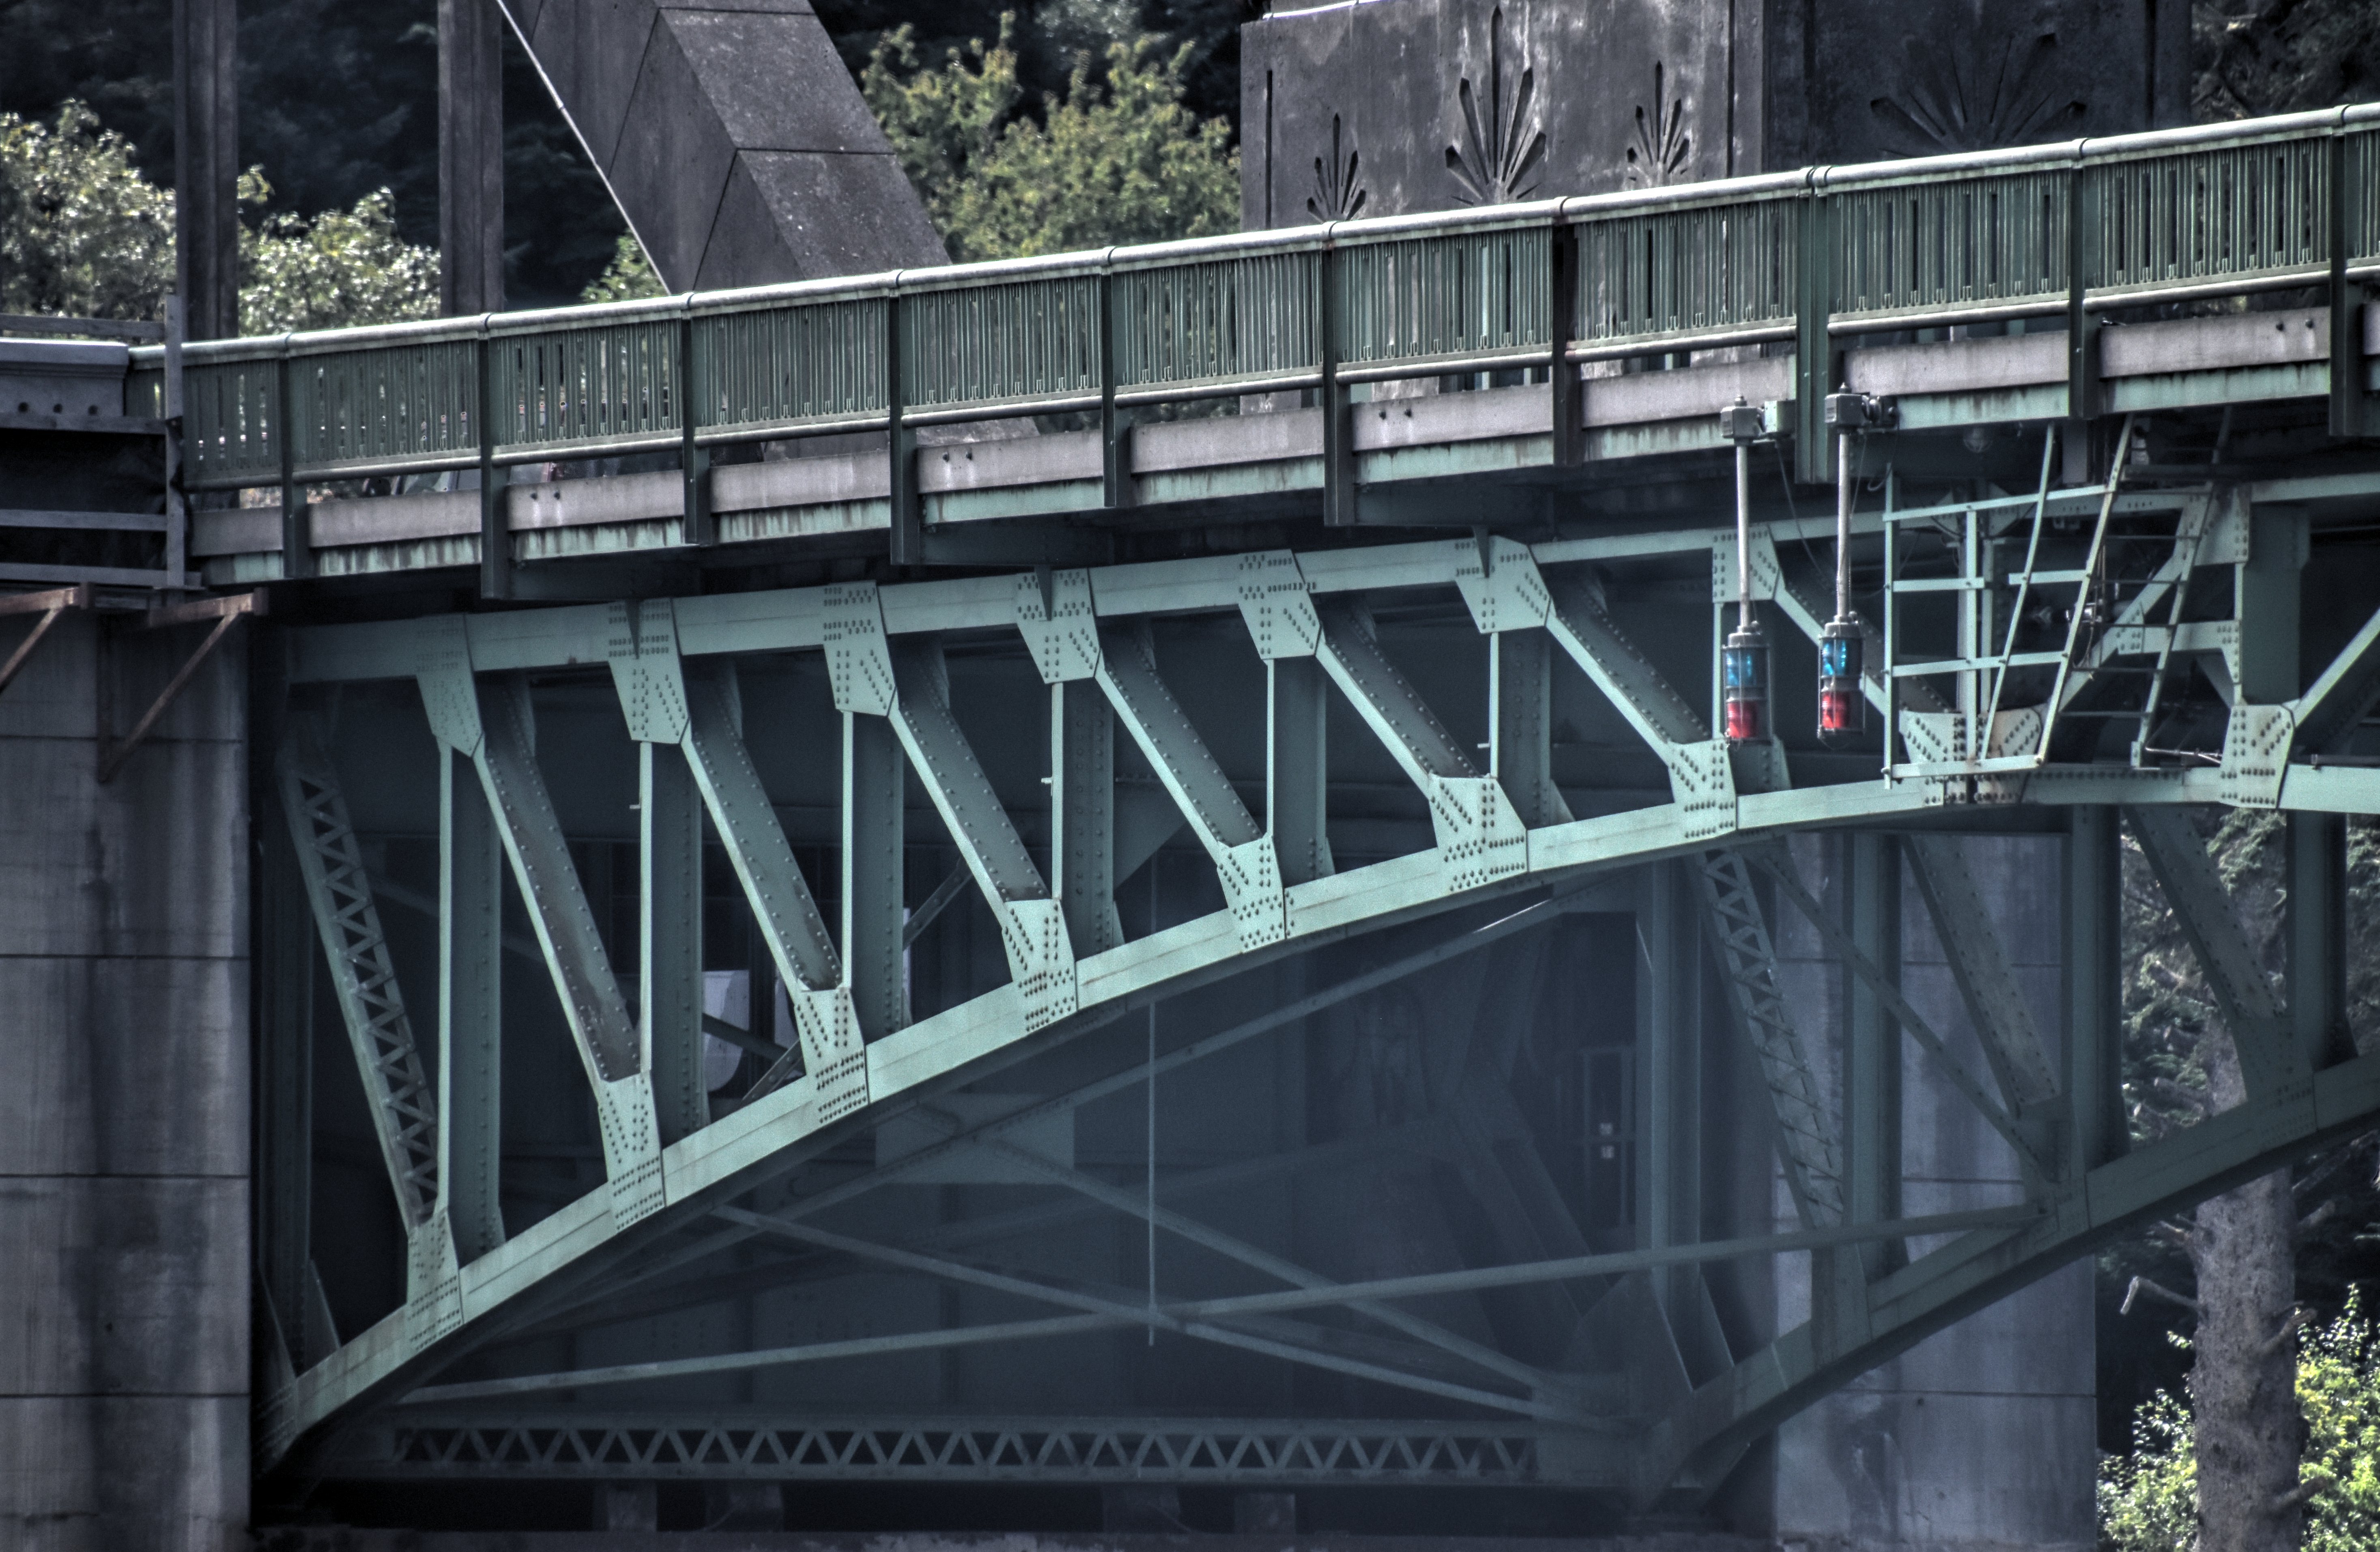
Elevation of arch span from northeast quadrant.
![]()
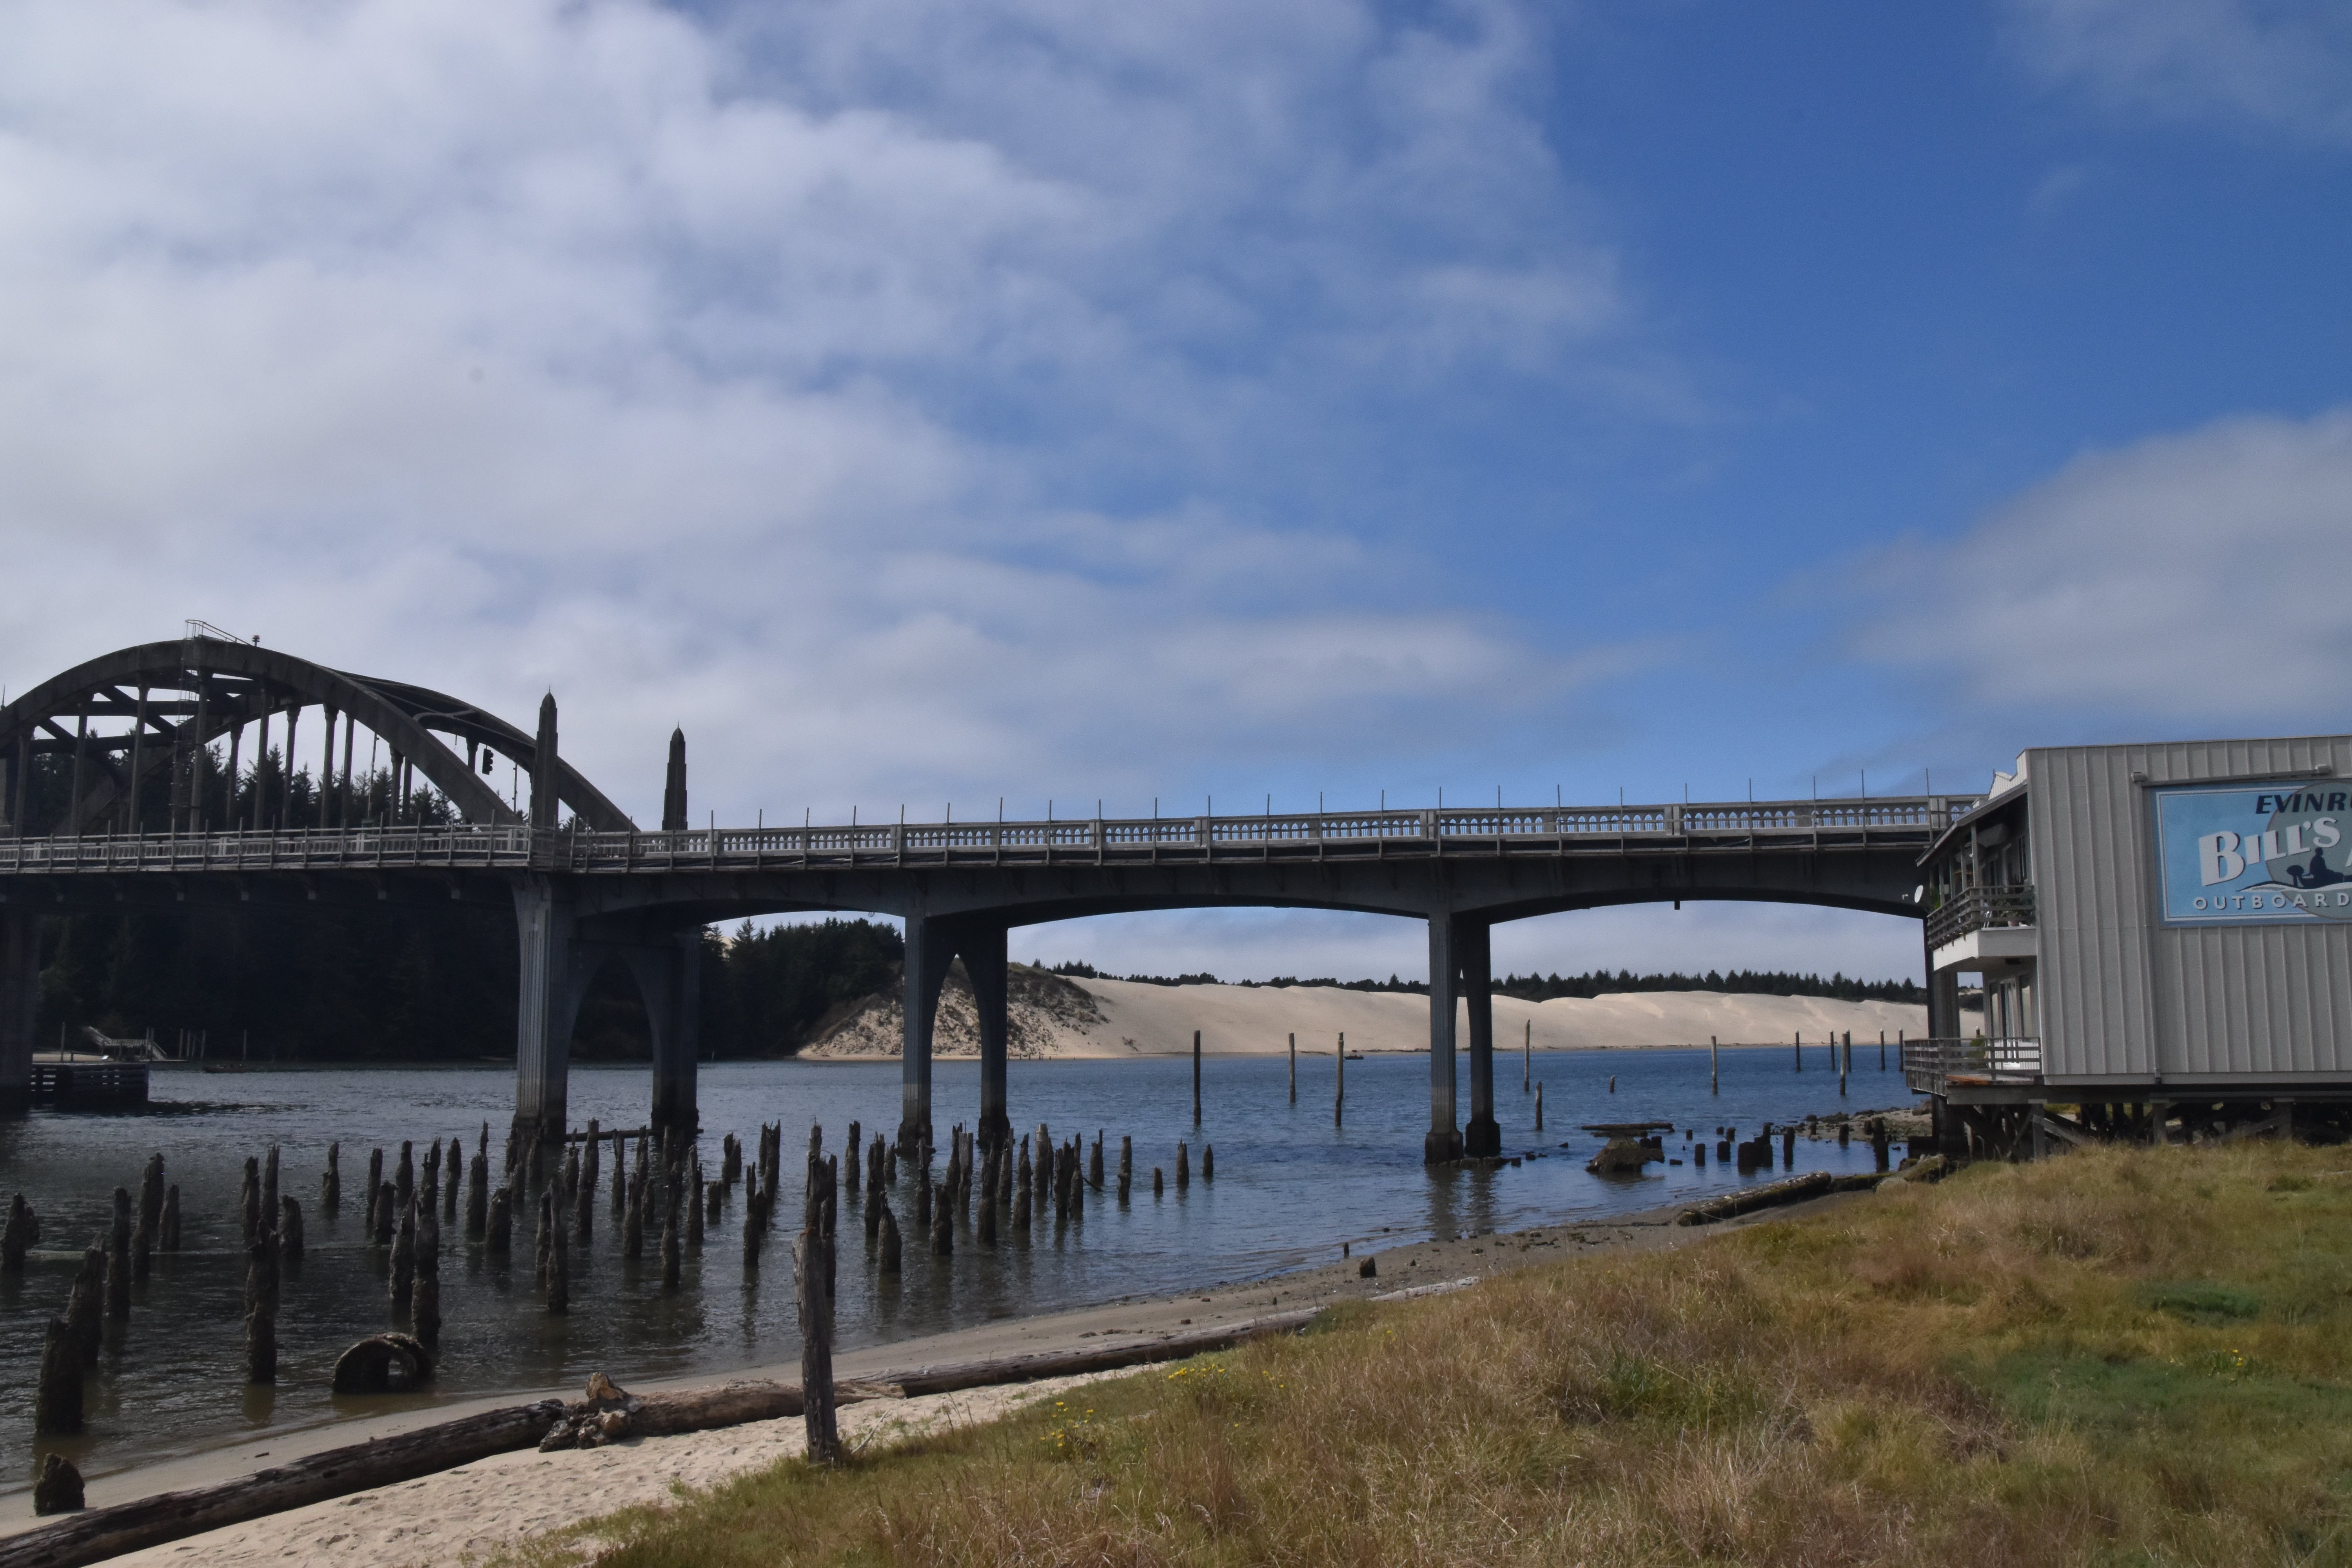


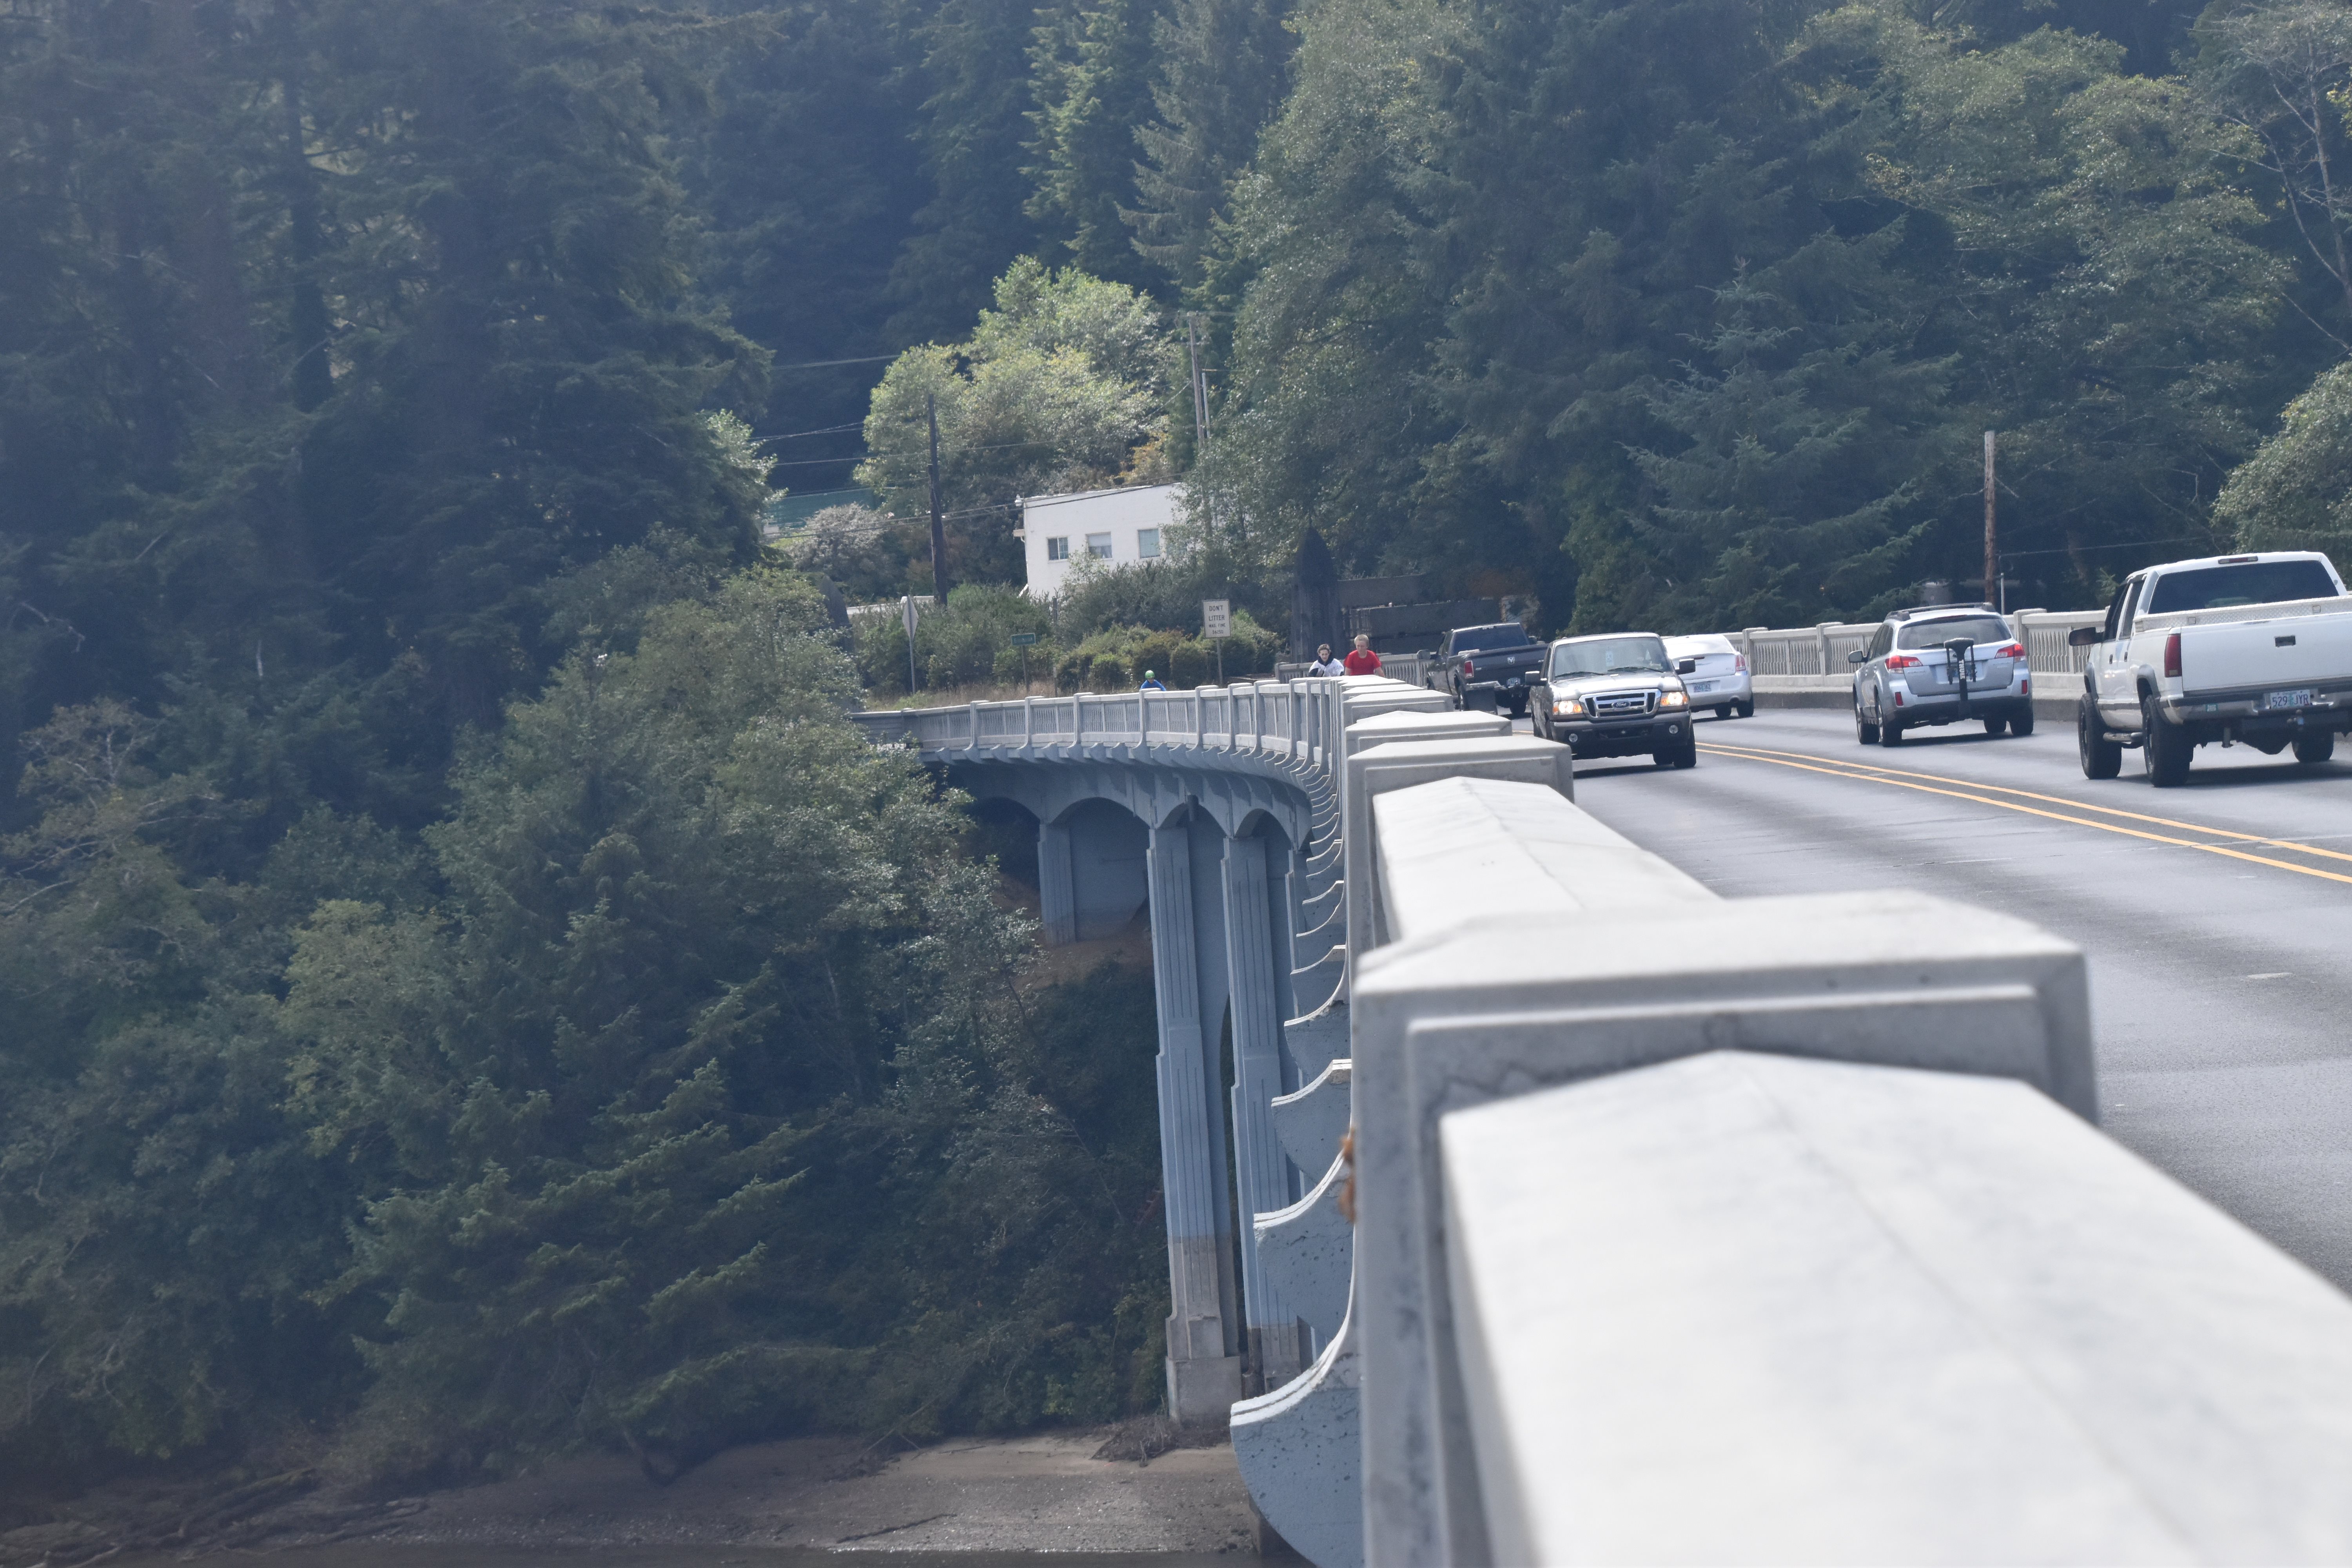
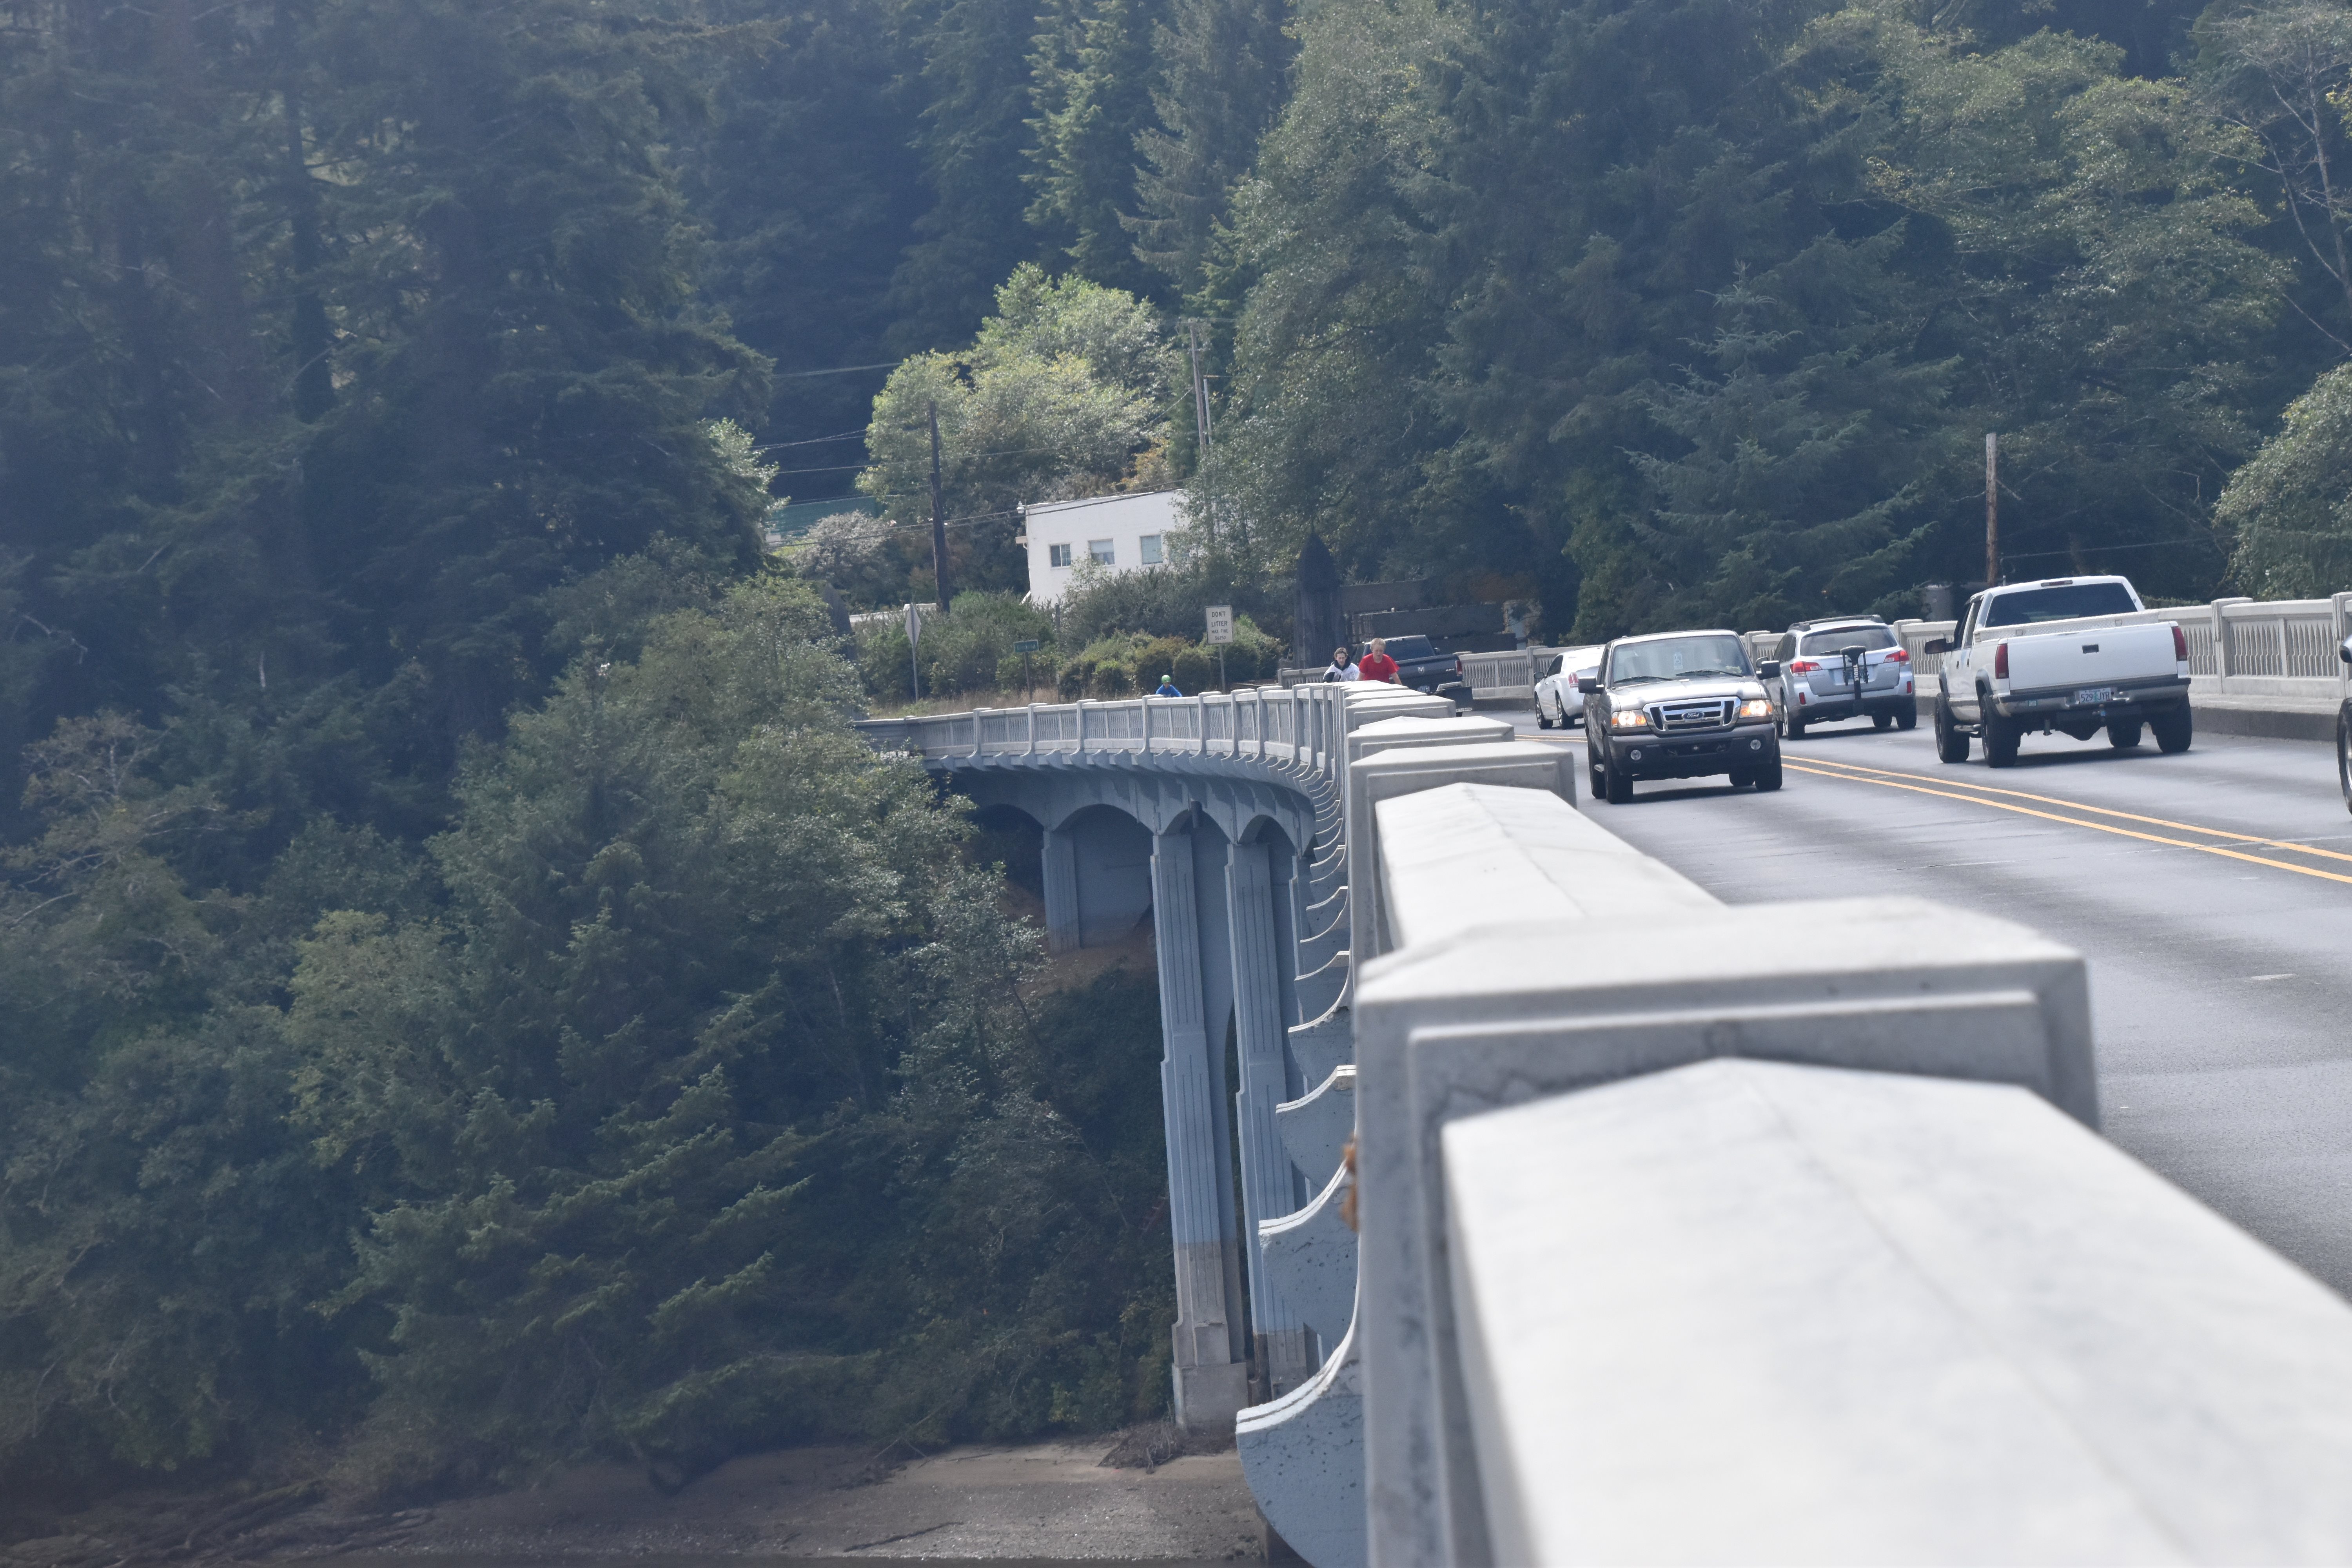
Elevation of approach spans from northeast quadrant.
![]()


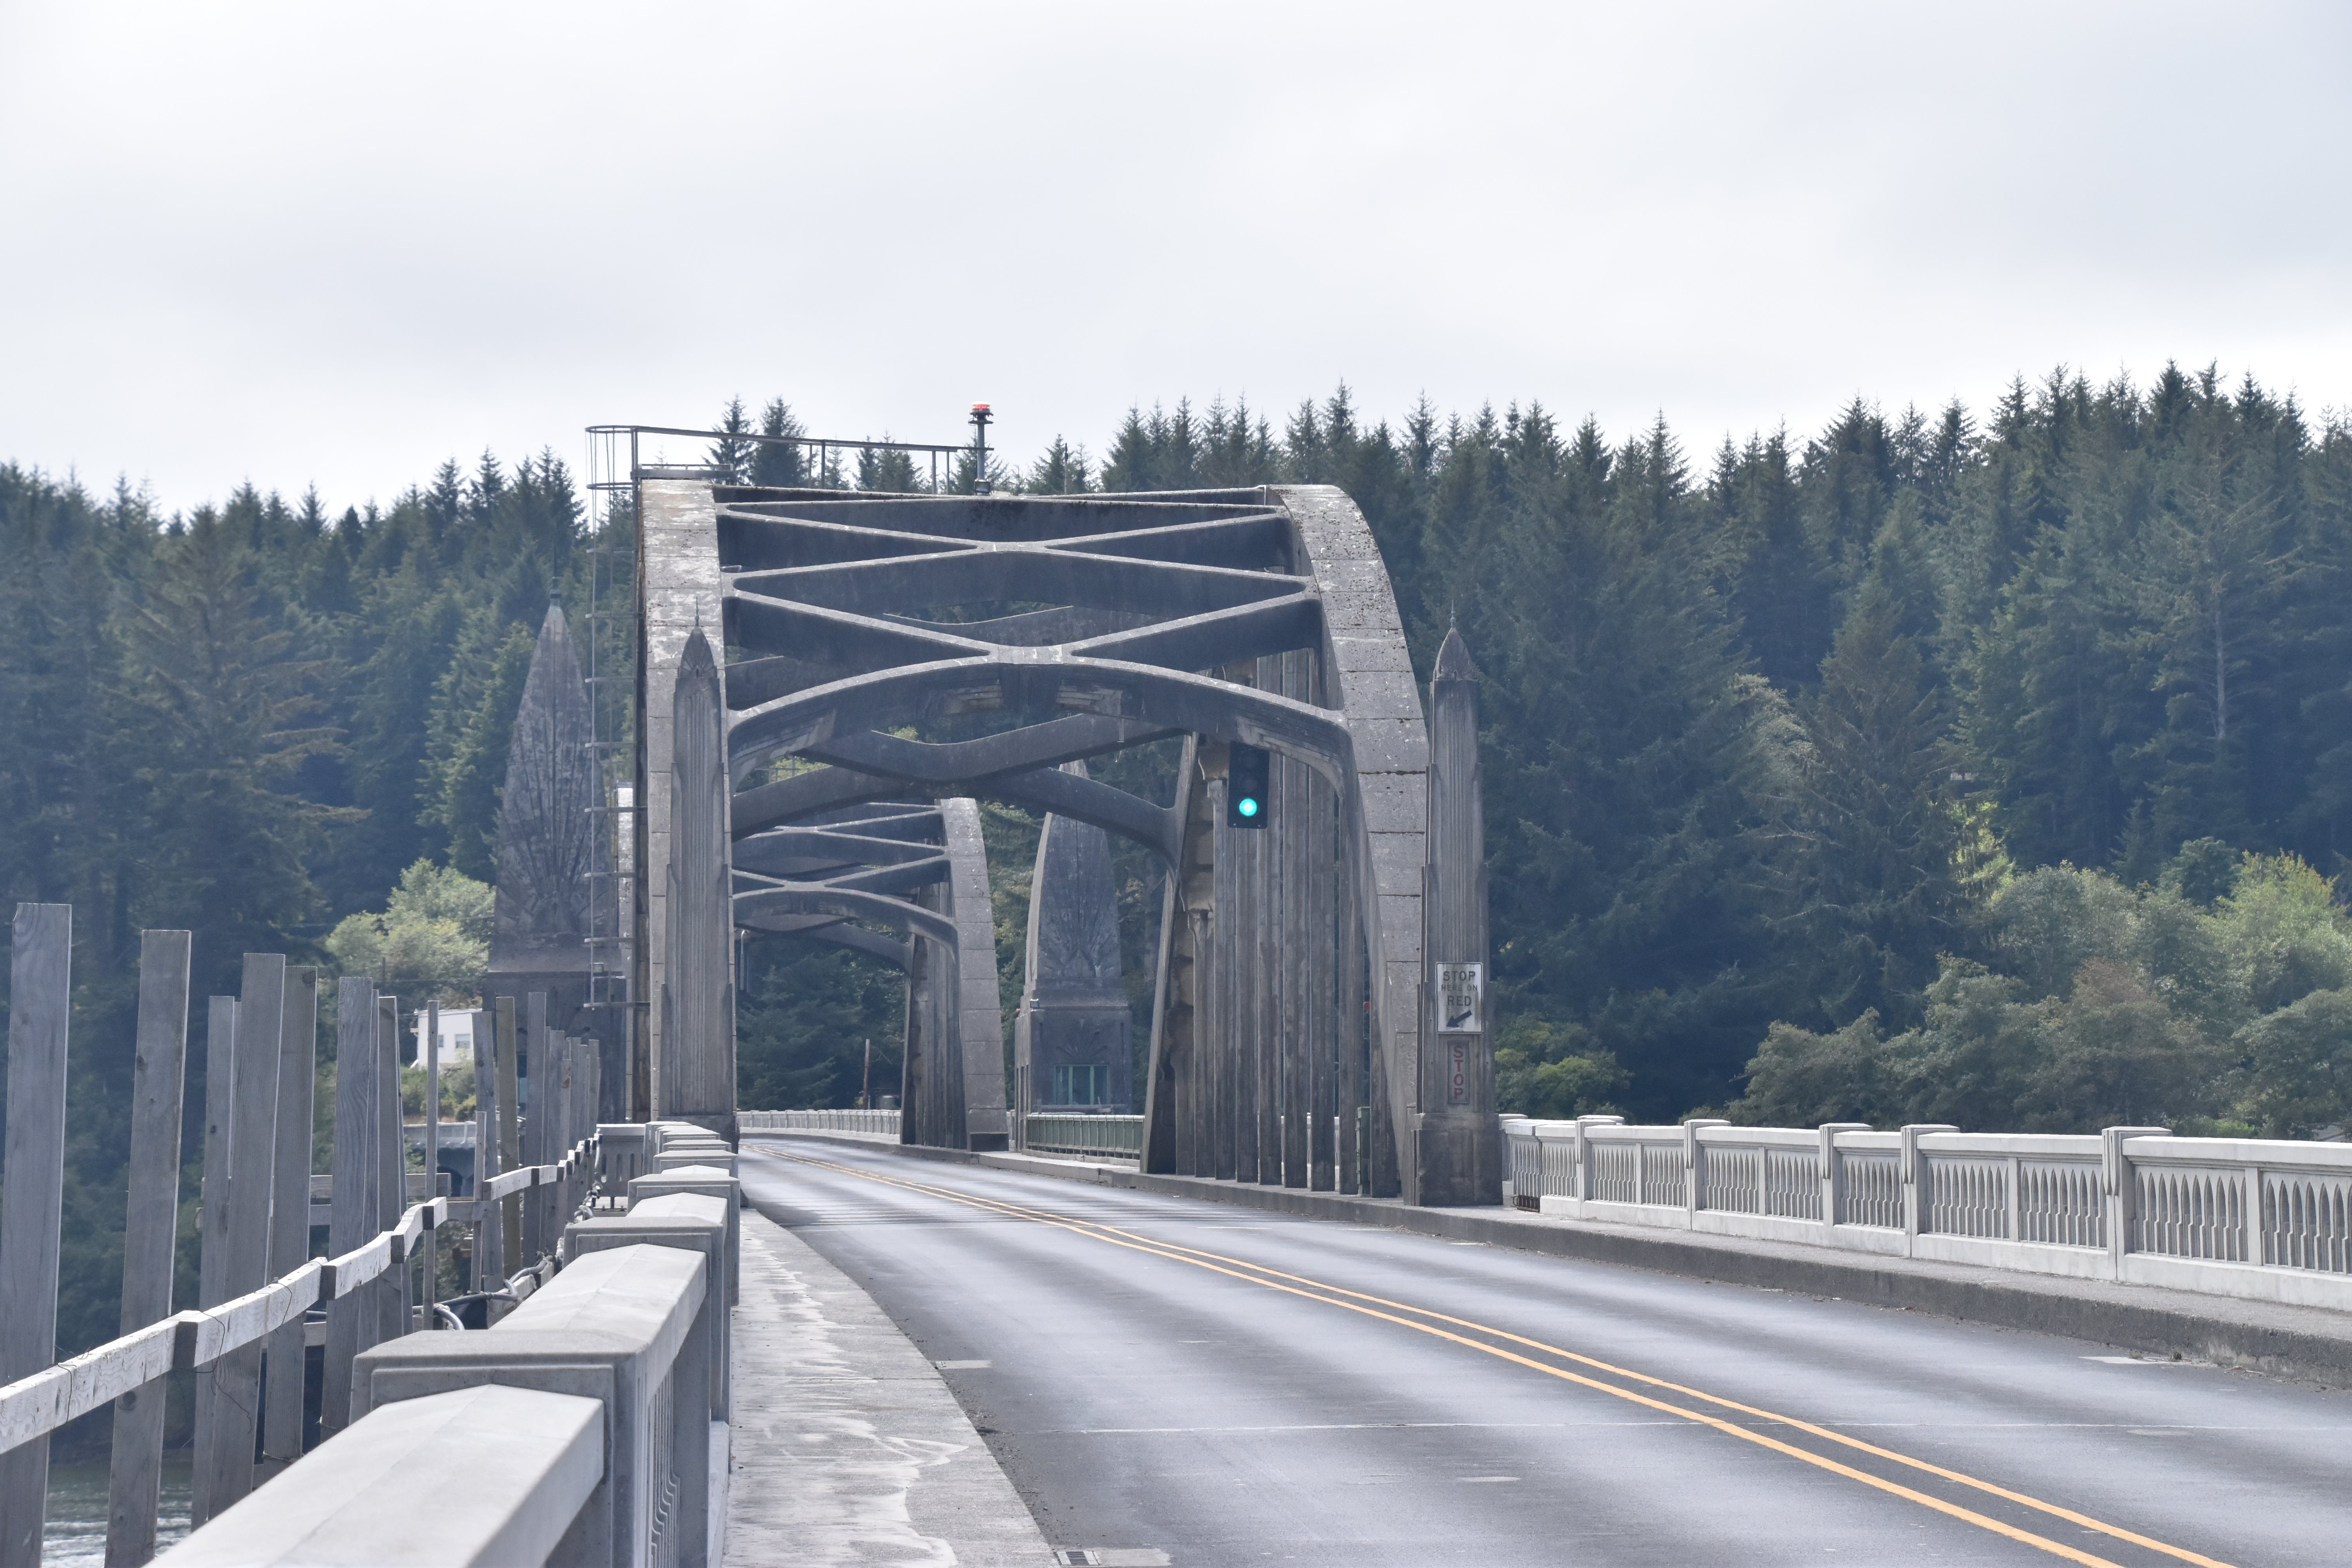
Portal views of south arch span facing north.
![]()
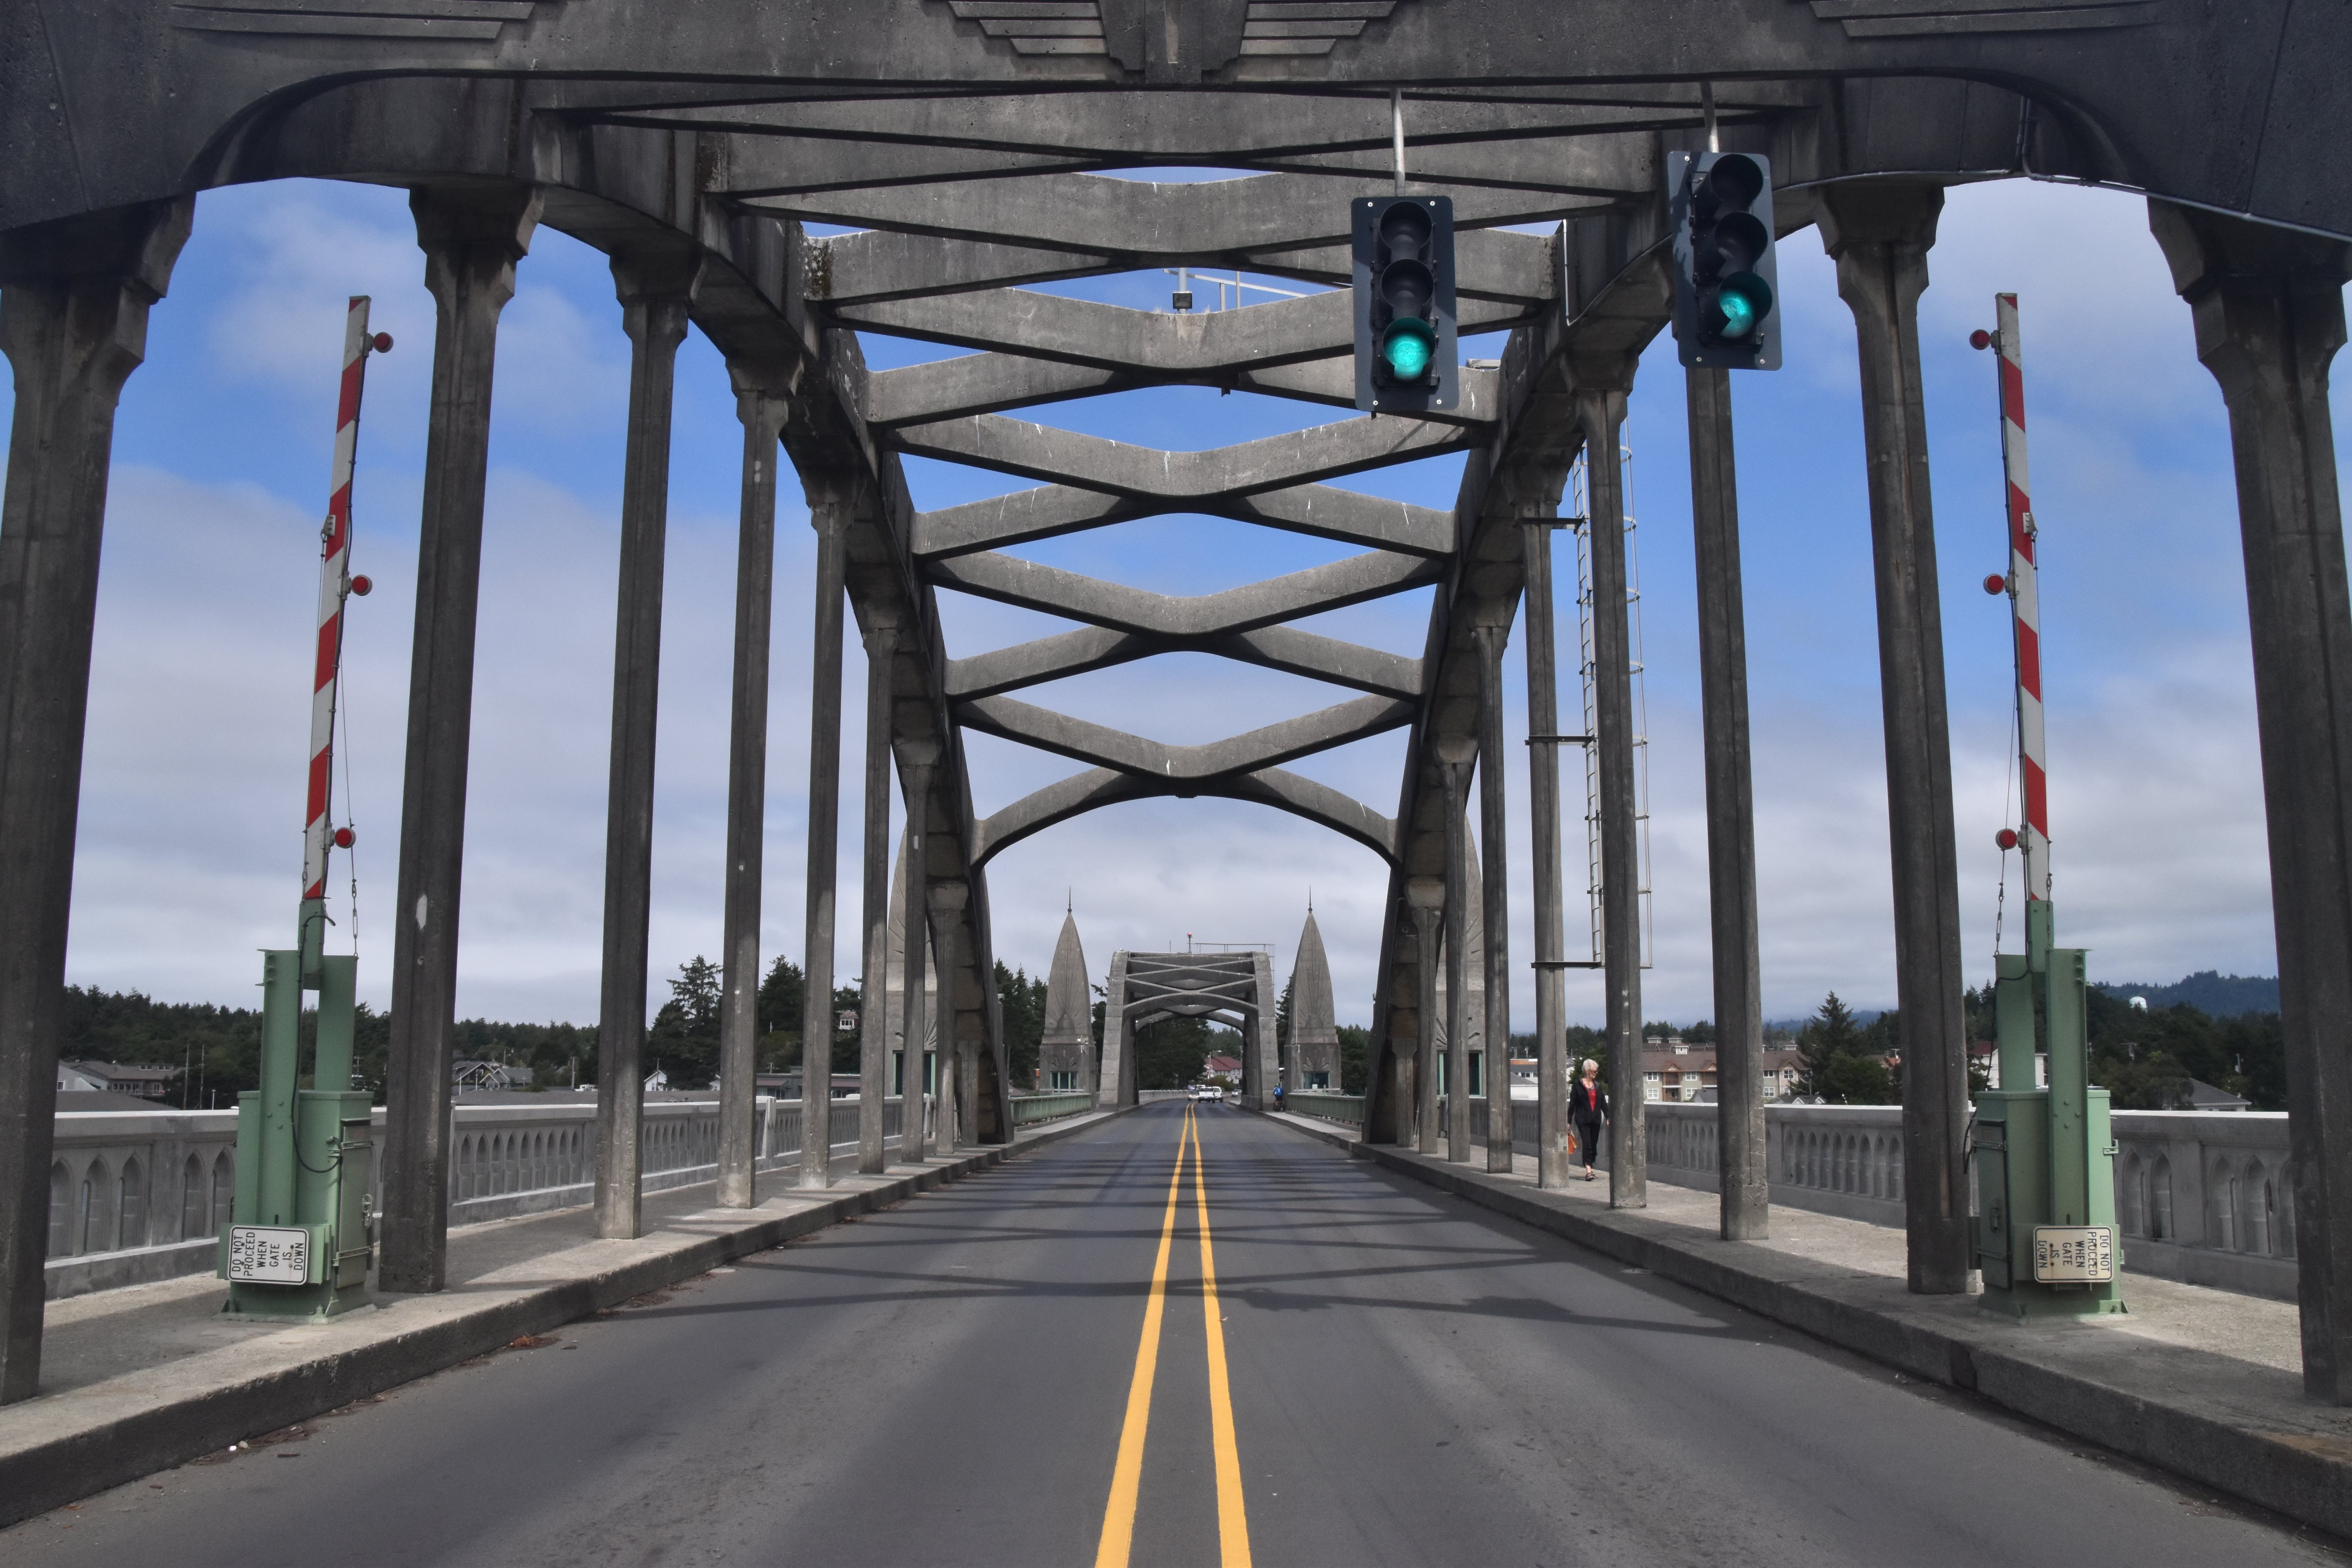


Portal views on south arch span facing north.
![]()


Portal views of north arch span facing north.
![]()
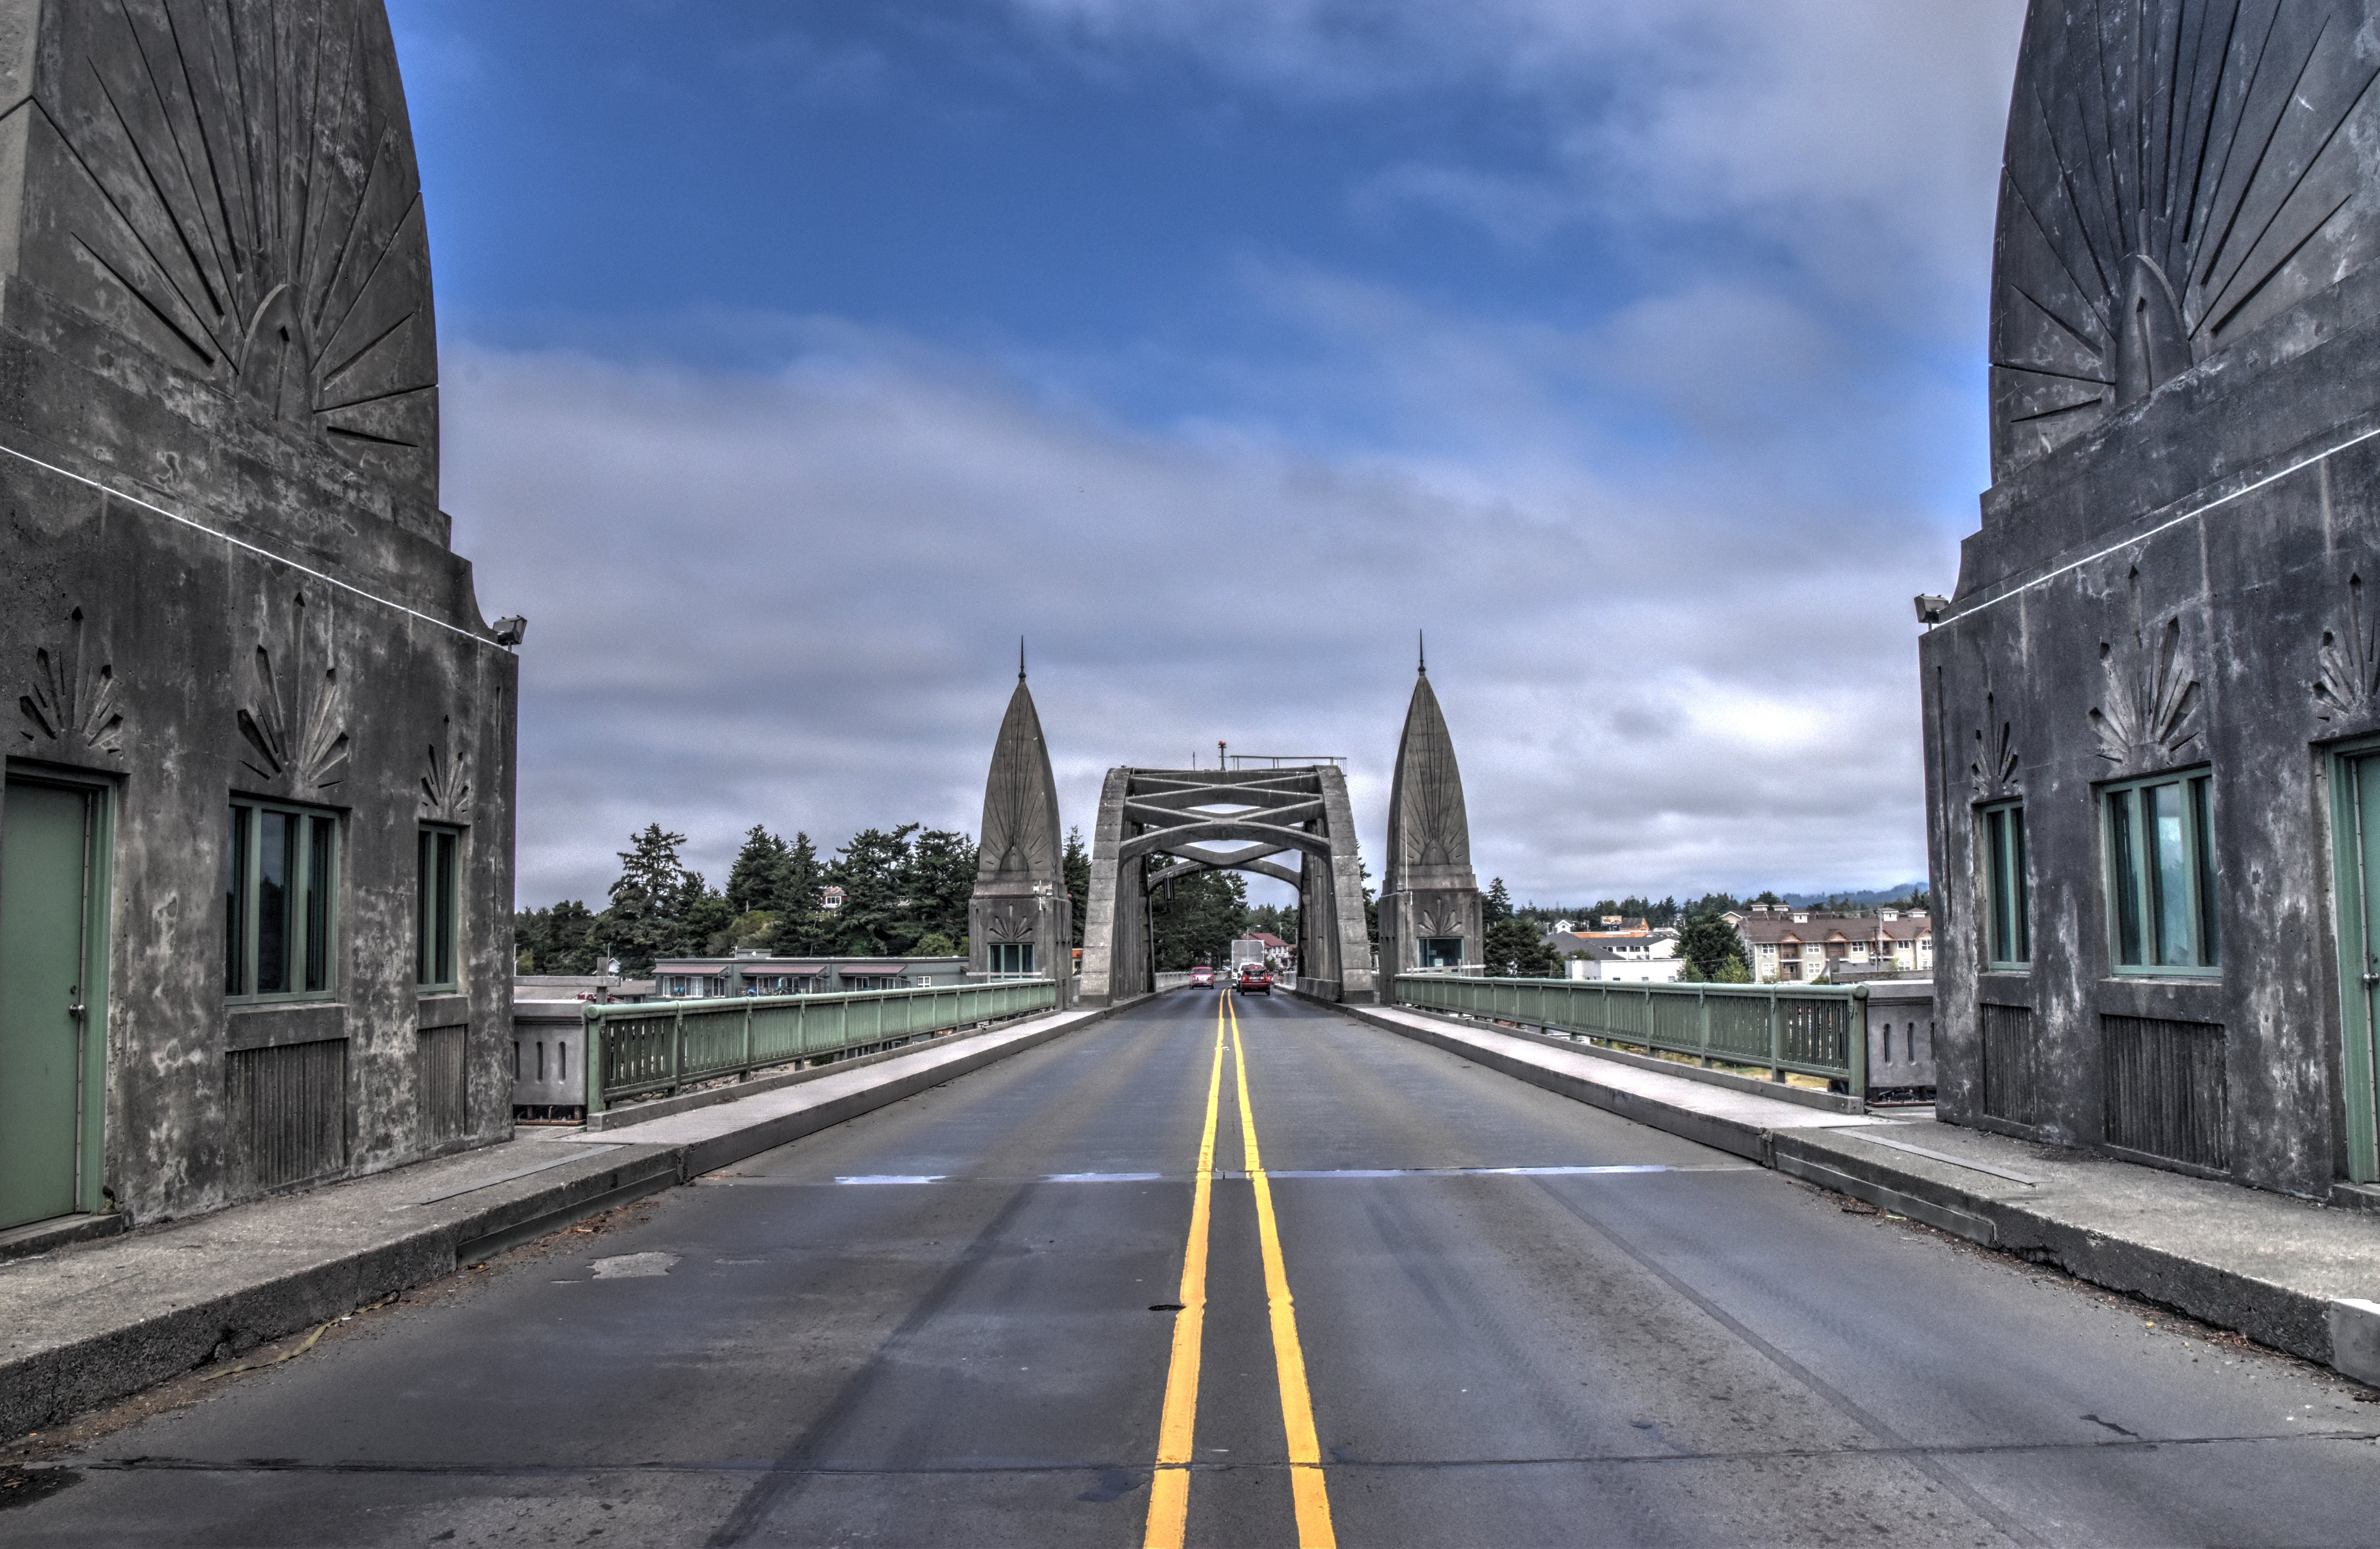


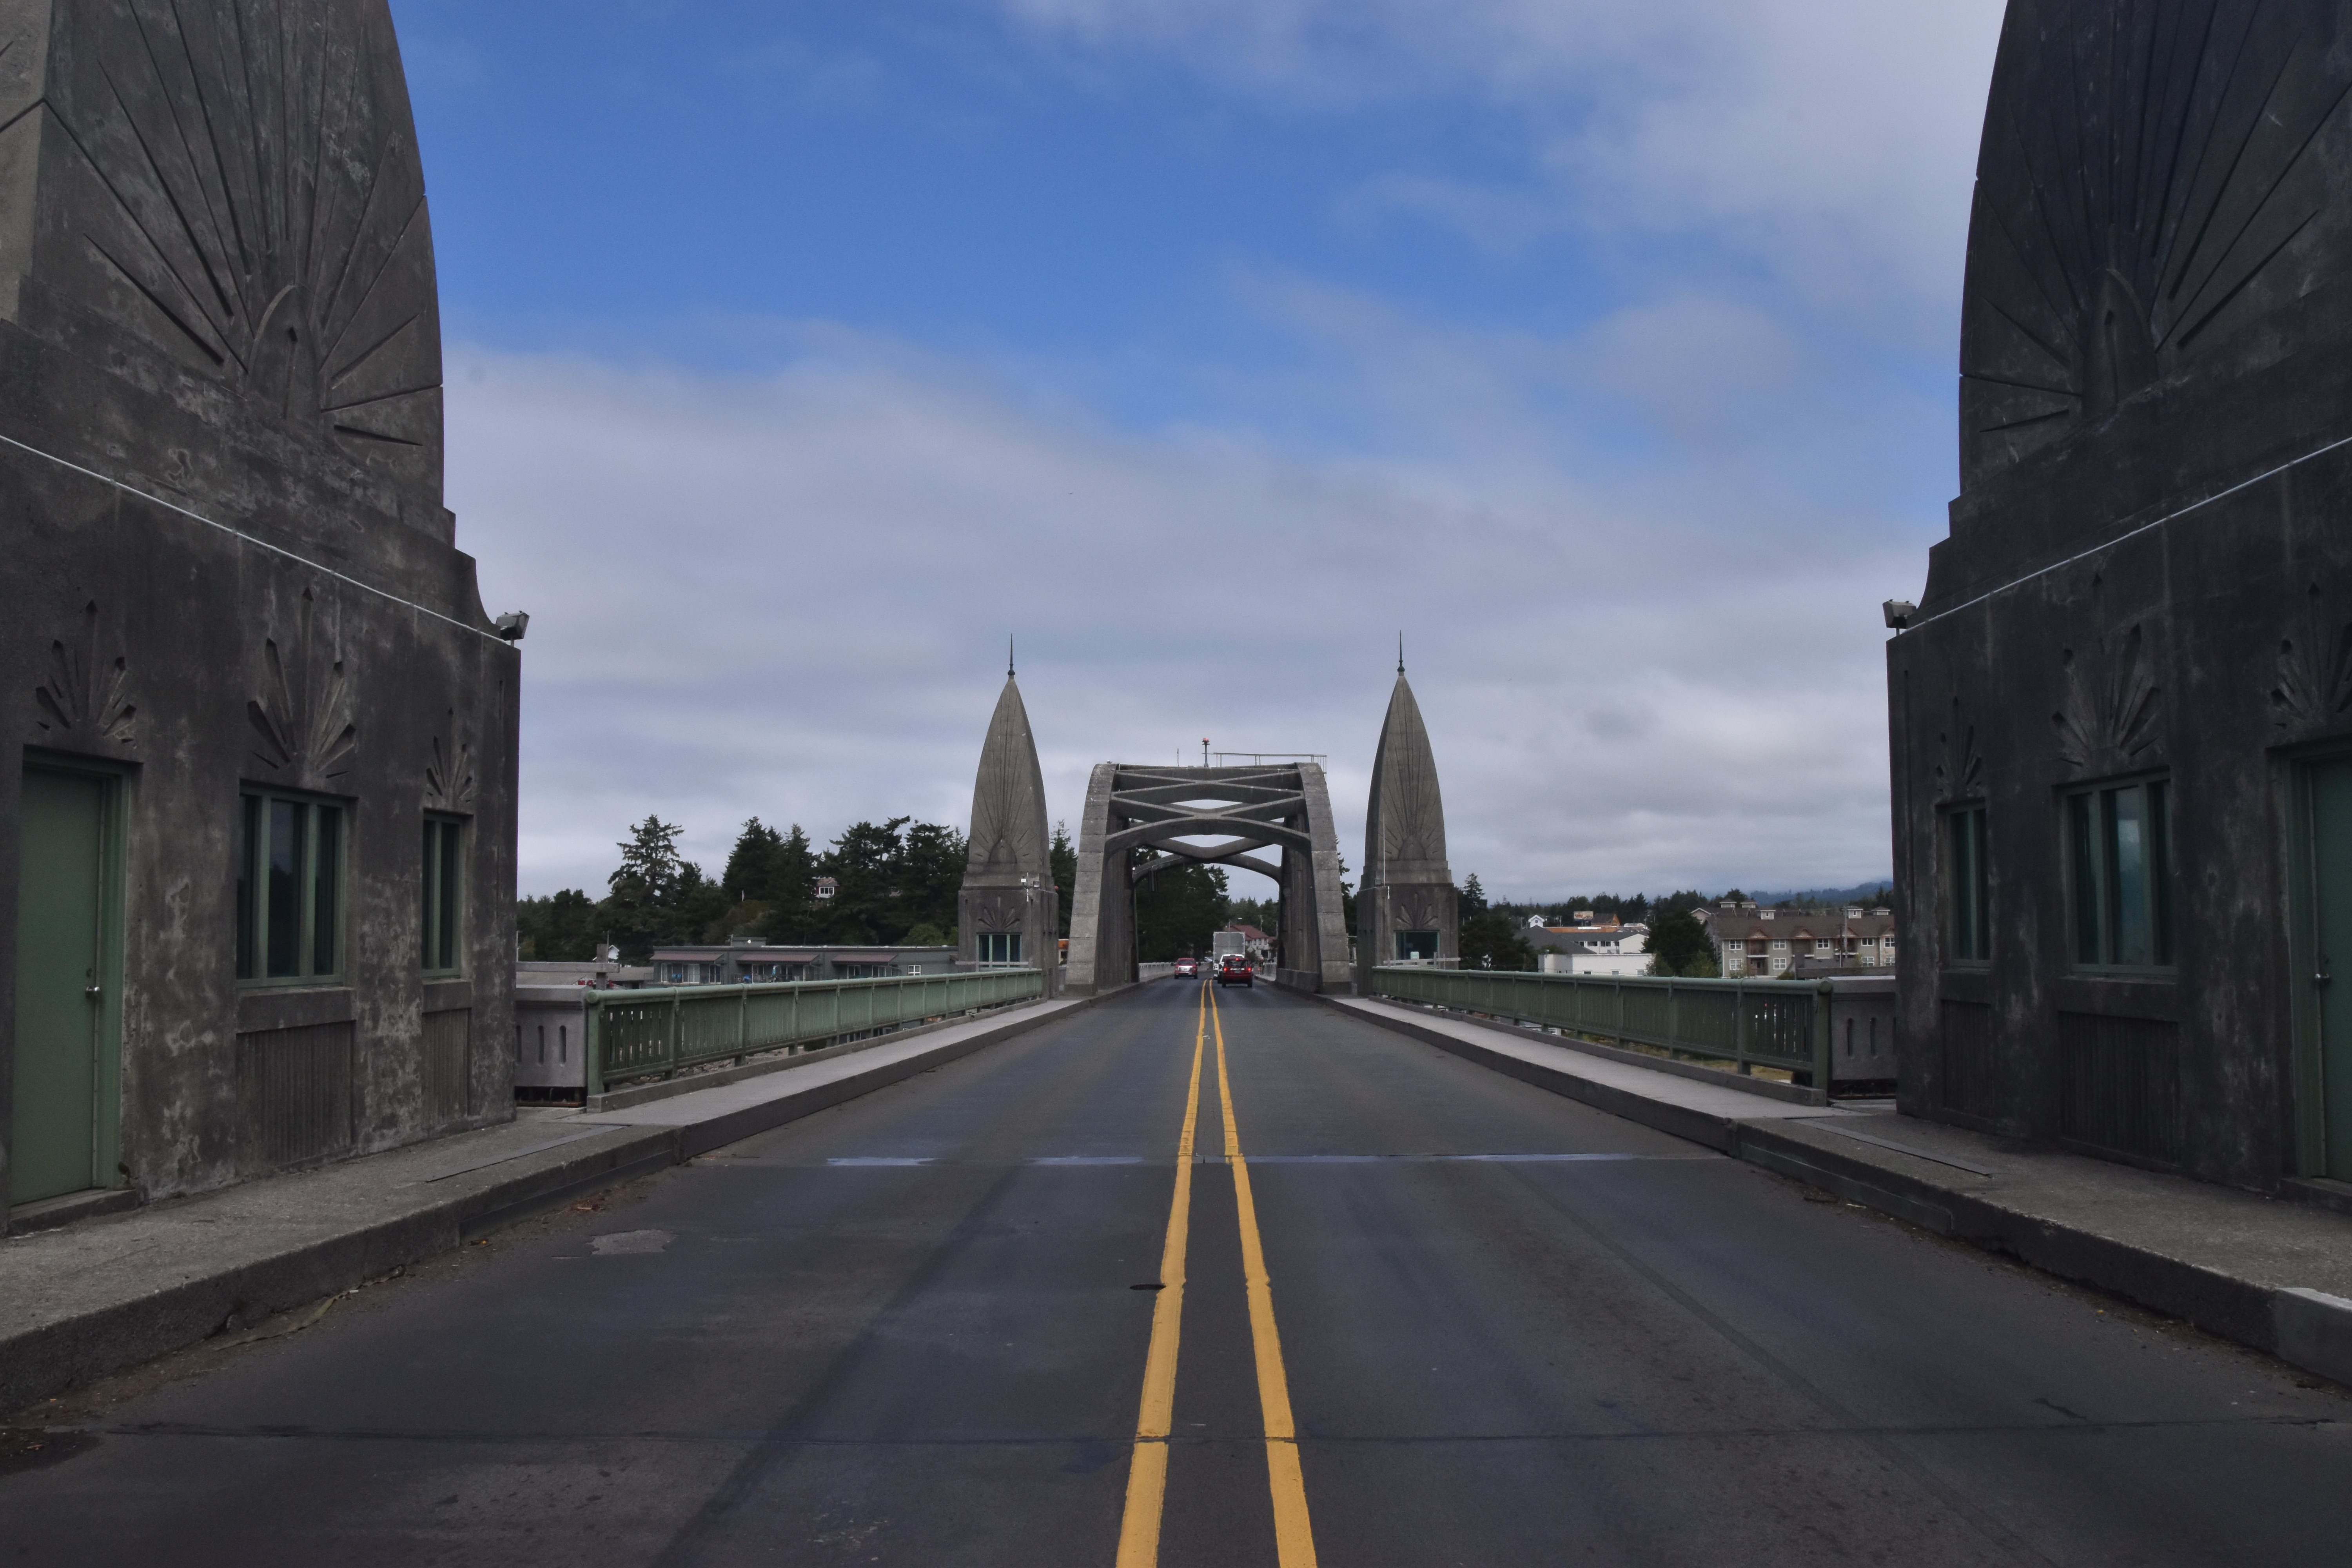
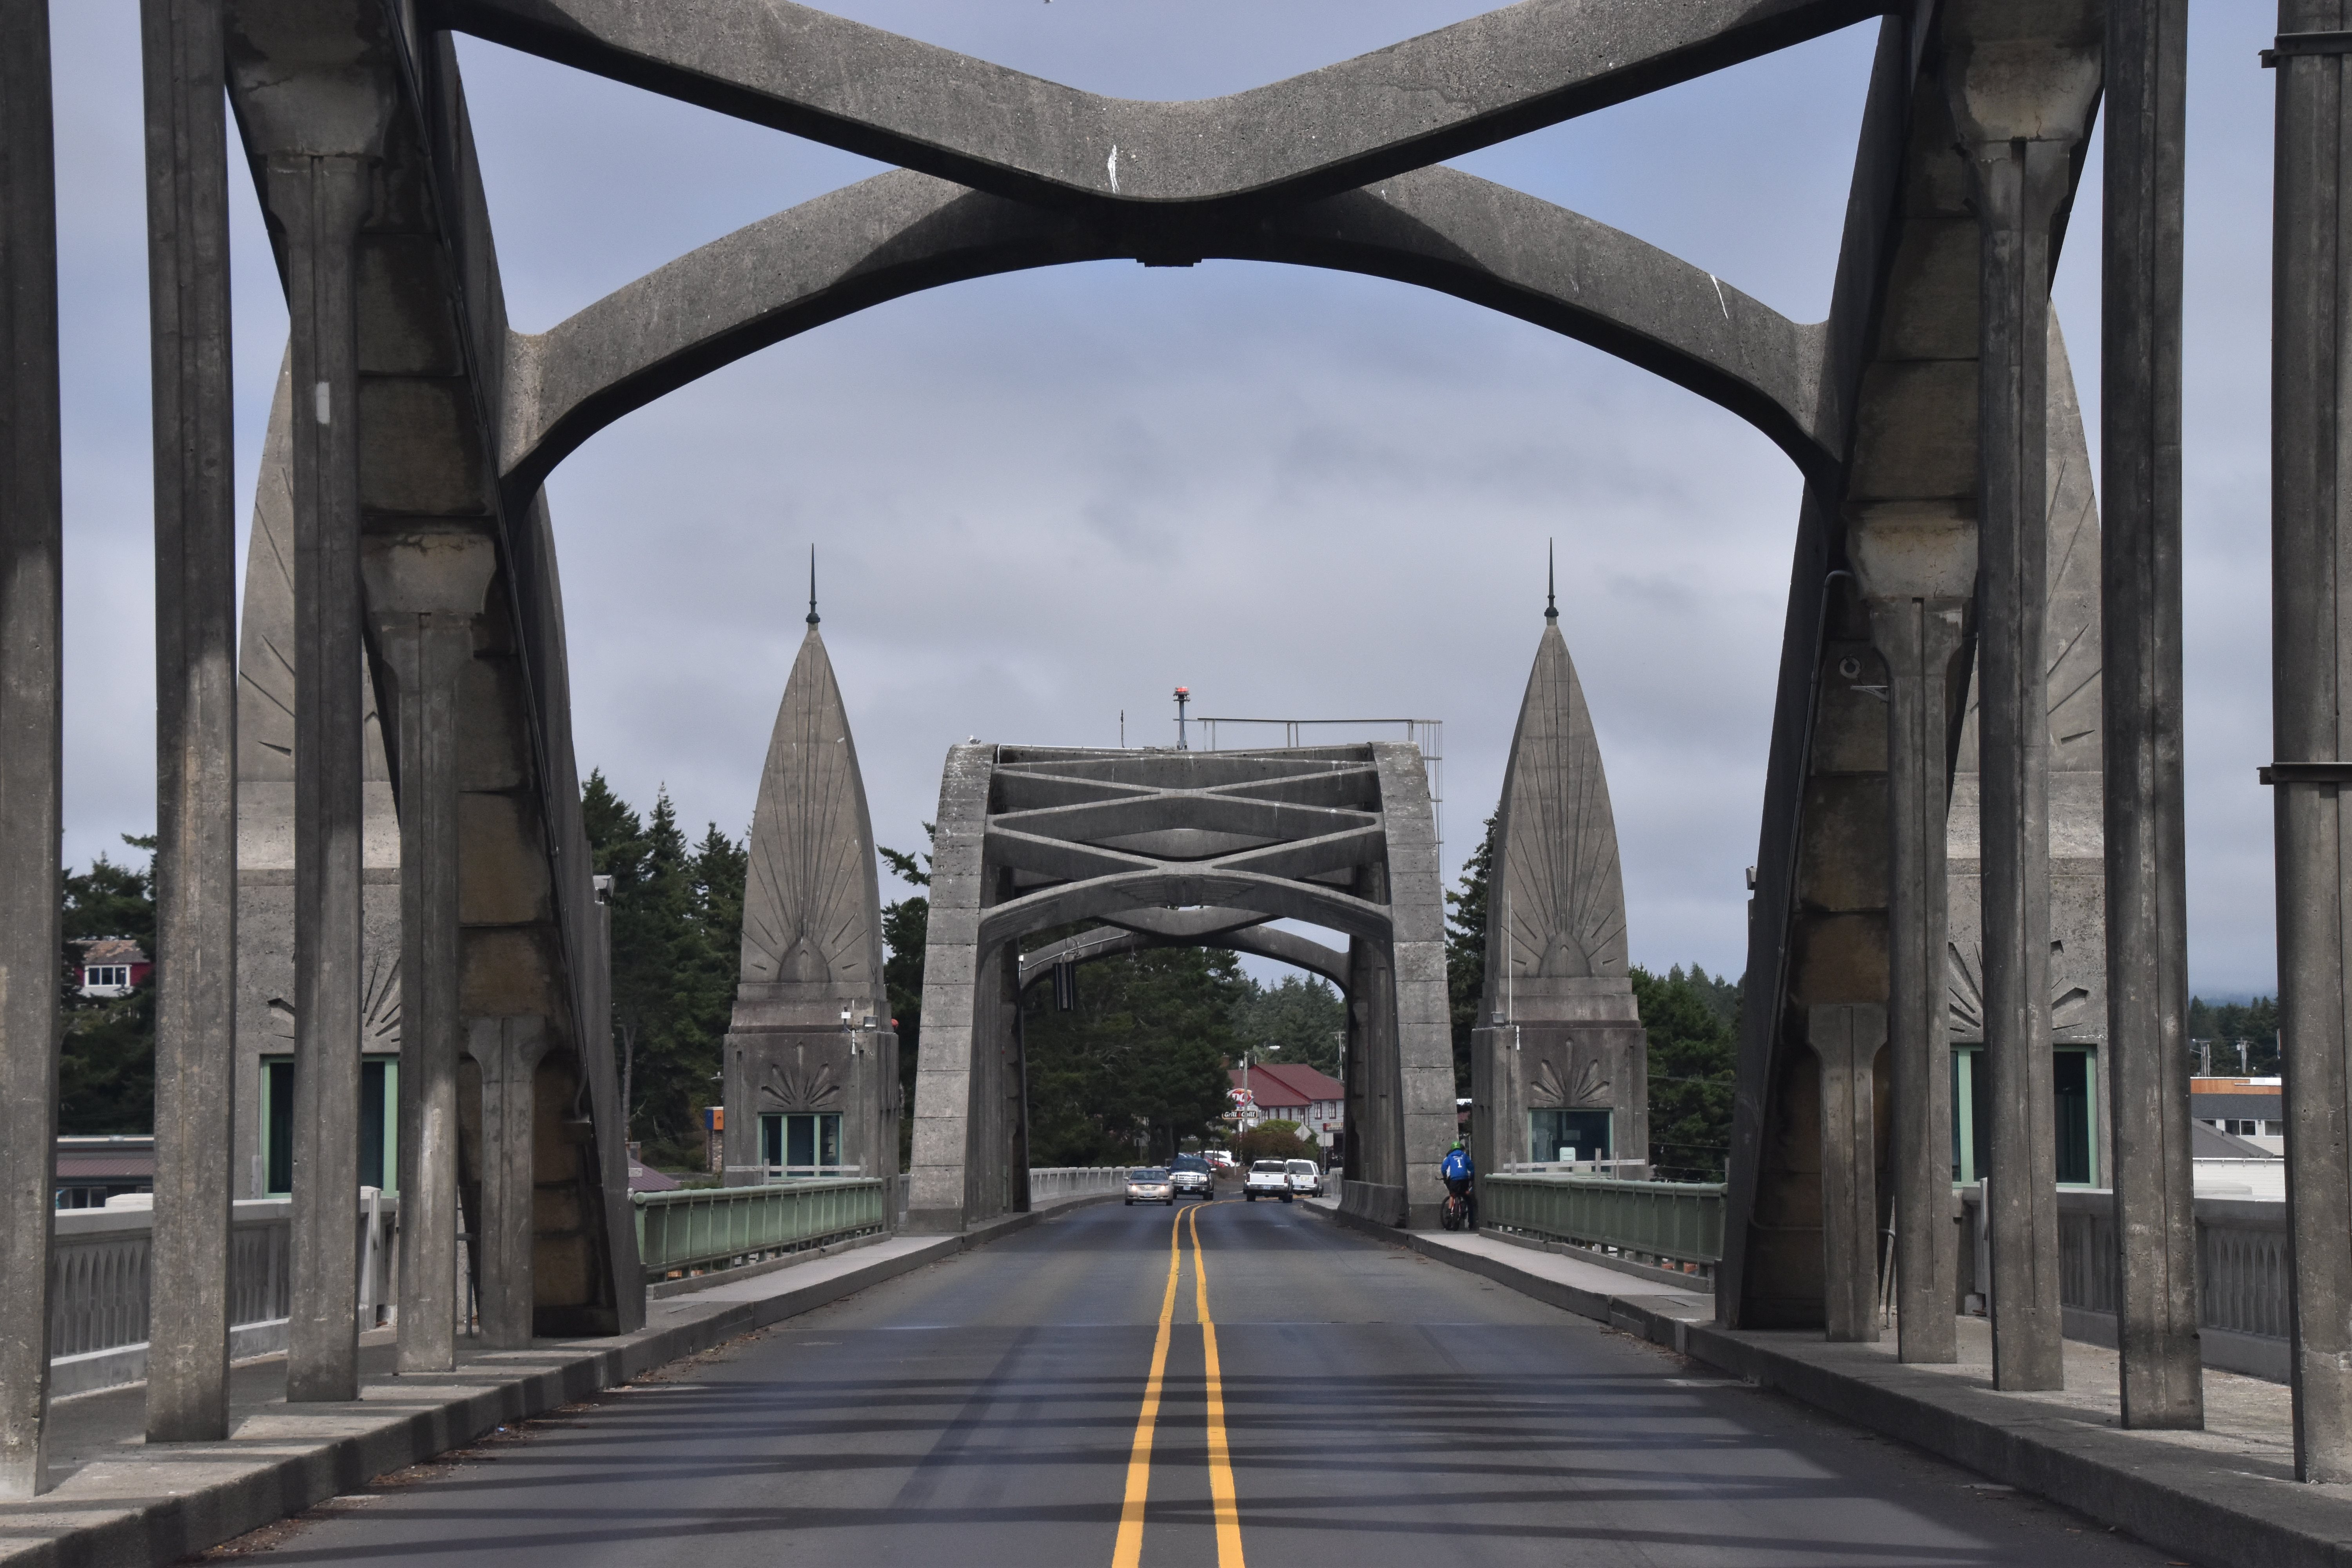
Portal views of bascule span facing north.
![]()


Portal views on bascule span facing north.
![]()
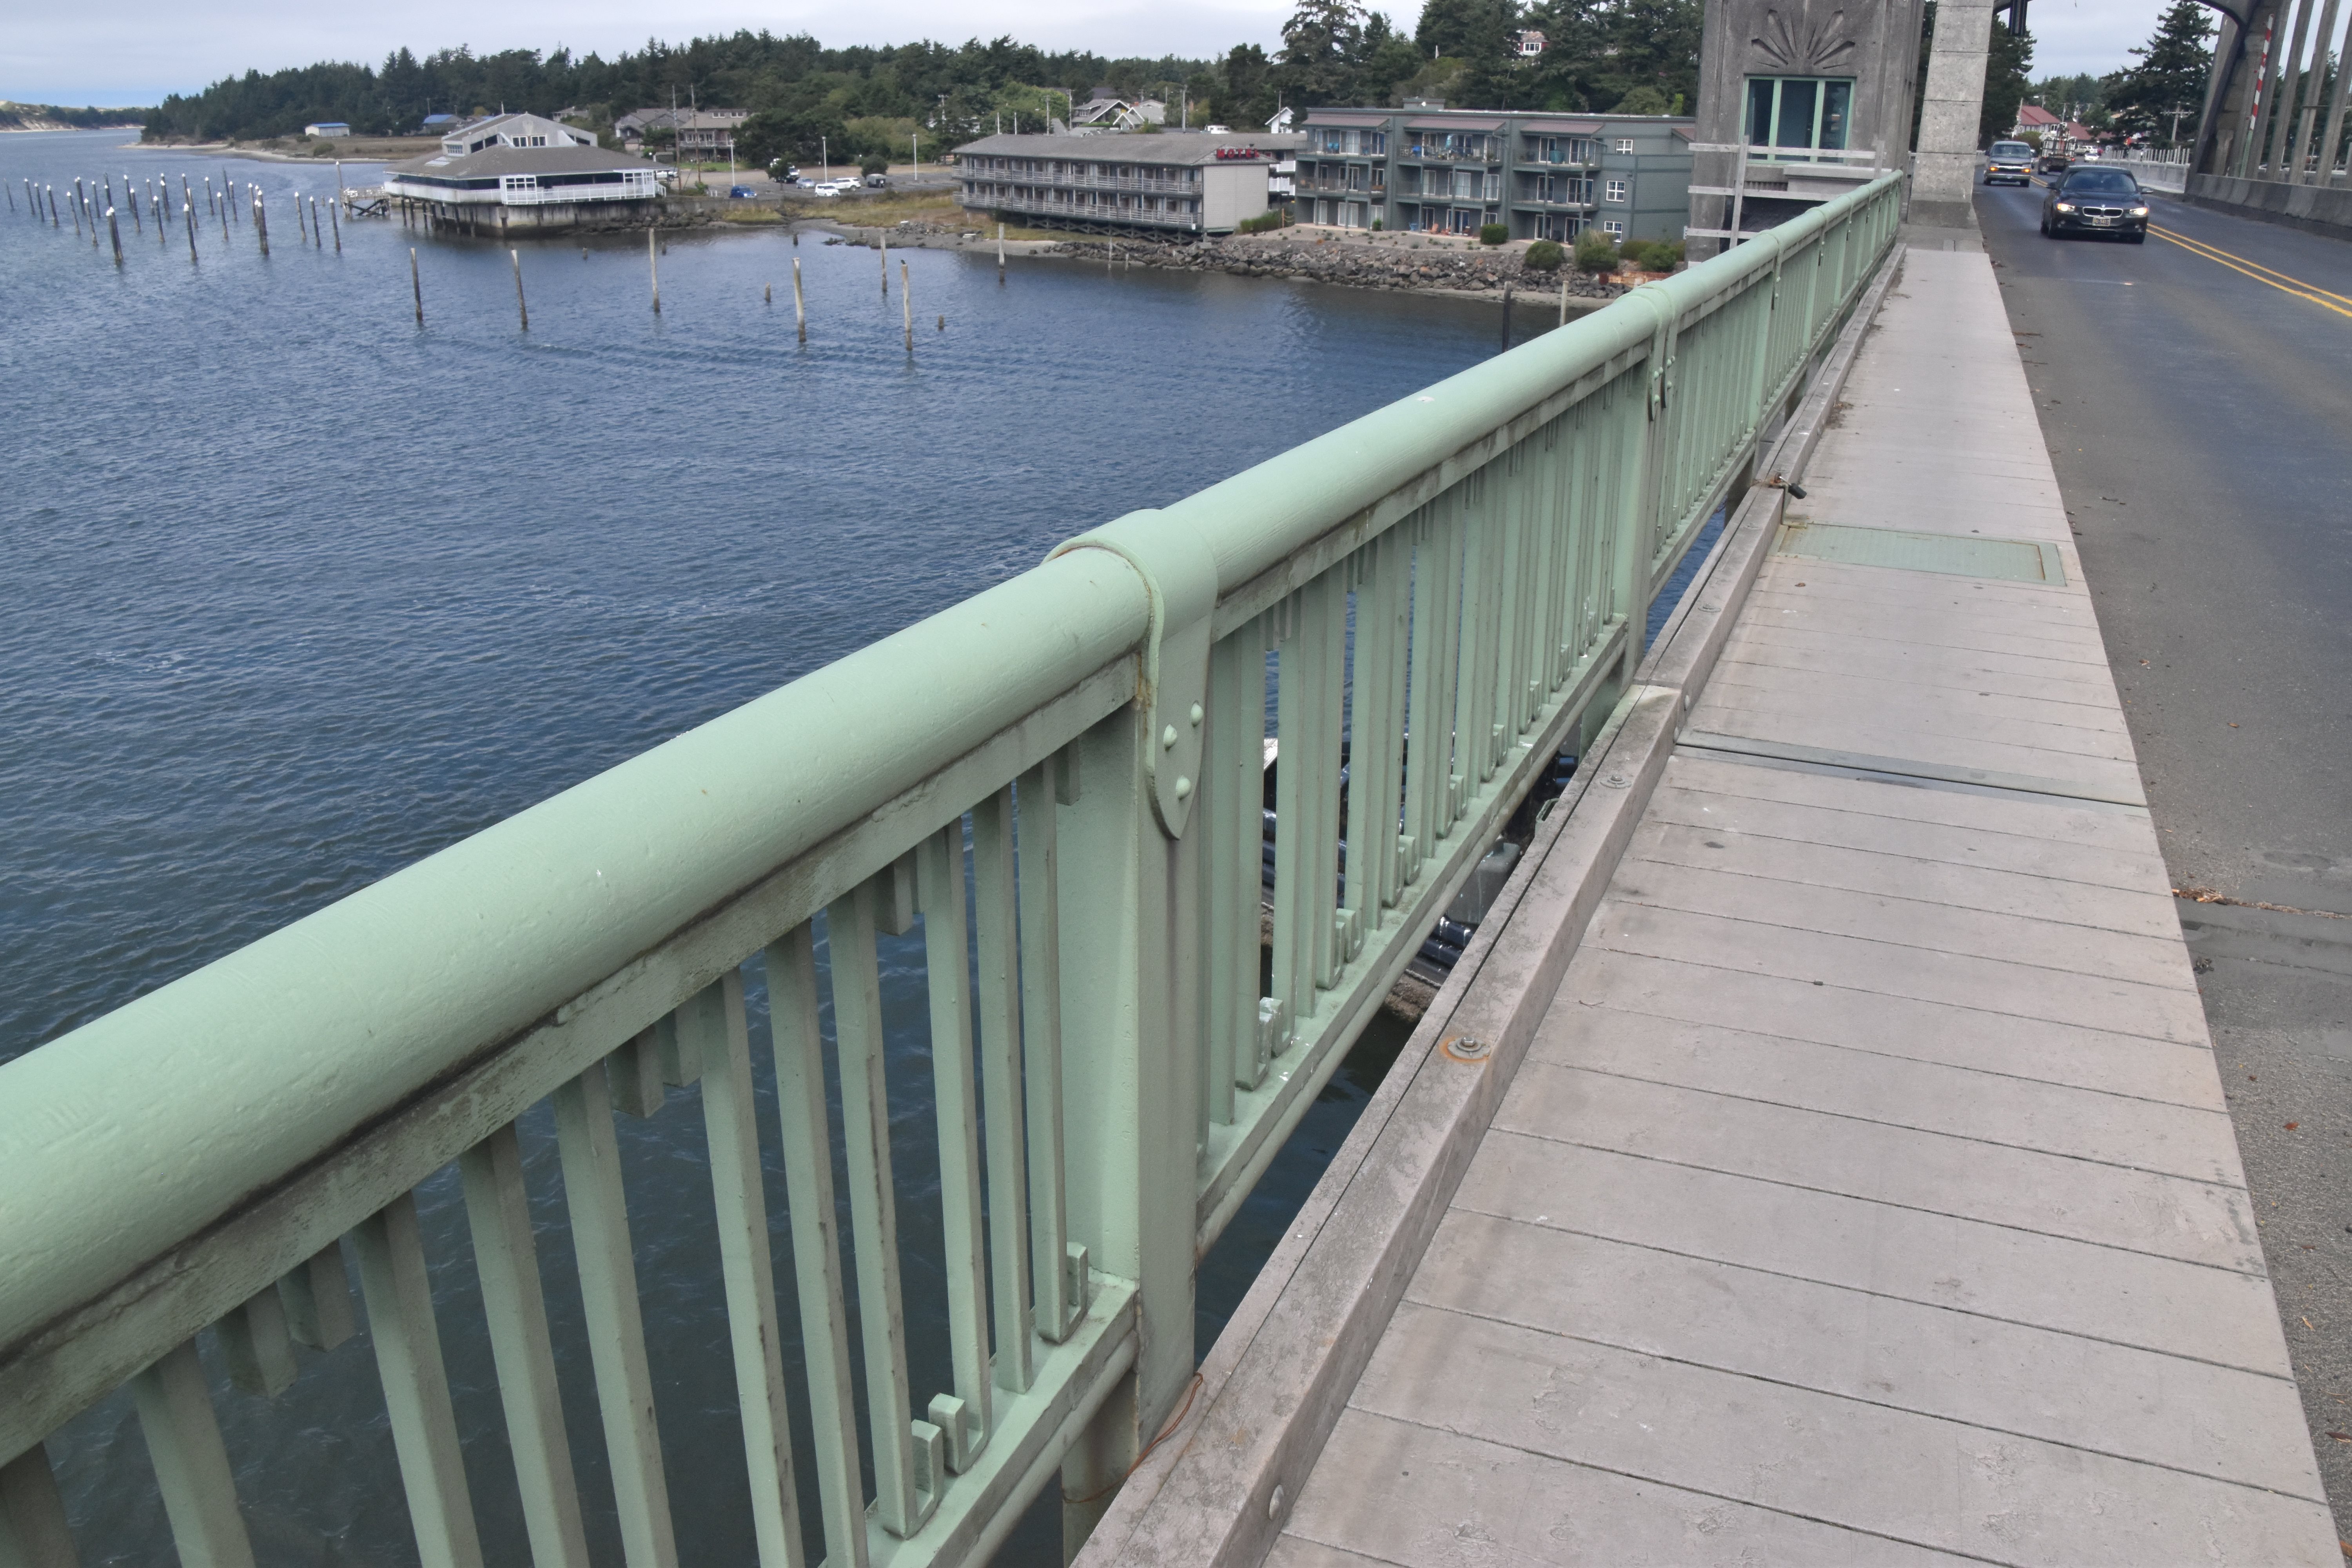
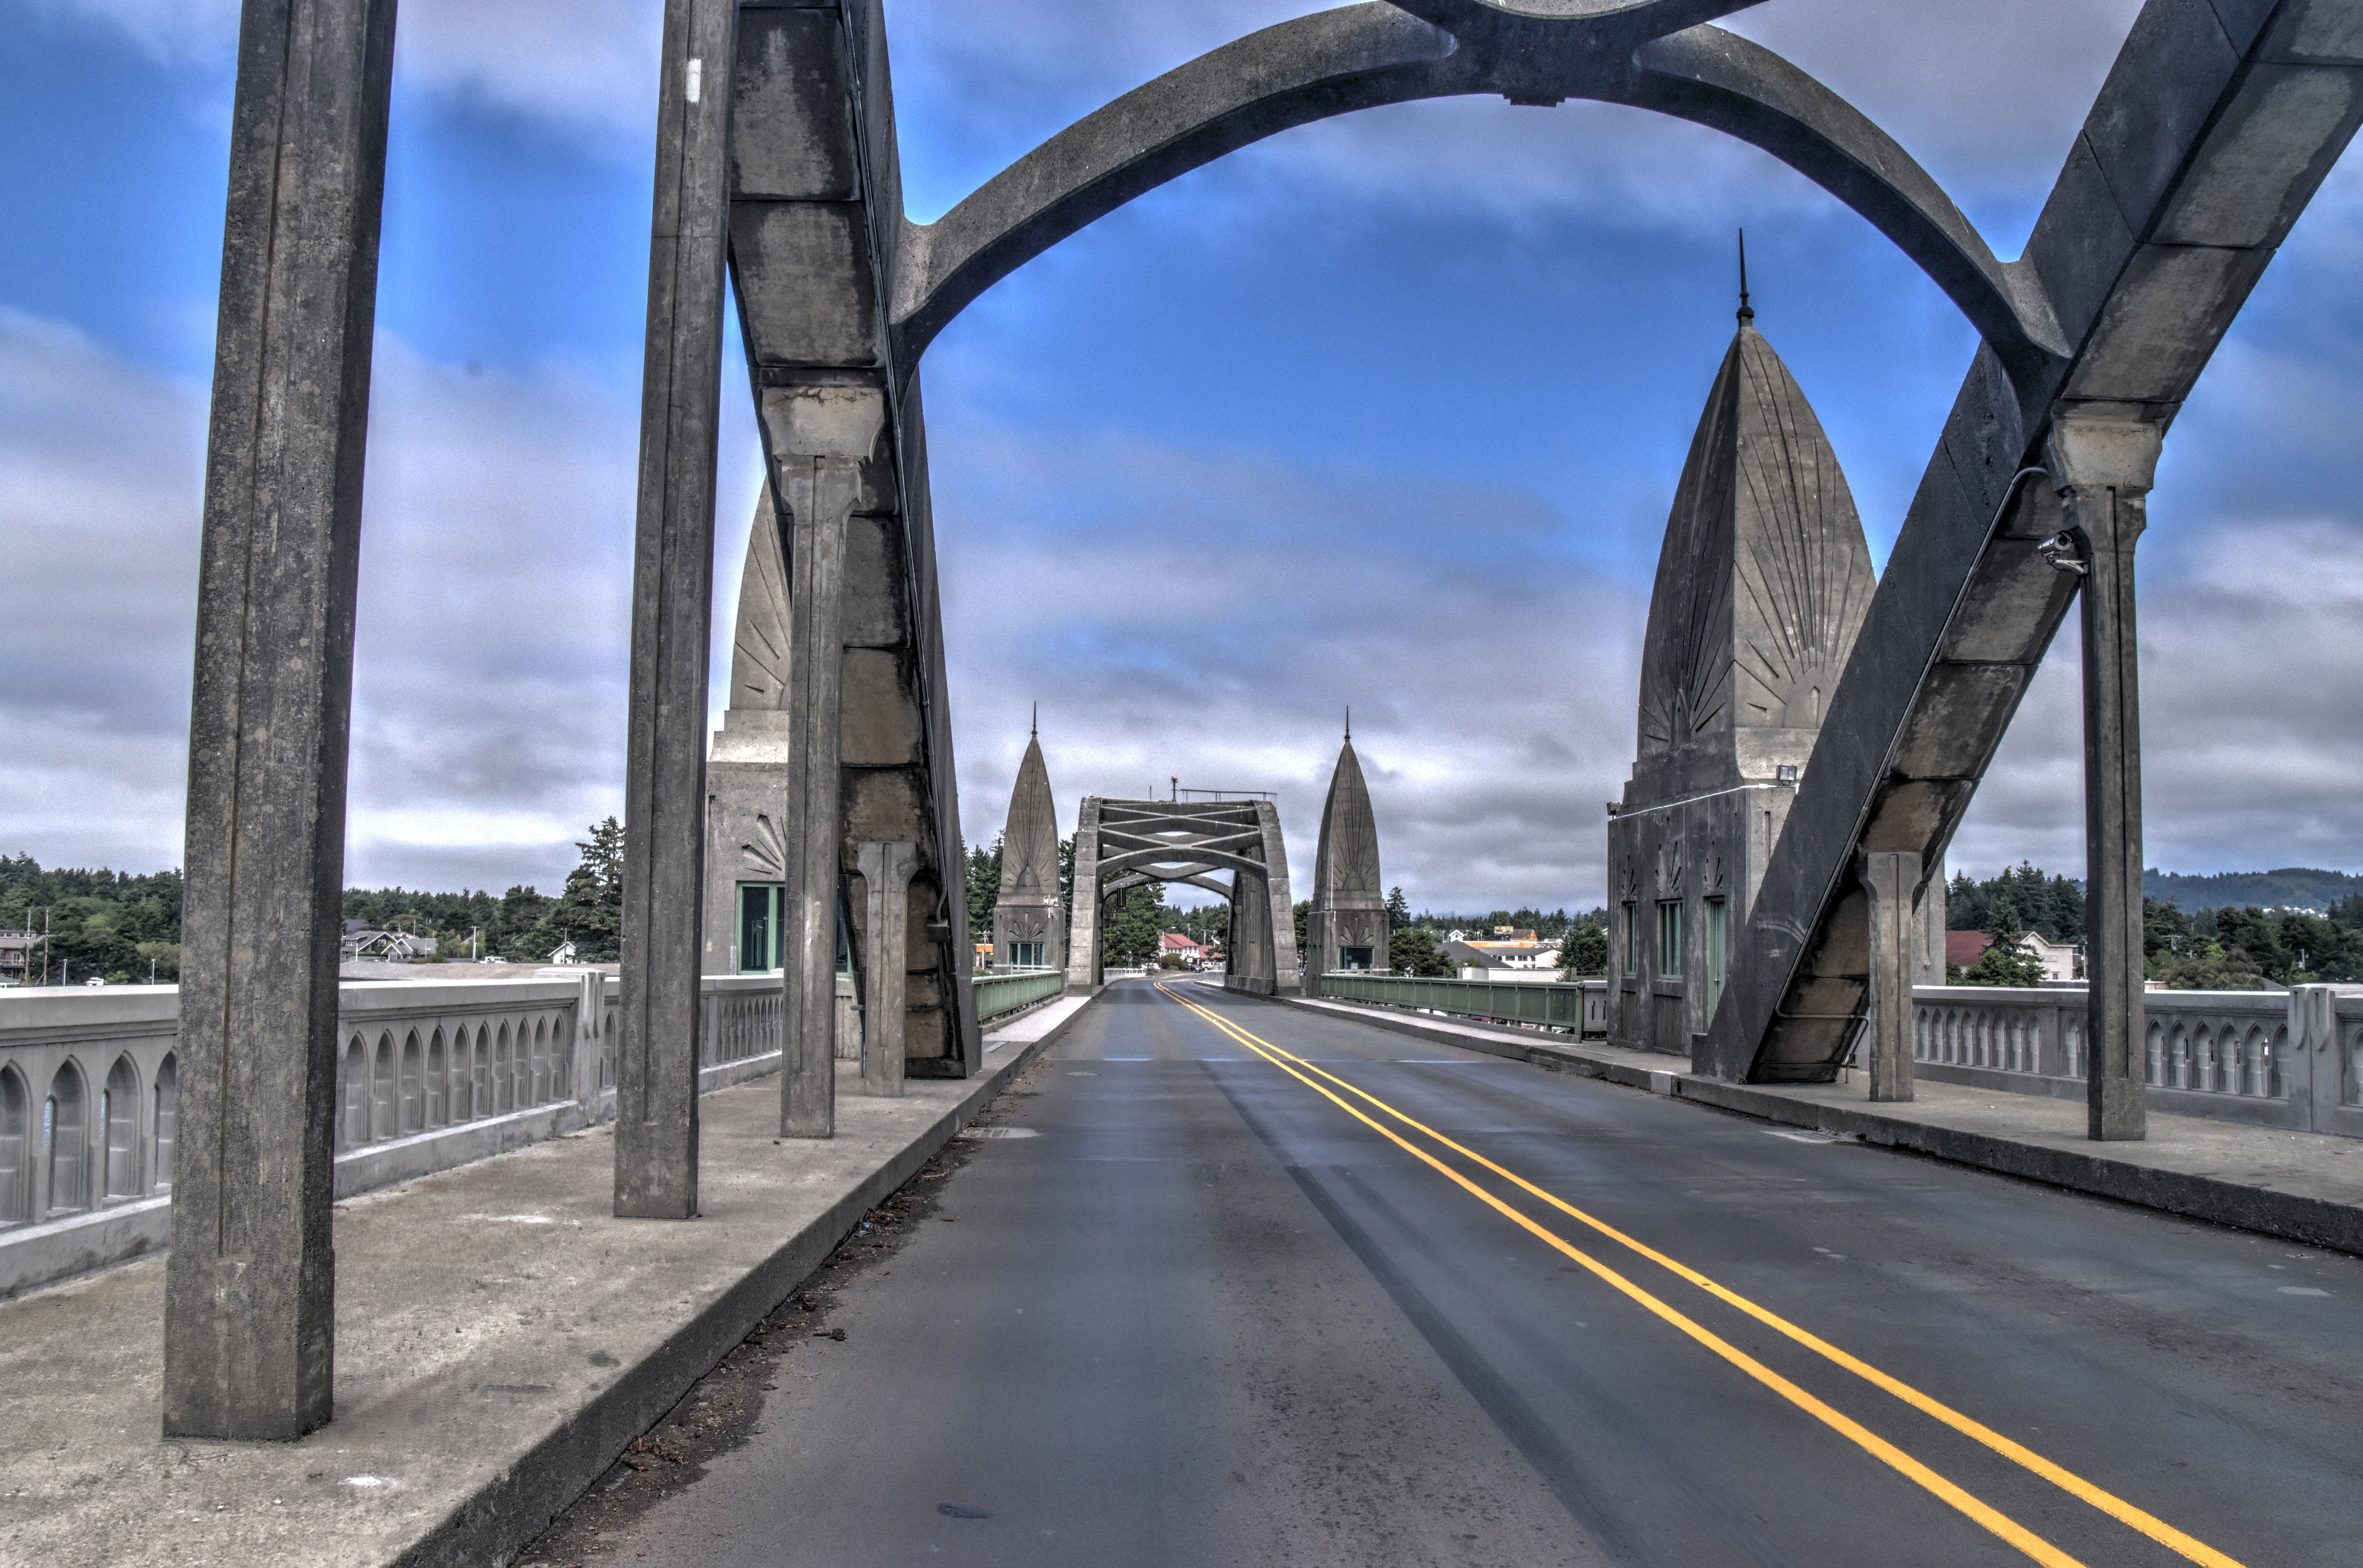
Views on bascule span sidewalk facing south.
![]()


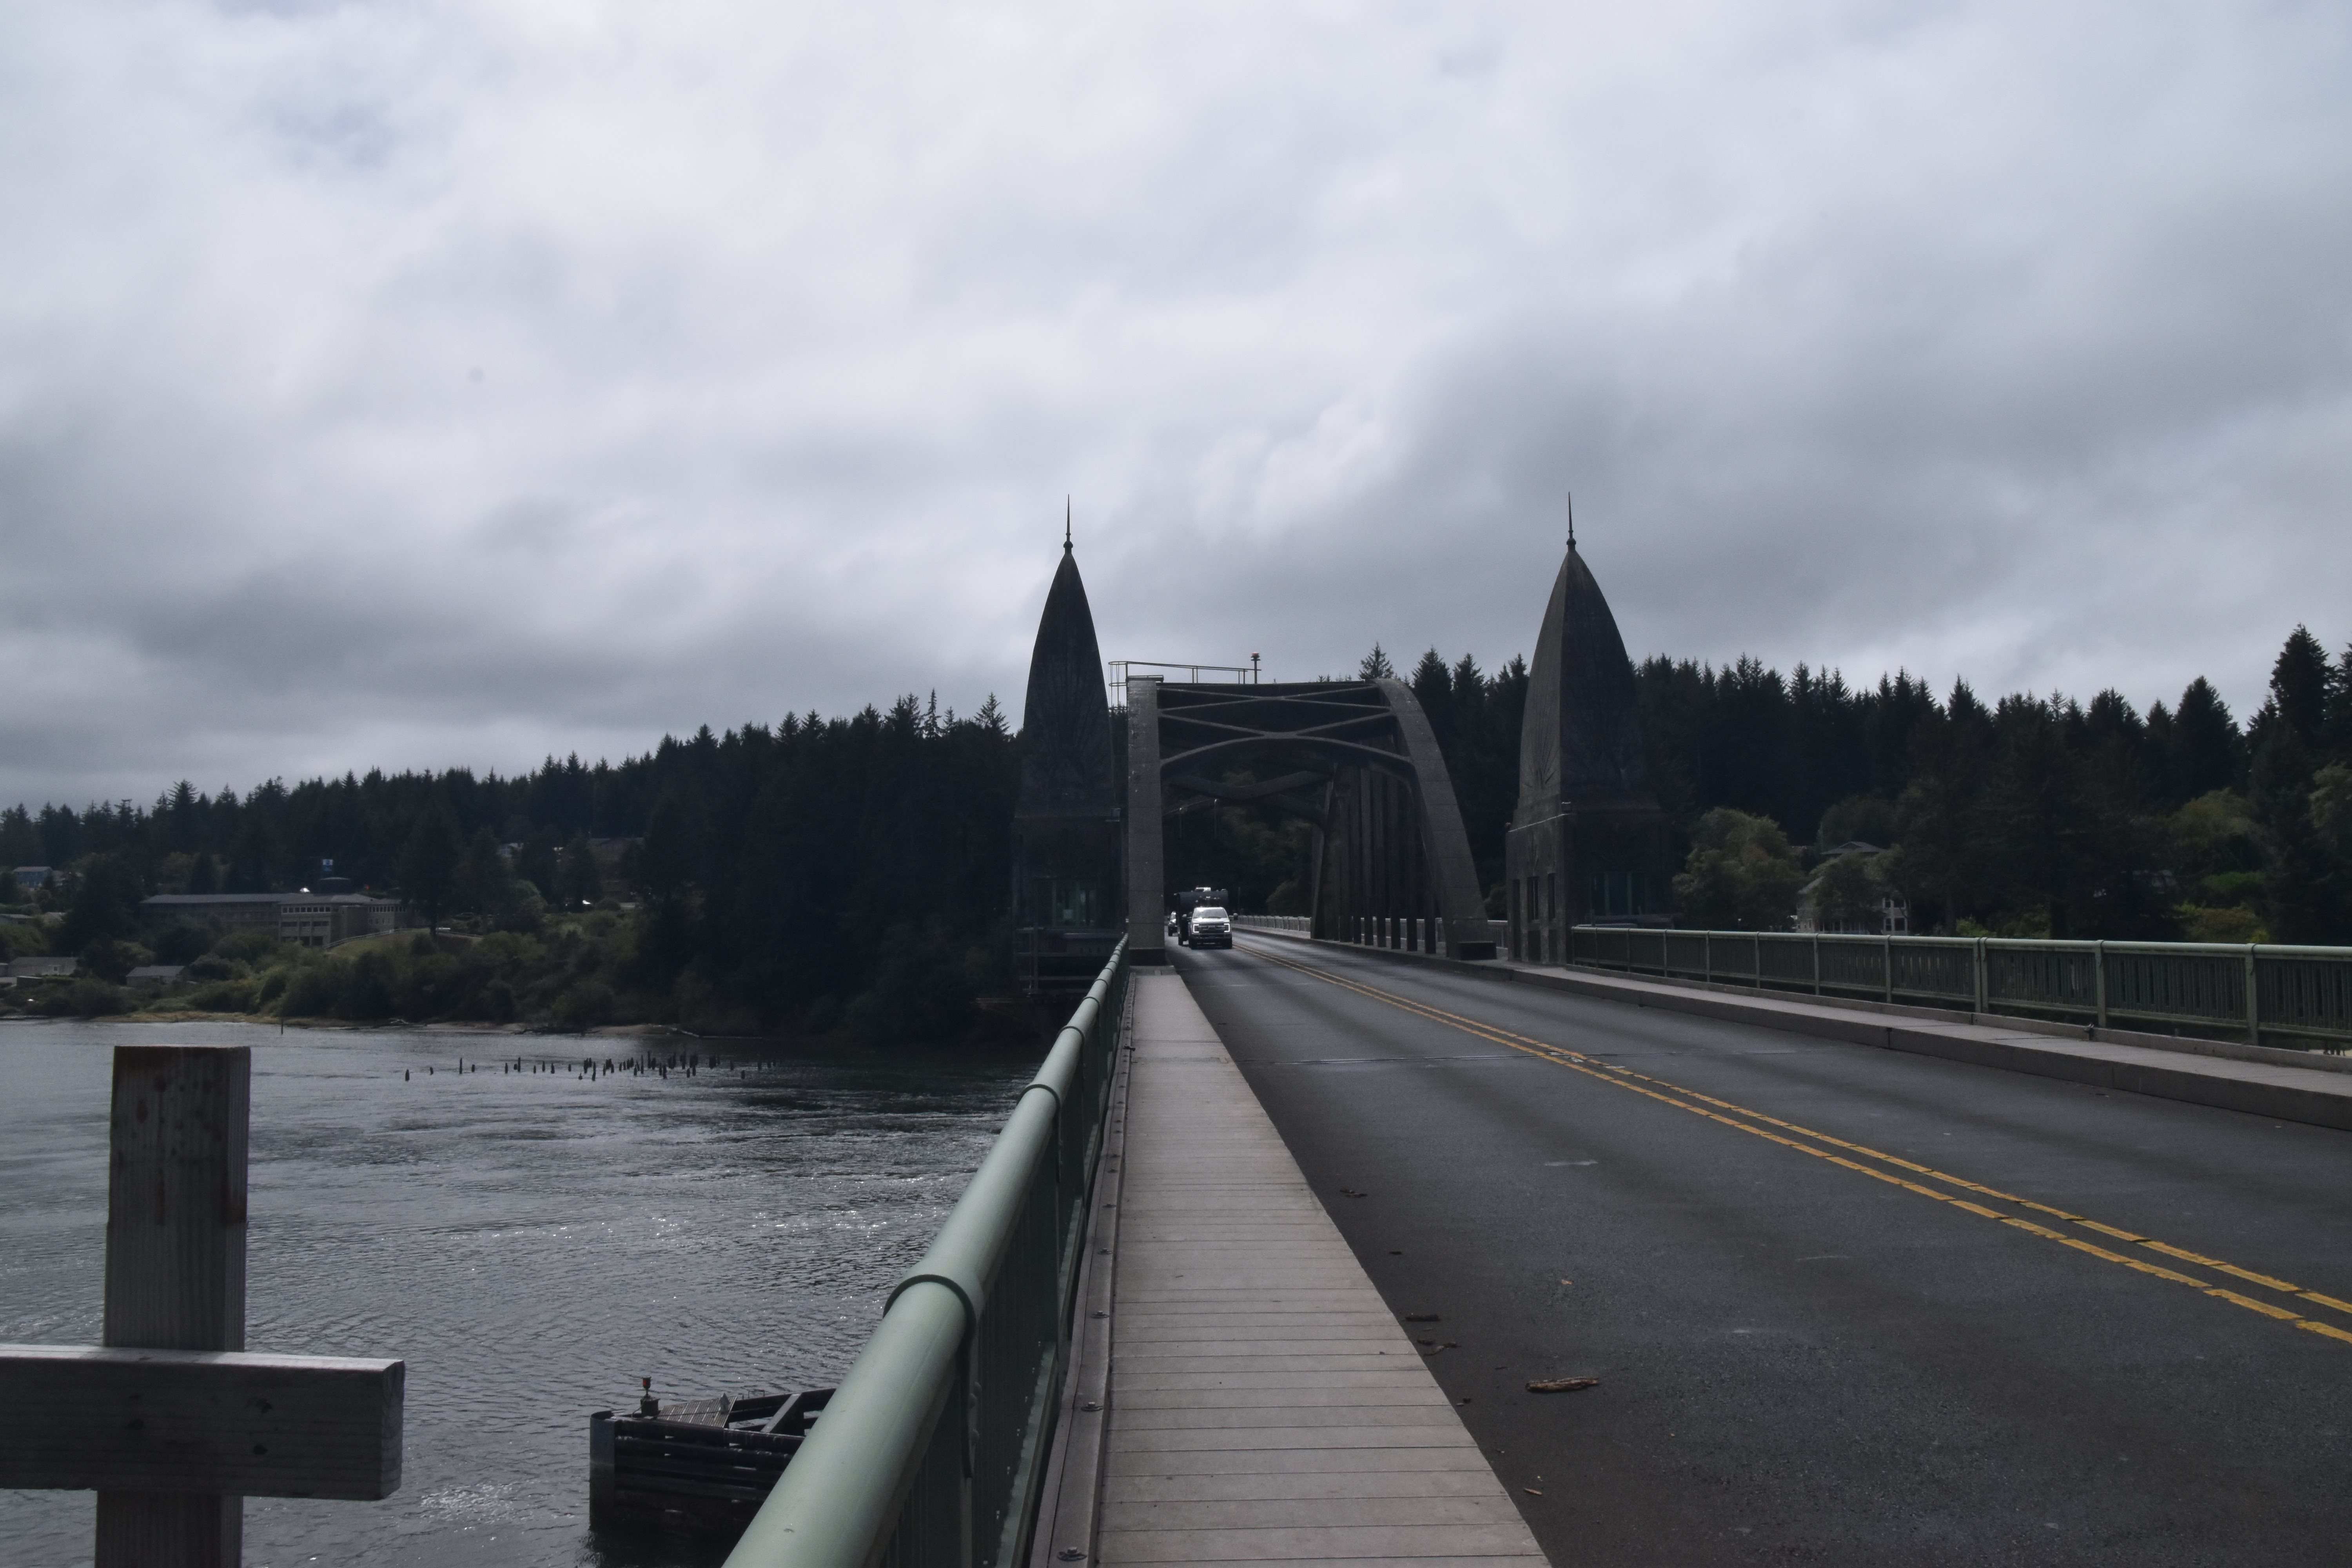
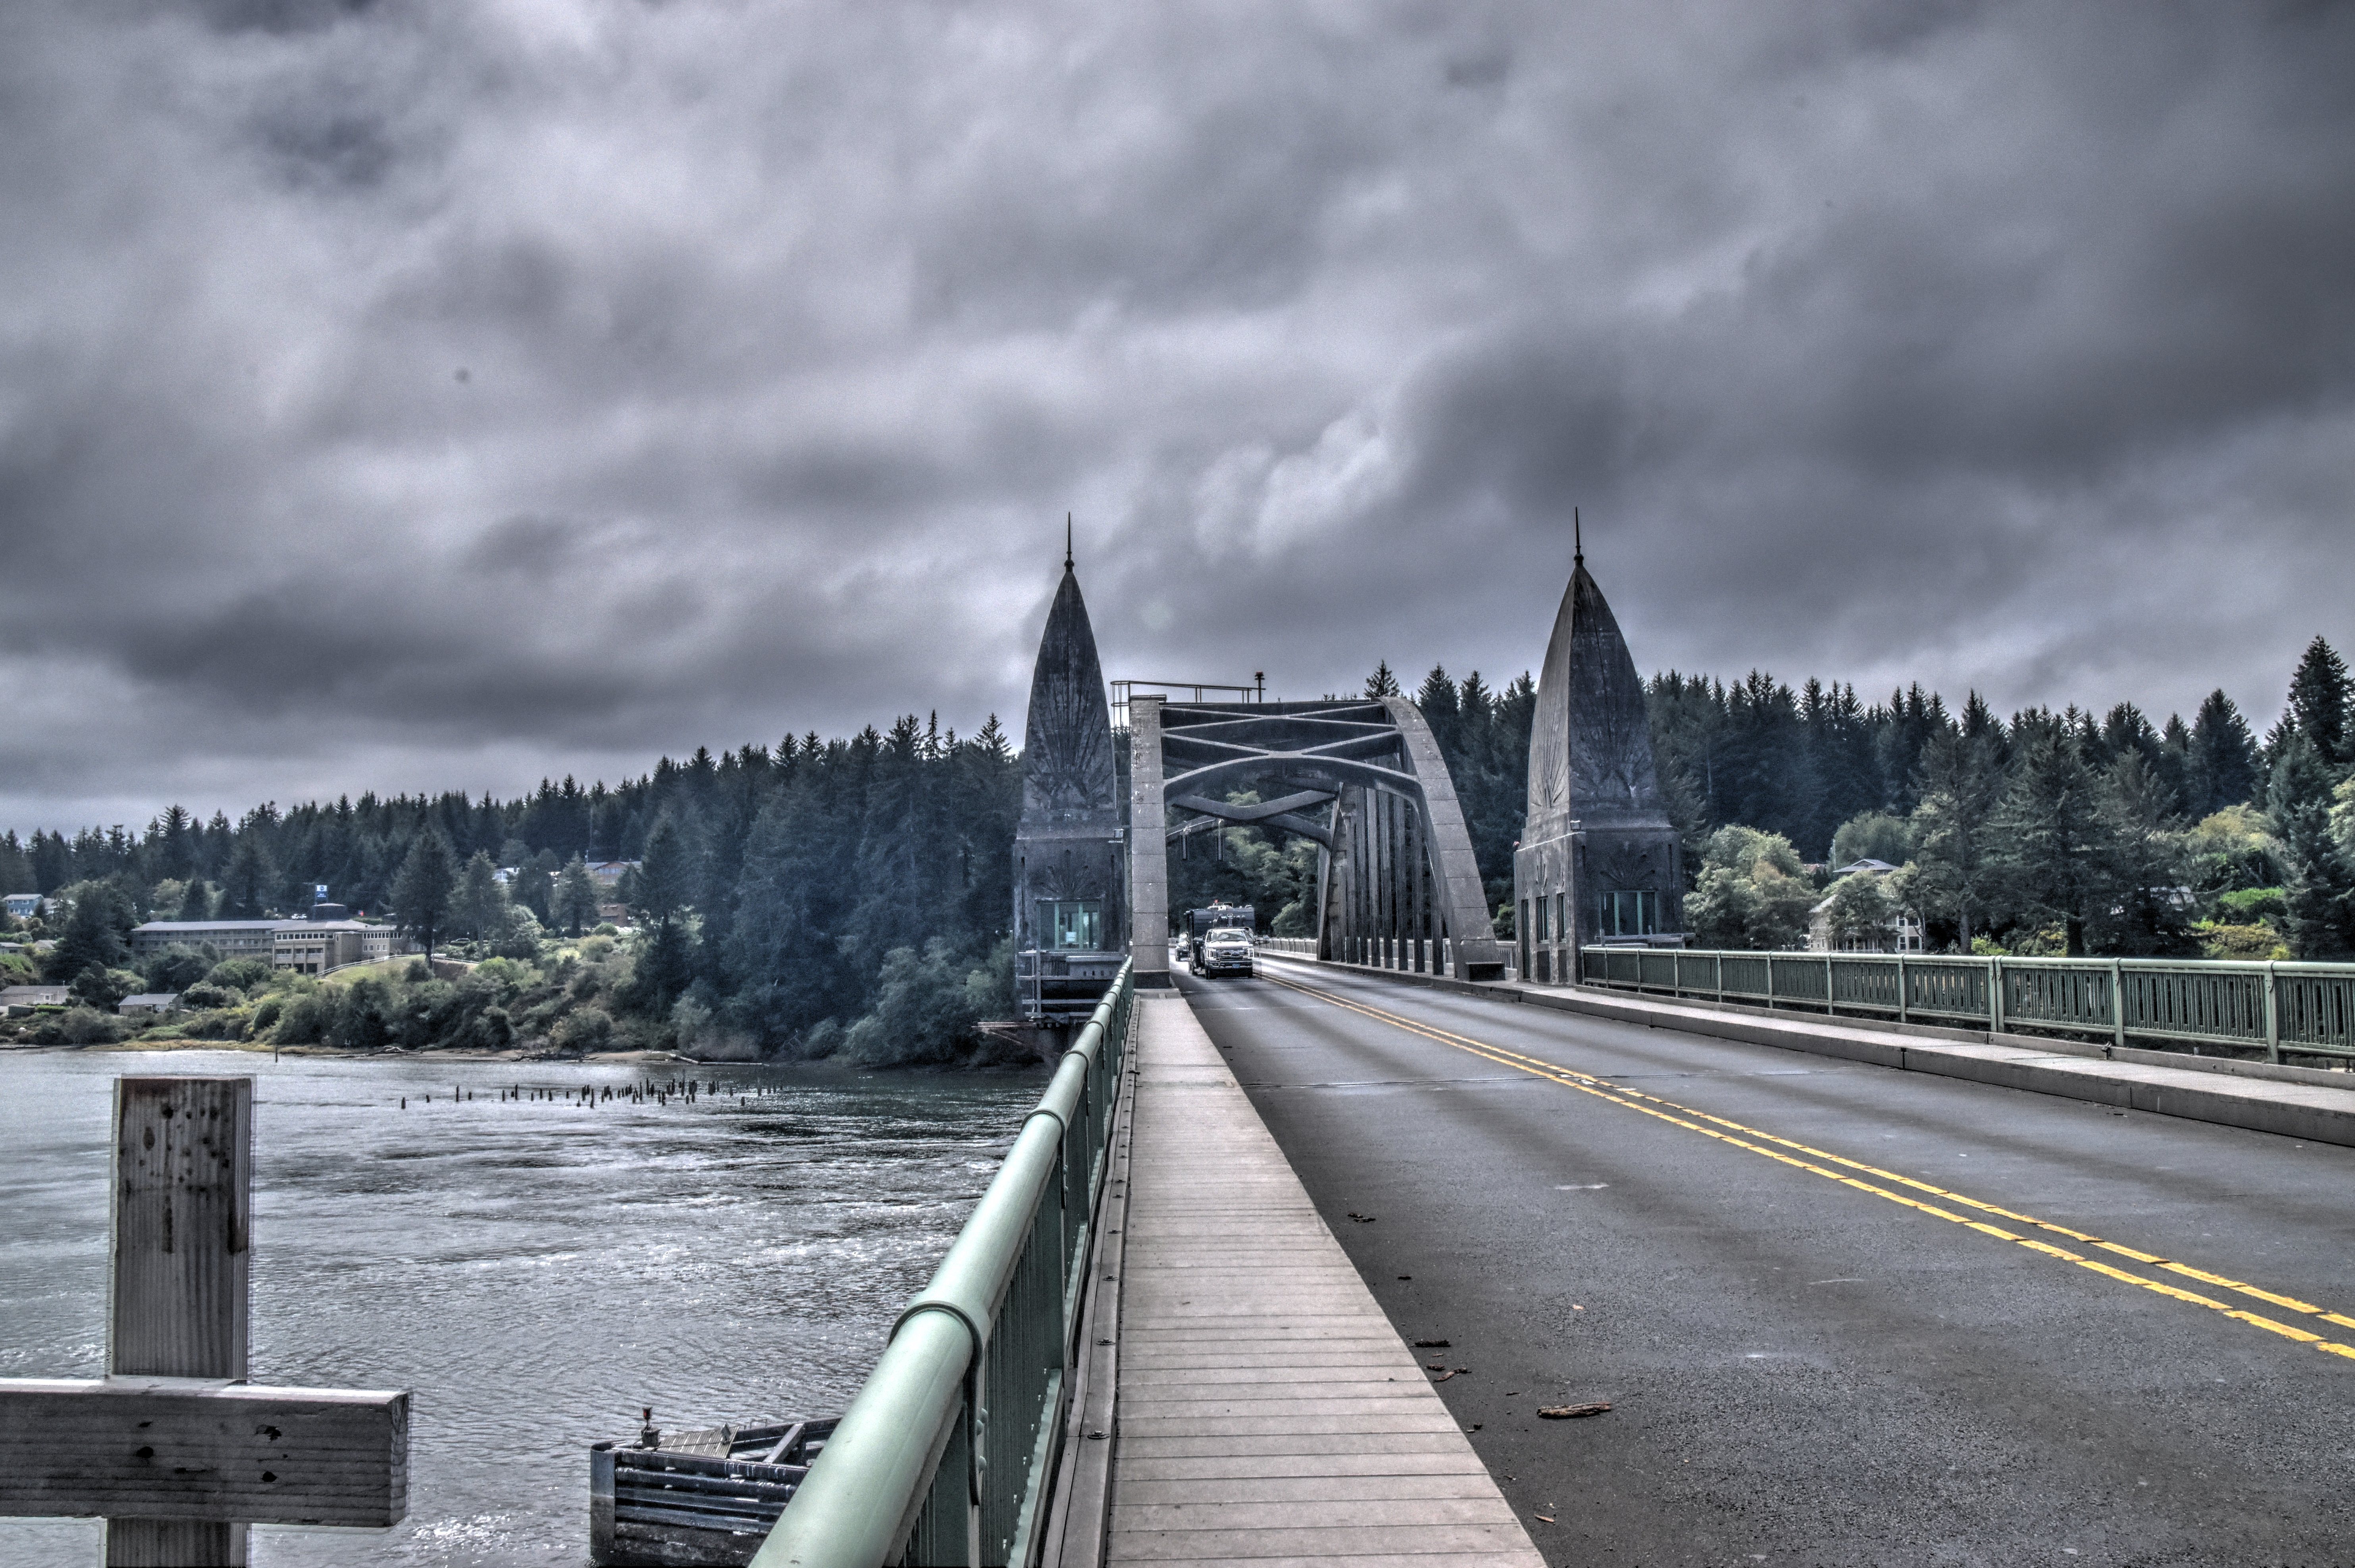
Views on bascule span sidewalk facing north.
![]()


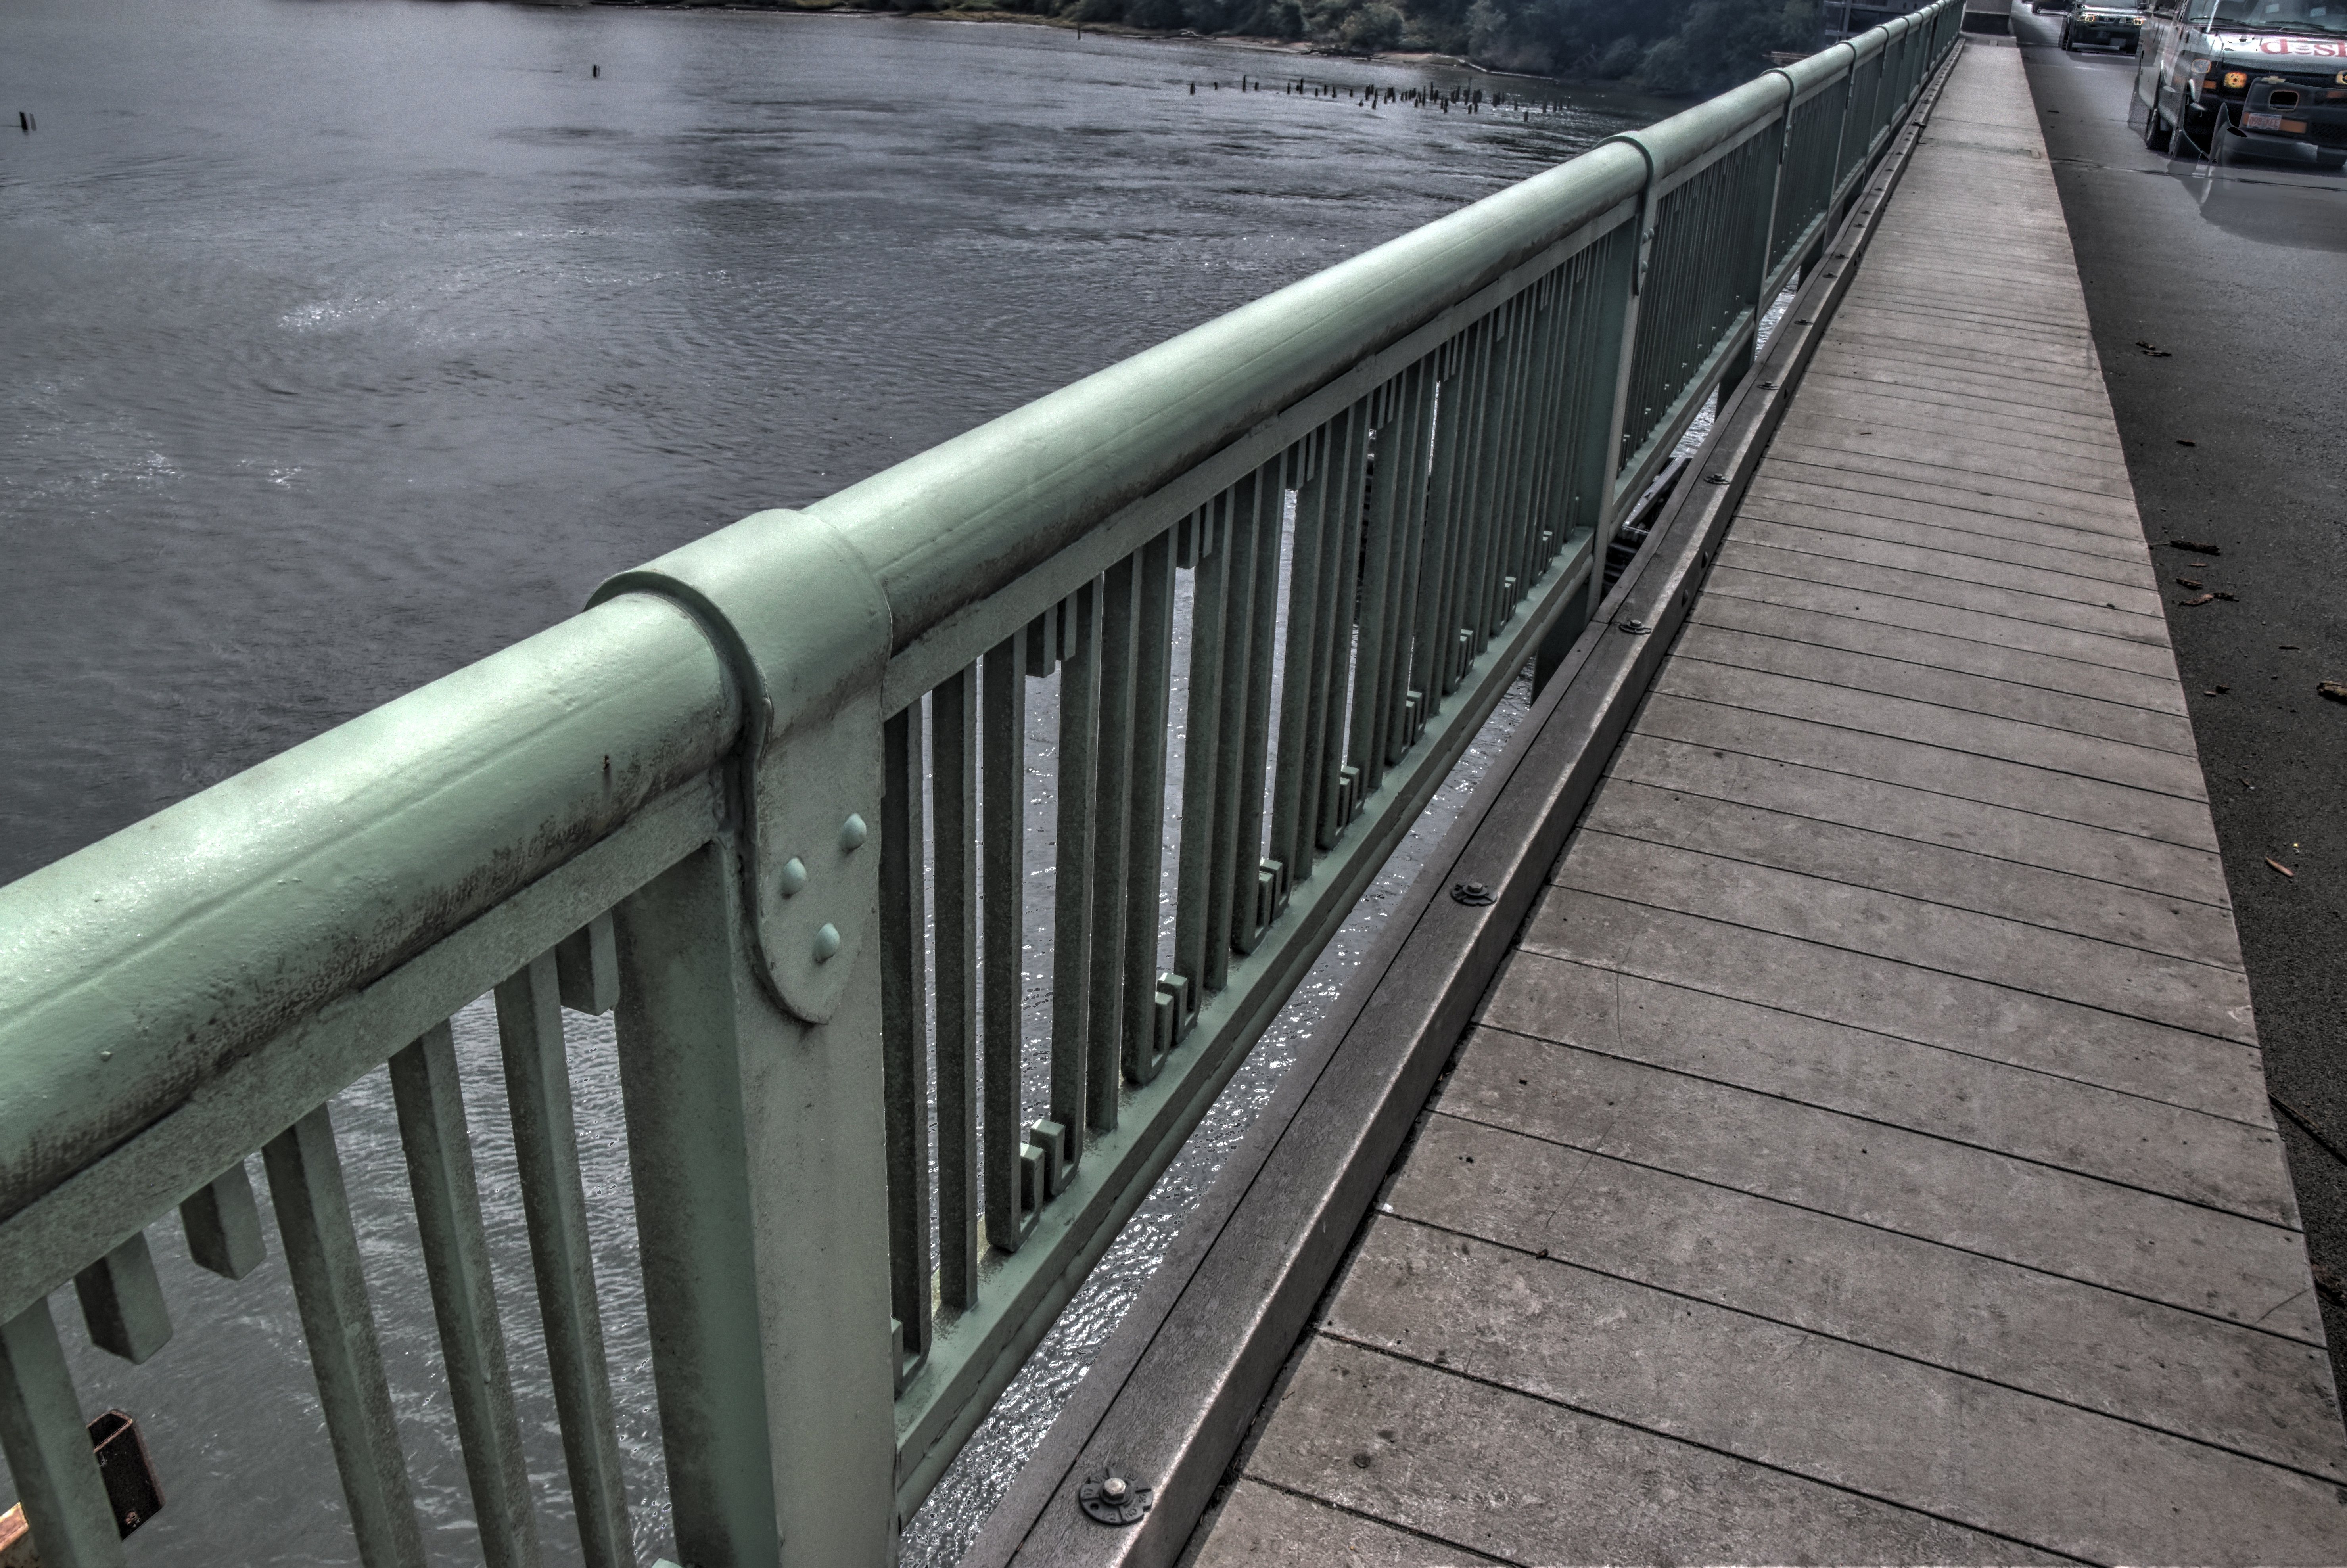
Views on sidewalk facing south.
![]()

View of south arch span facing north.
![]()


Elevation from northwest quadrant.
![]()


Elevation of bascule span from northwest quadrant.
![]()


Bascule and arch spans elevation from northwest quadrant.
![]()
Arch span elevation from northwest quadrant.
![]()

Photo Credit: Historic American Engineering Record
Original bridge control panel.
![]()
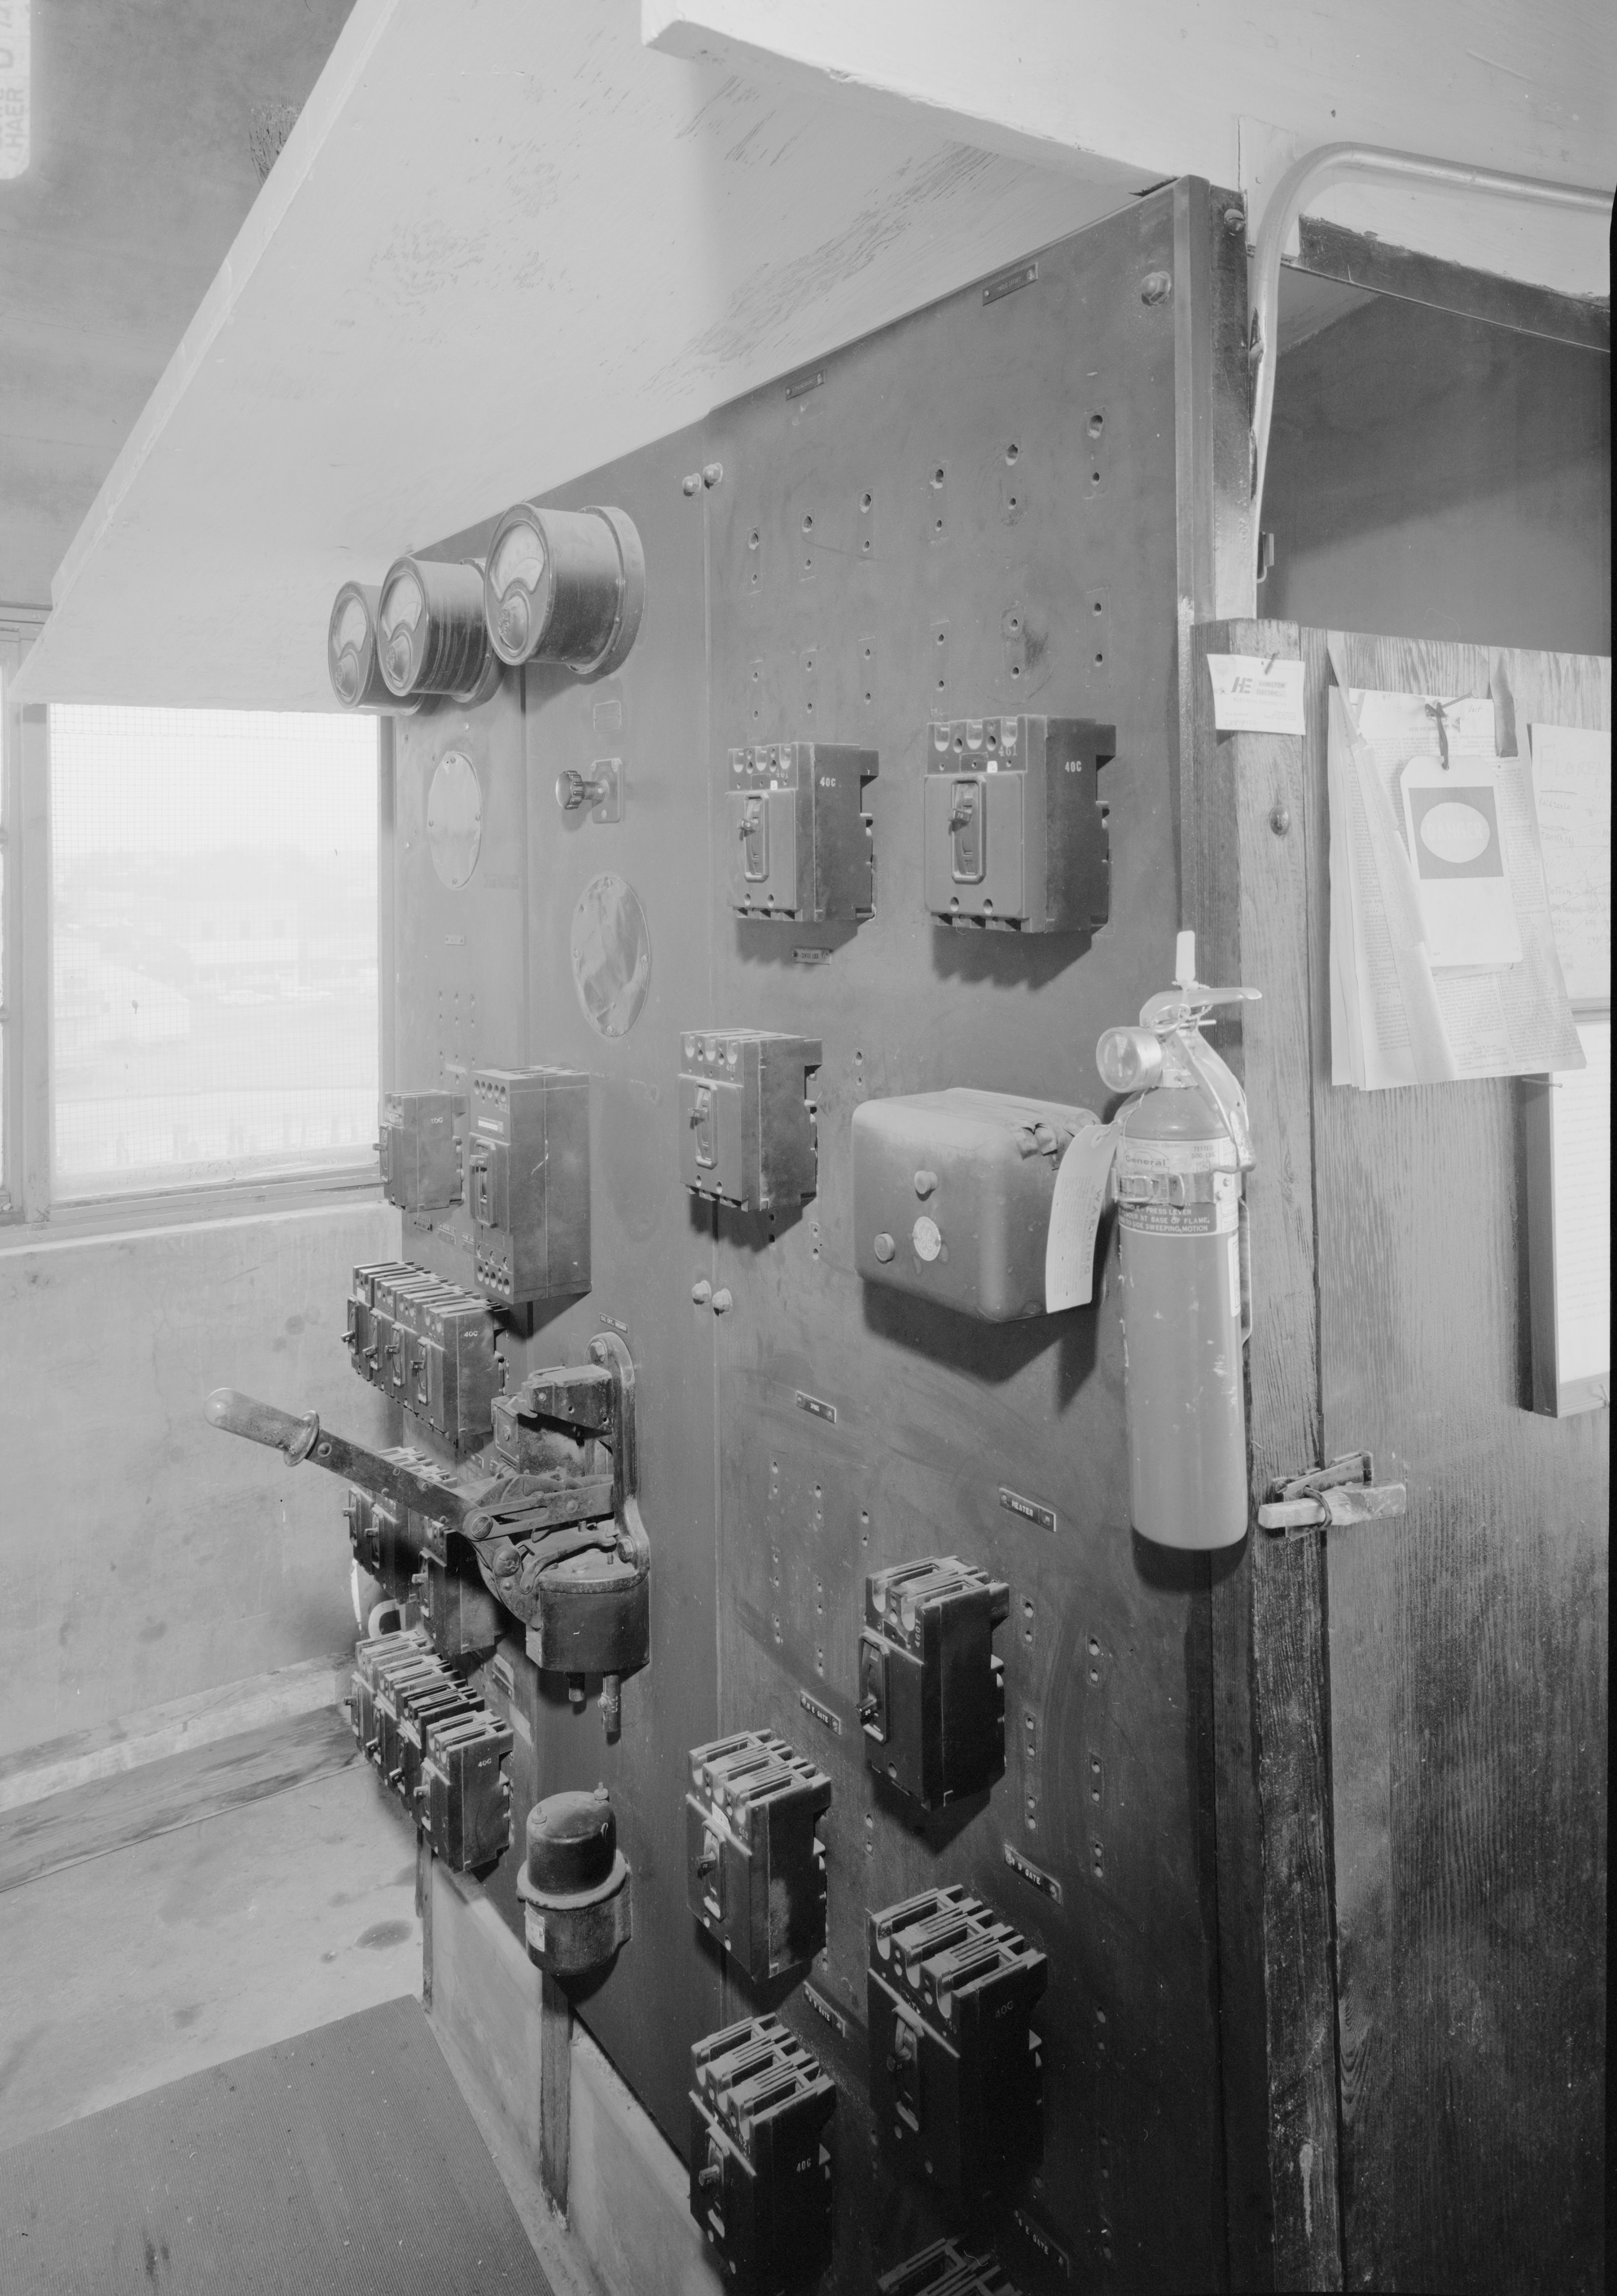
Photo Credit: Historic American Engineering Record
Original bridge electrical panel.
![]()

Photo Credit: Historic American Engineering Record
Mechanical room under bridge deck.
![]()

Photo Credit: Historic American Engineering Record
View of trunnion.
![]()
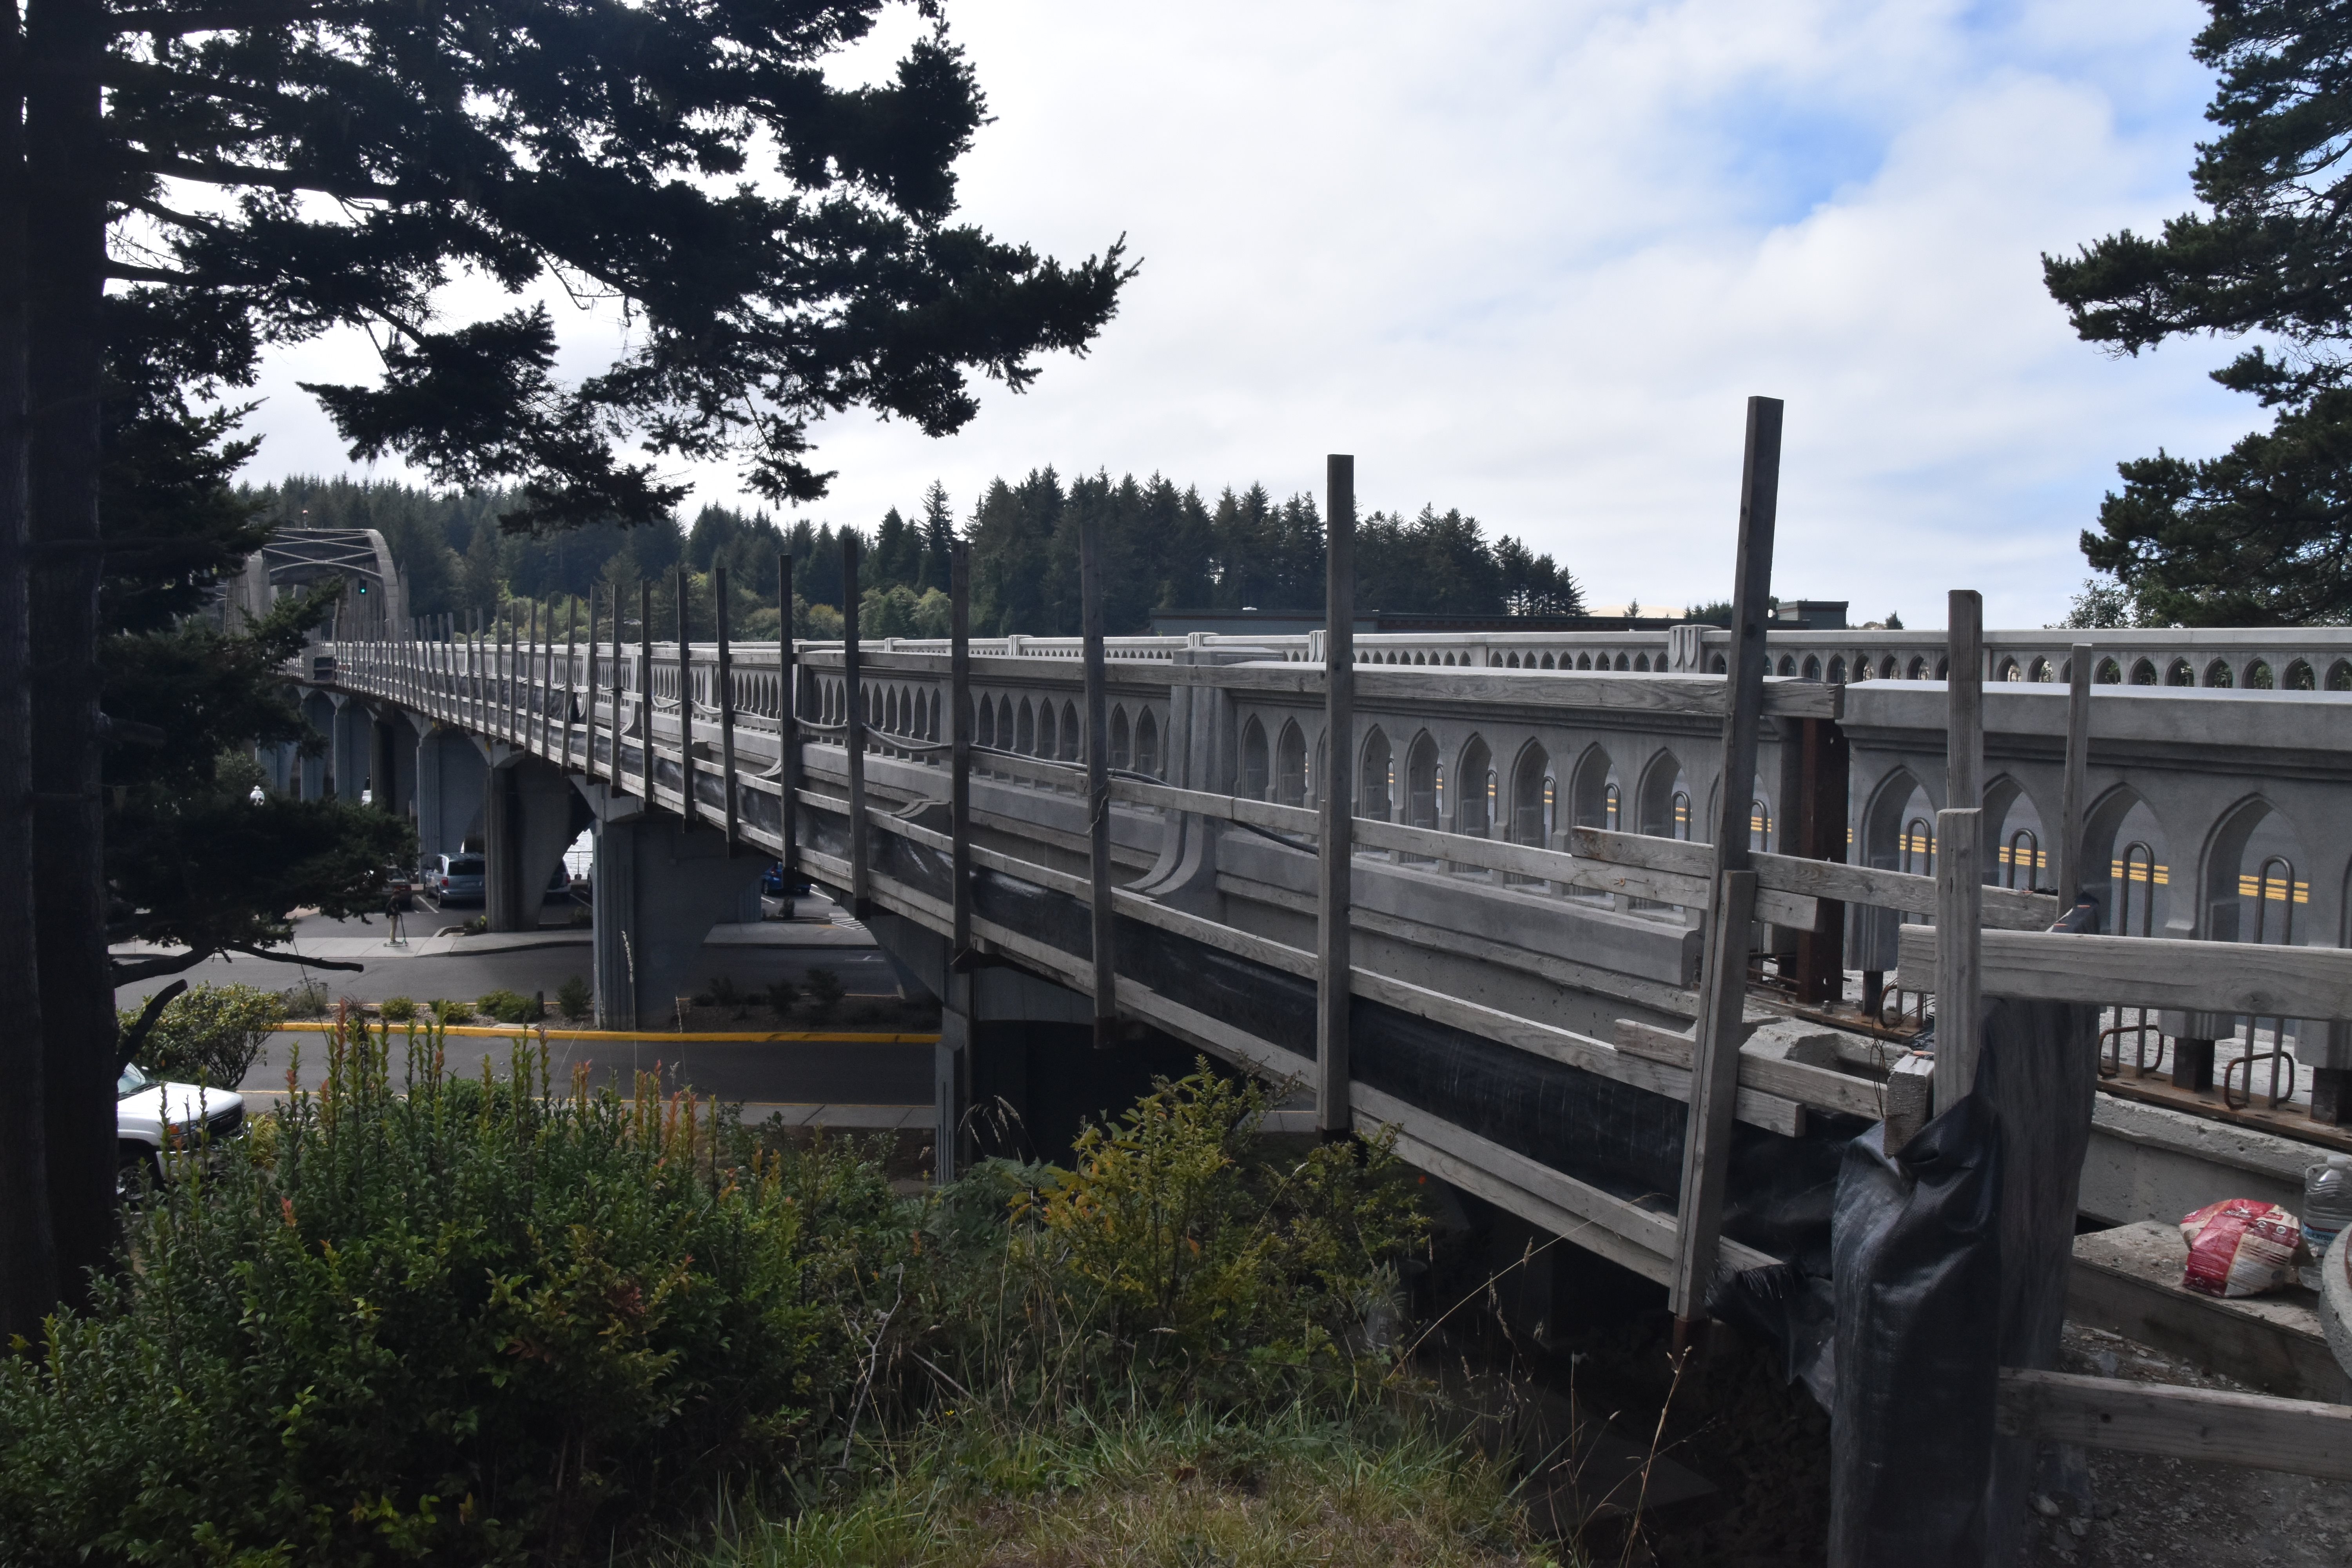
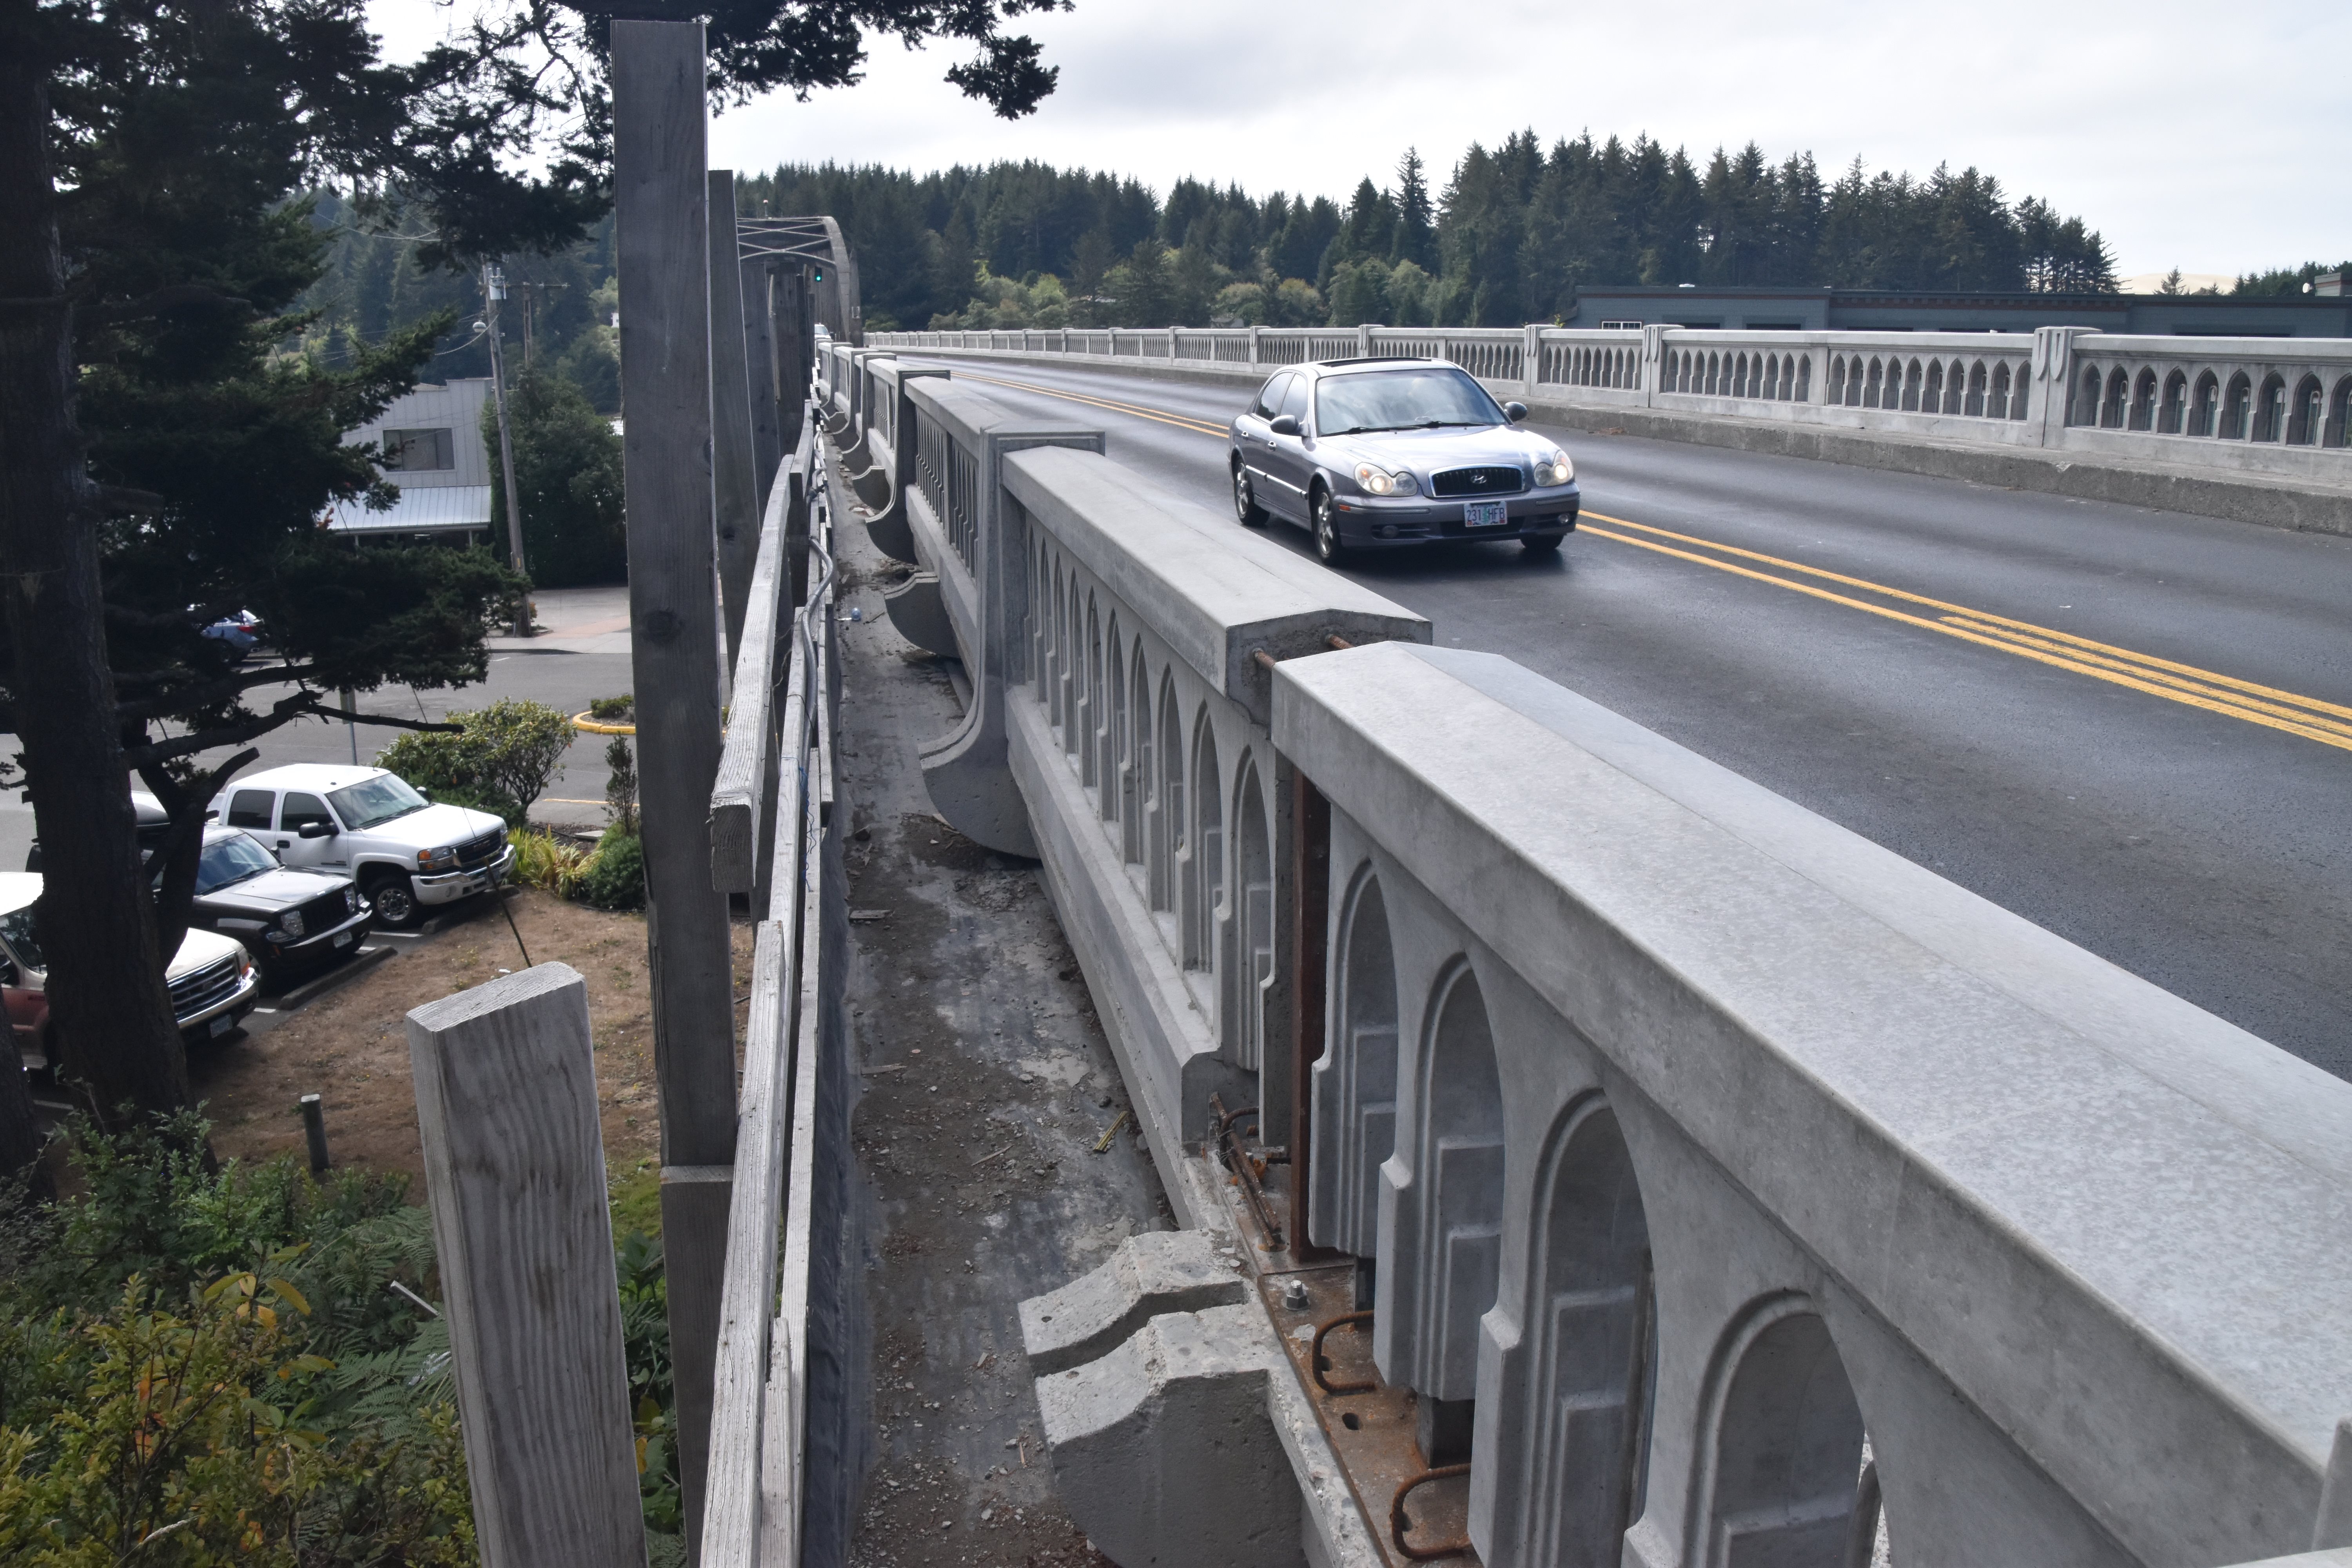
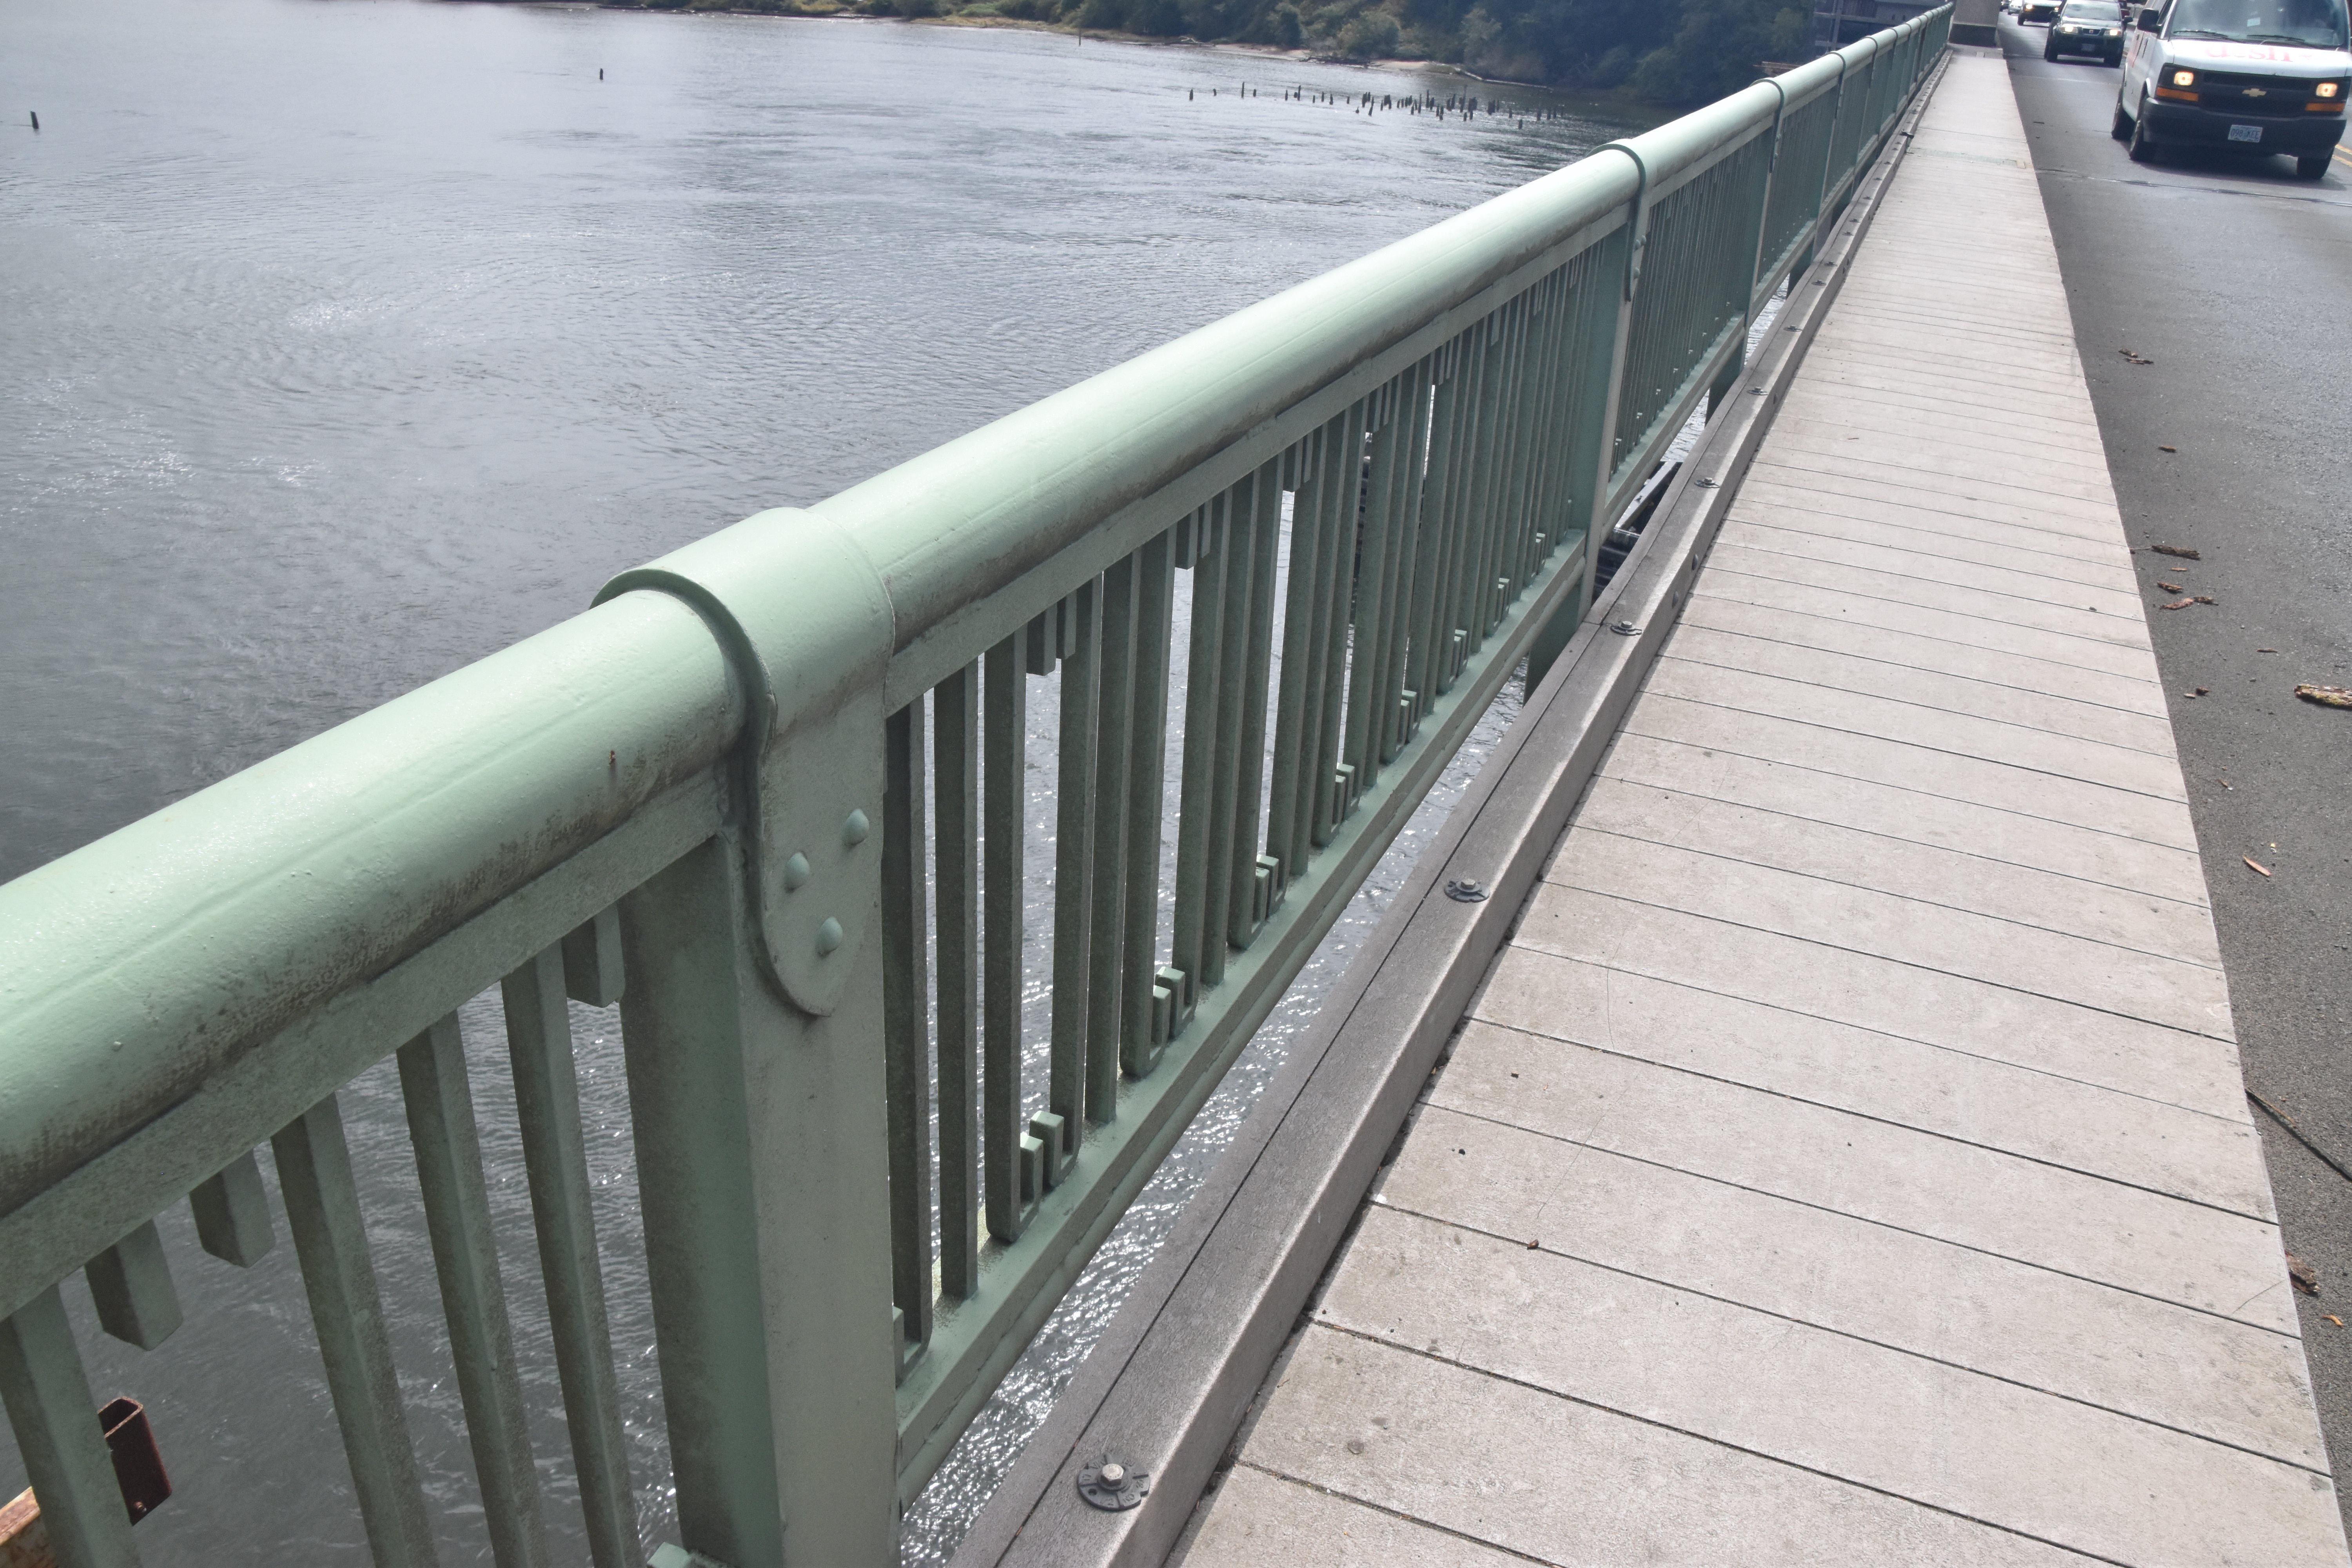
Replacement in progress of original railing with "stealth railing" which is a term used by ODOT to indicate they are replicating the appearance, but with added internal reinforcing to offer better crash protection. Also, steel bars are added in between balusters to meet the "sphere test" of modern railing code.
![]()
New stealth railing completed.
![]()
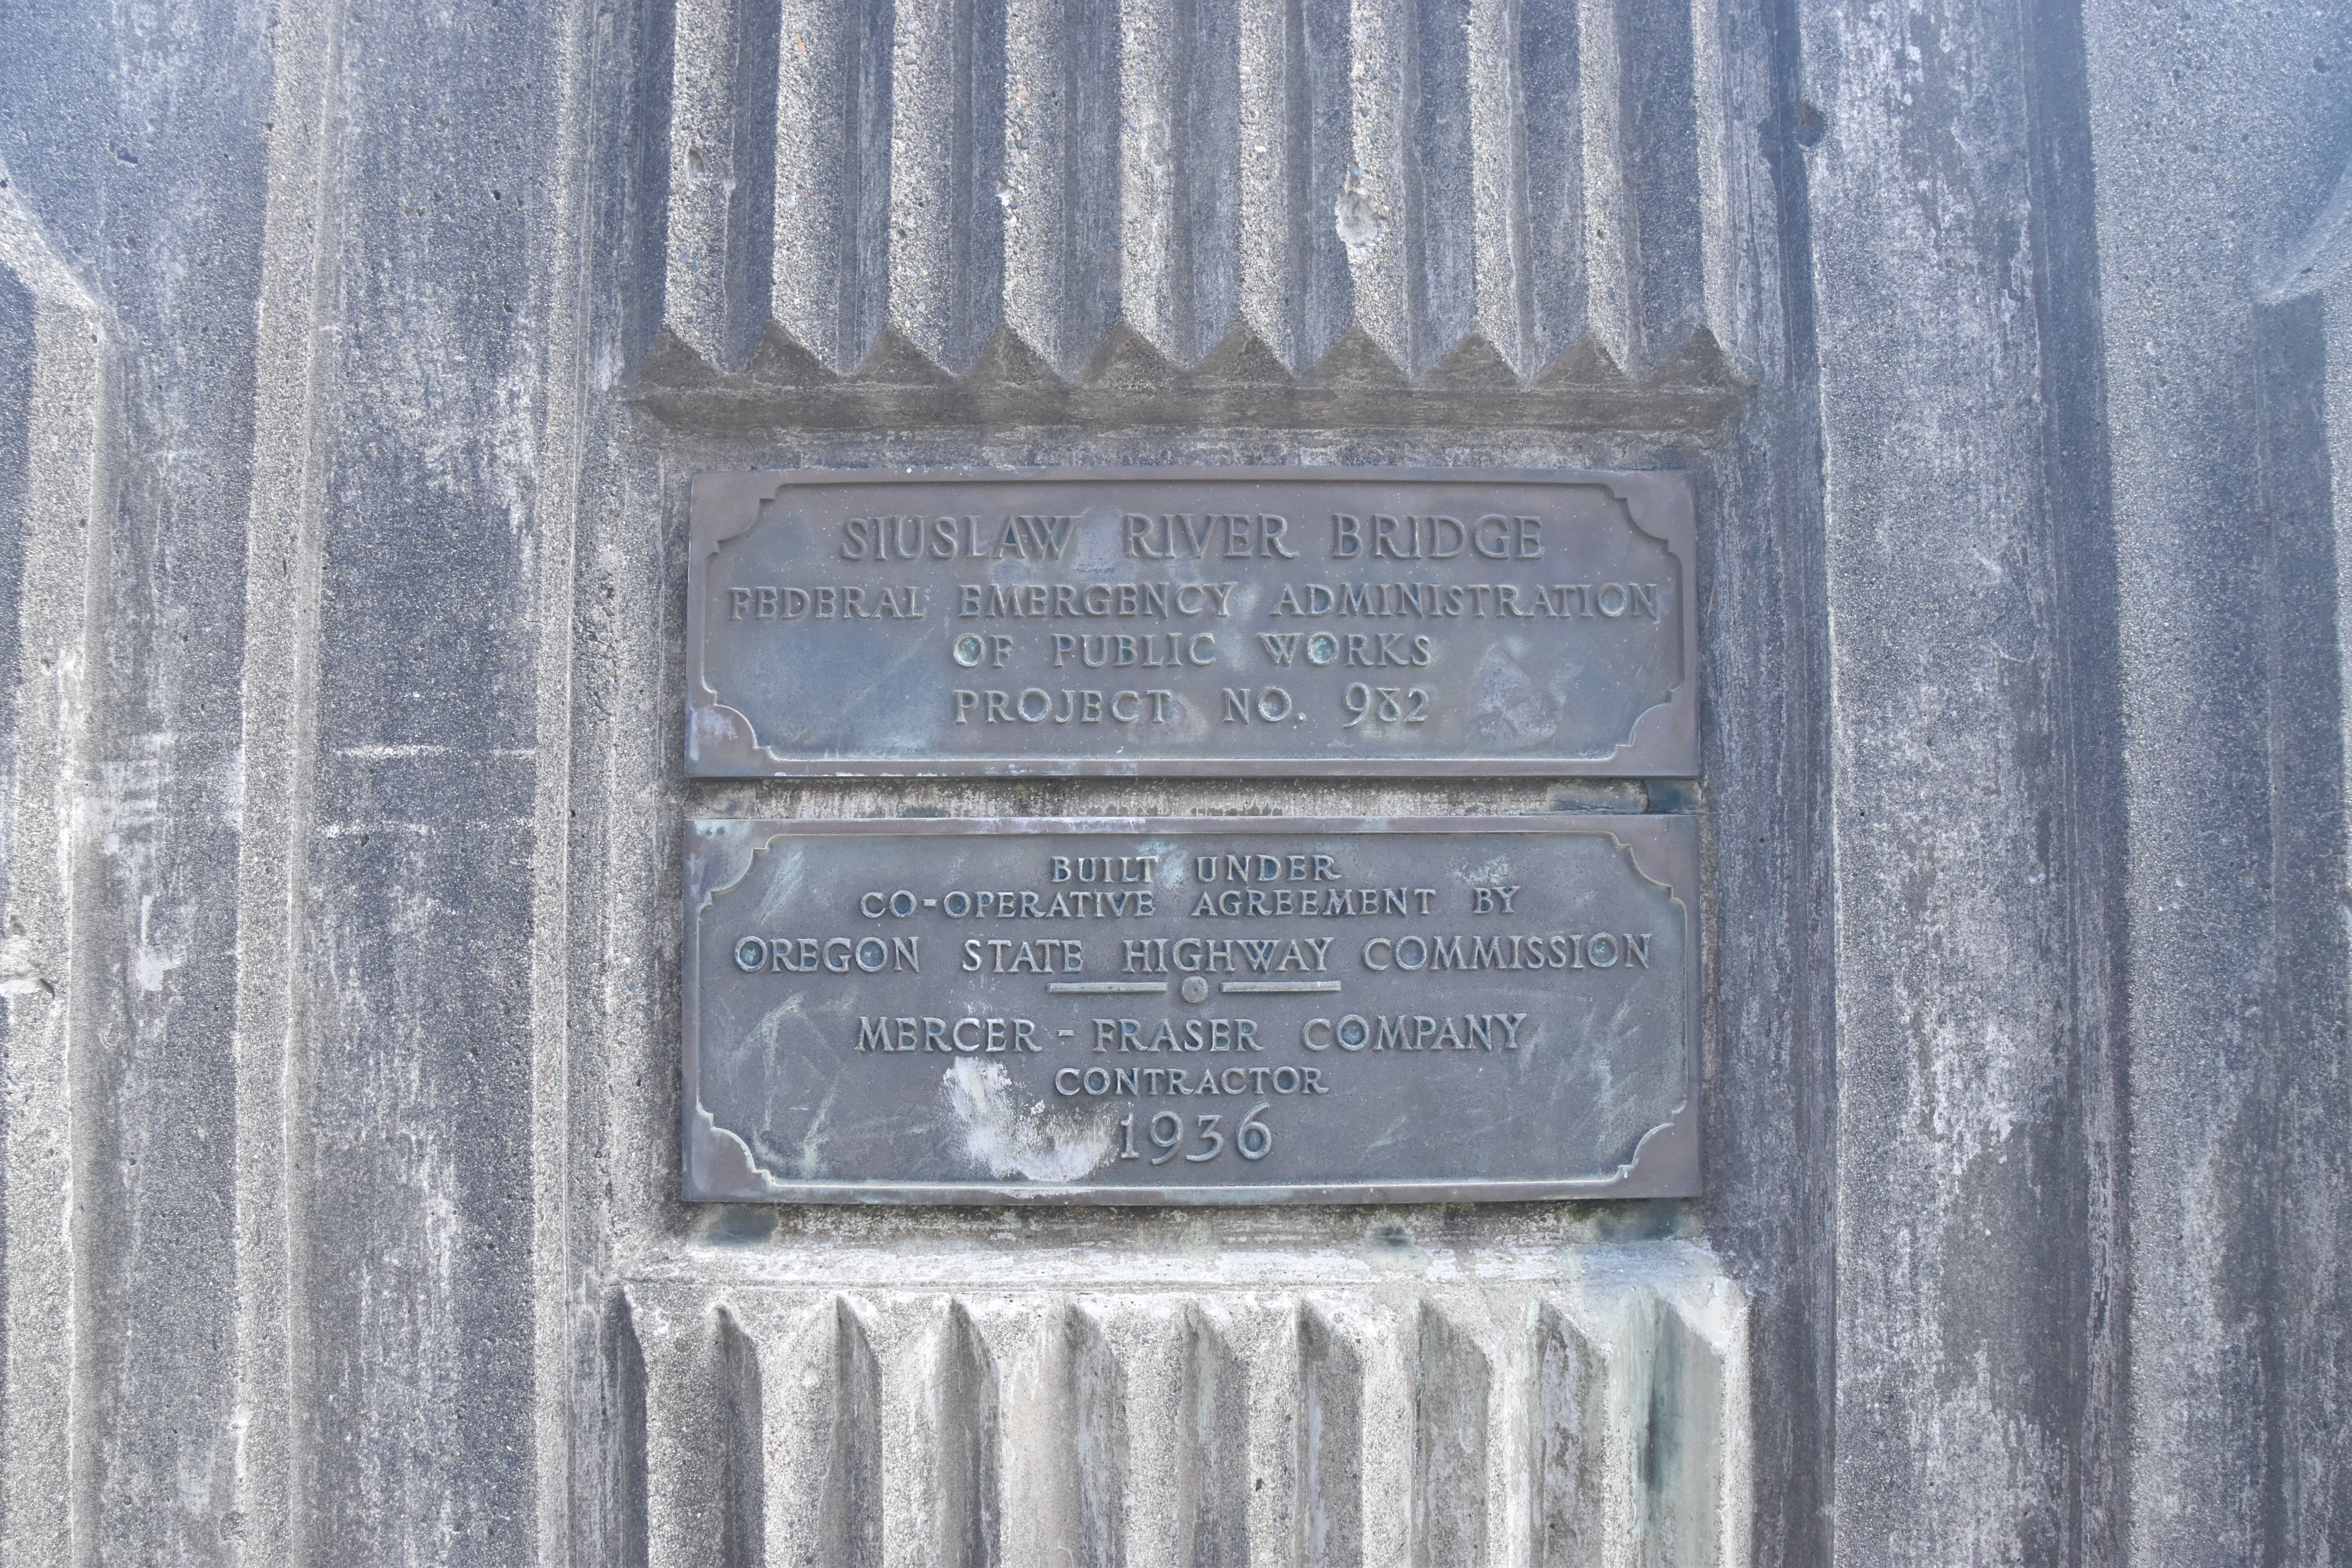

Plaques.
![]()


DOT sign.
![]()

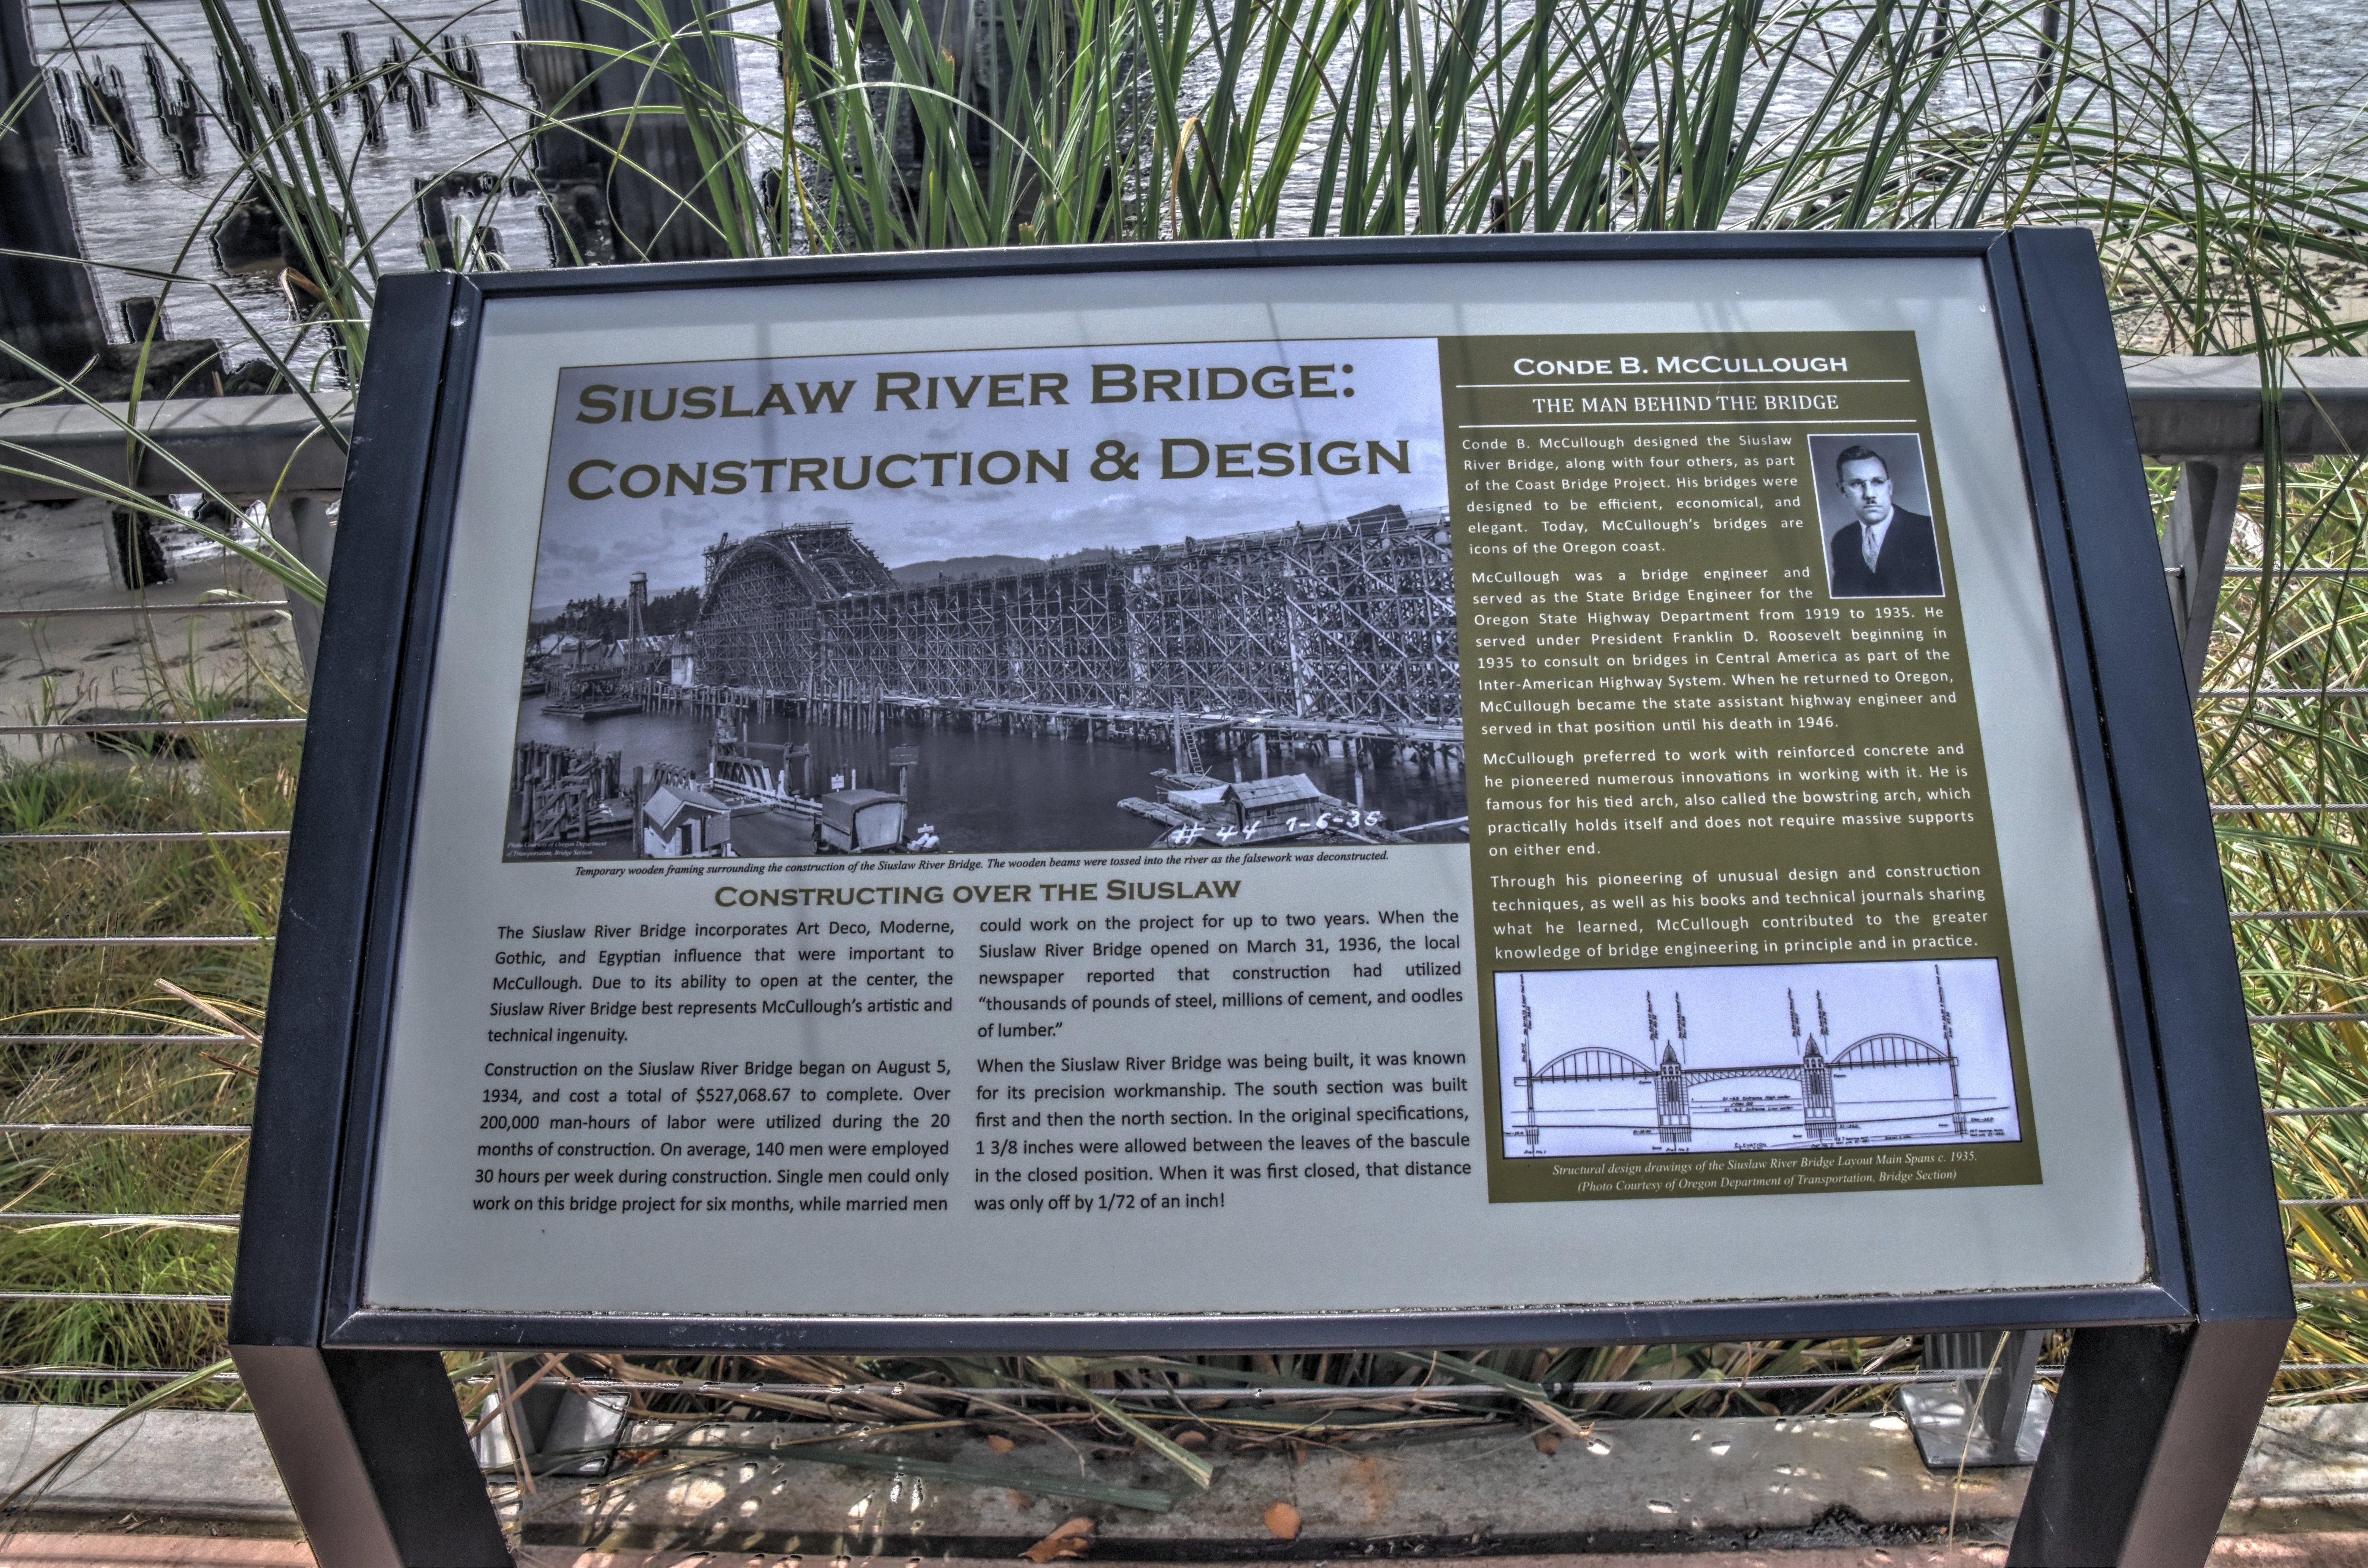


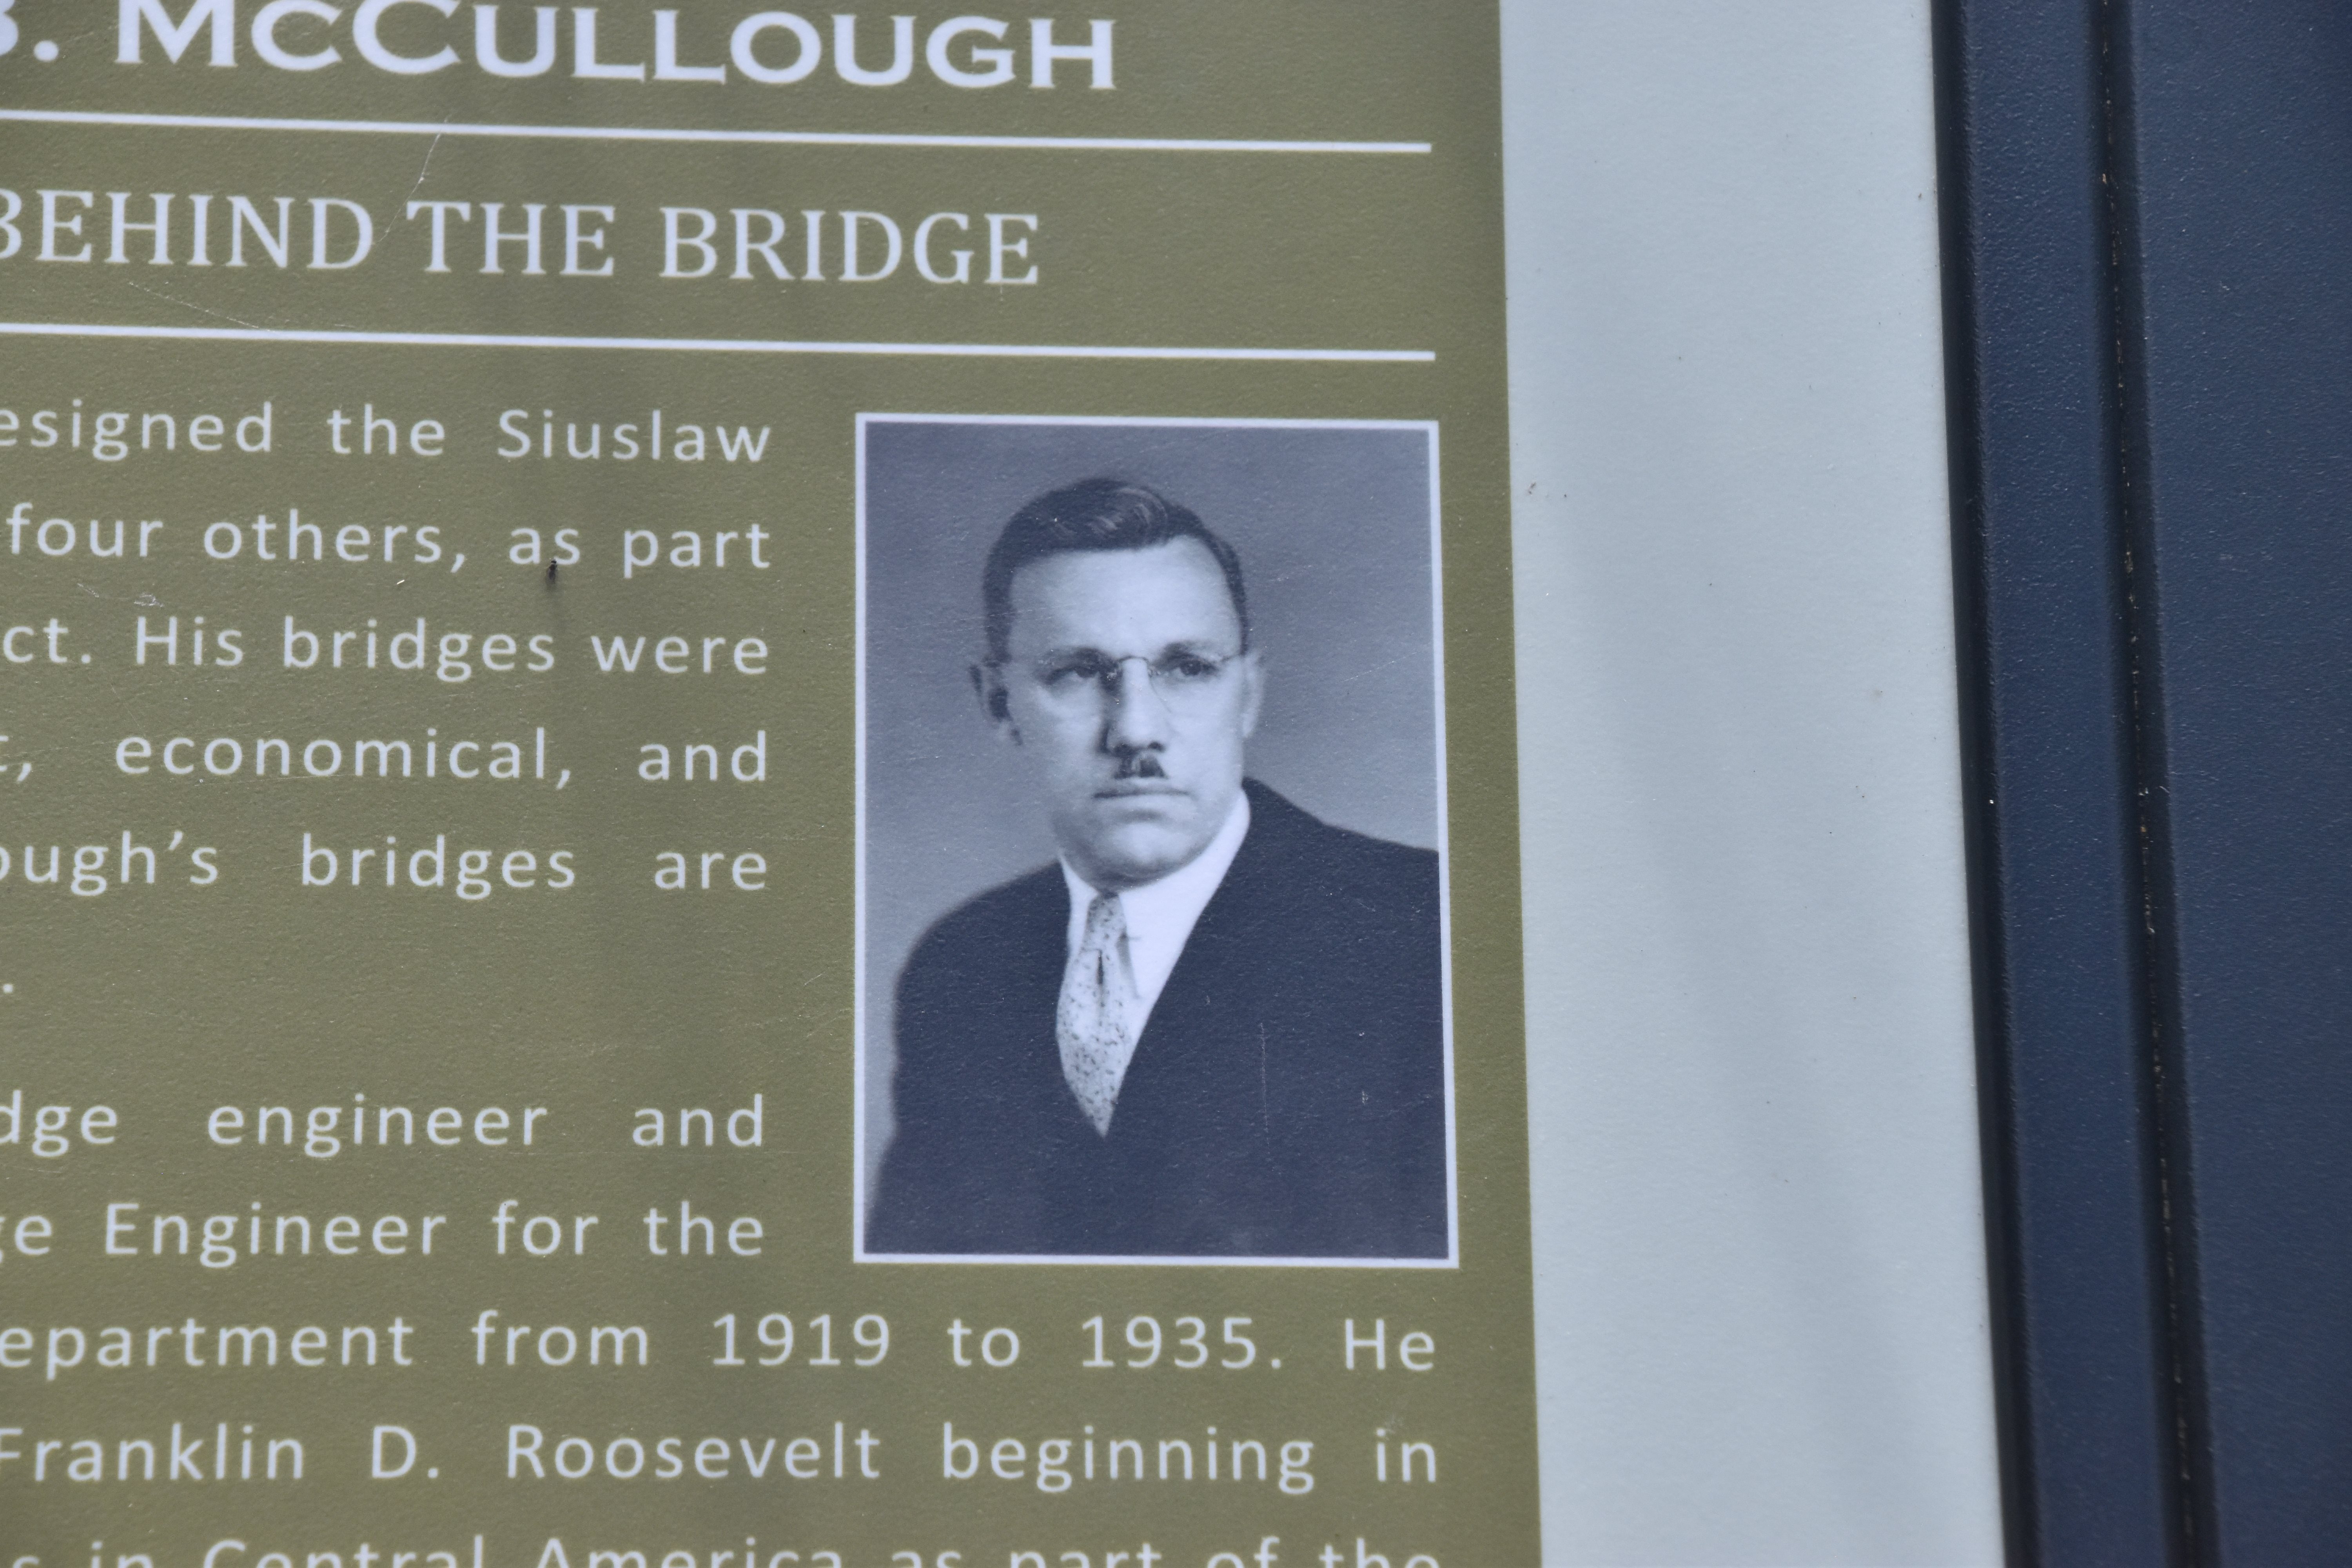
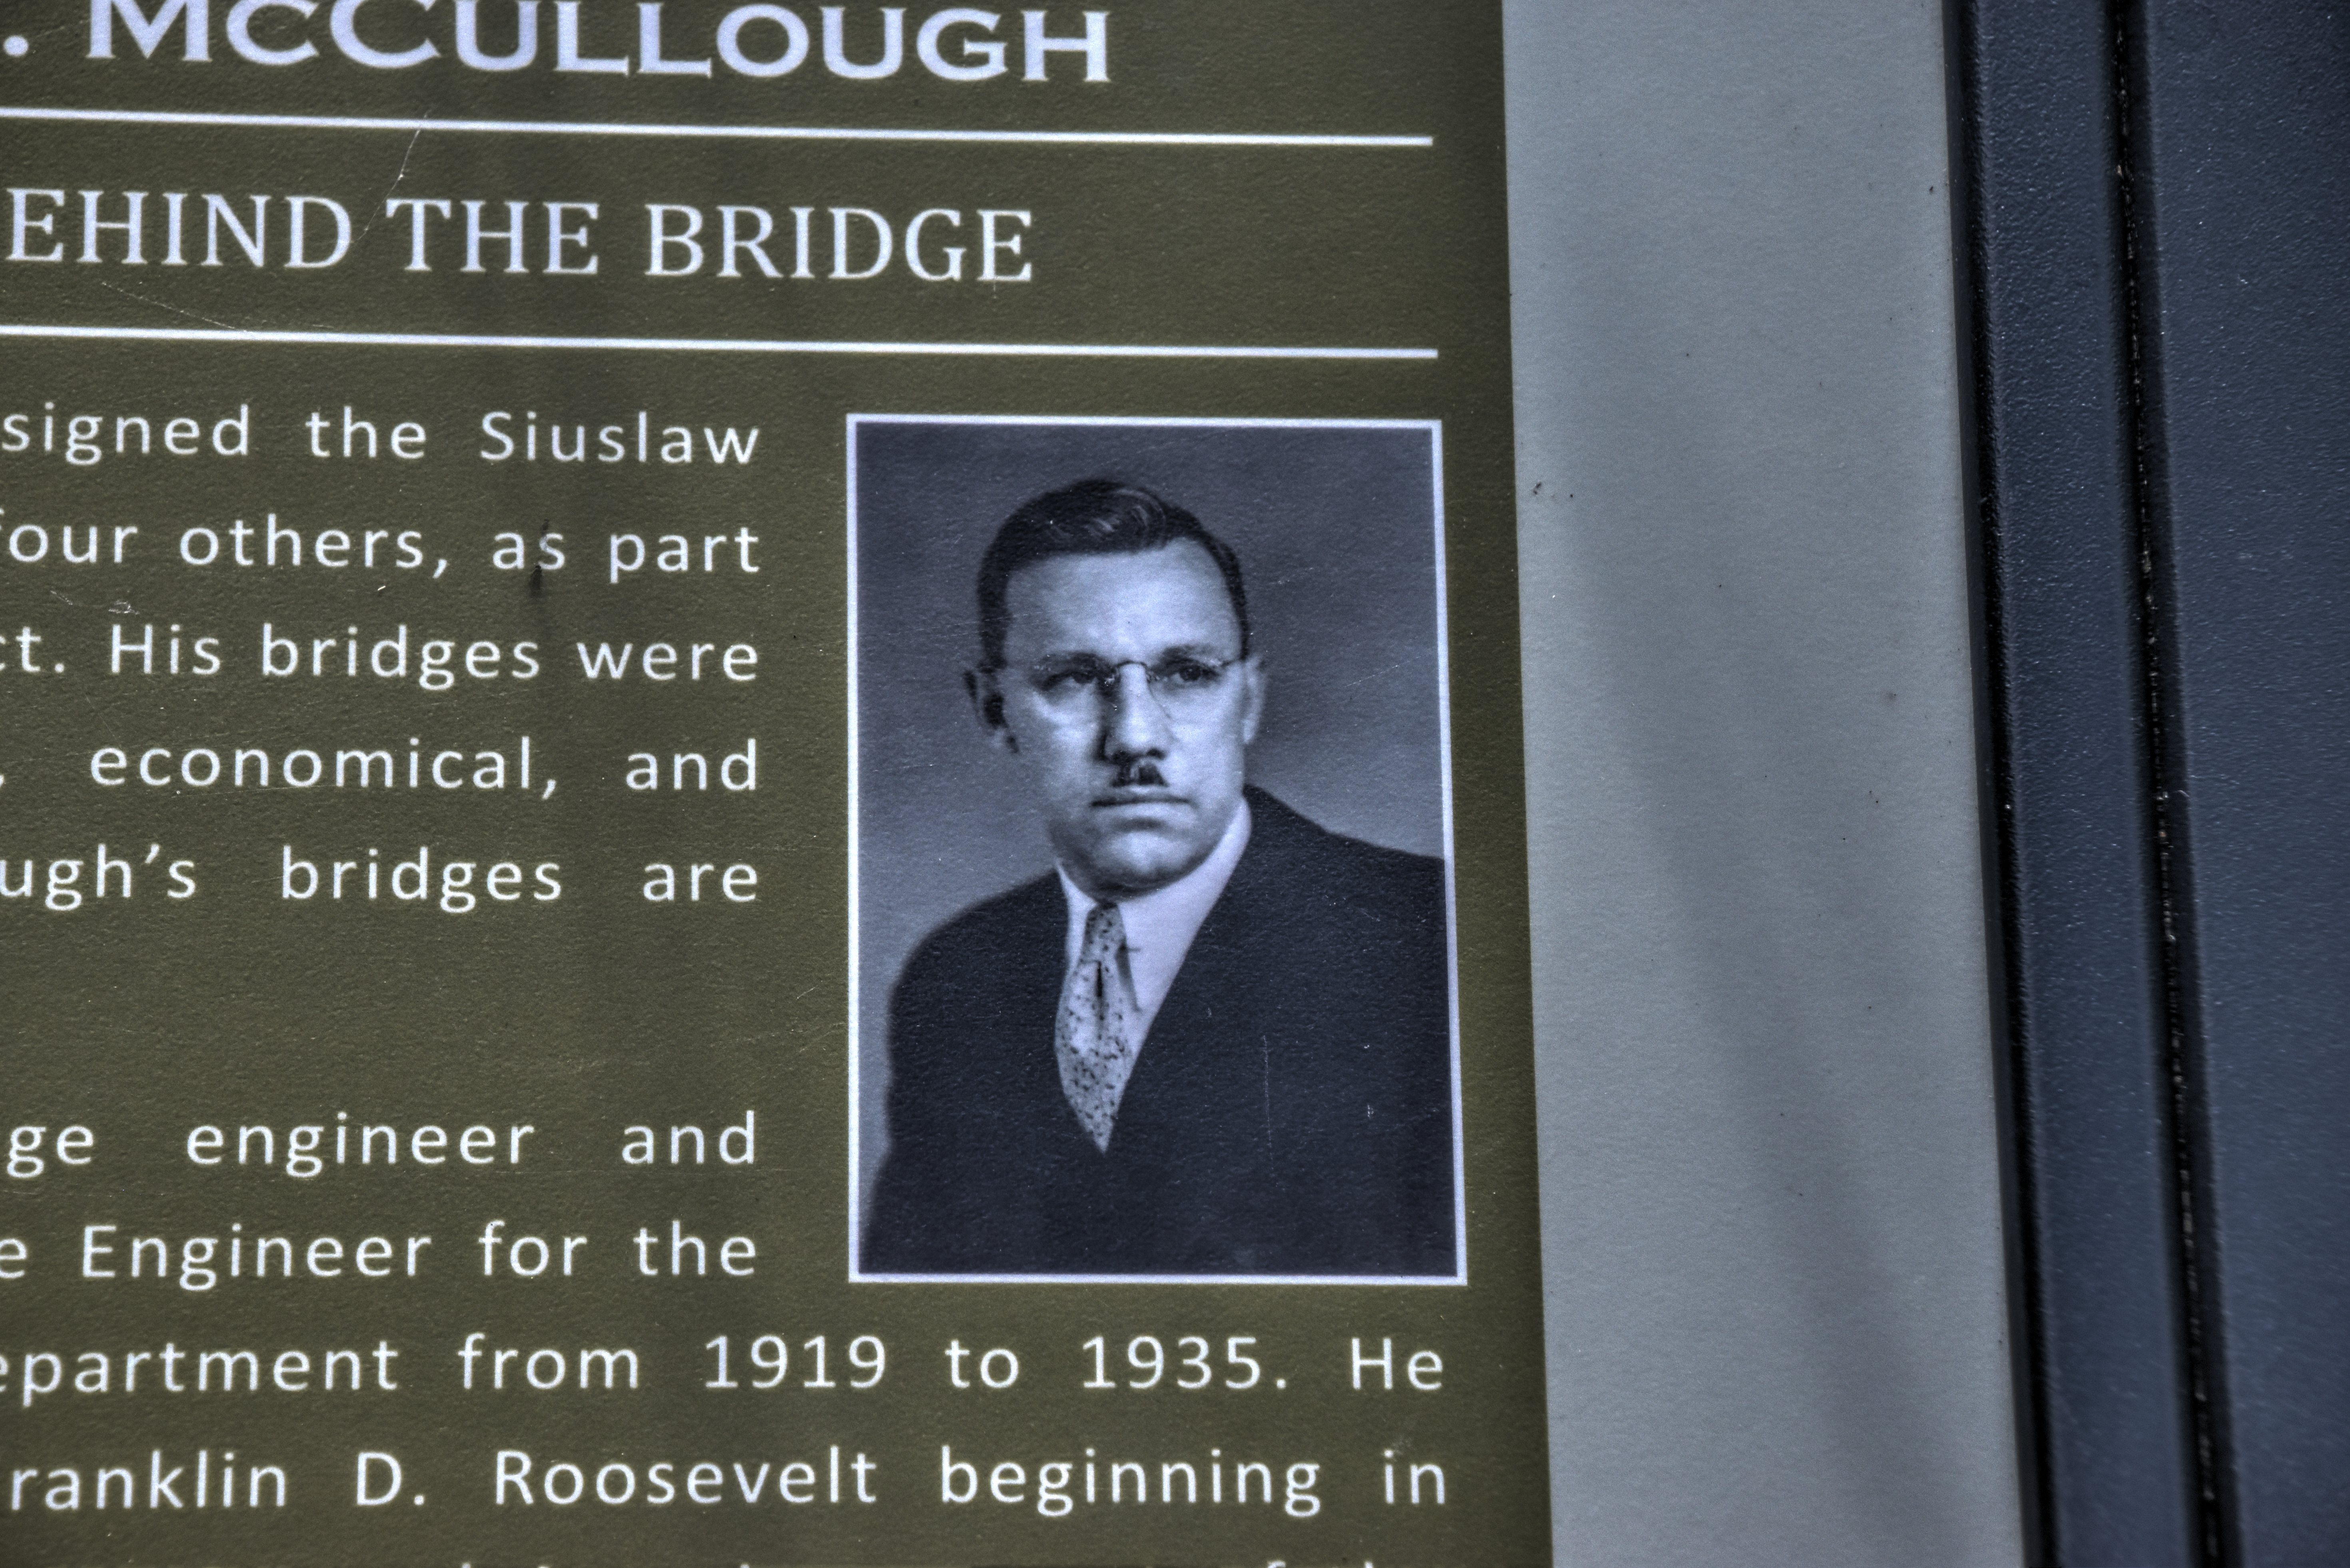
Interpretive signage: Bridge construction and design.
![]()


Interpretive signage: Bridge overview and 2011 repairs.
![]()
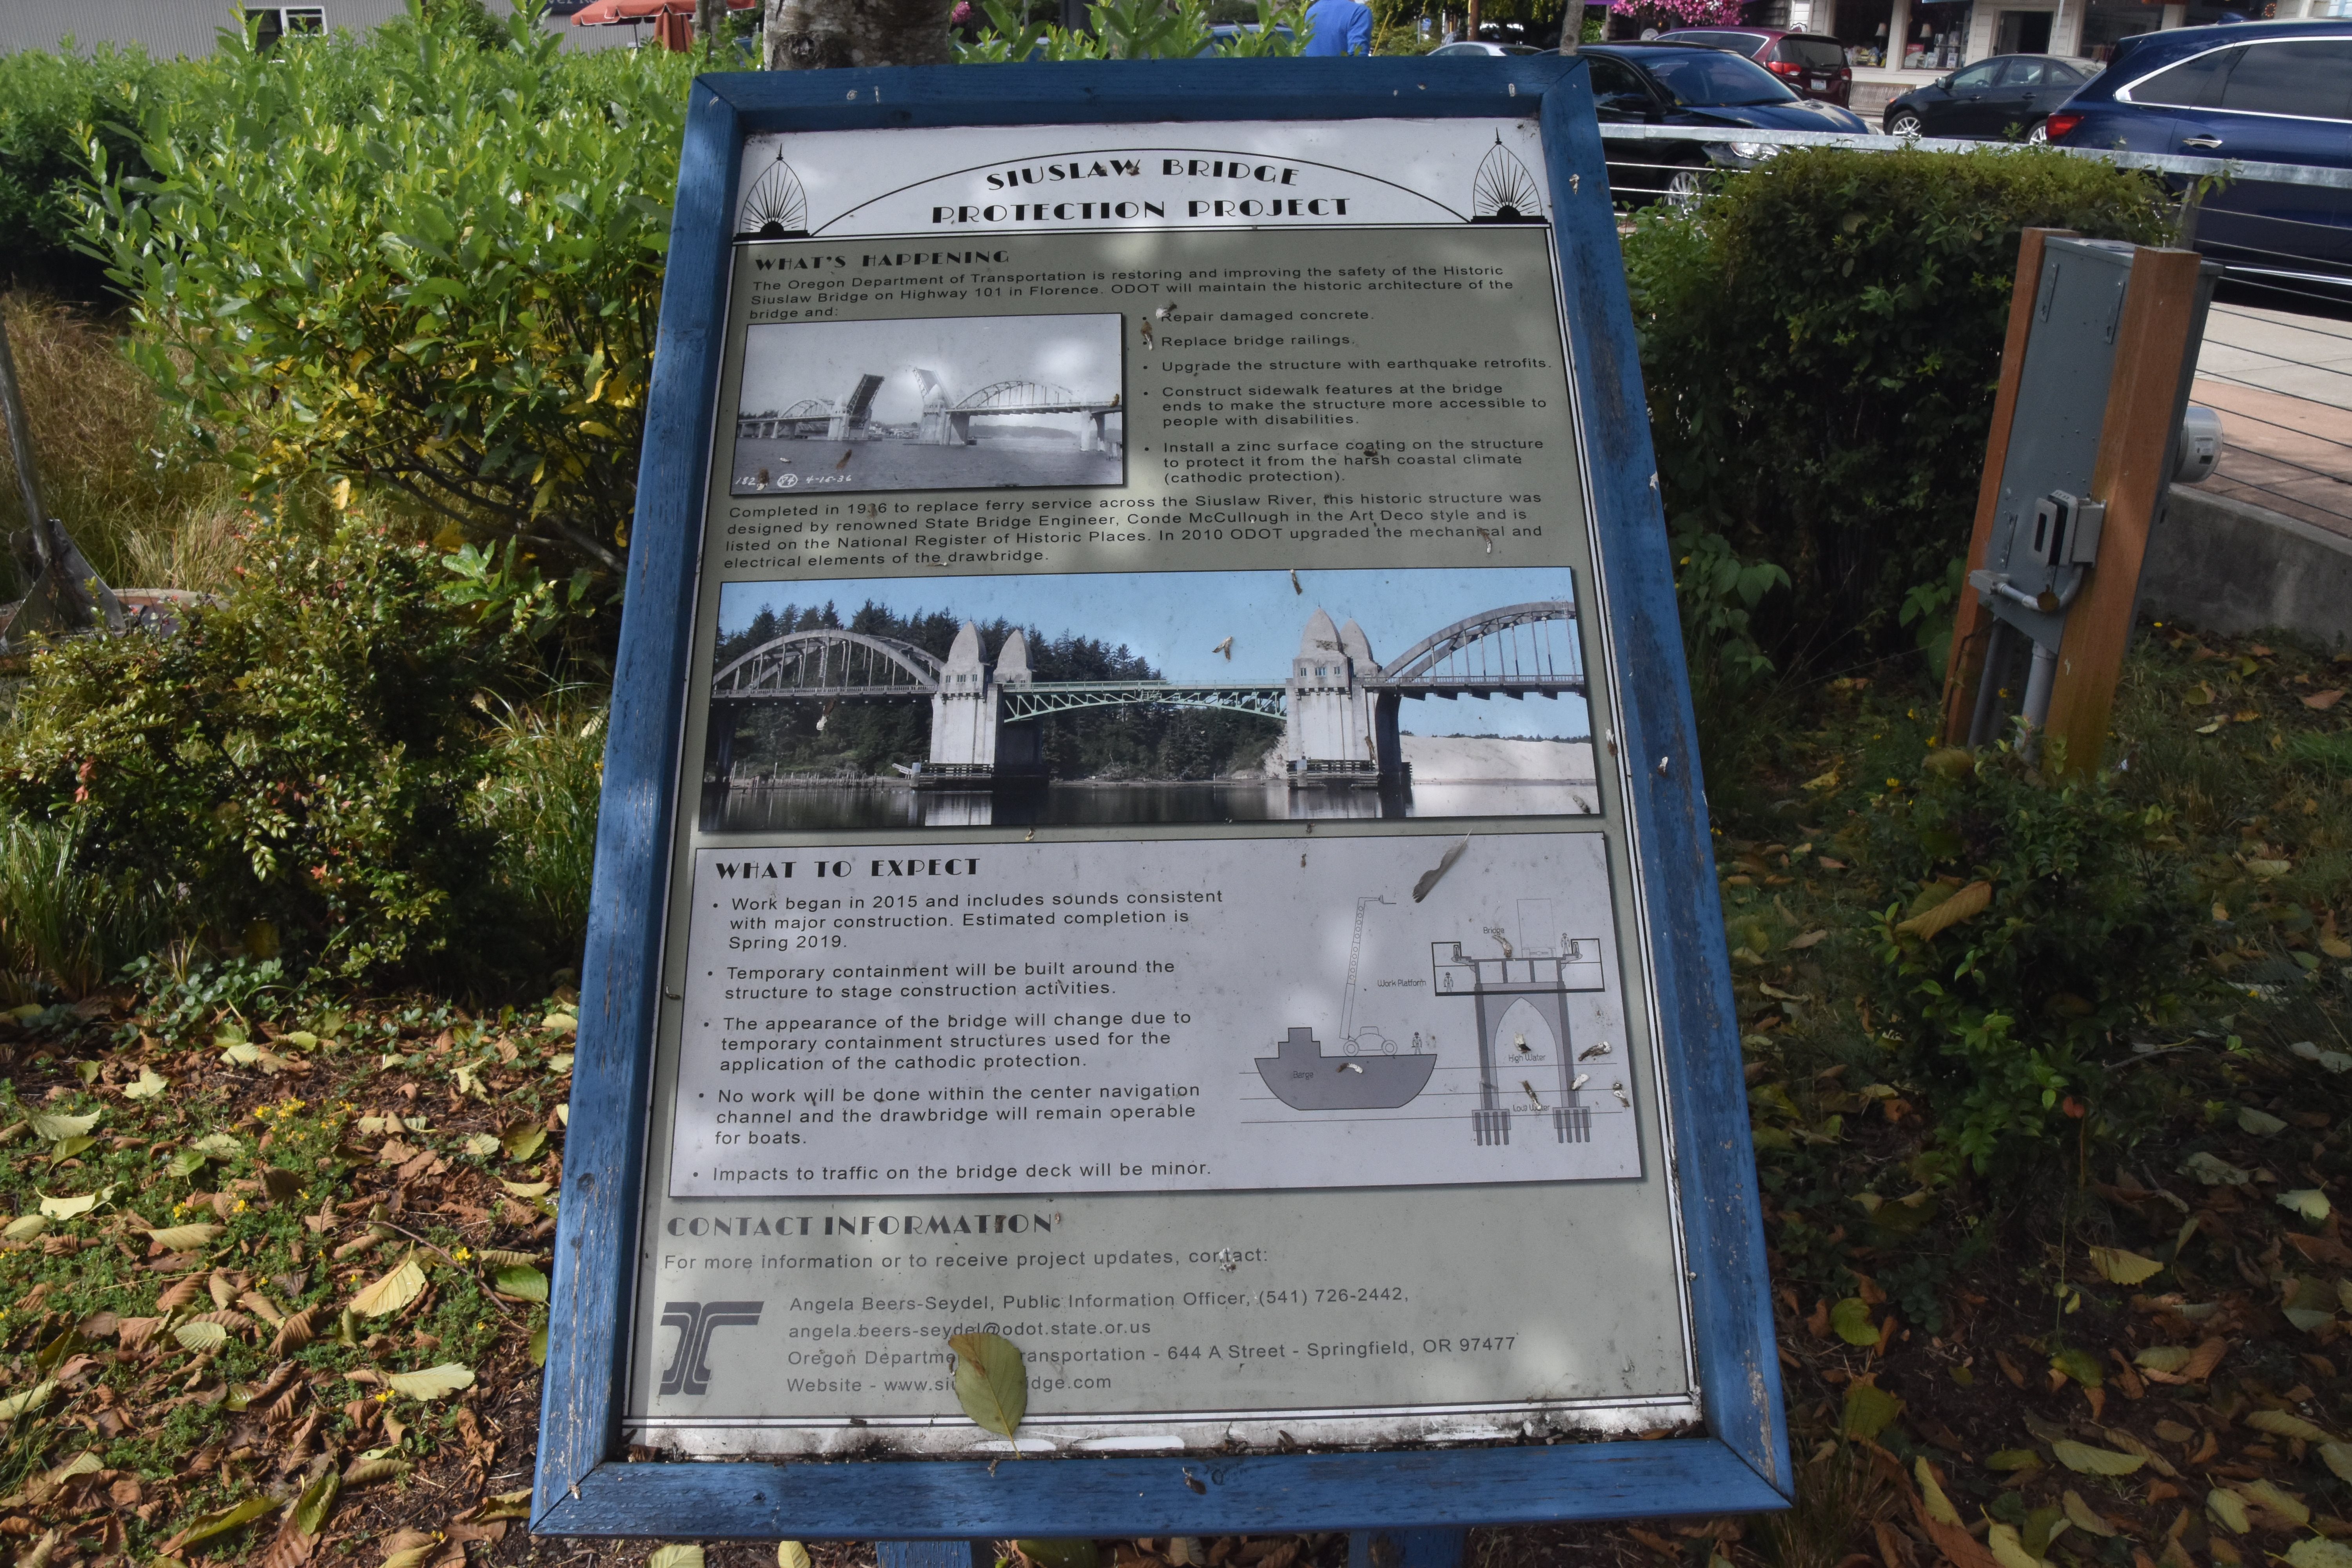


Interpretive signage: Bridge rehabilitation.
![]()

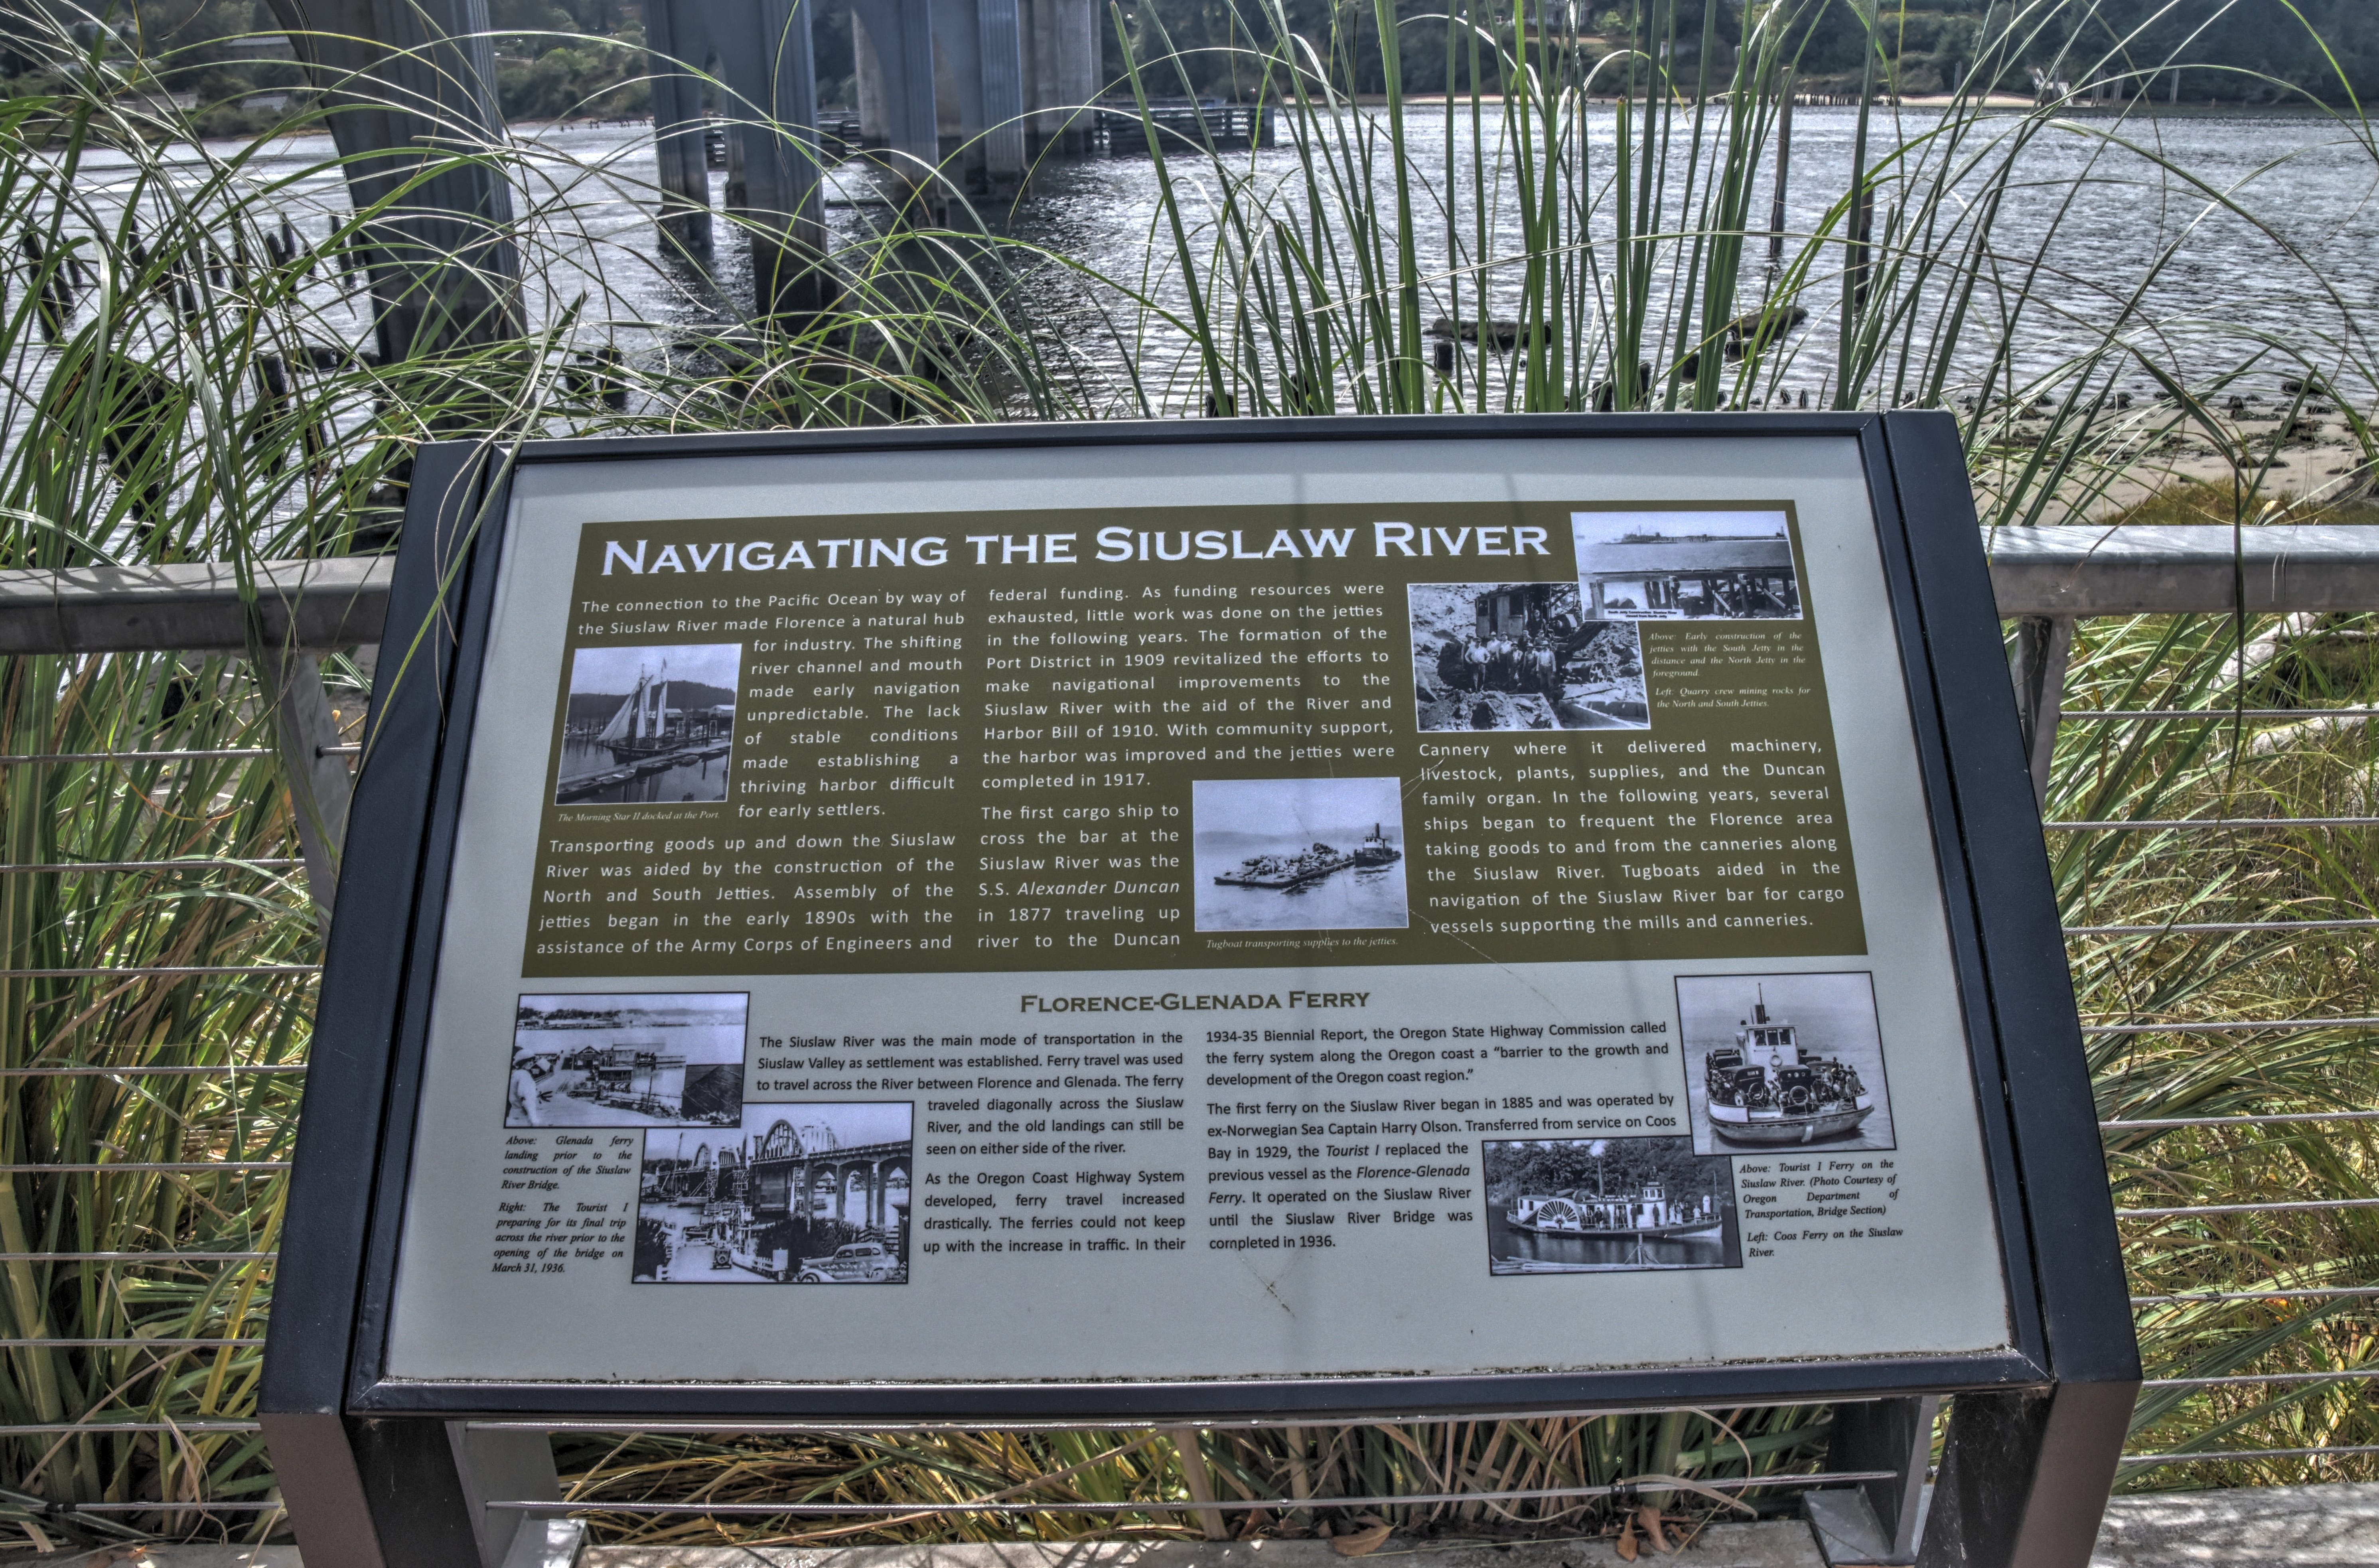
Interpretive signage: Navigating the river.
![]()


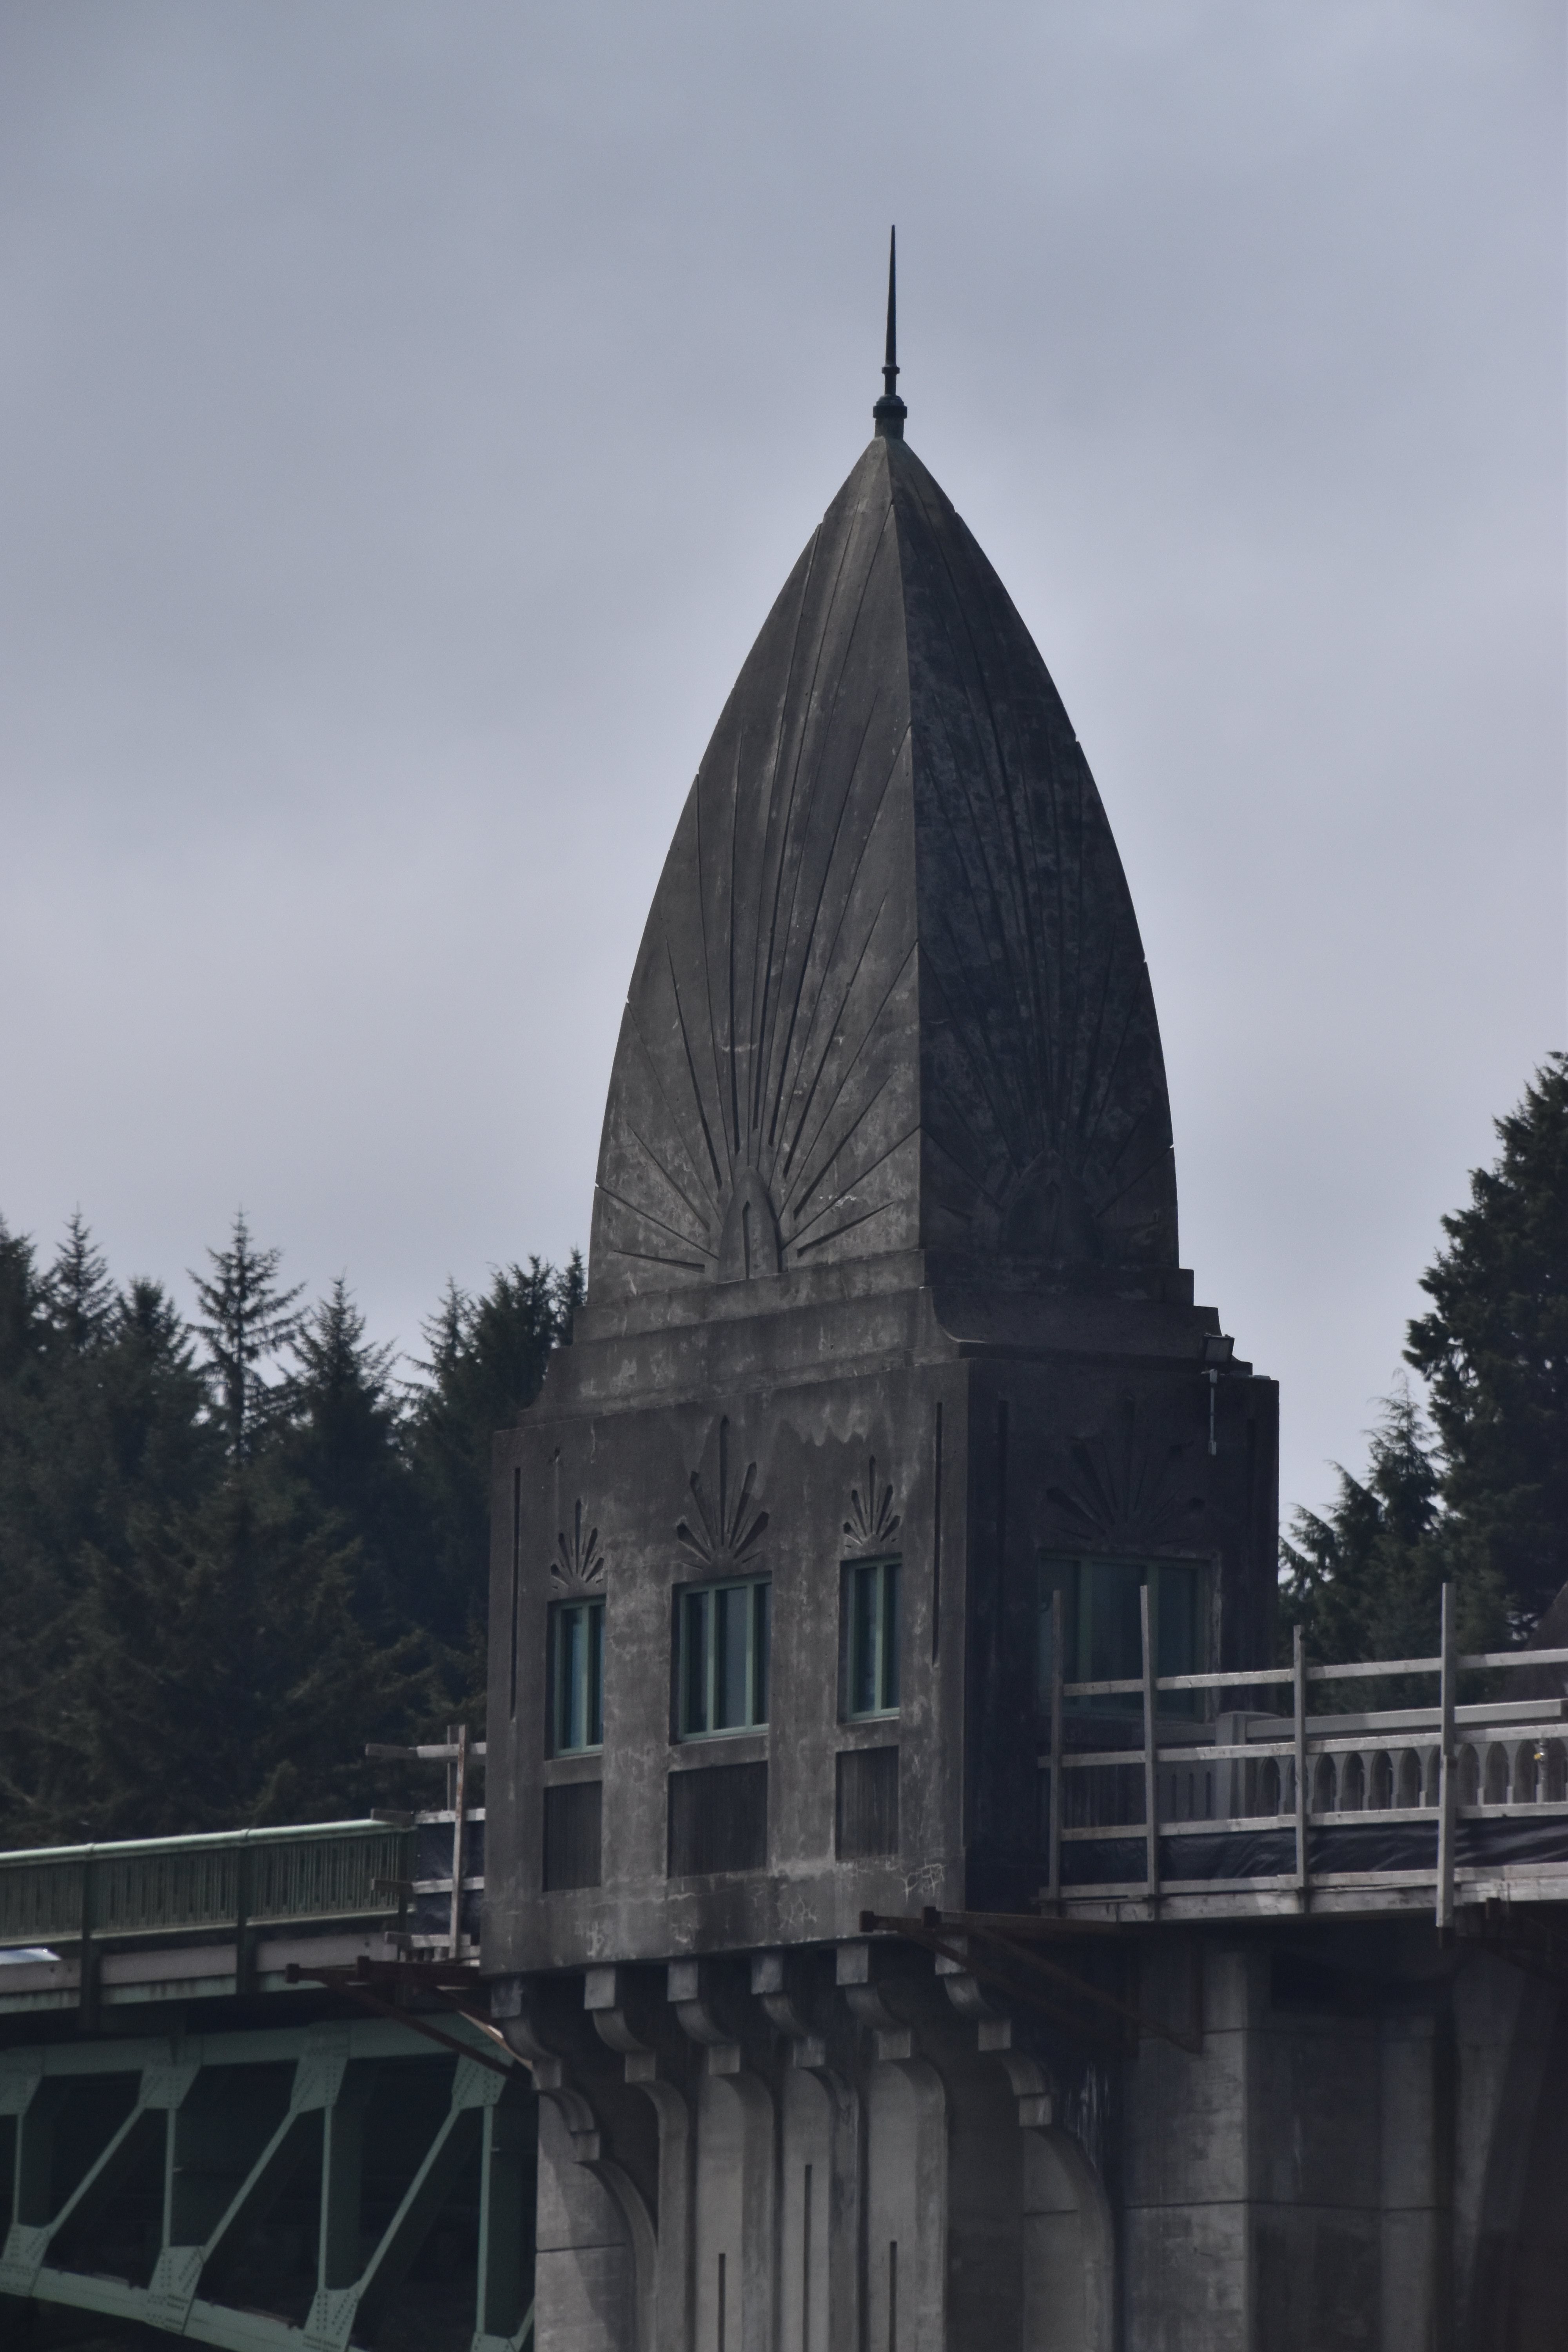


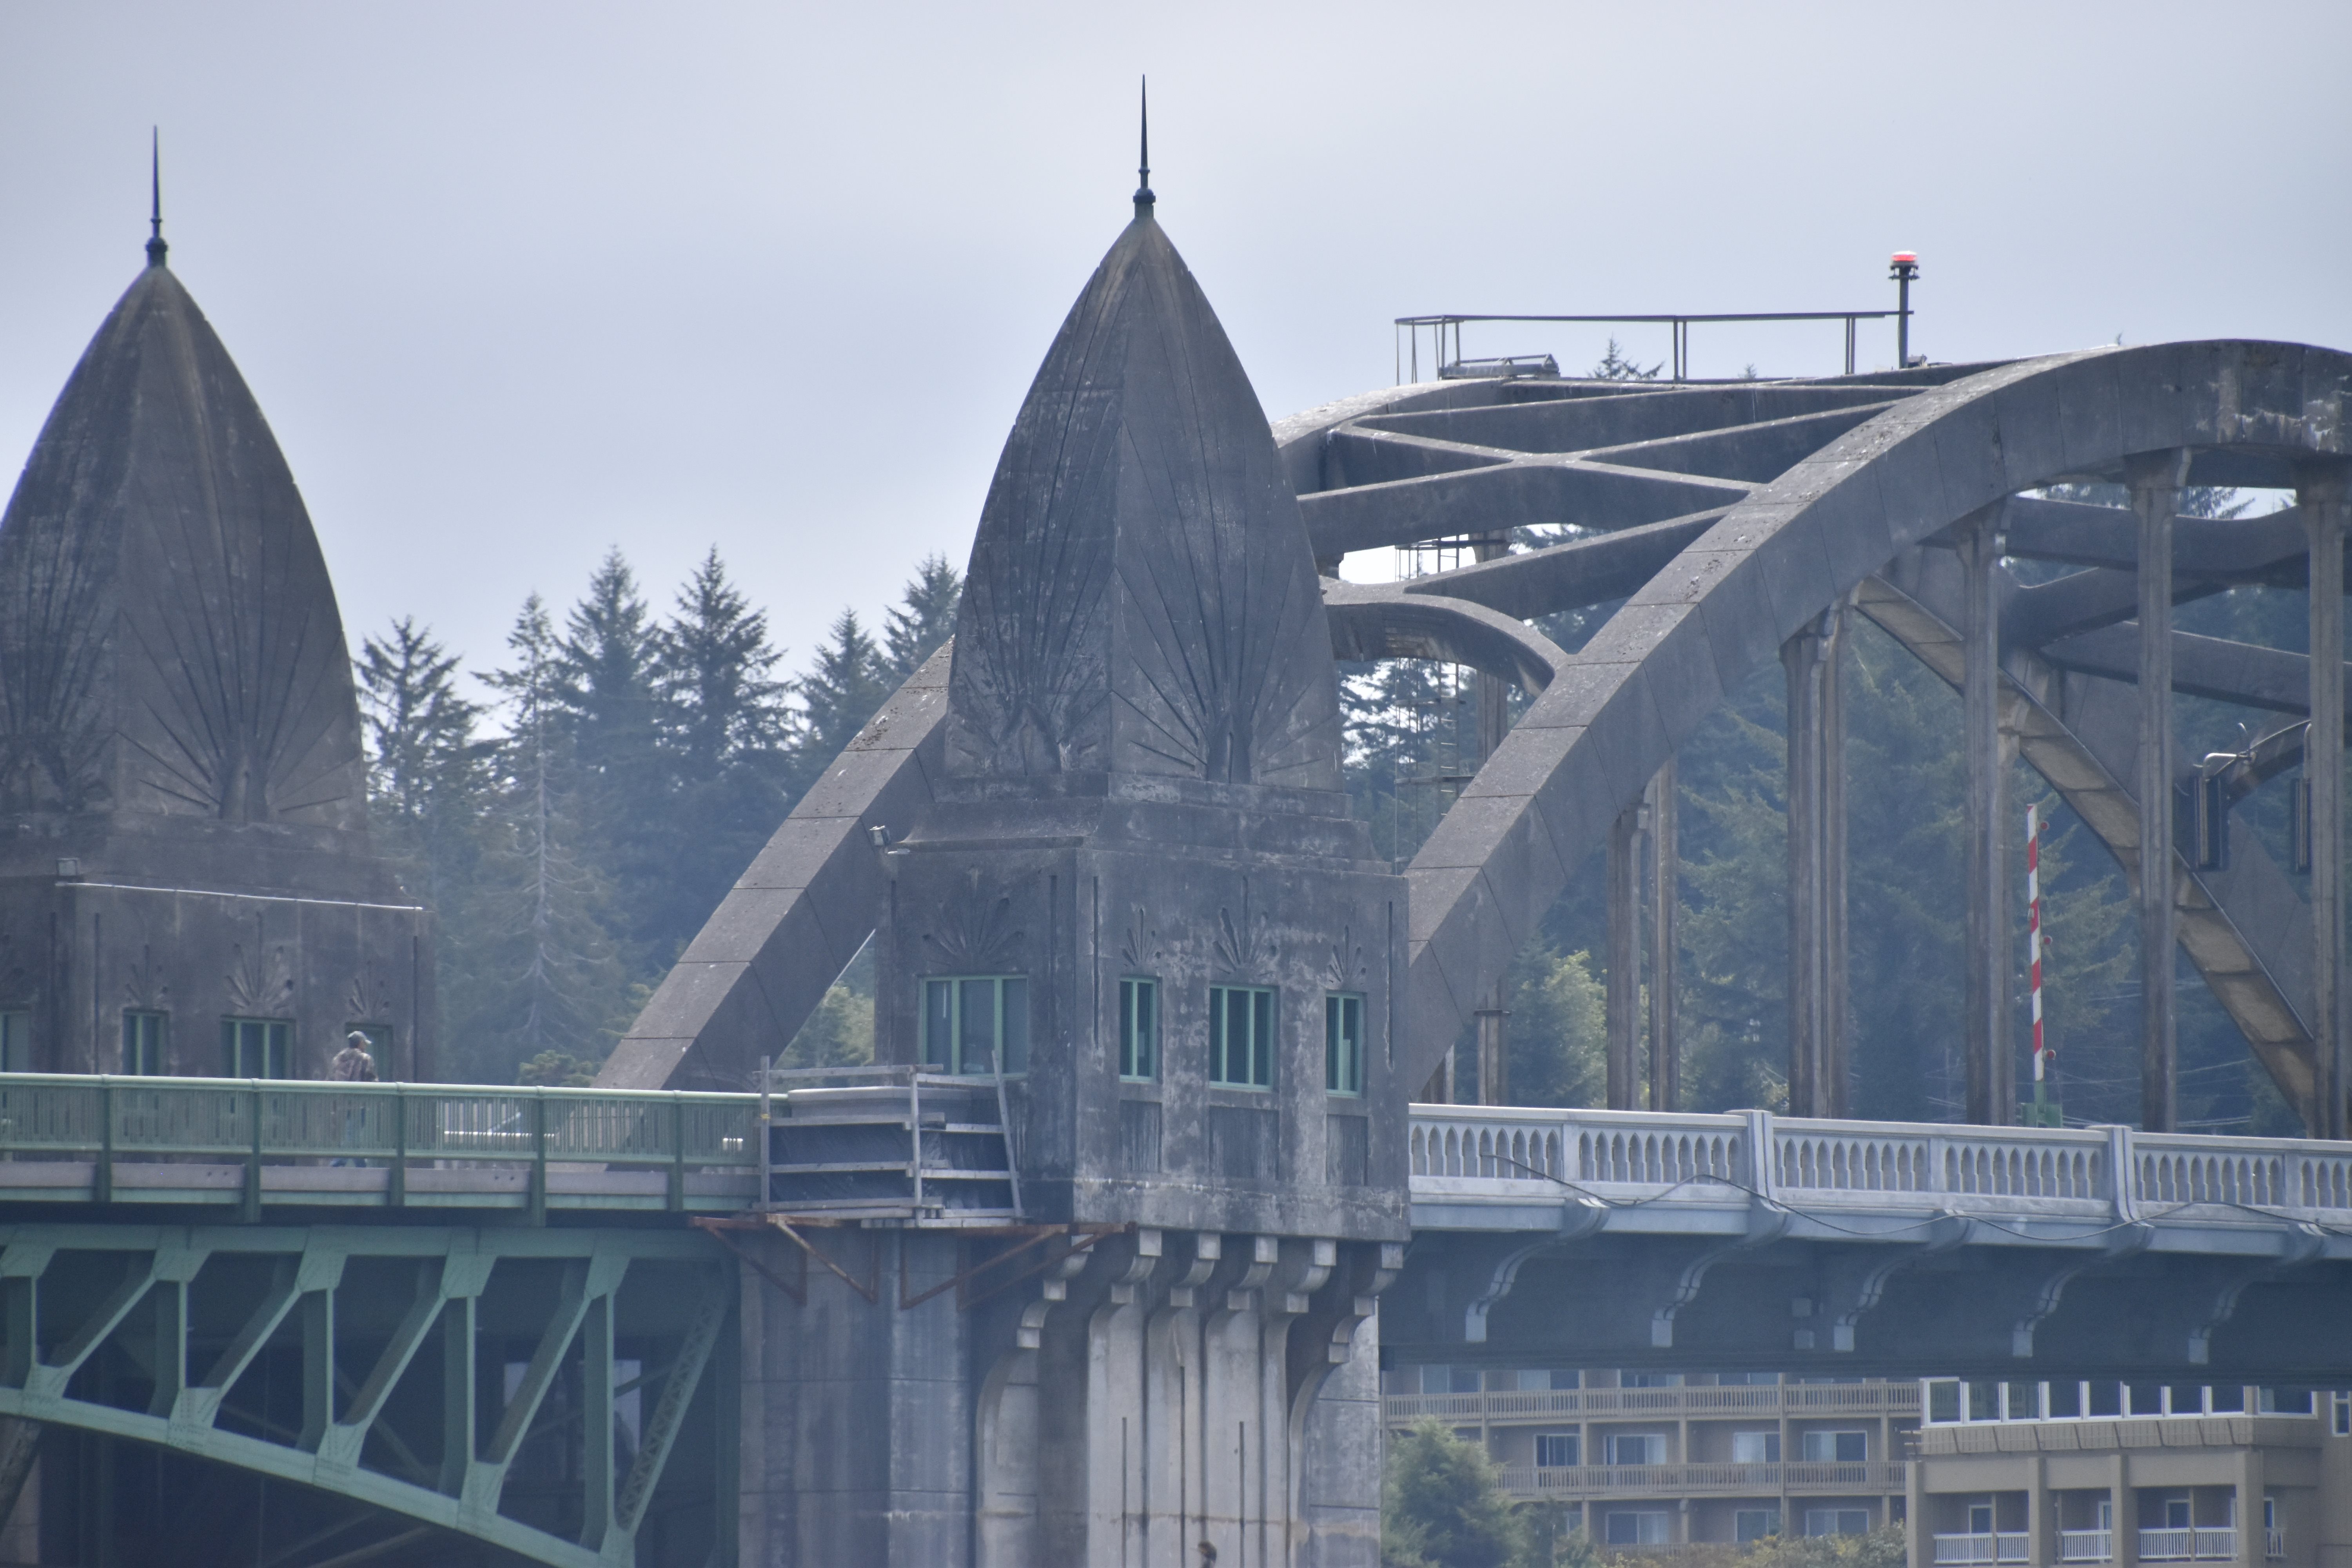

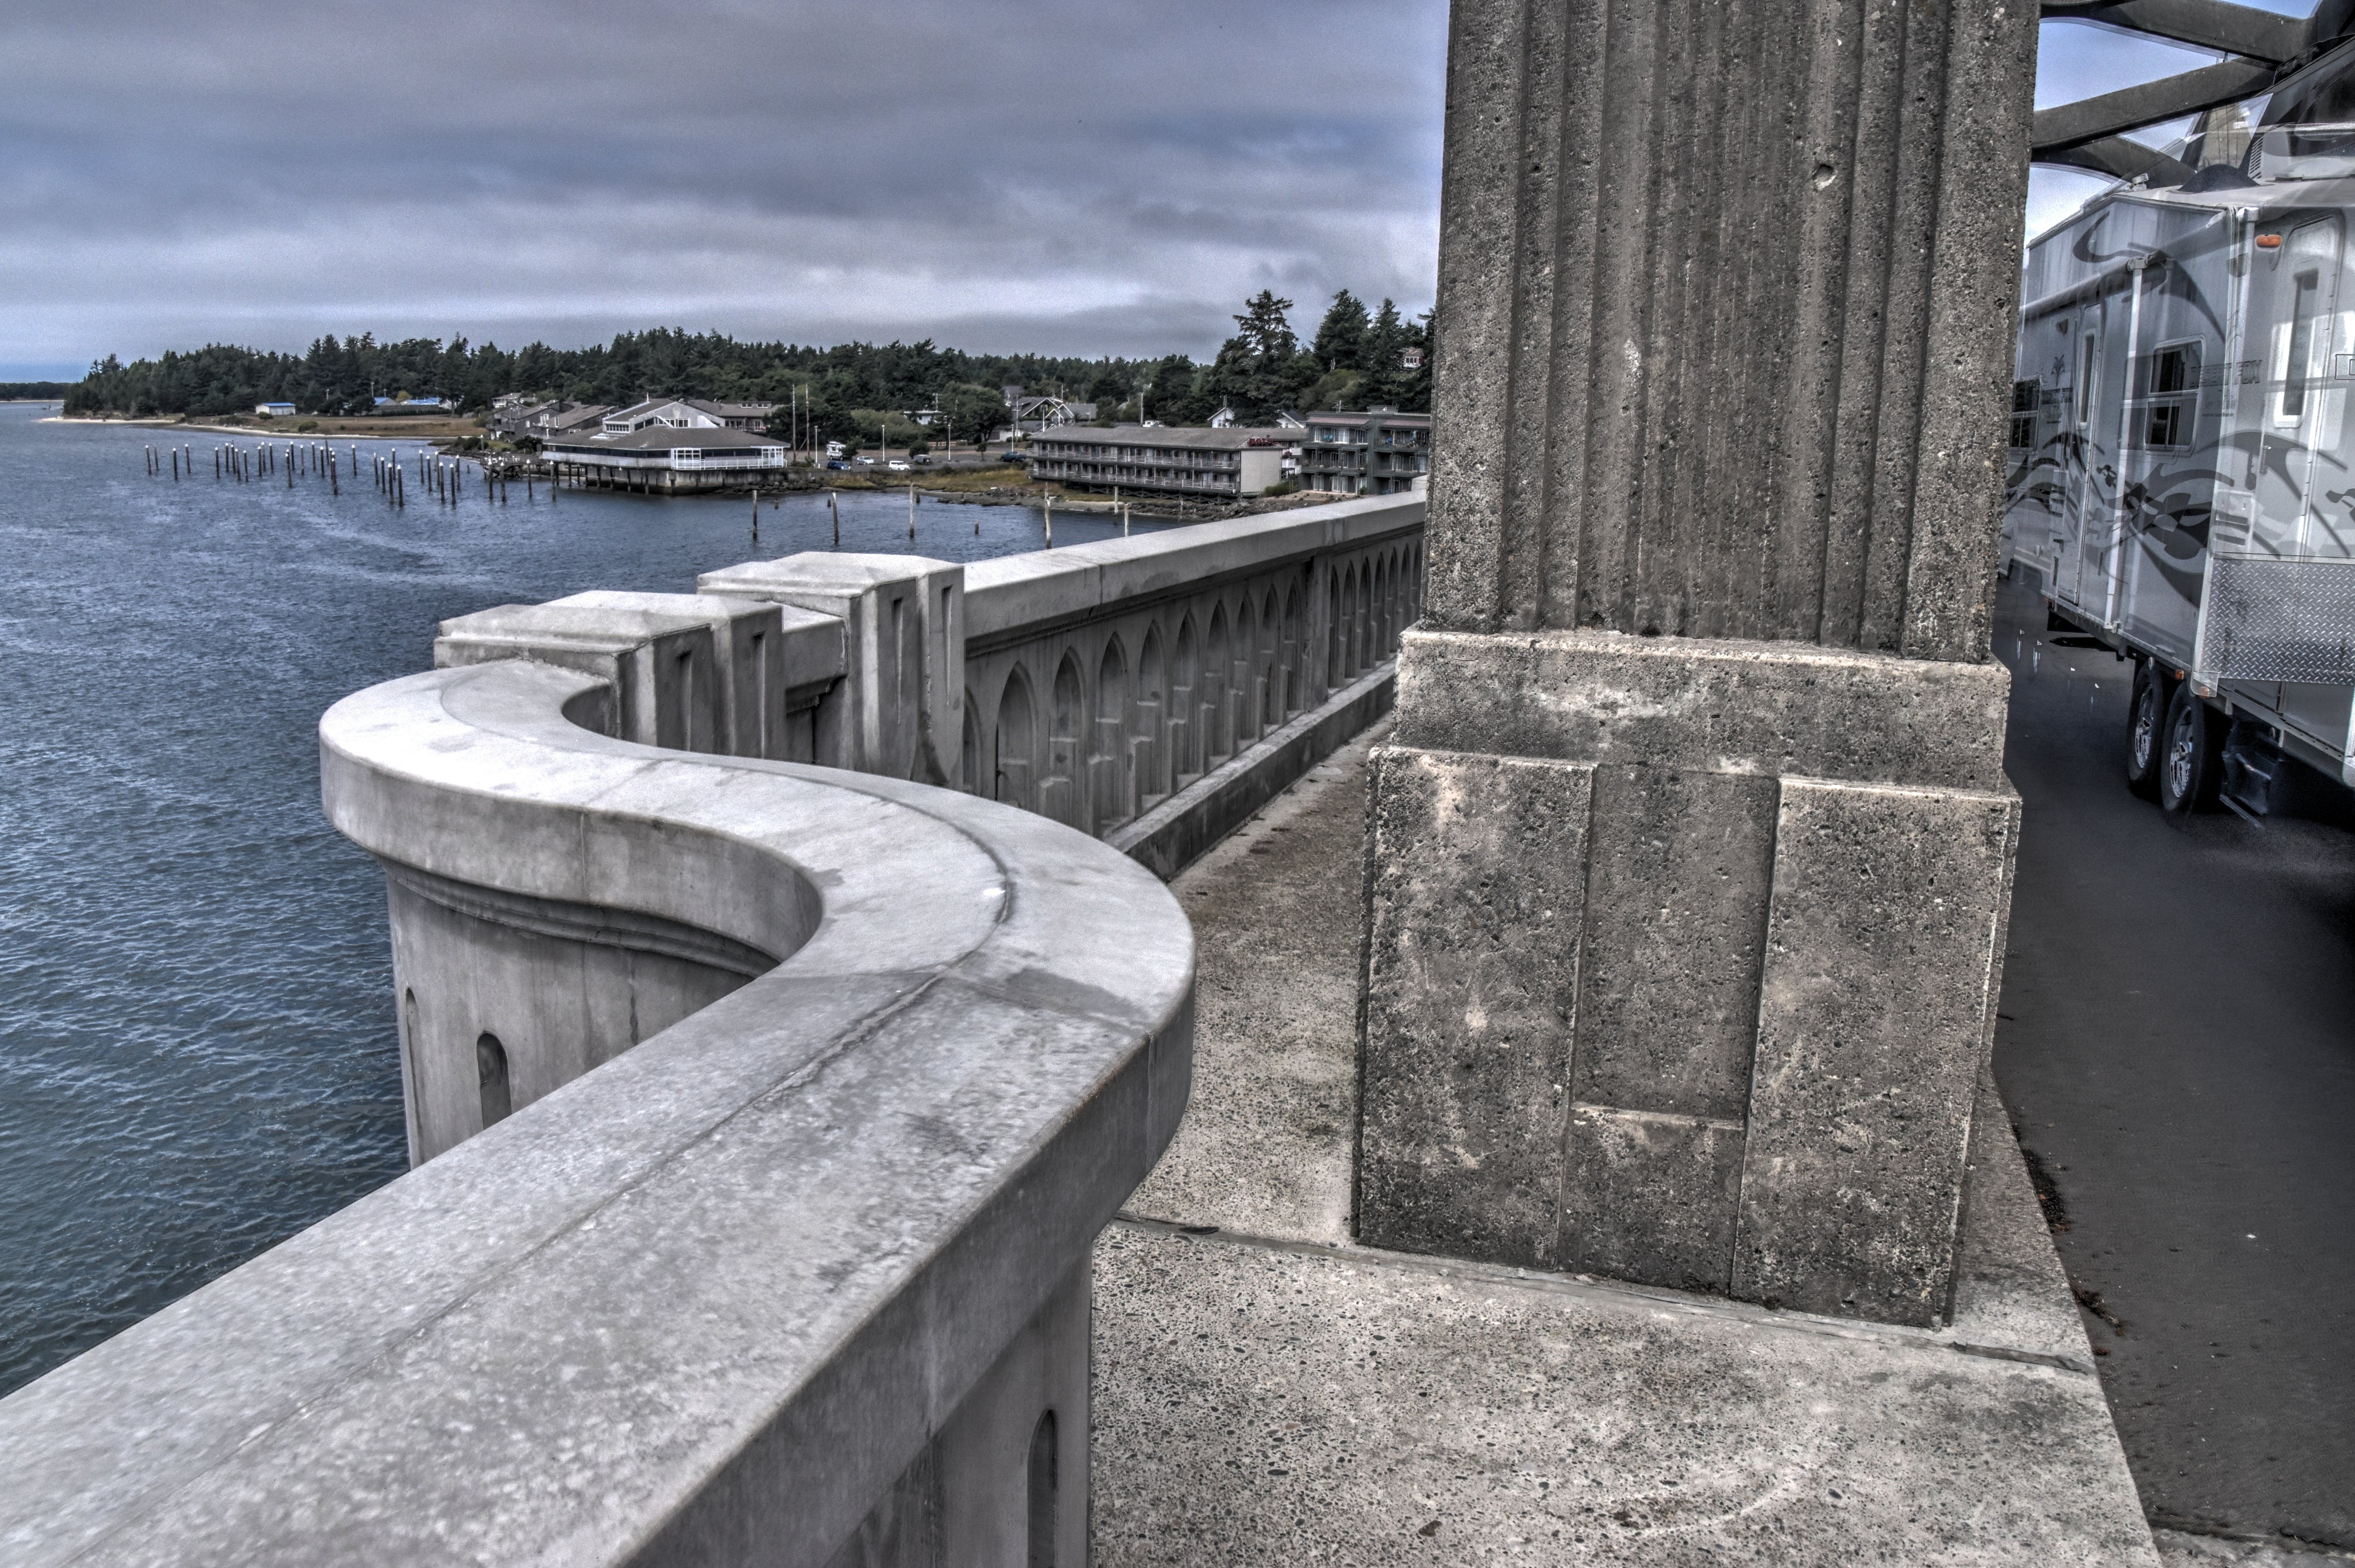
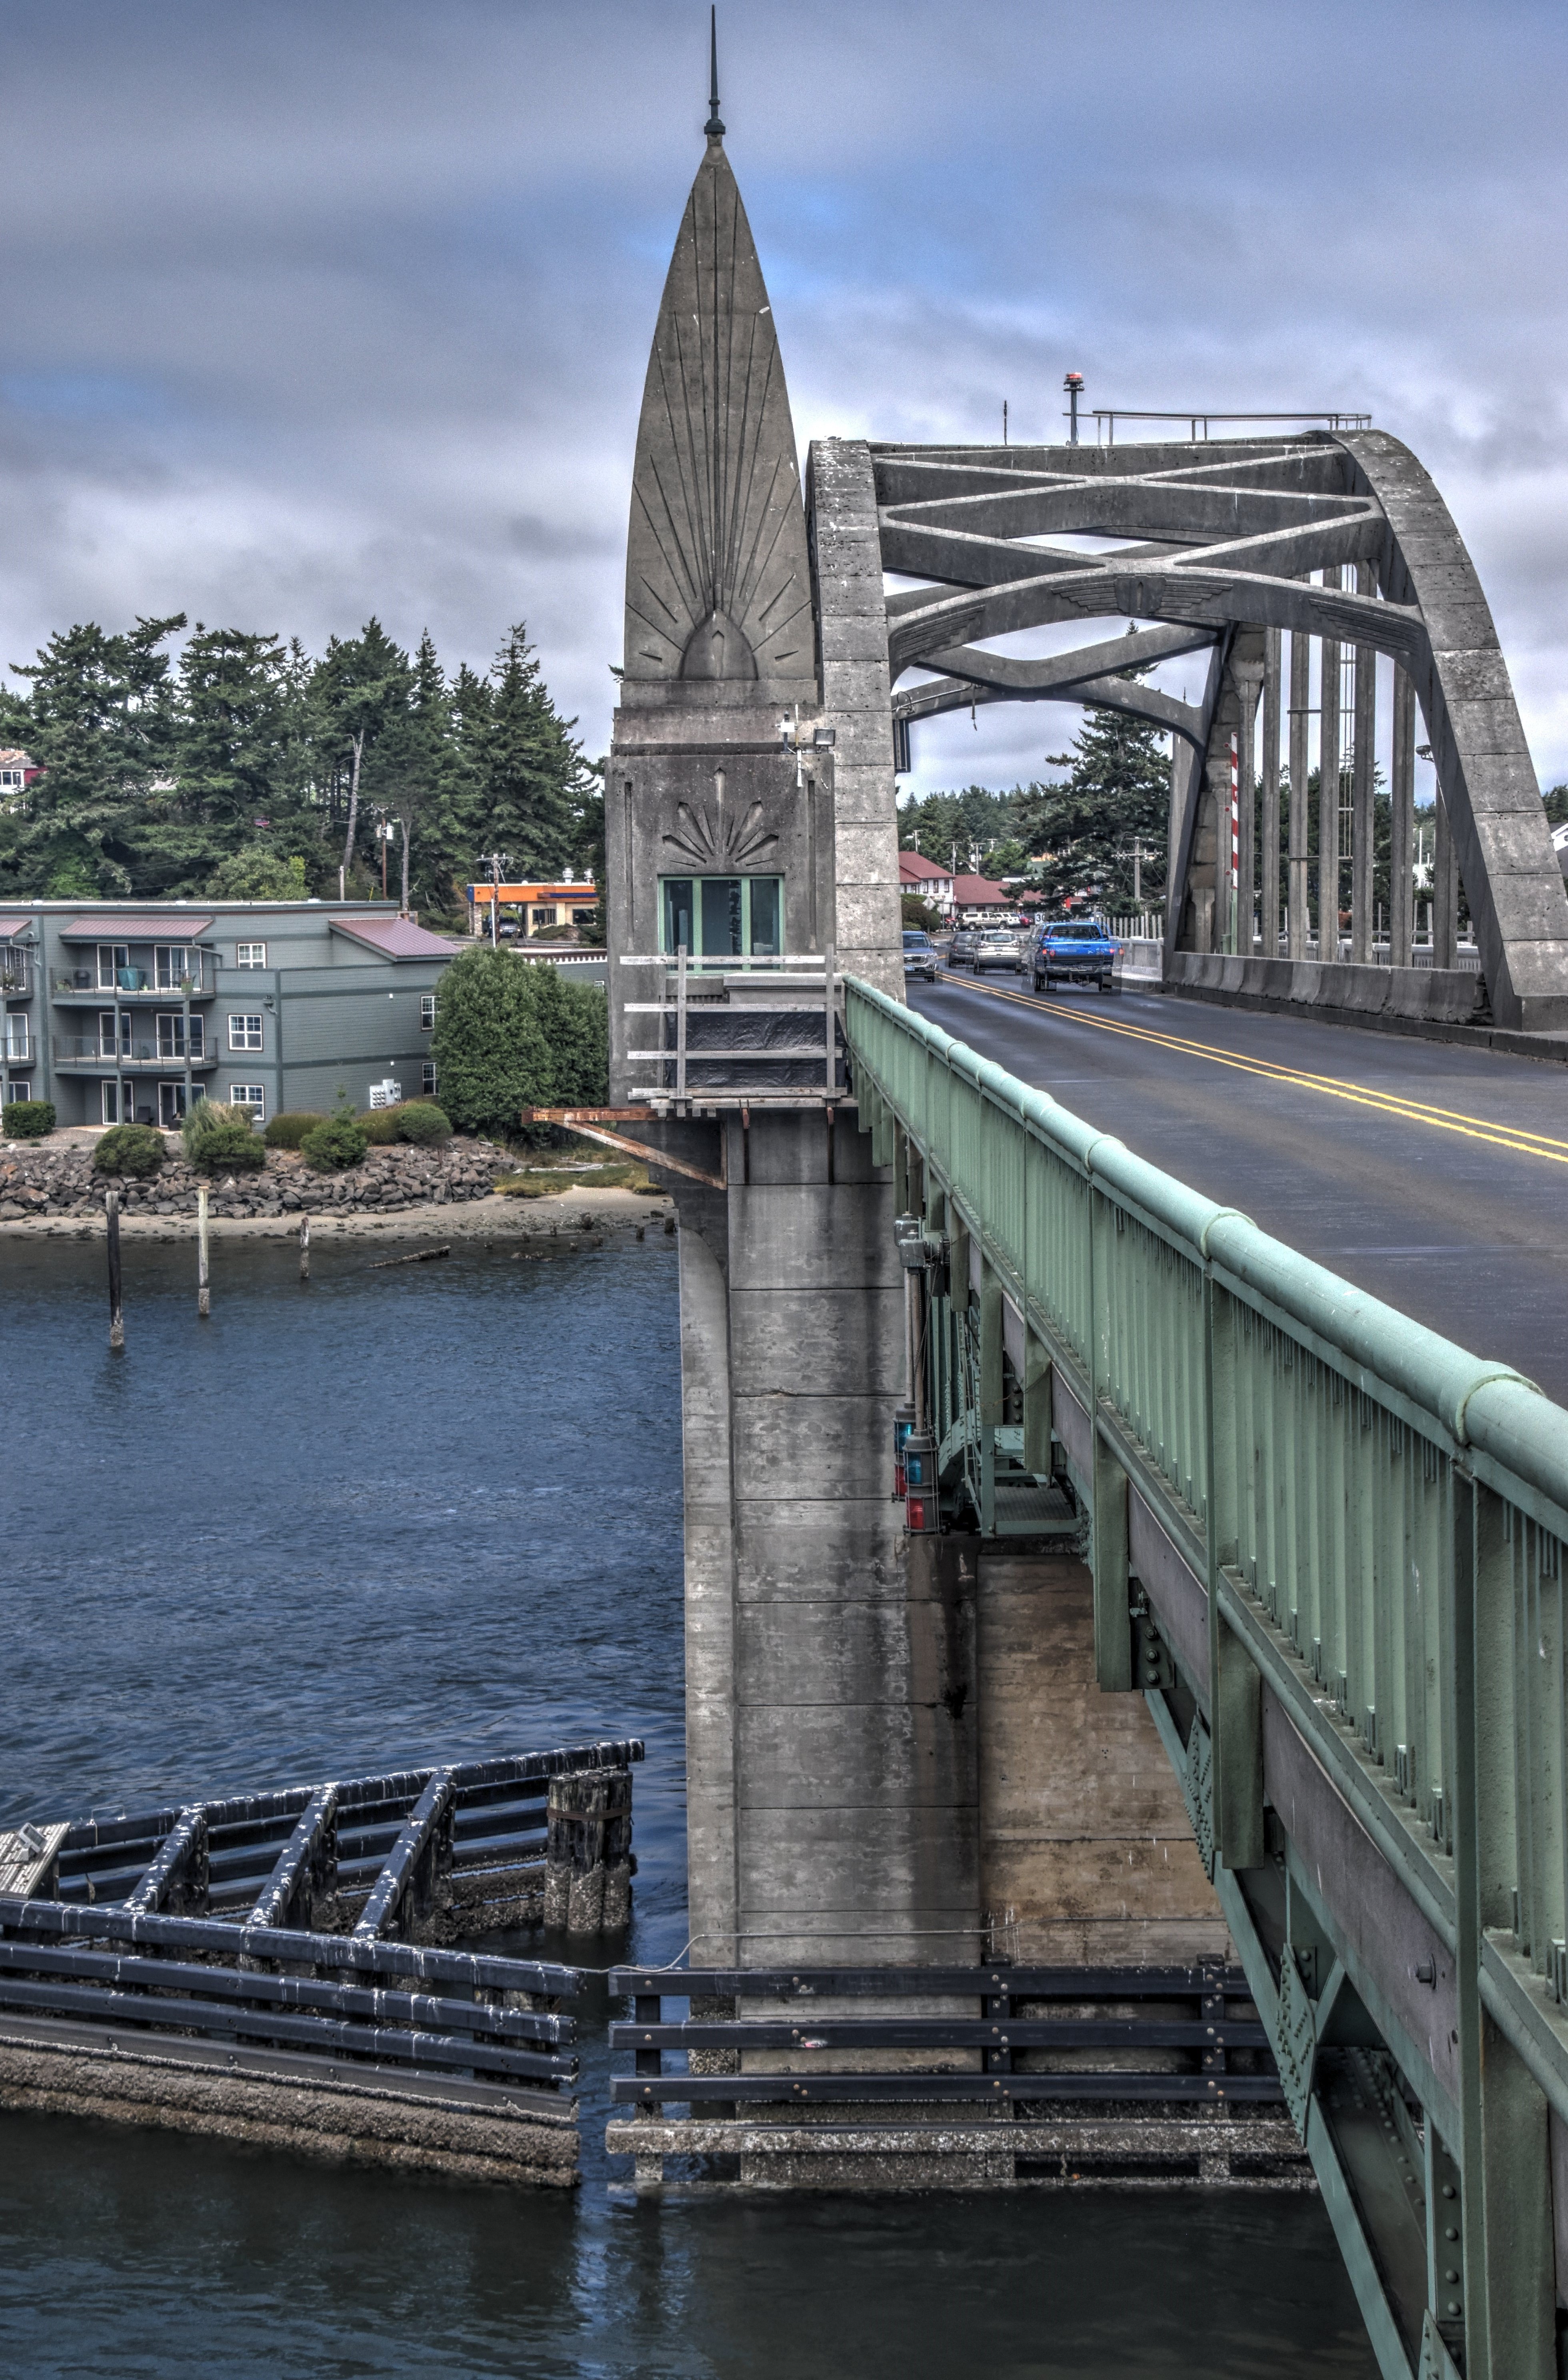
Views of bascule pier and bridge houses as seen from beside bridge.
![]()
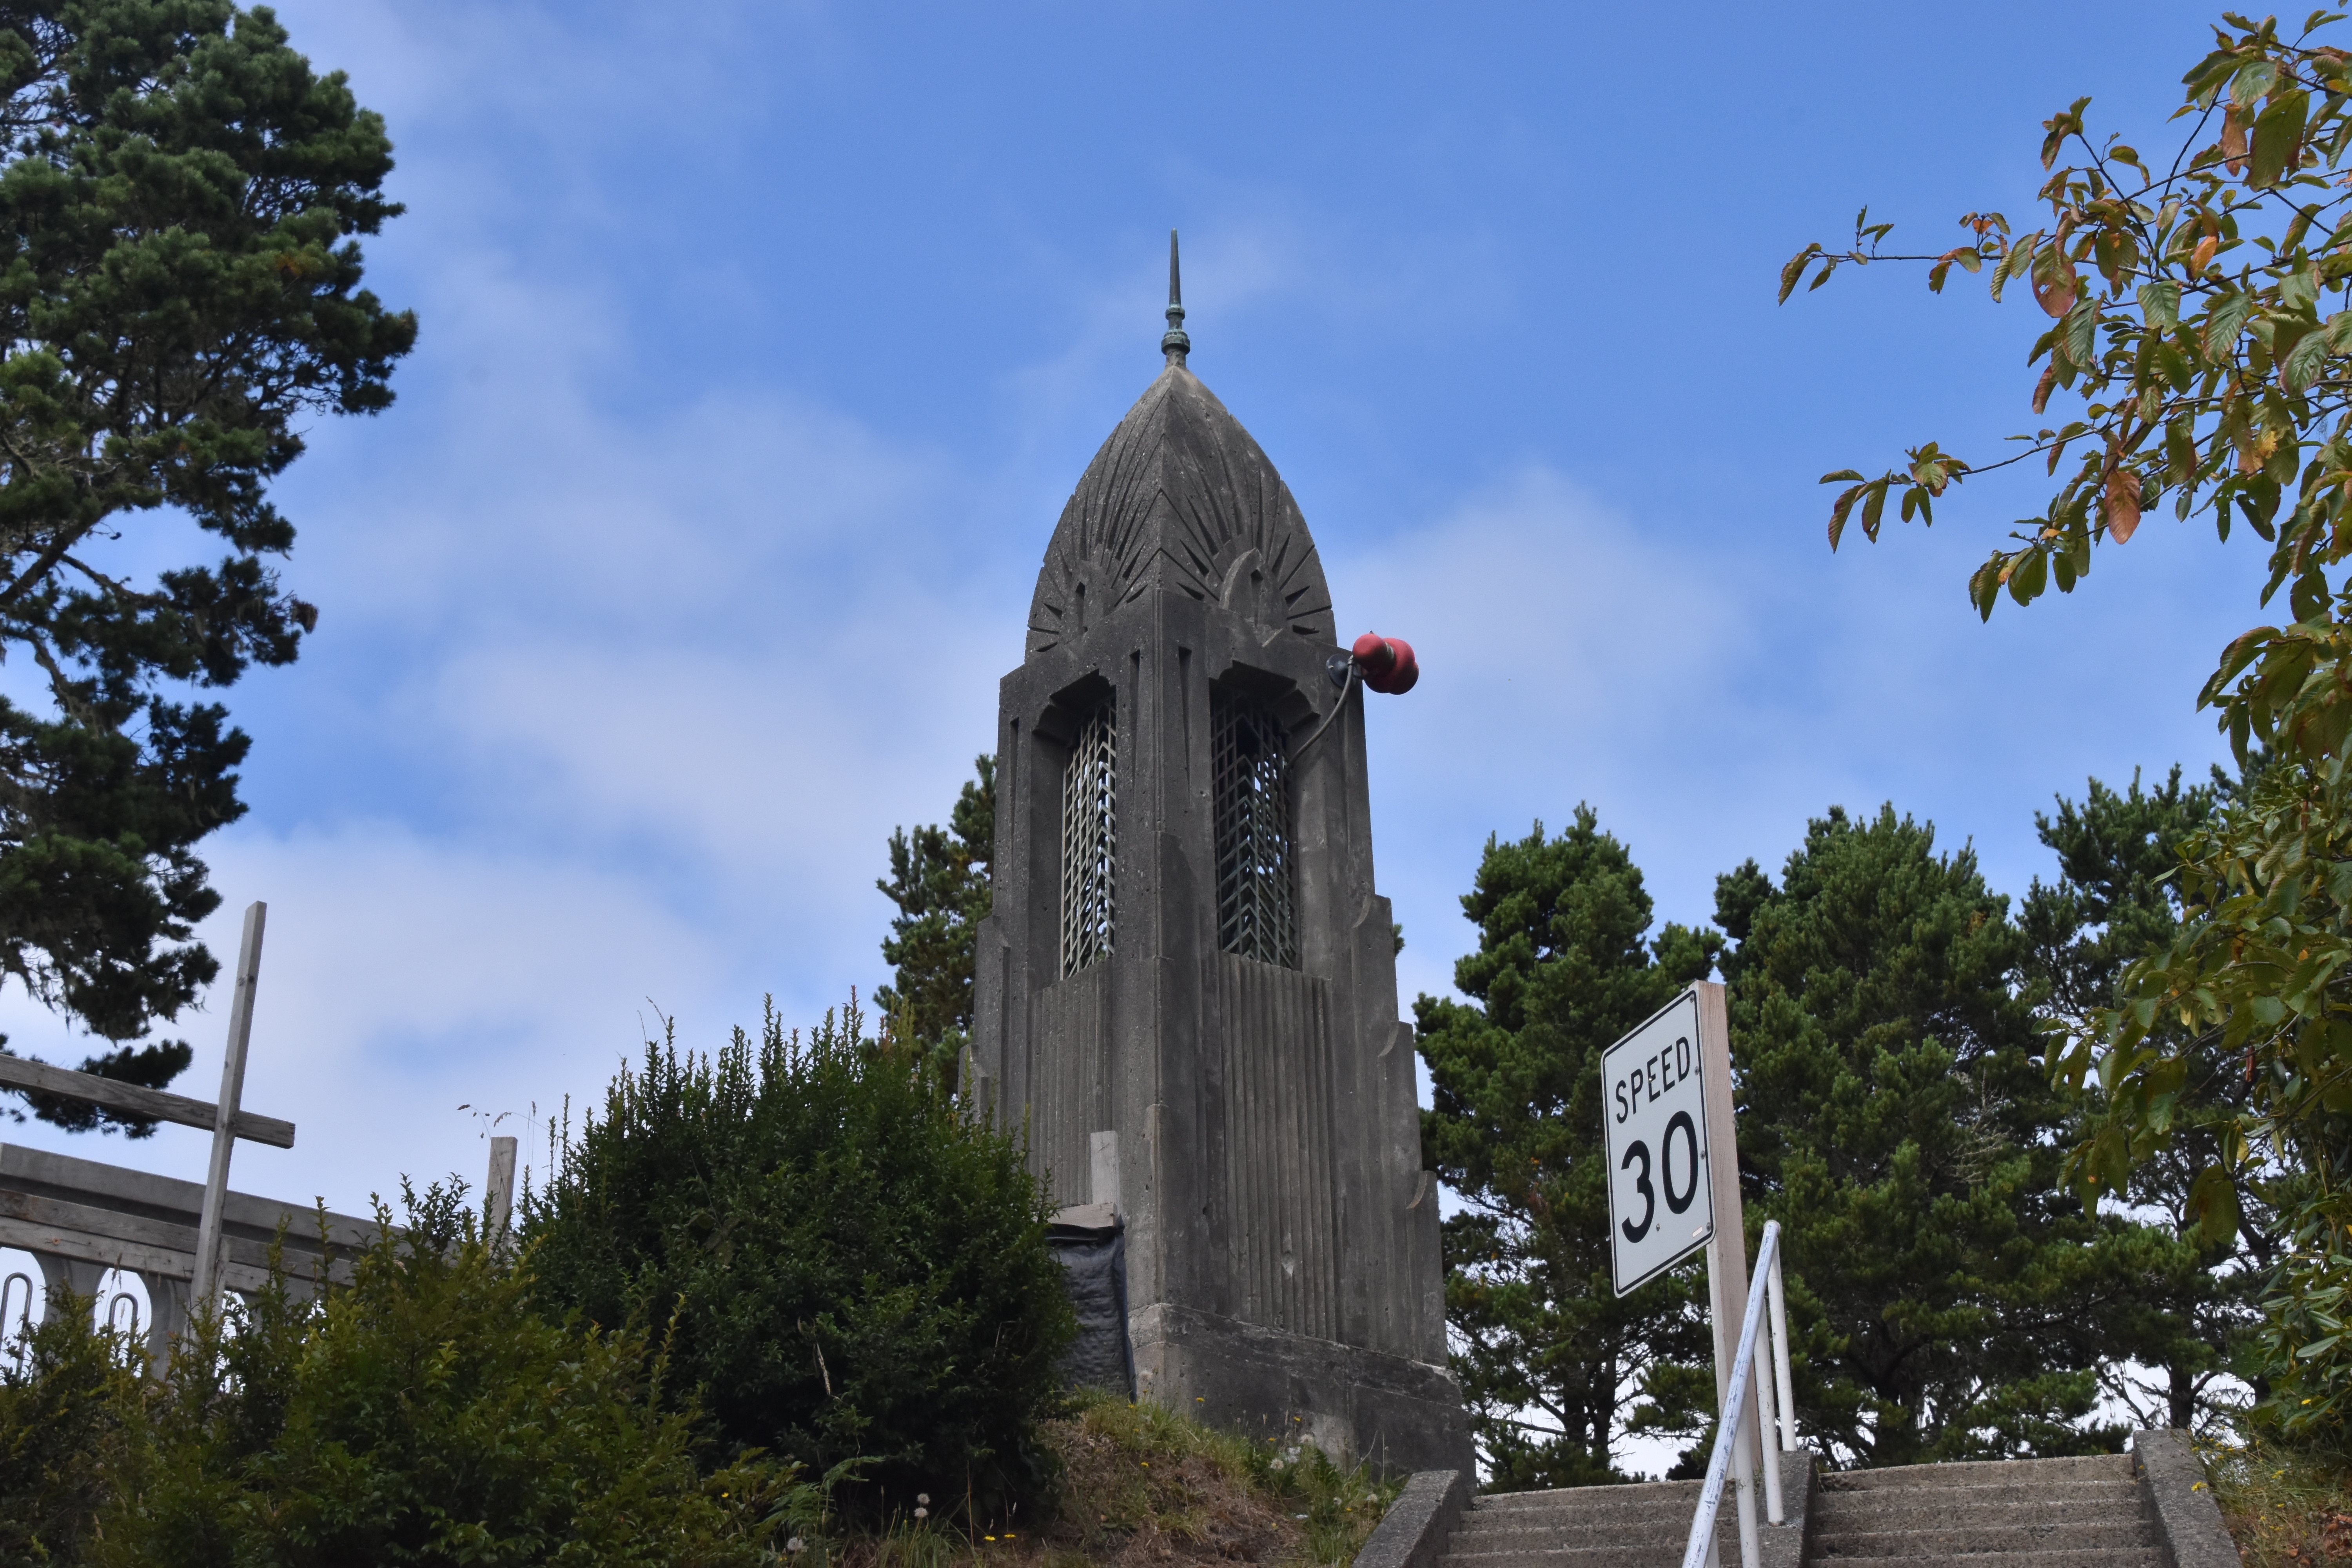
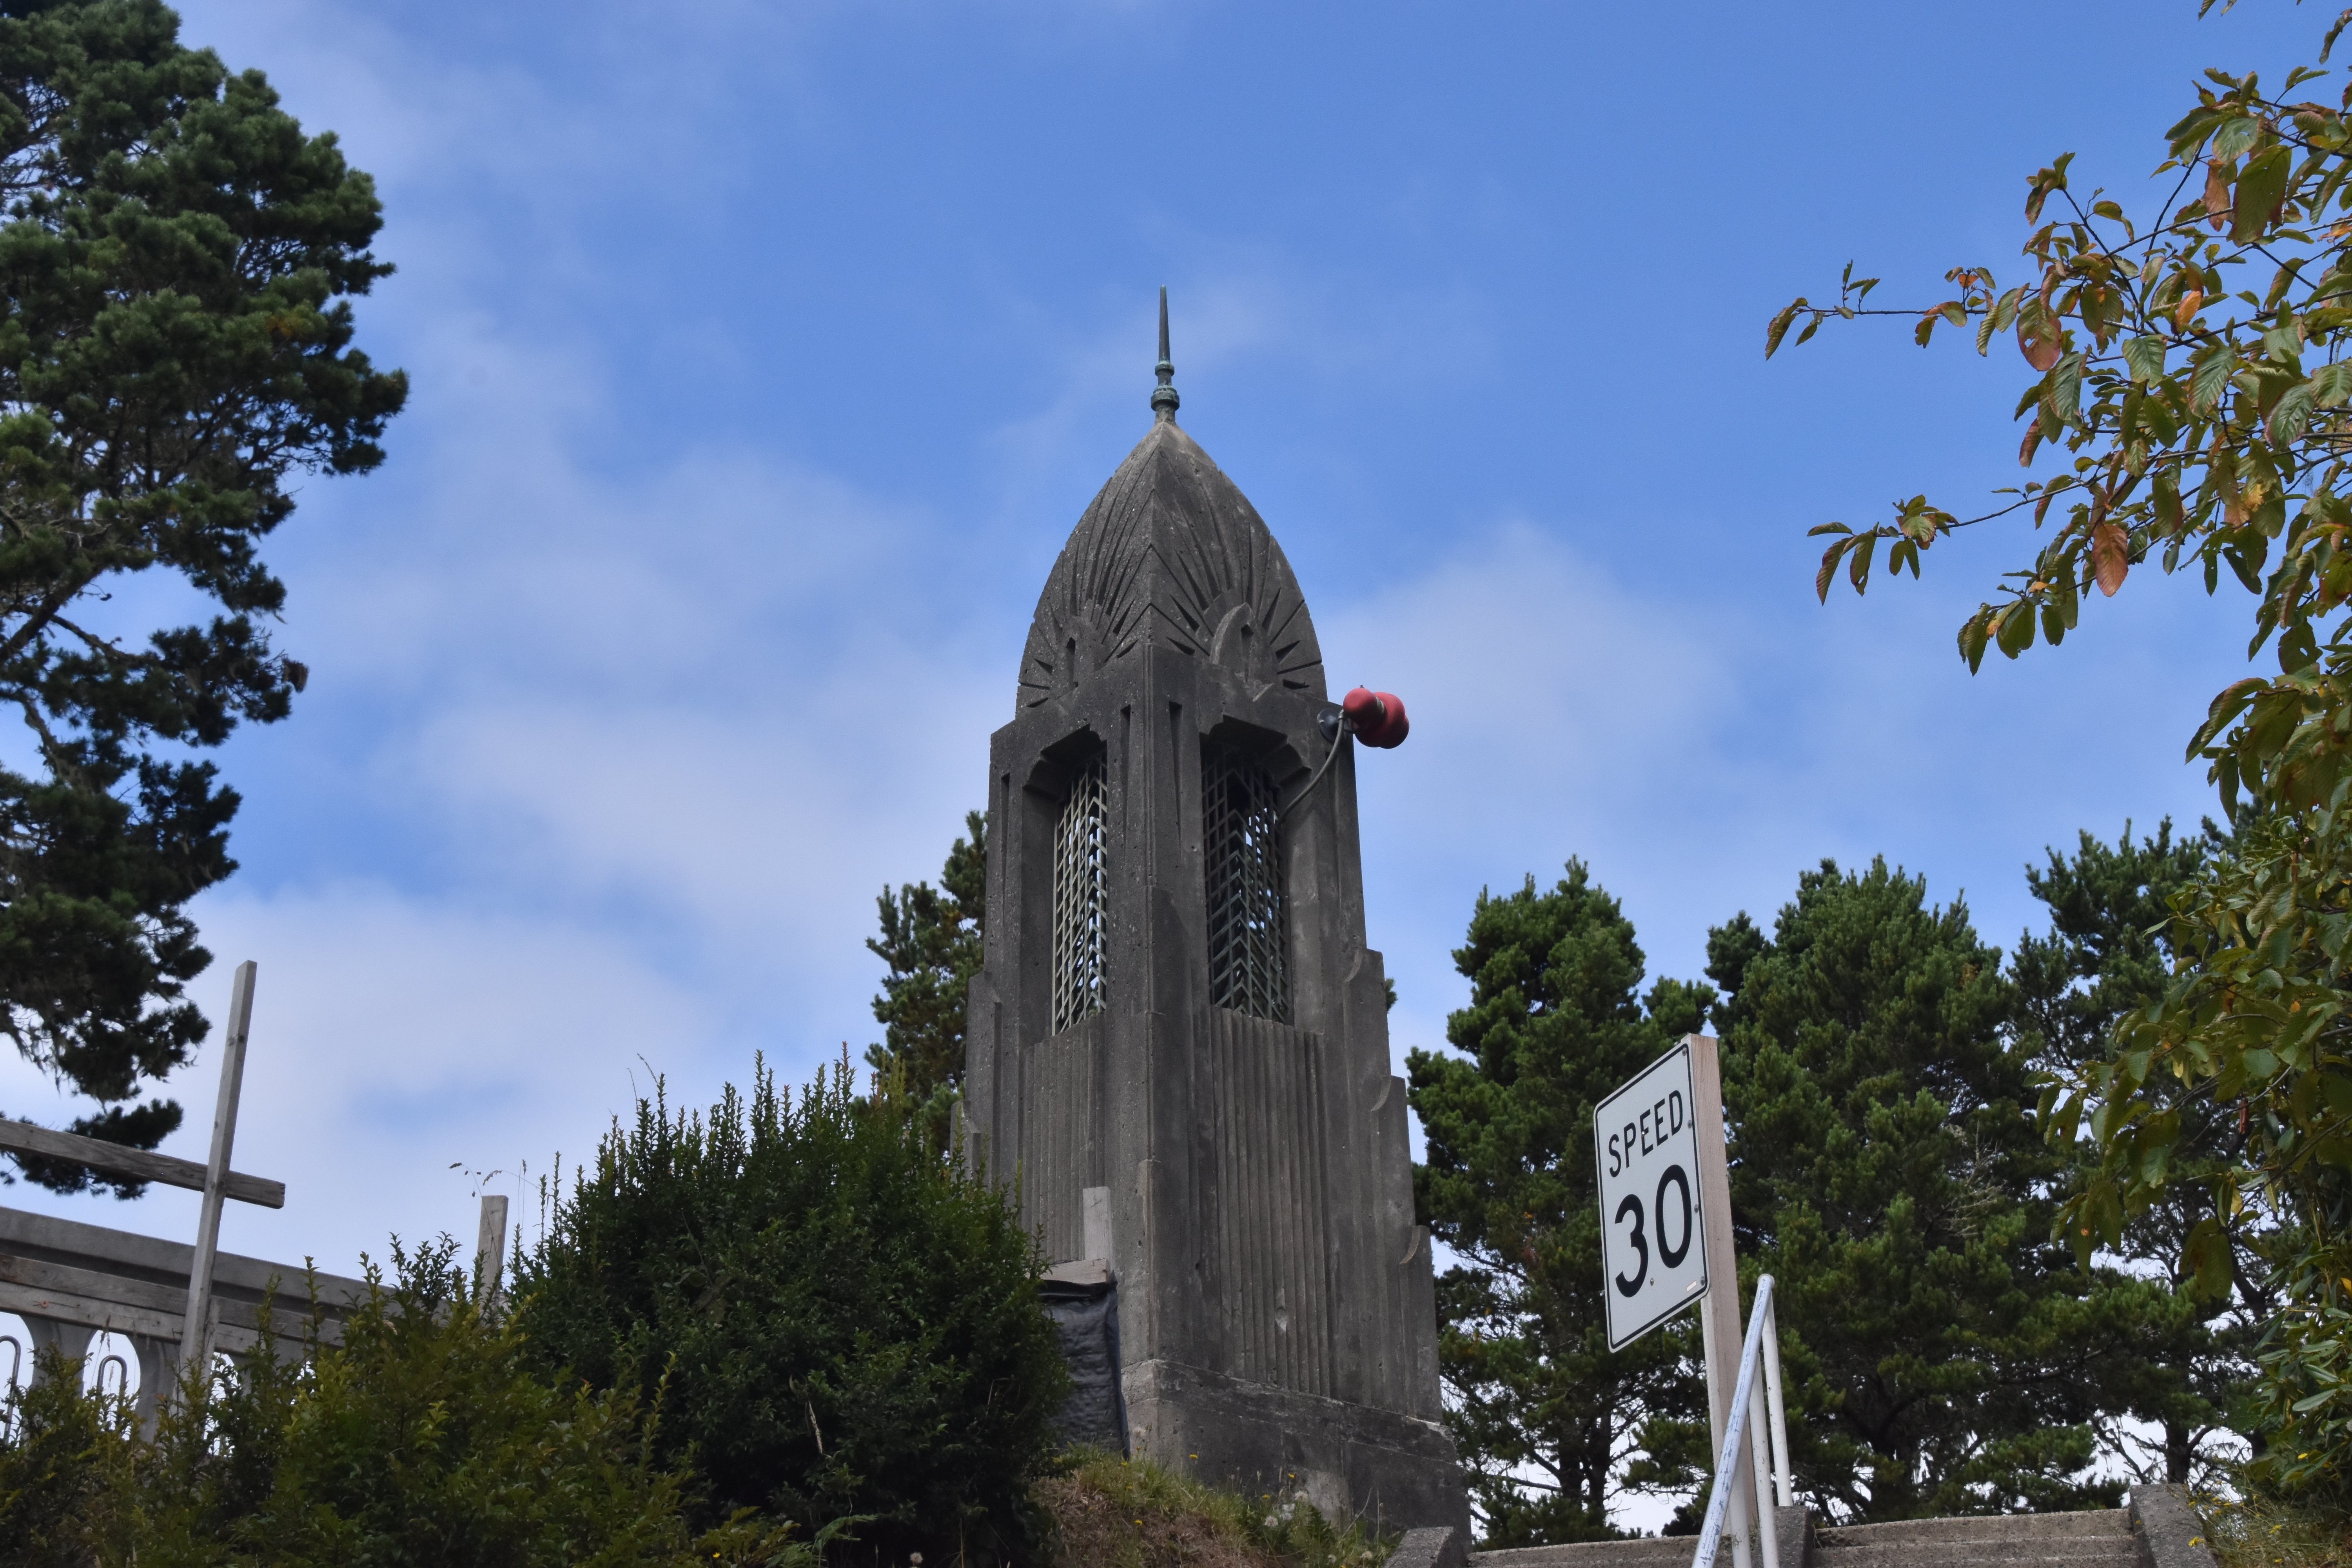

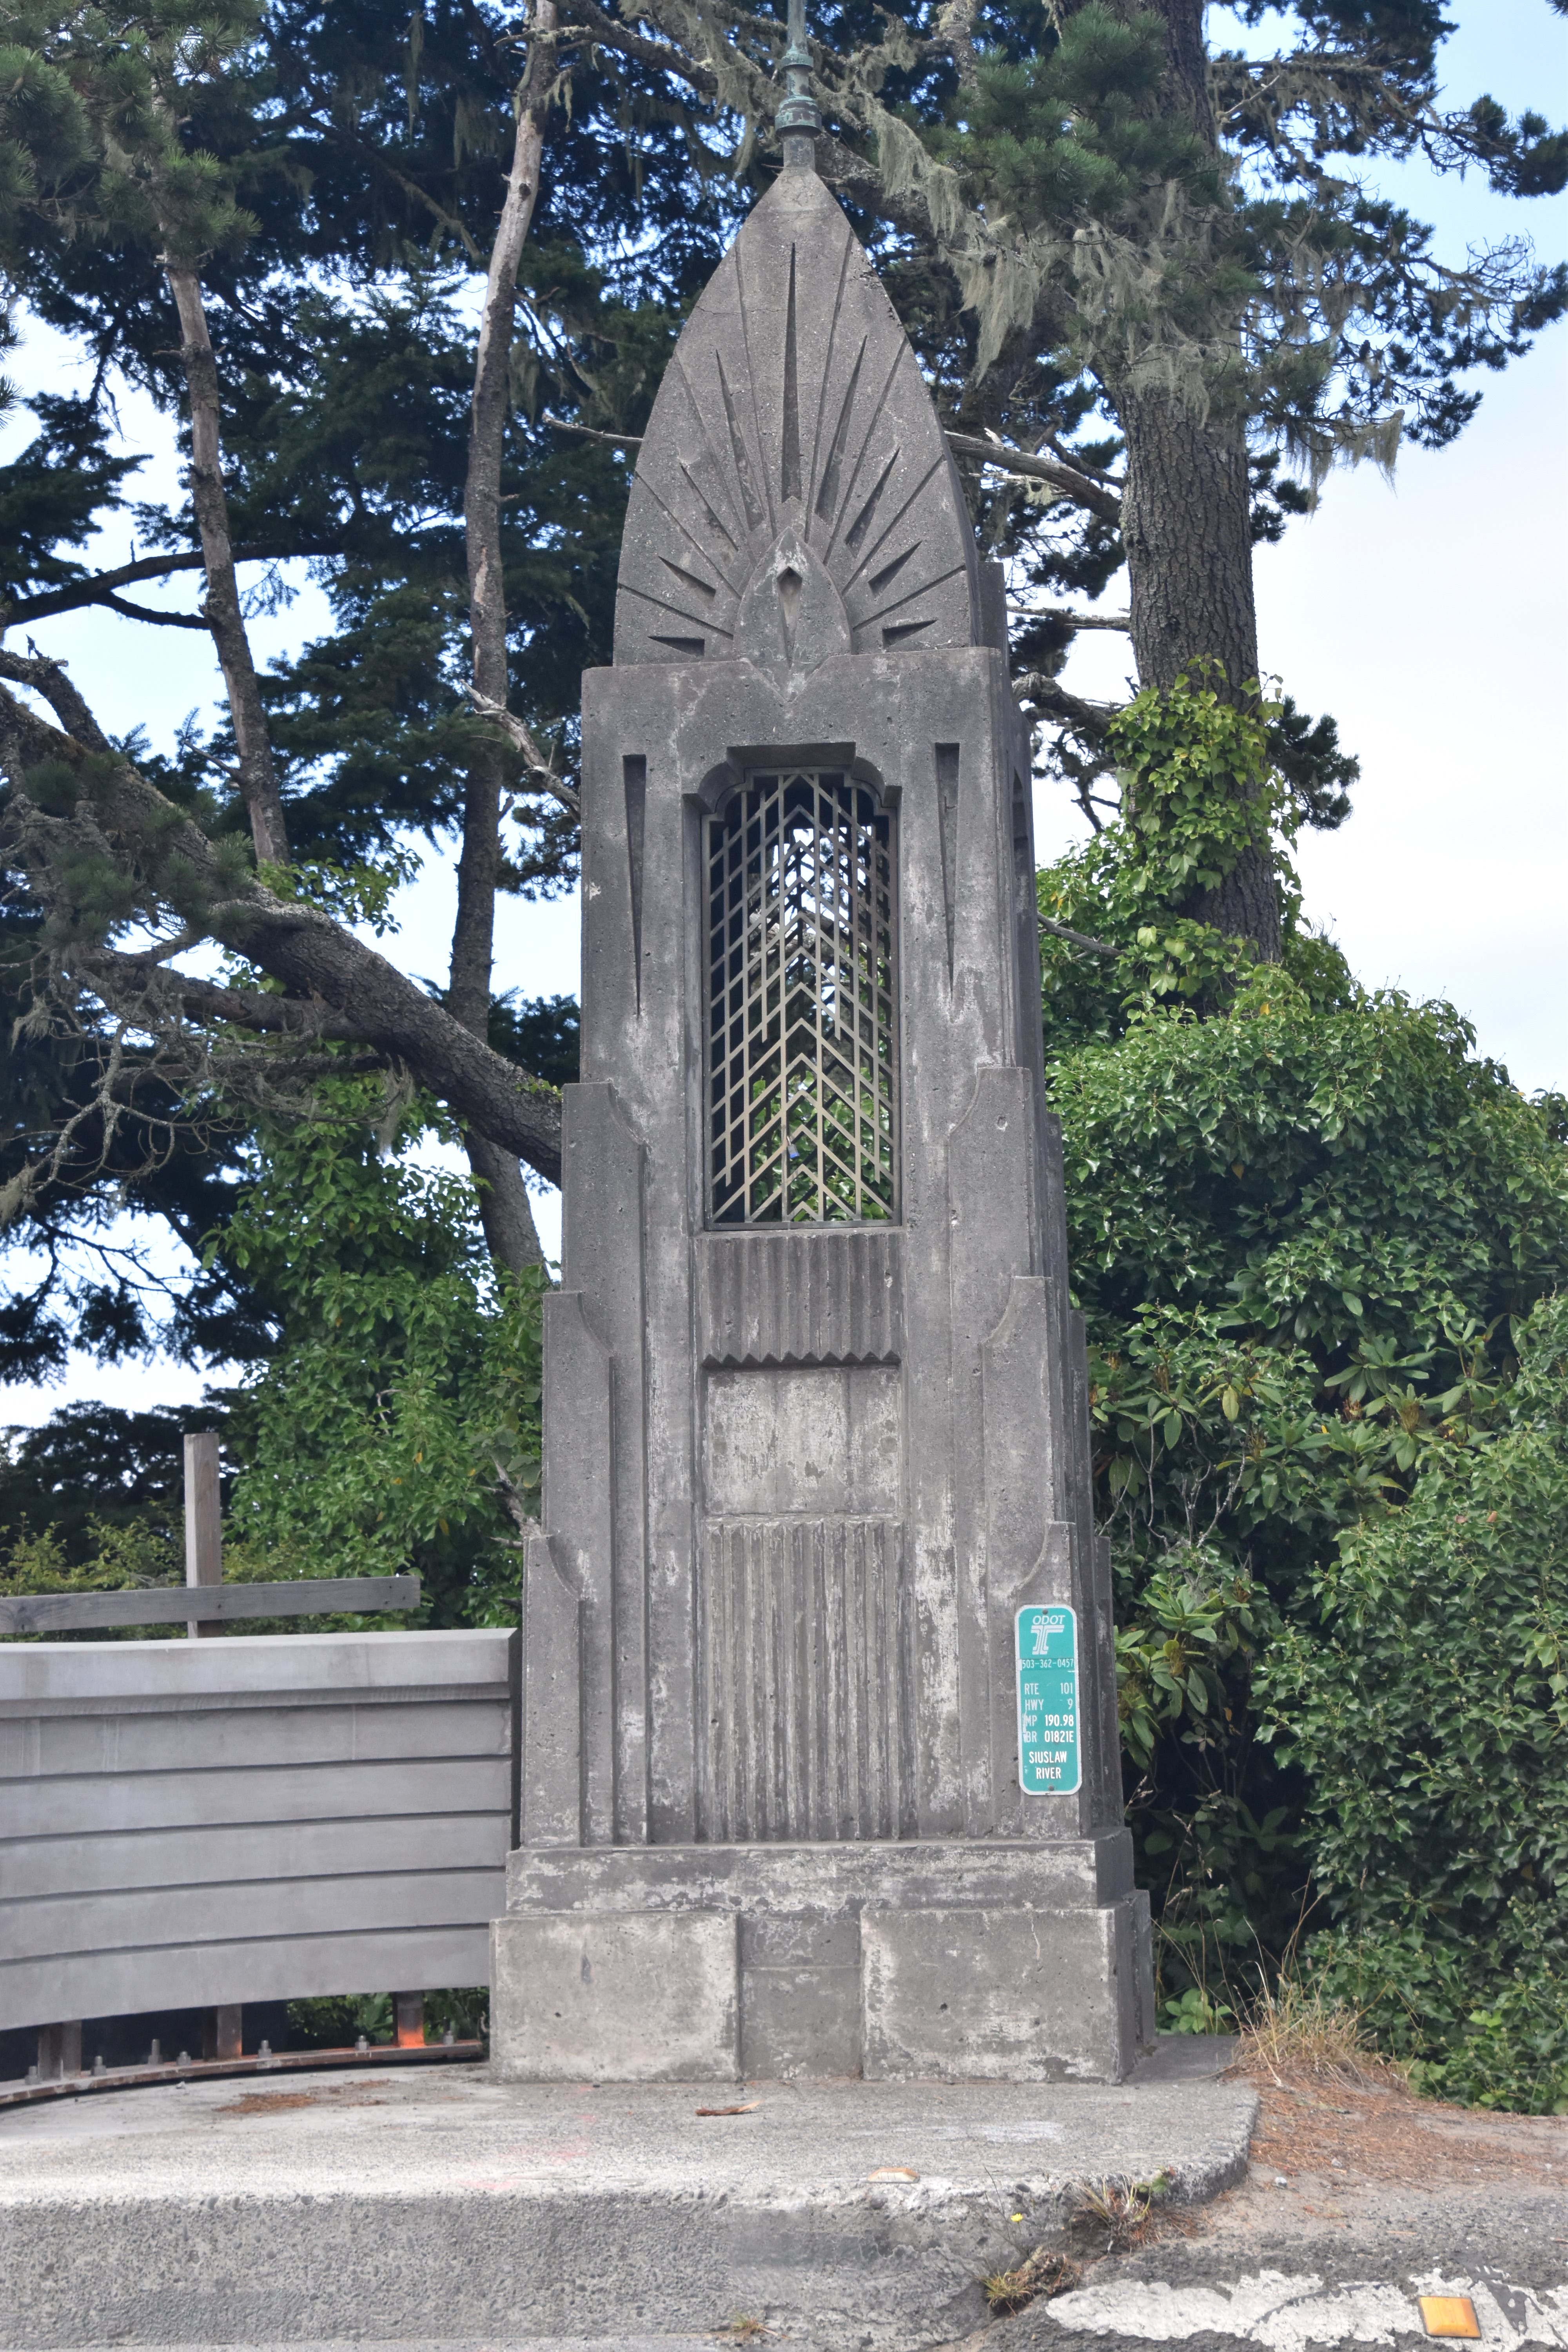

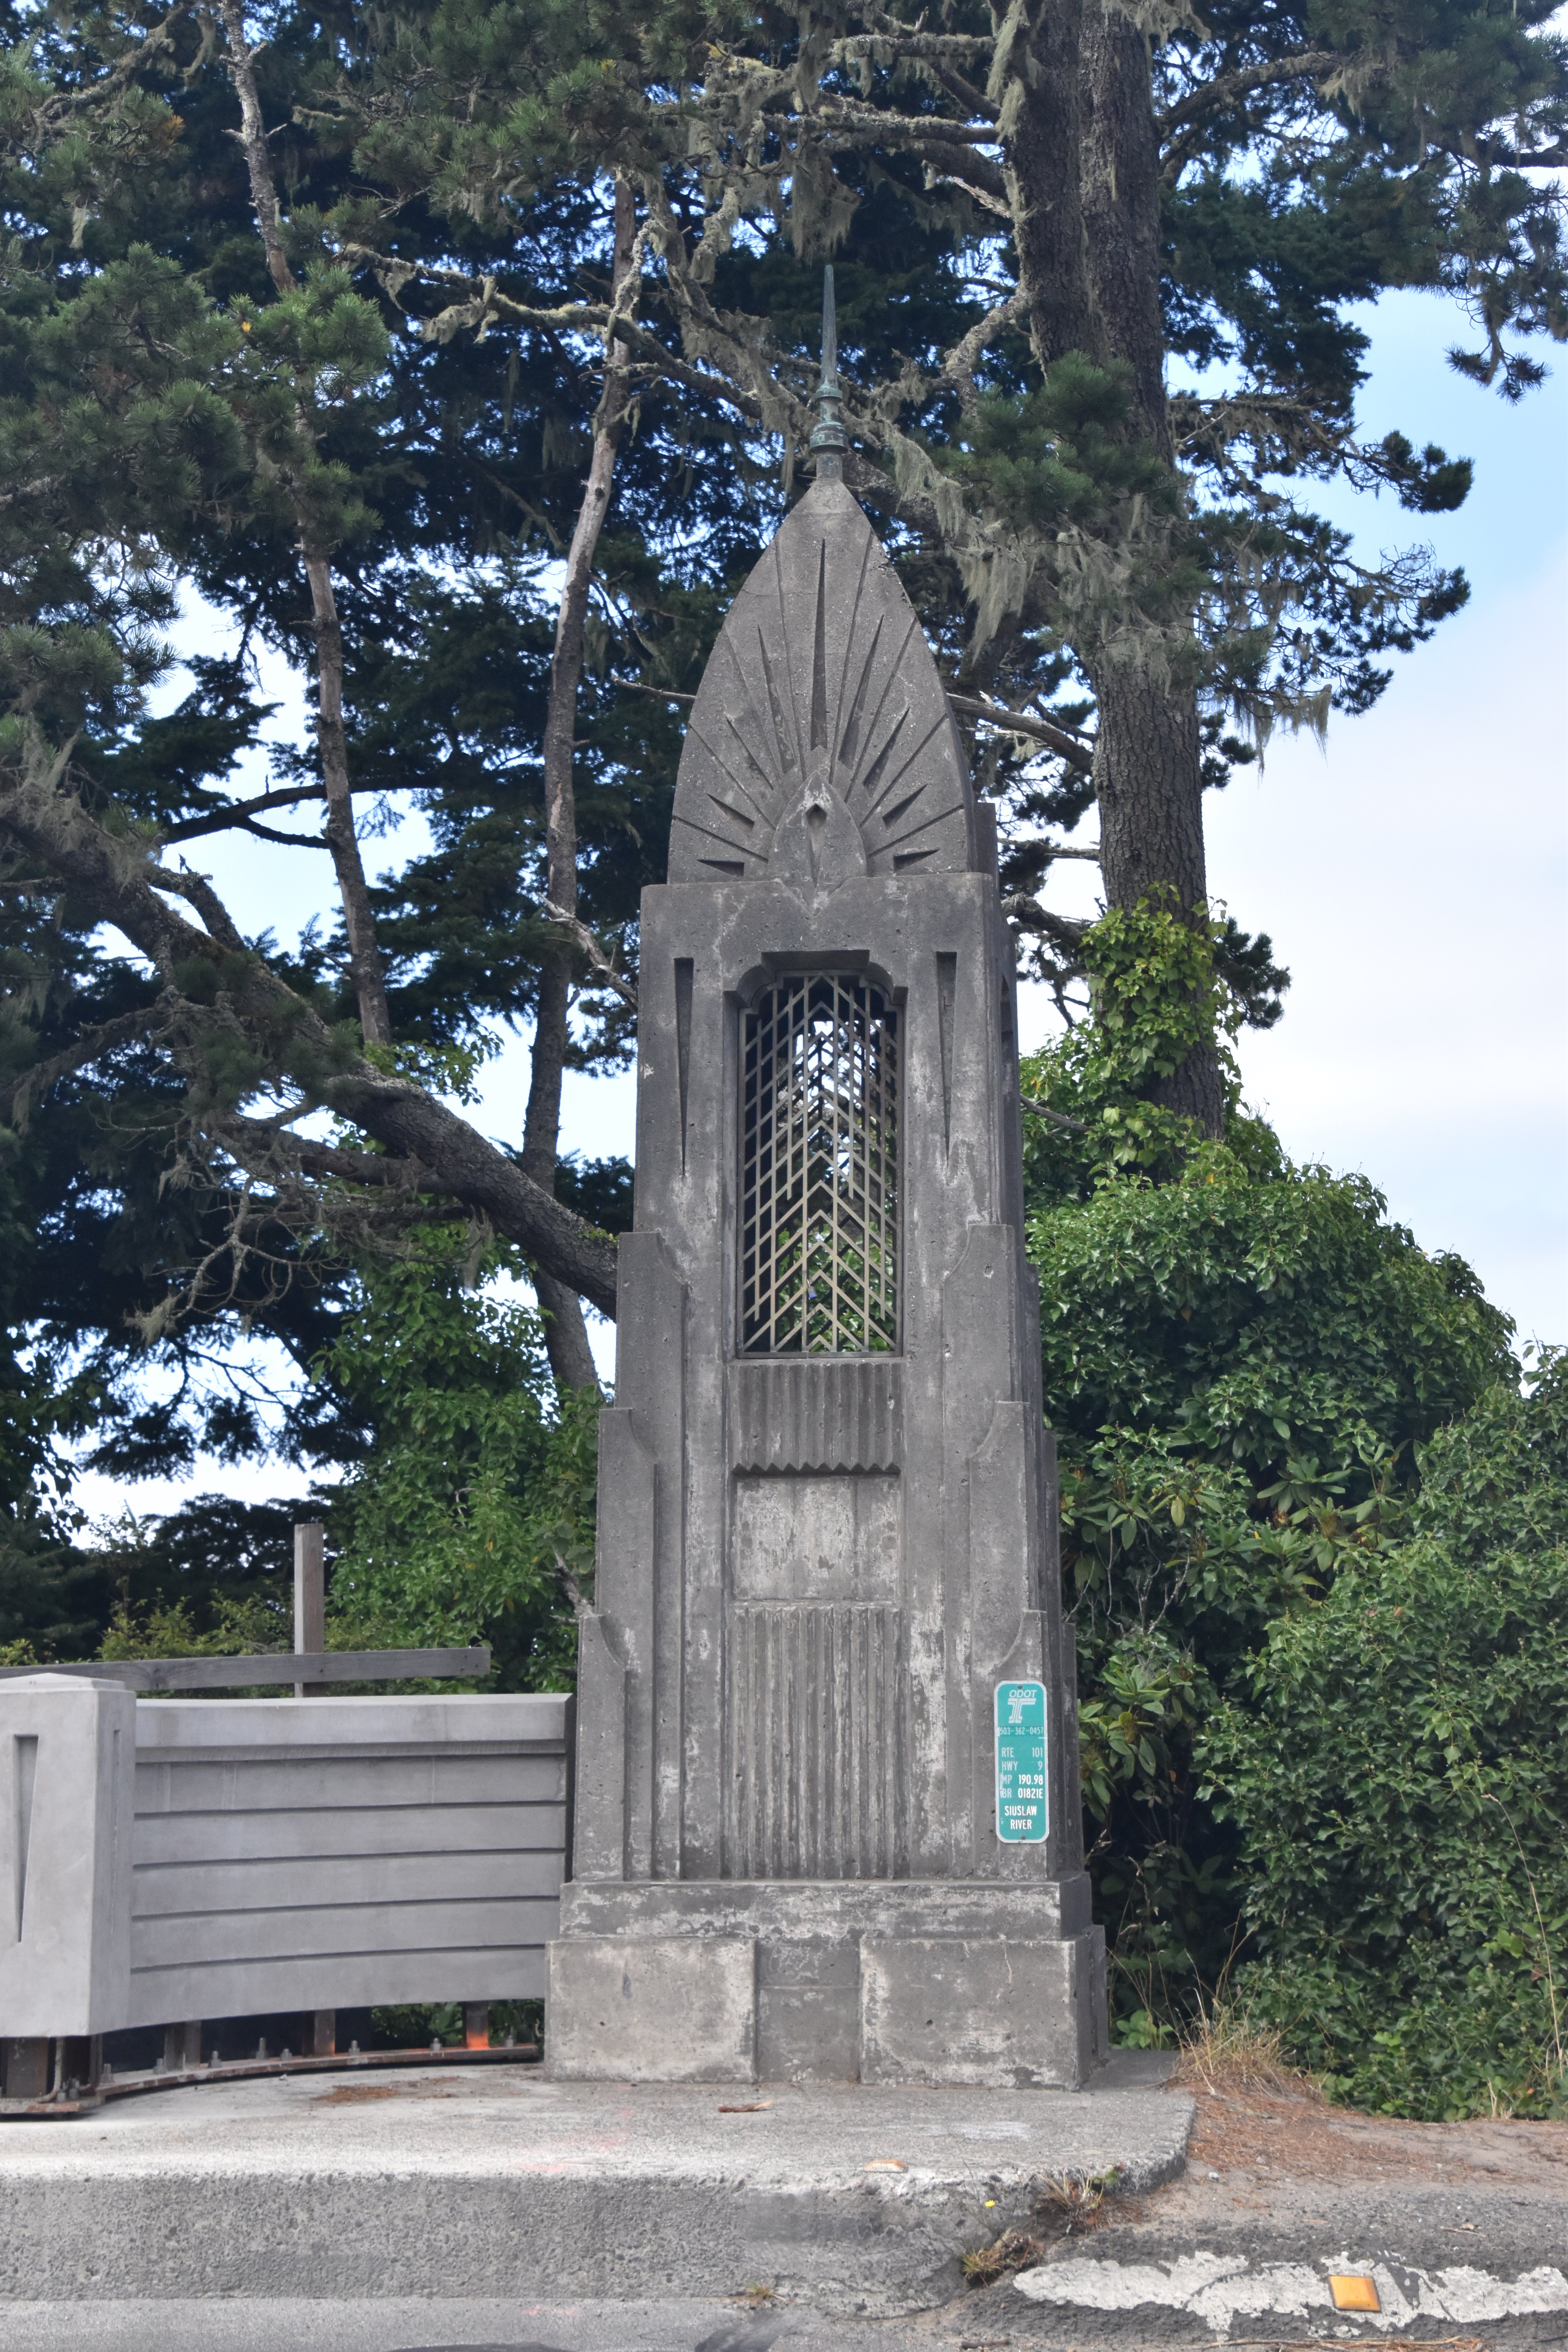
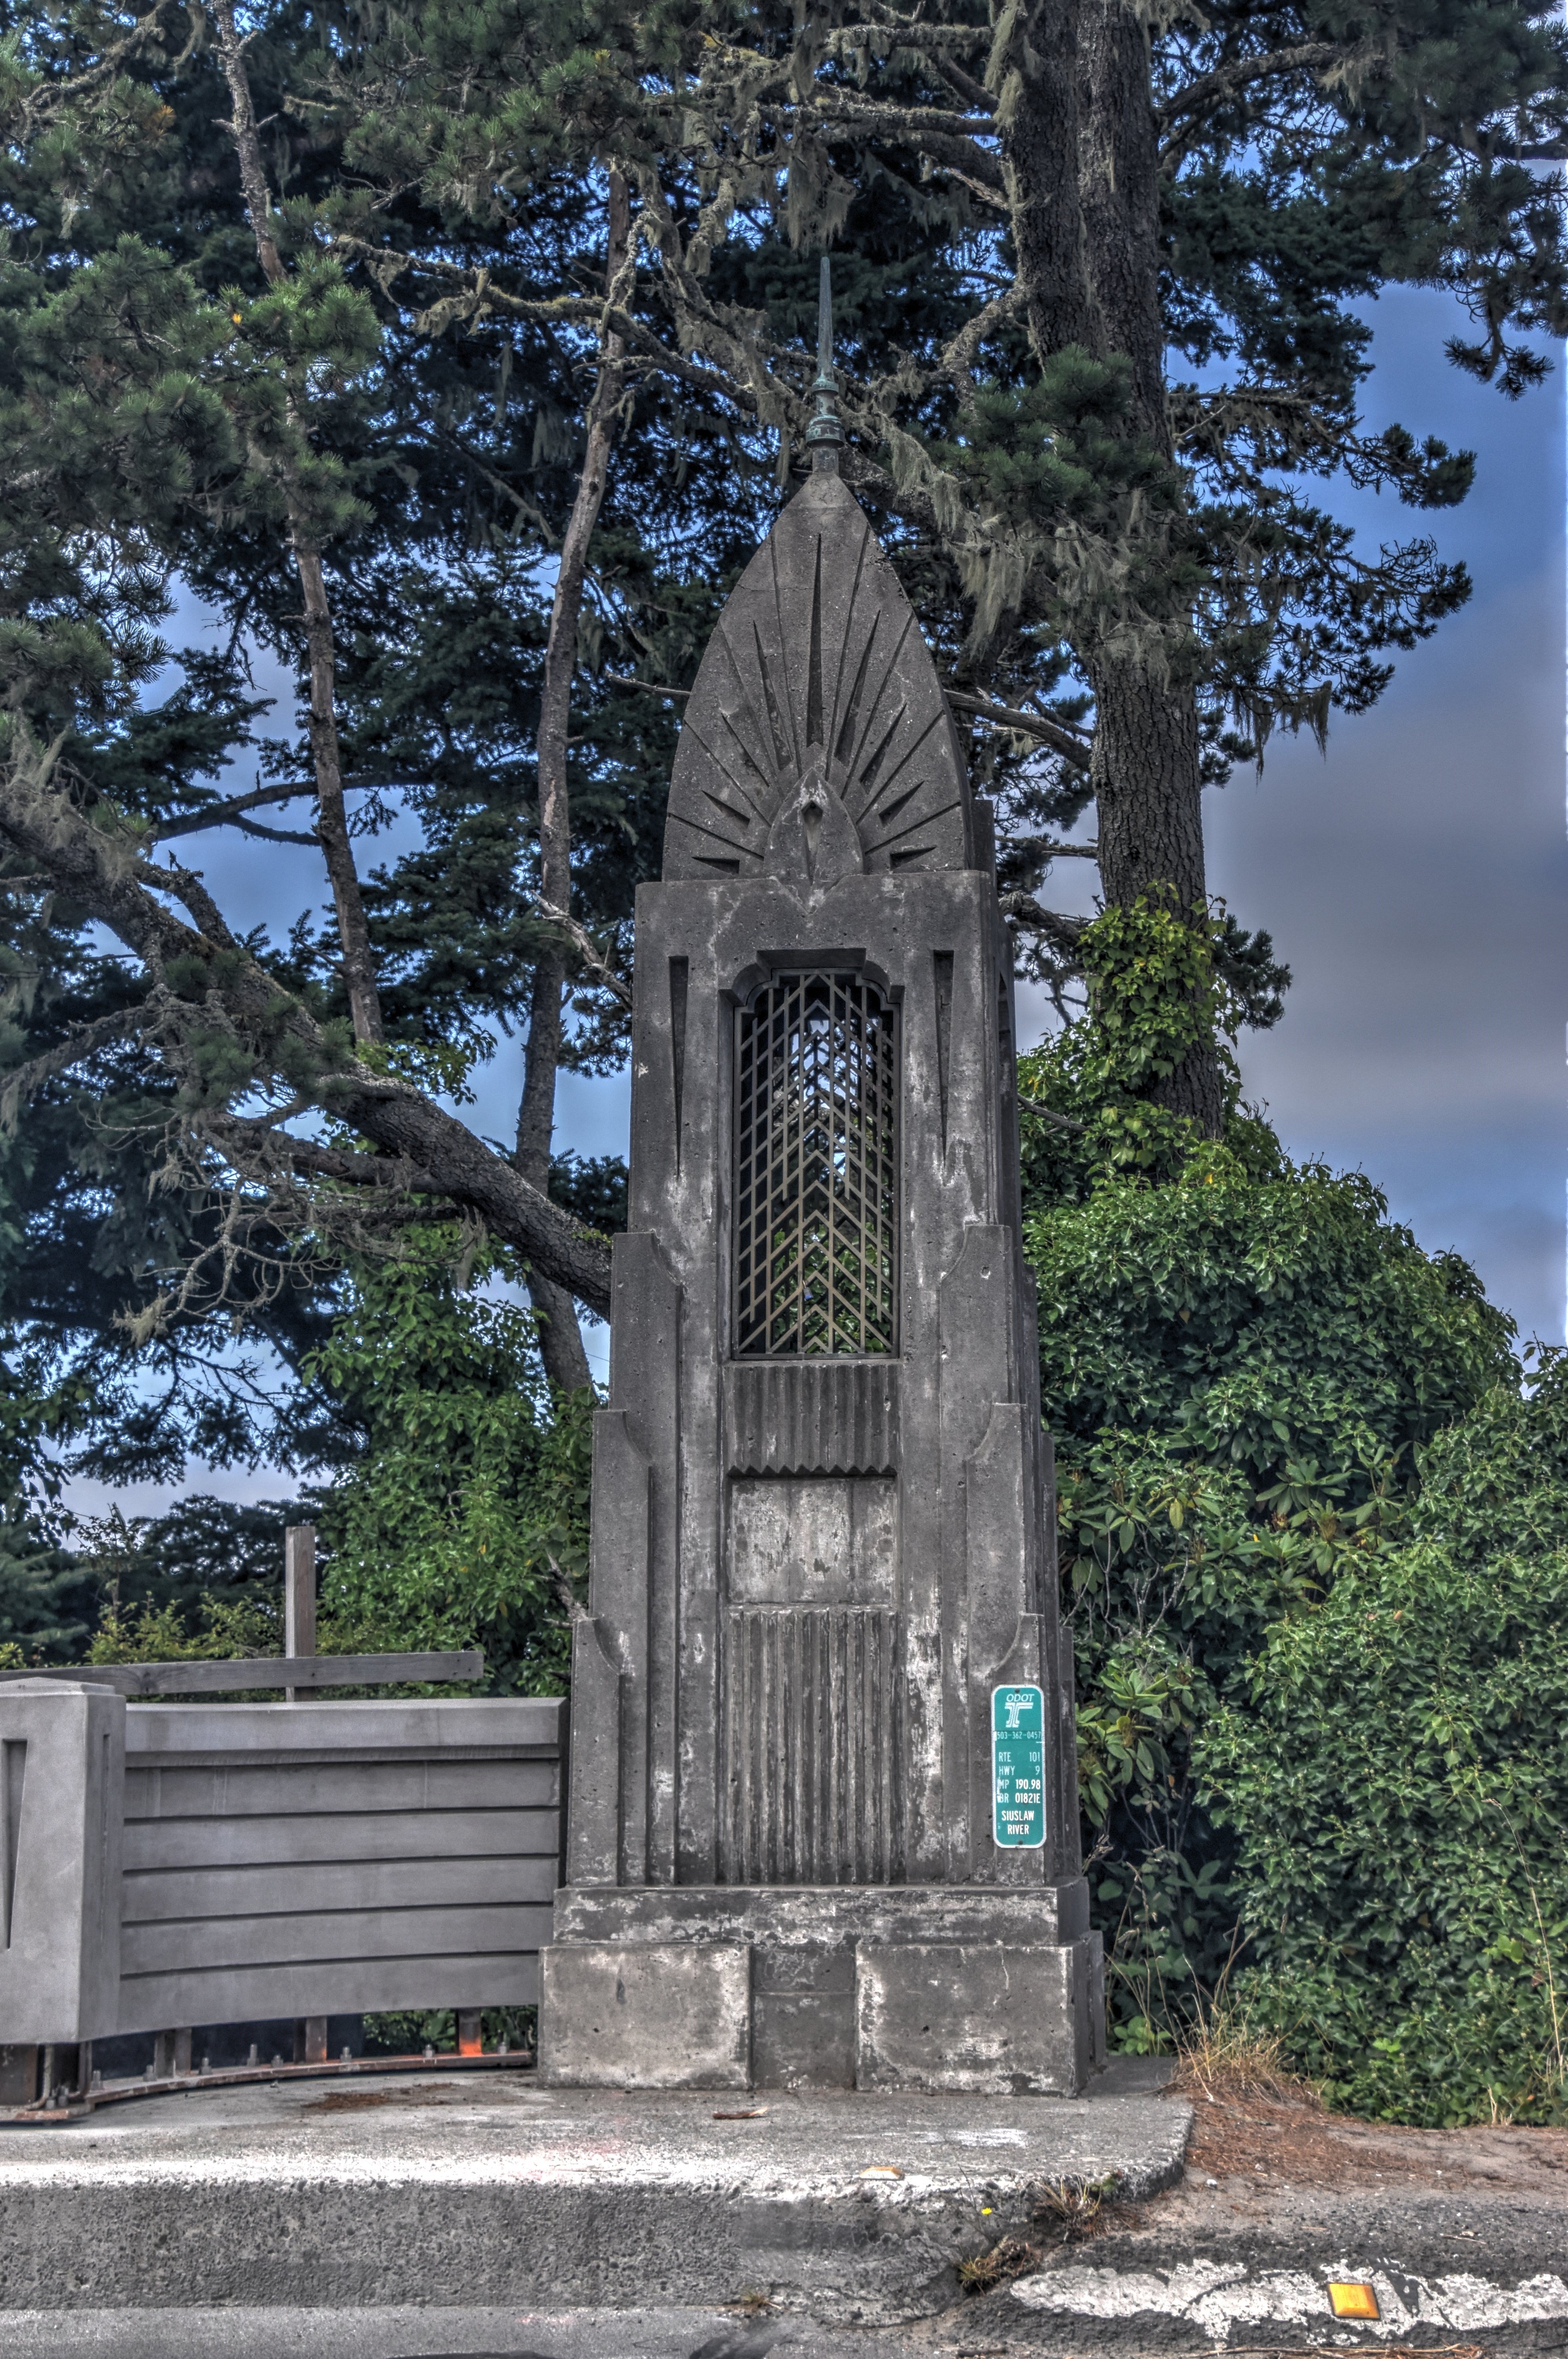


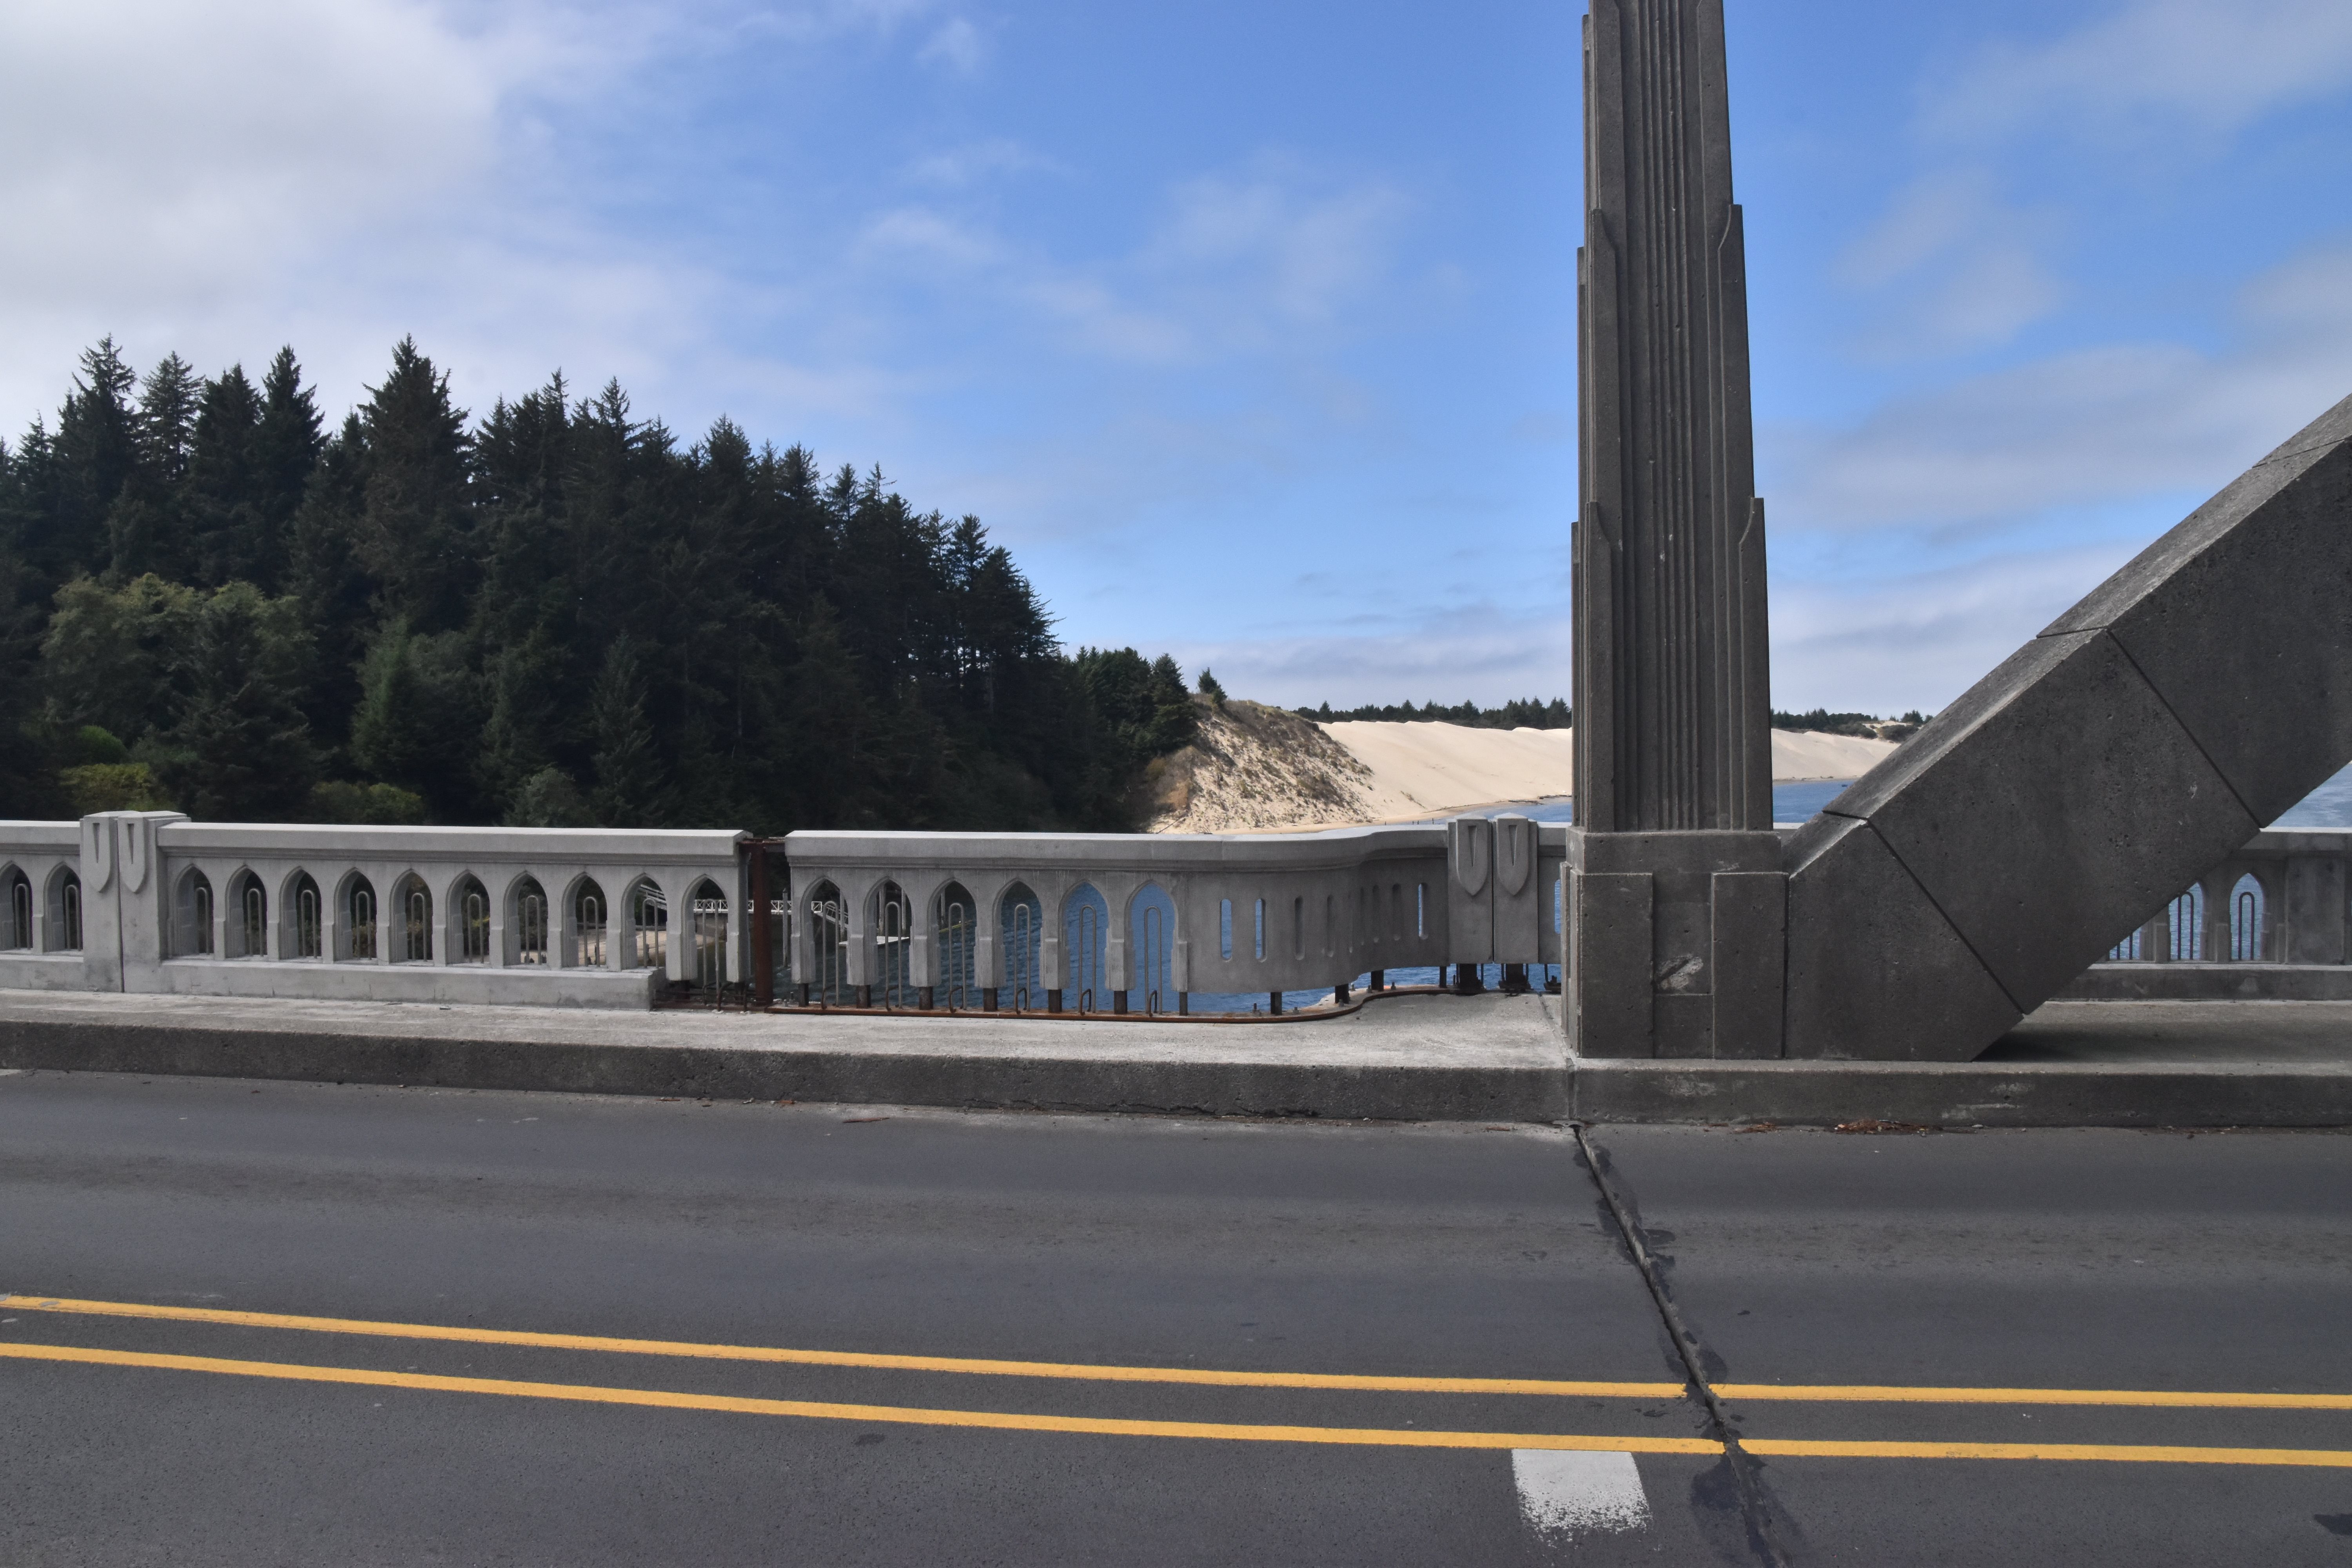
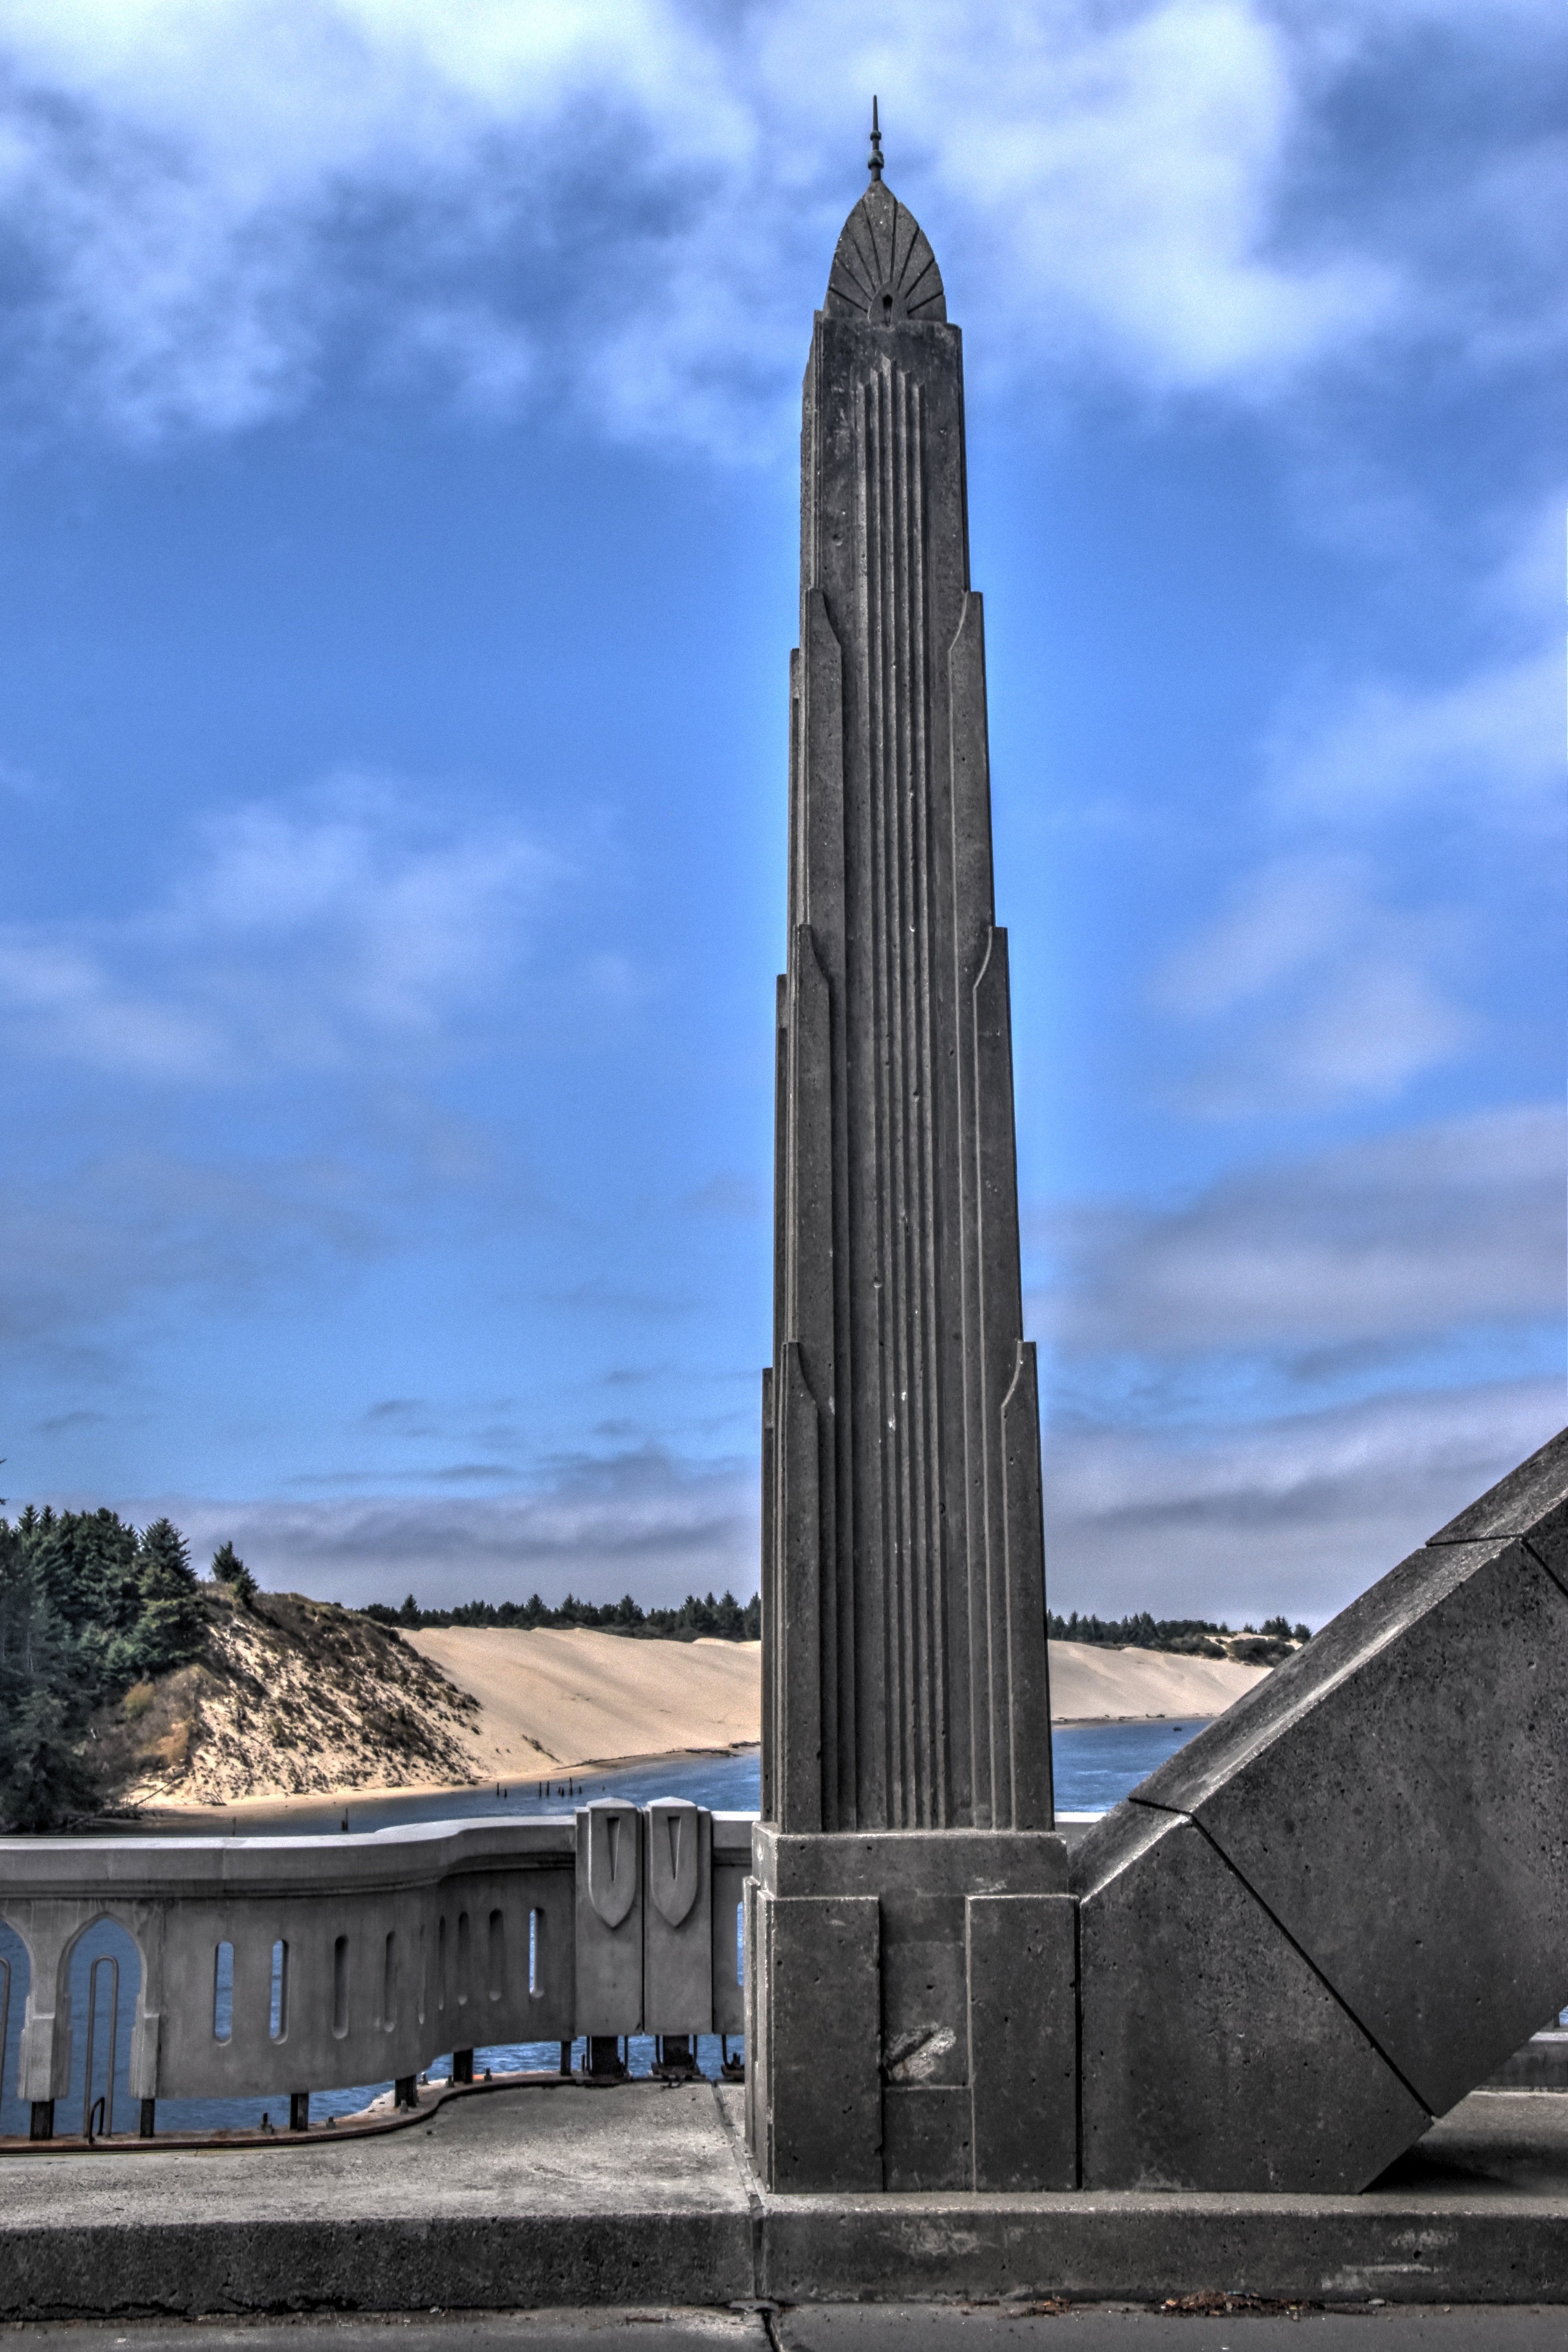
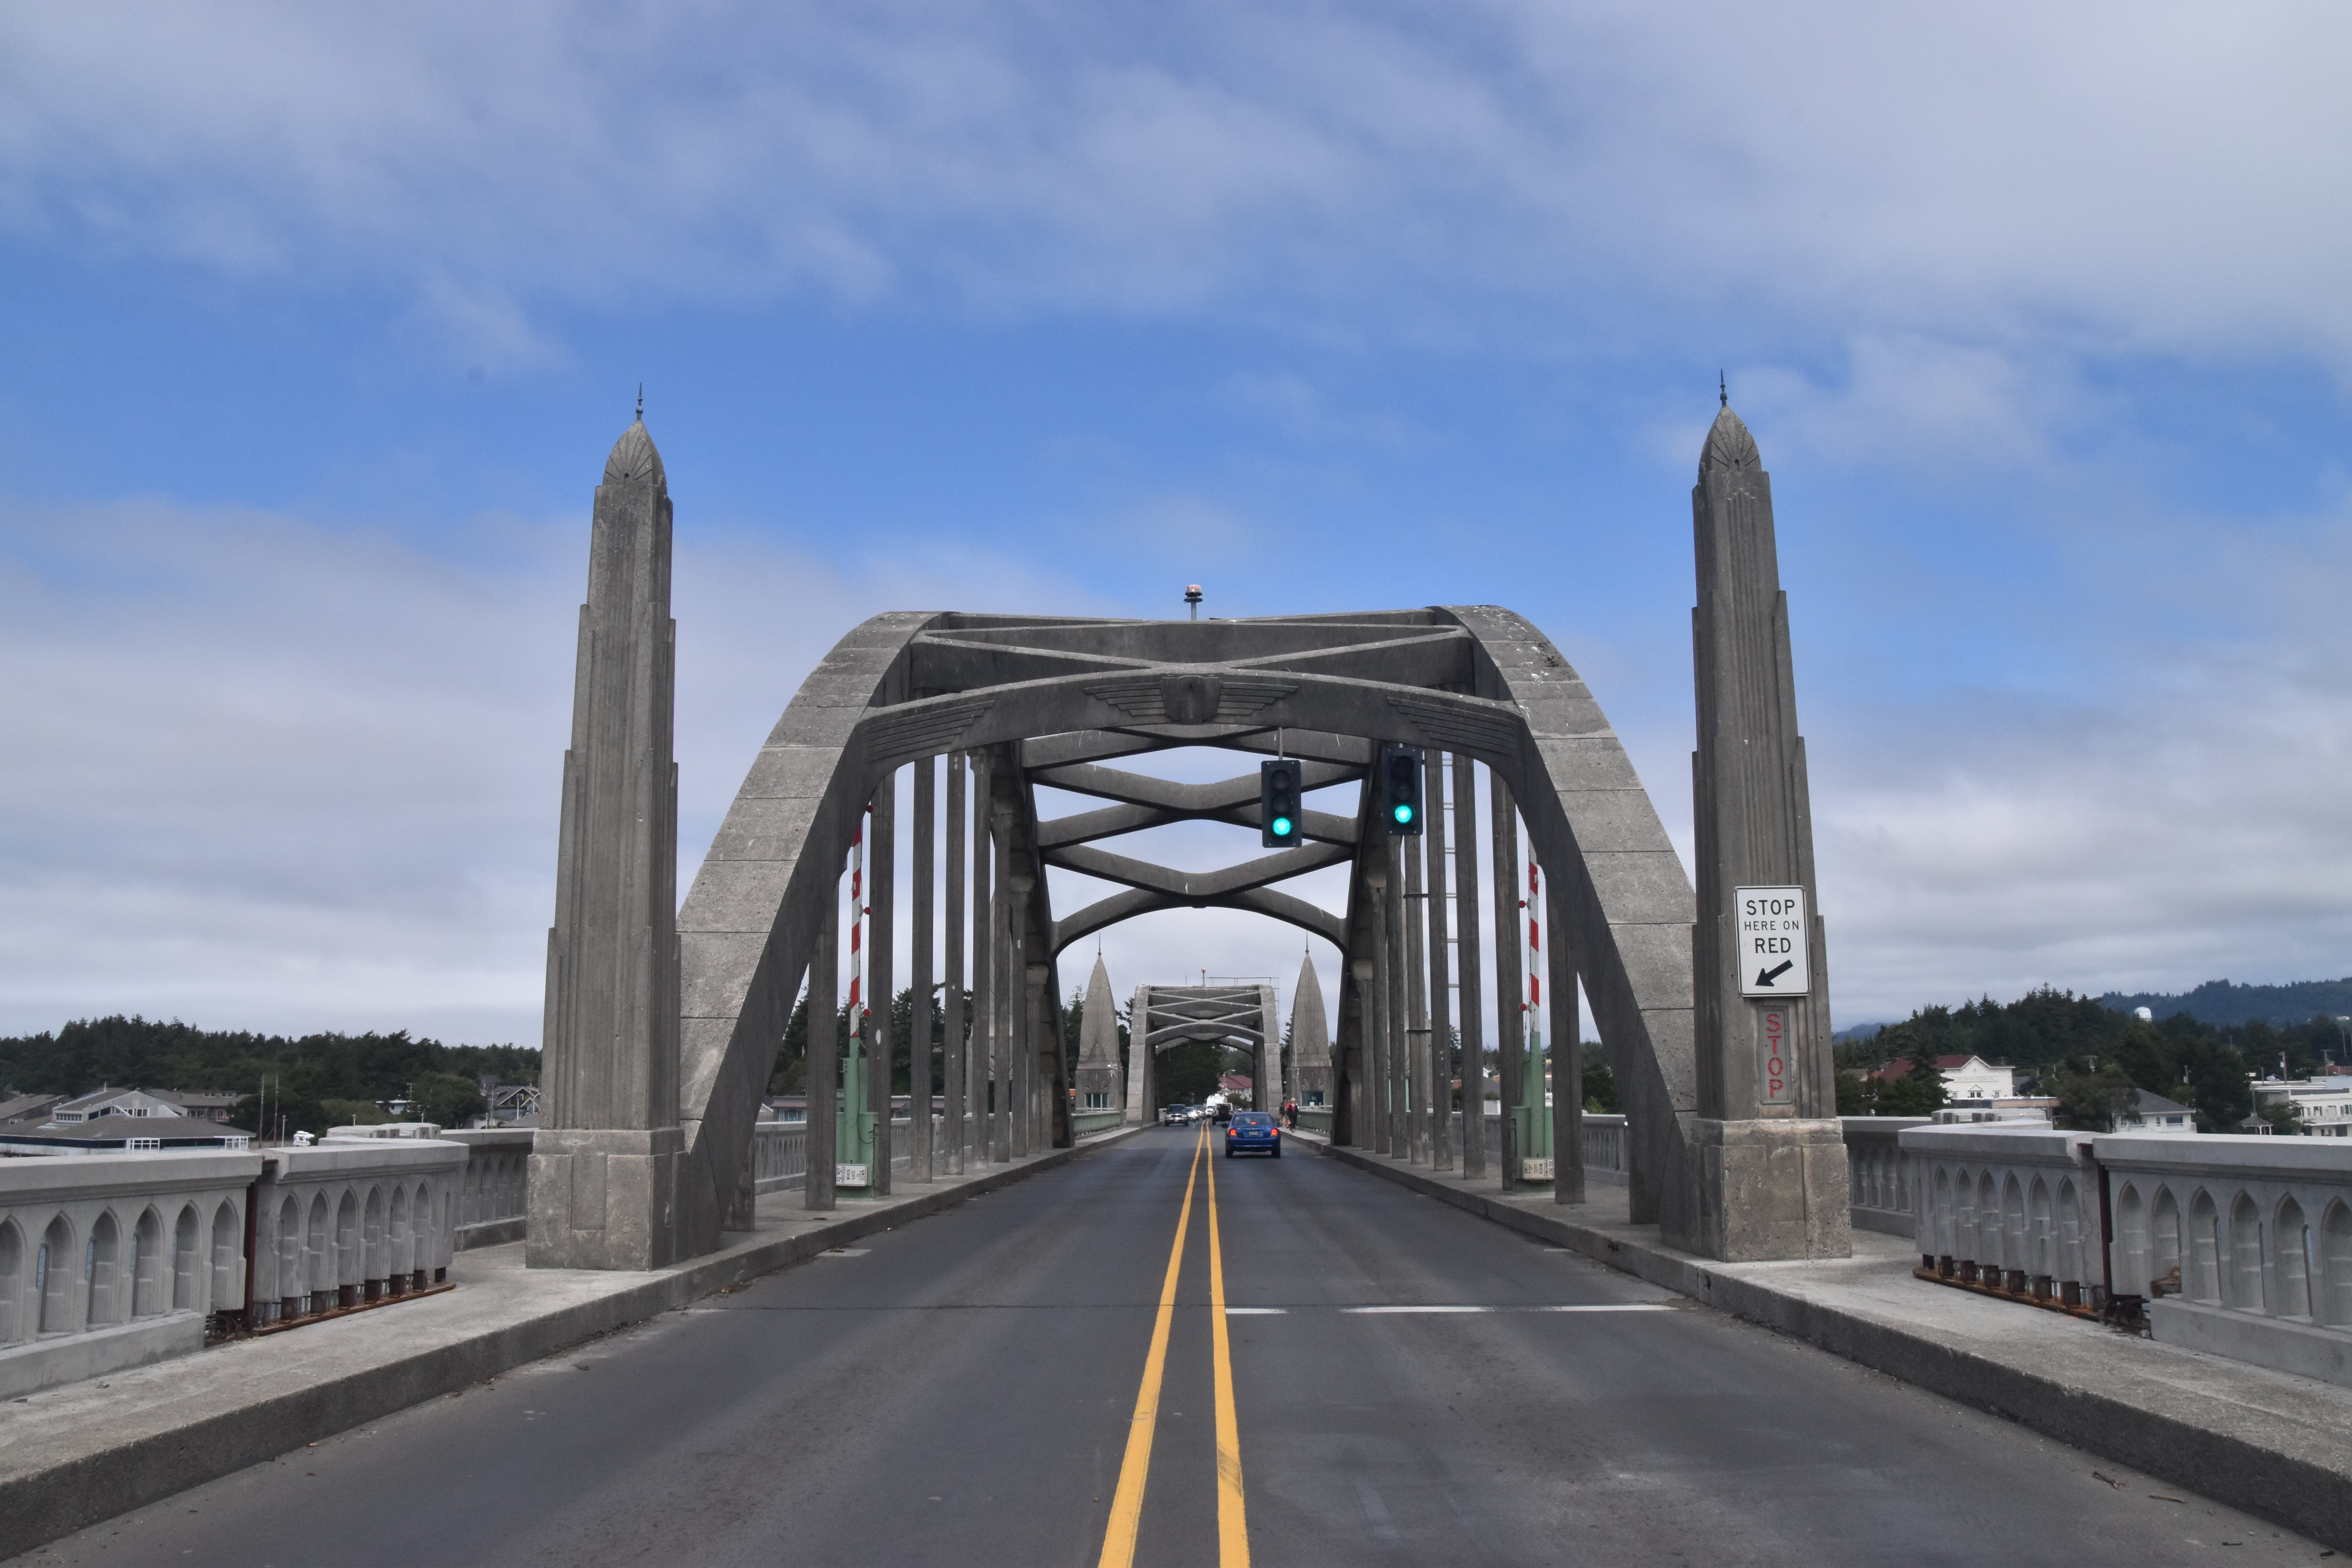
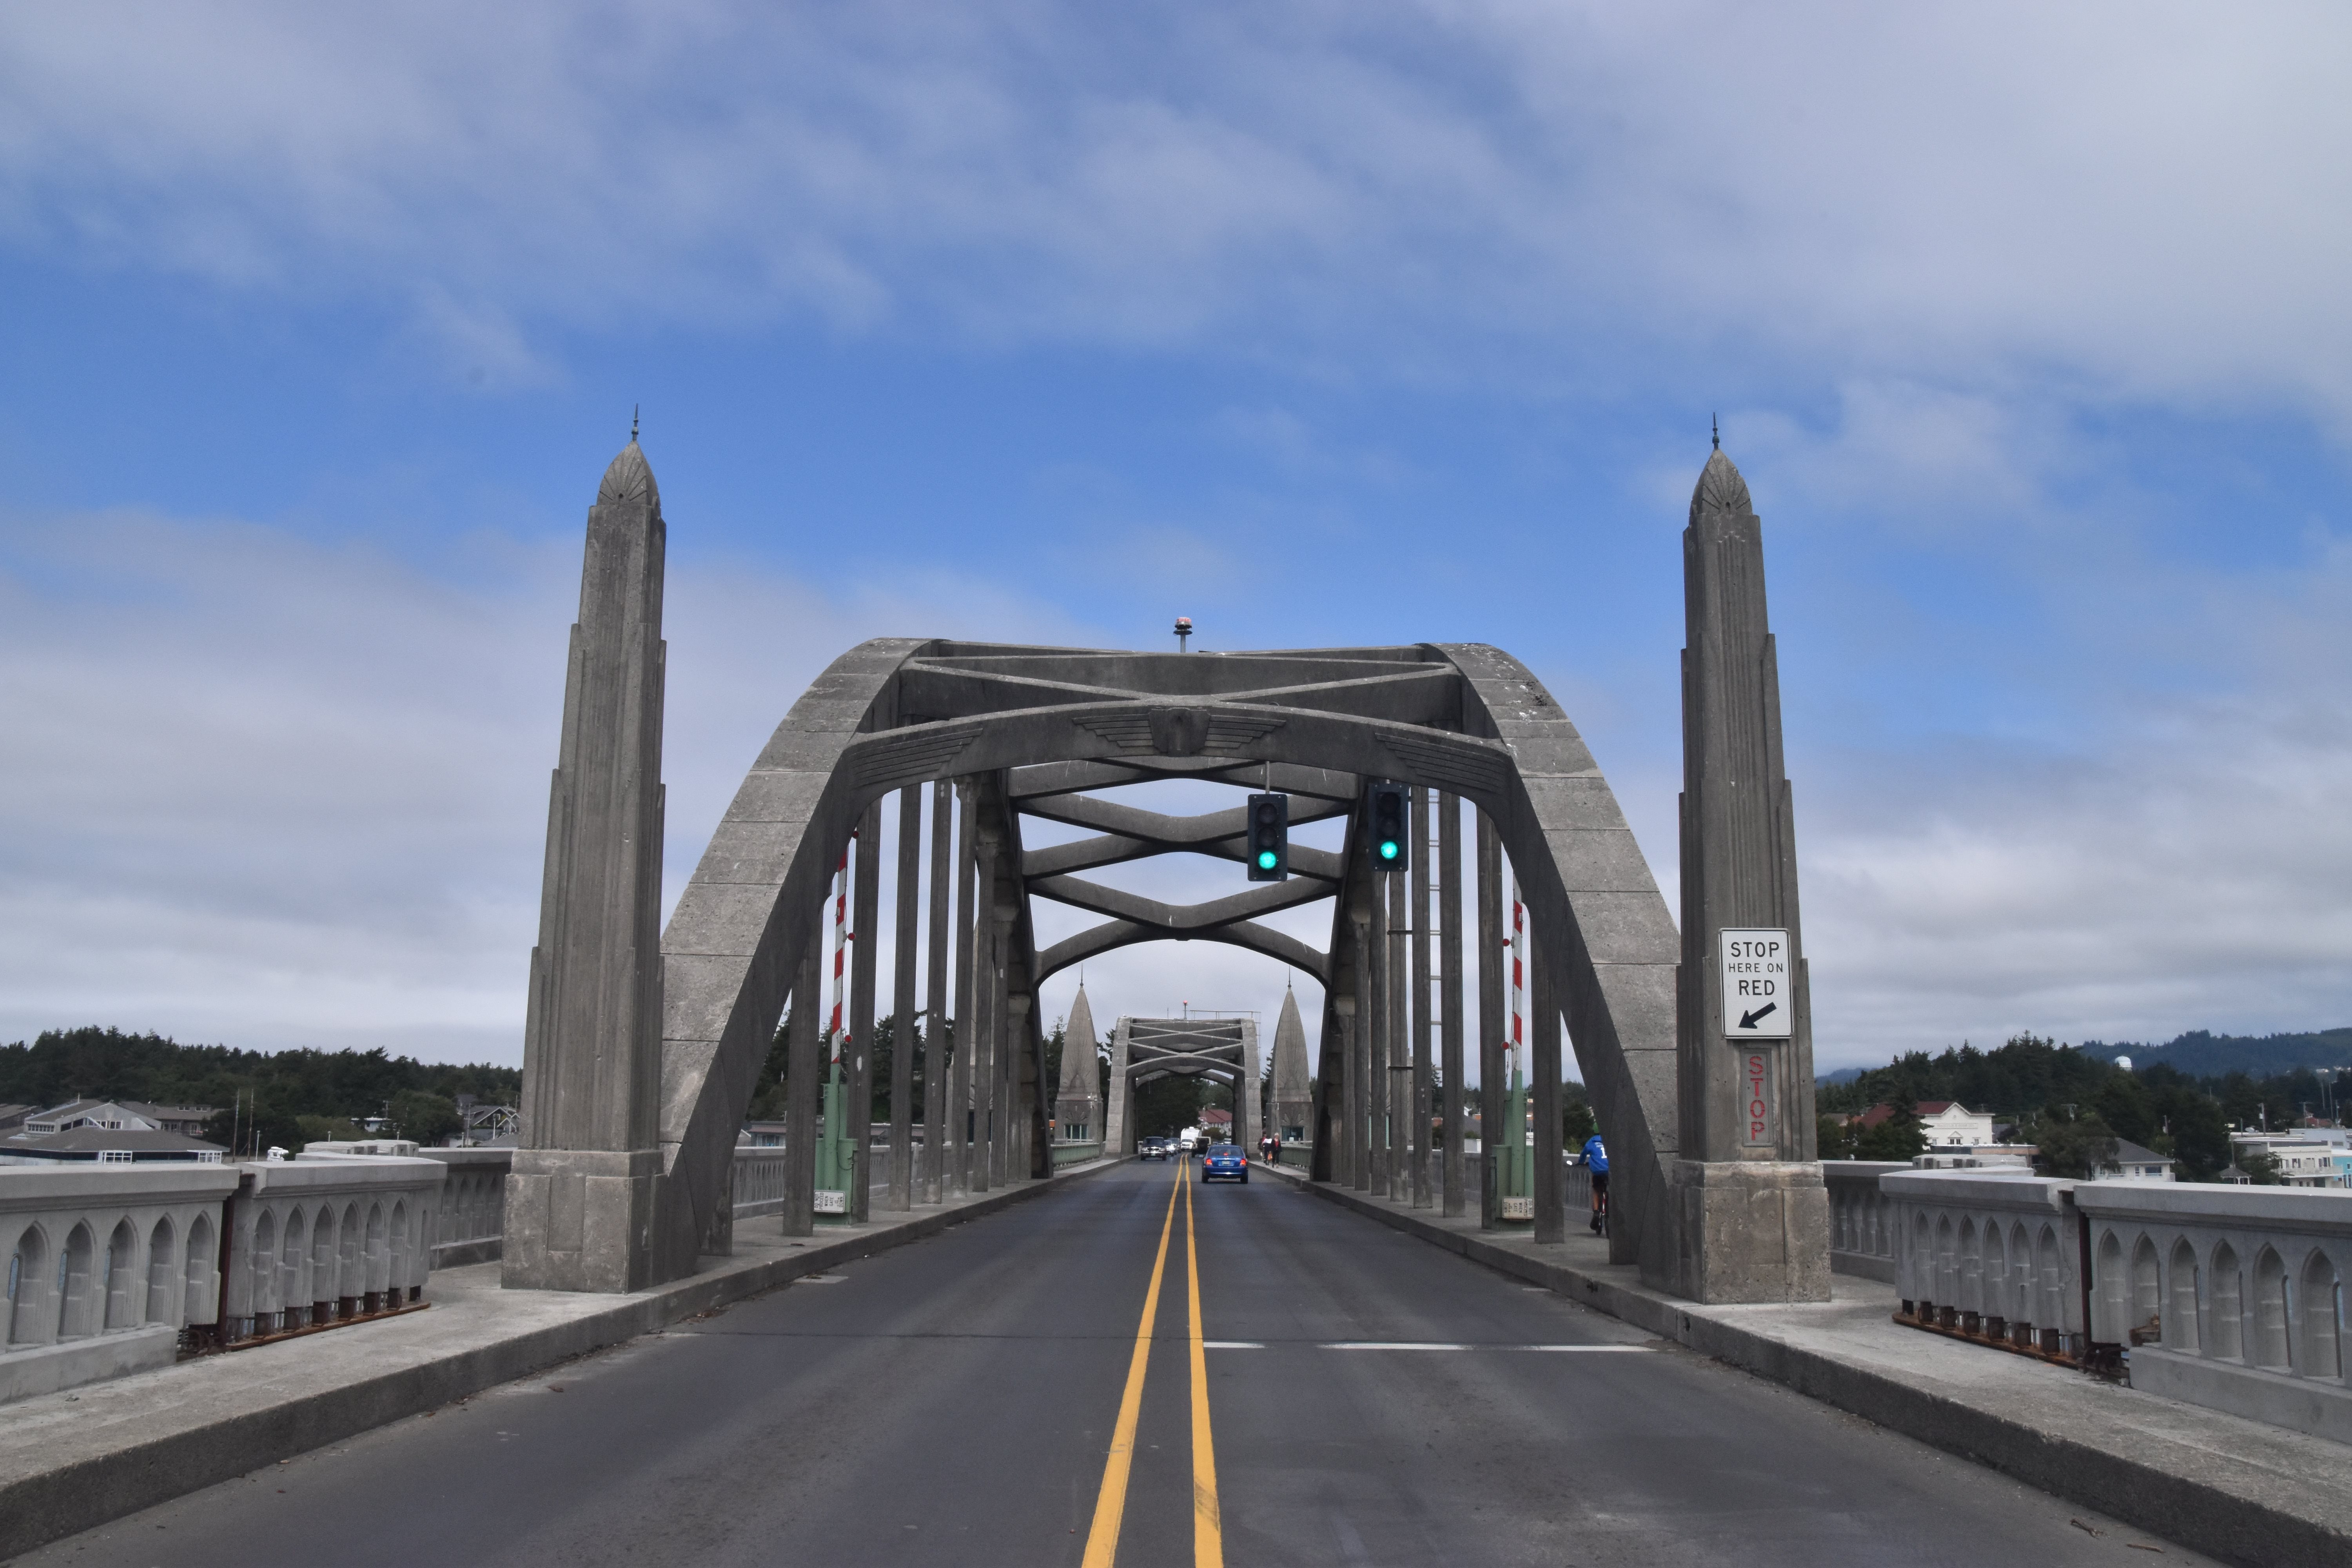
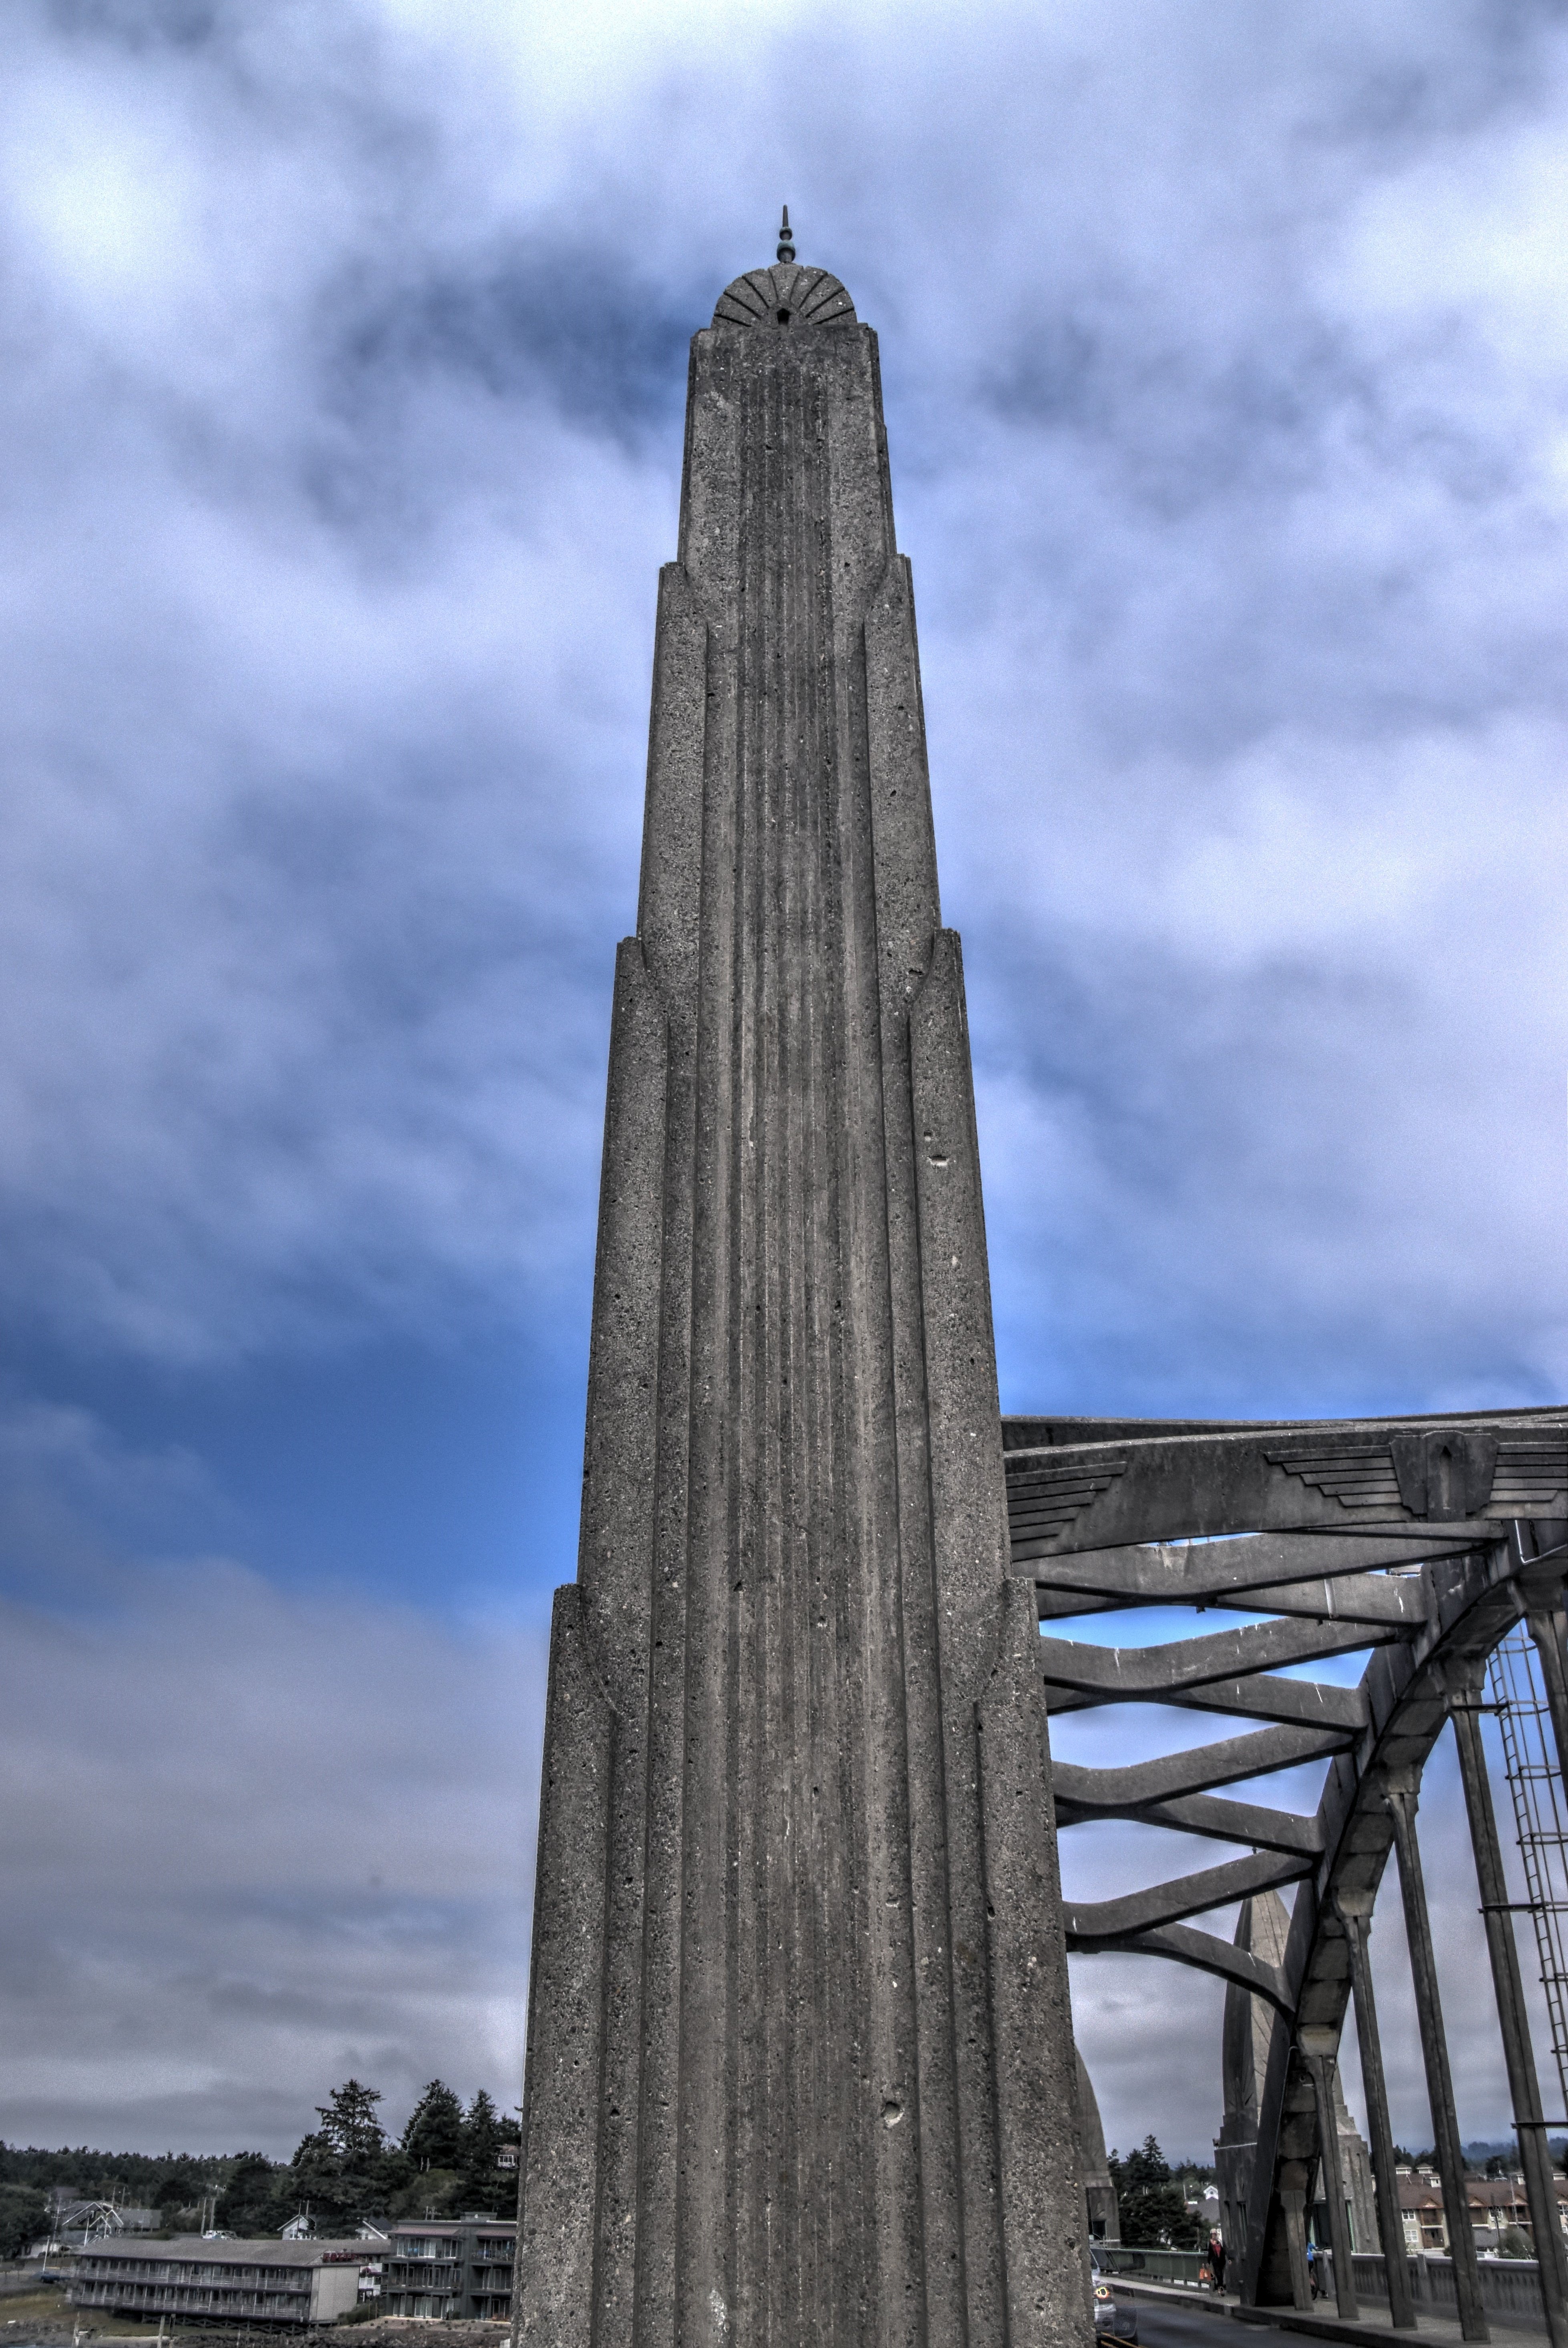
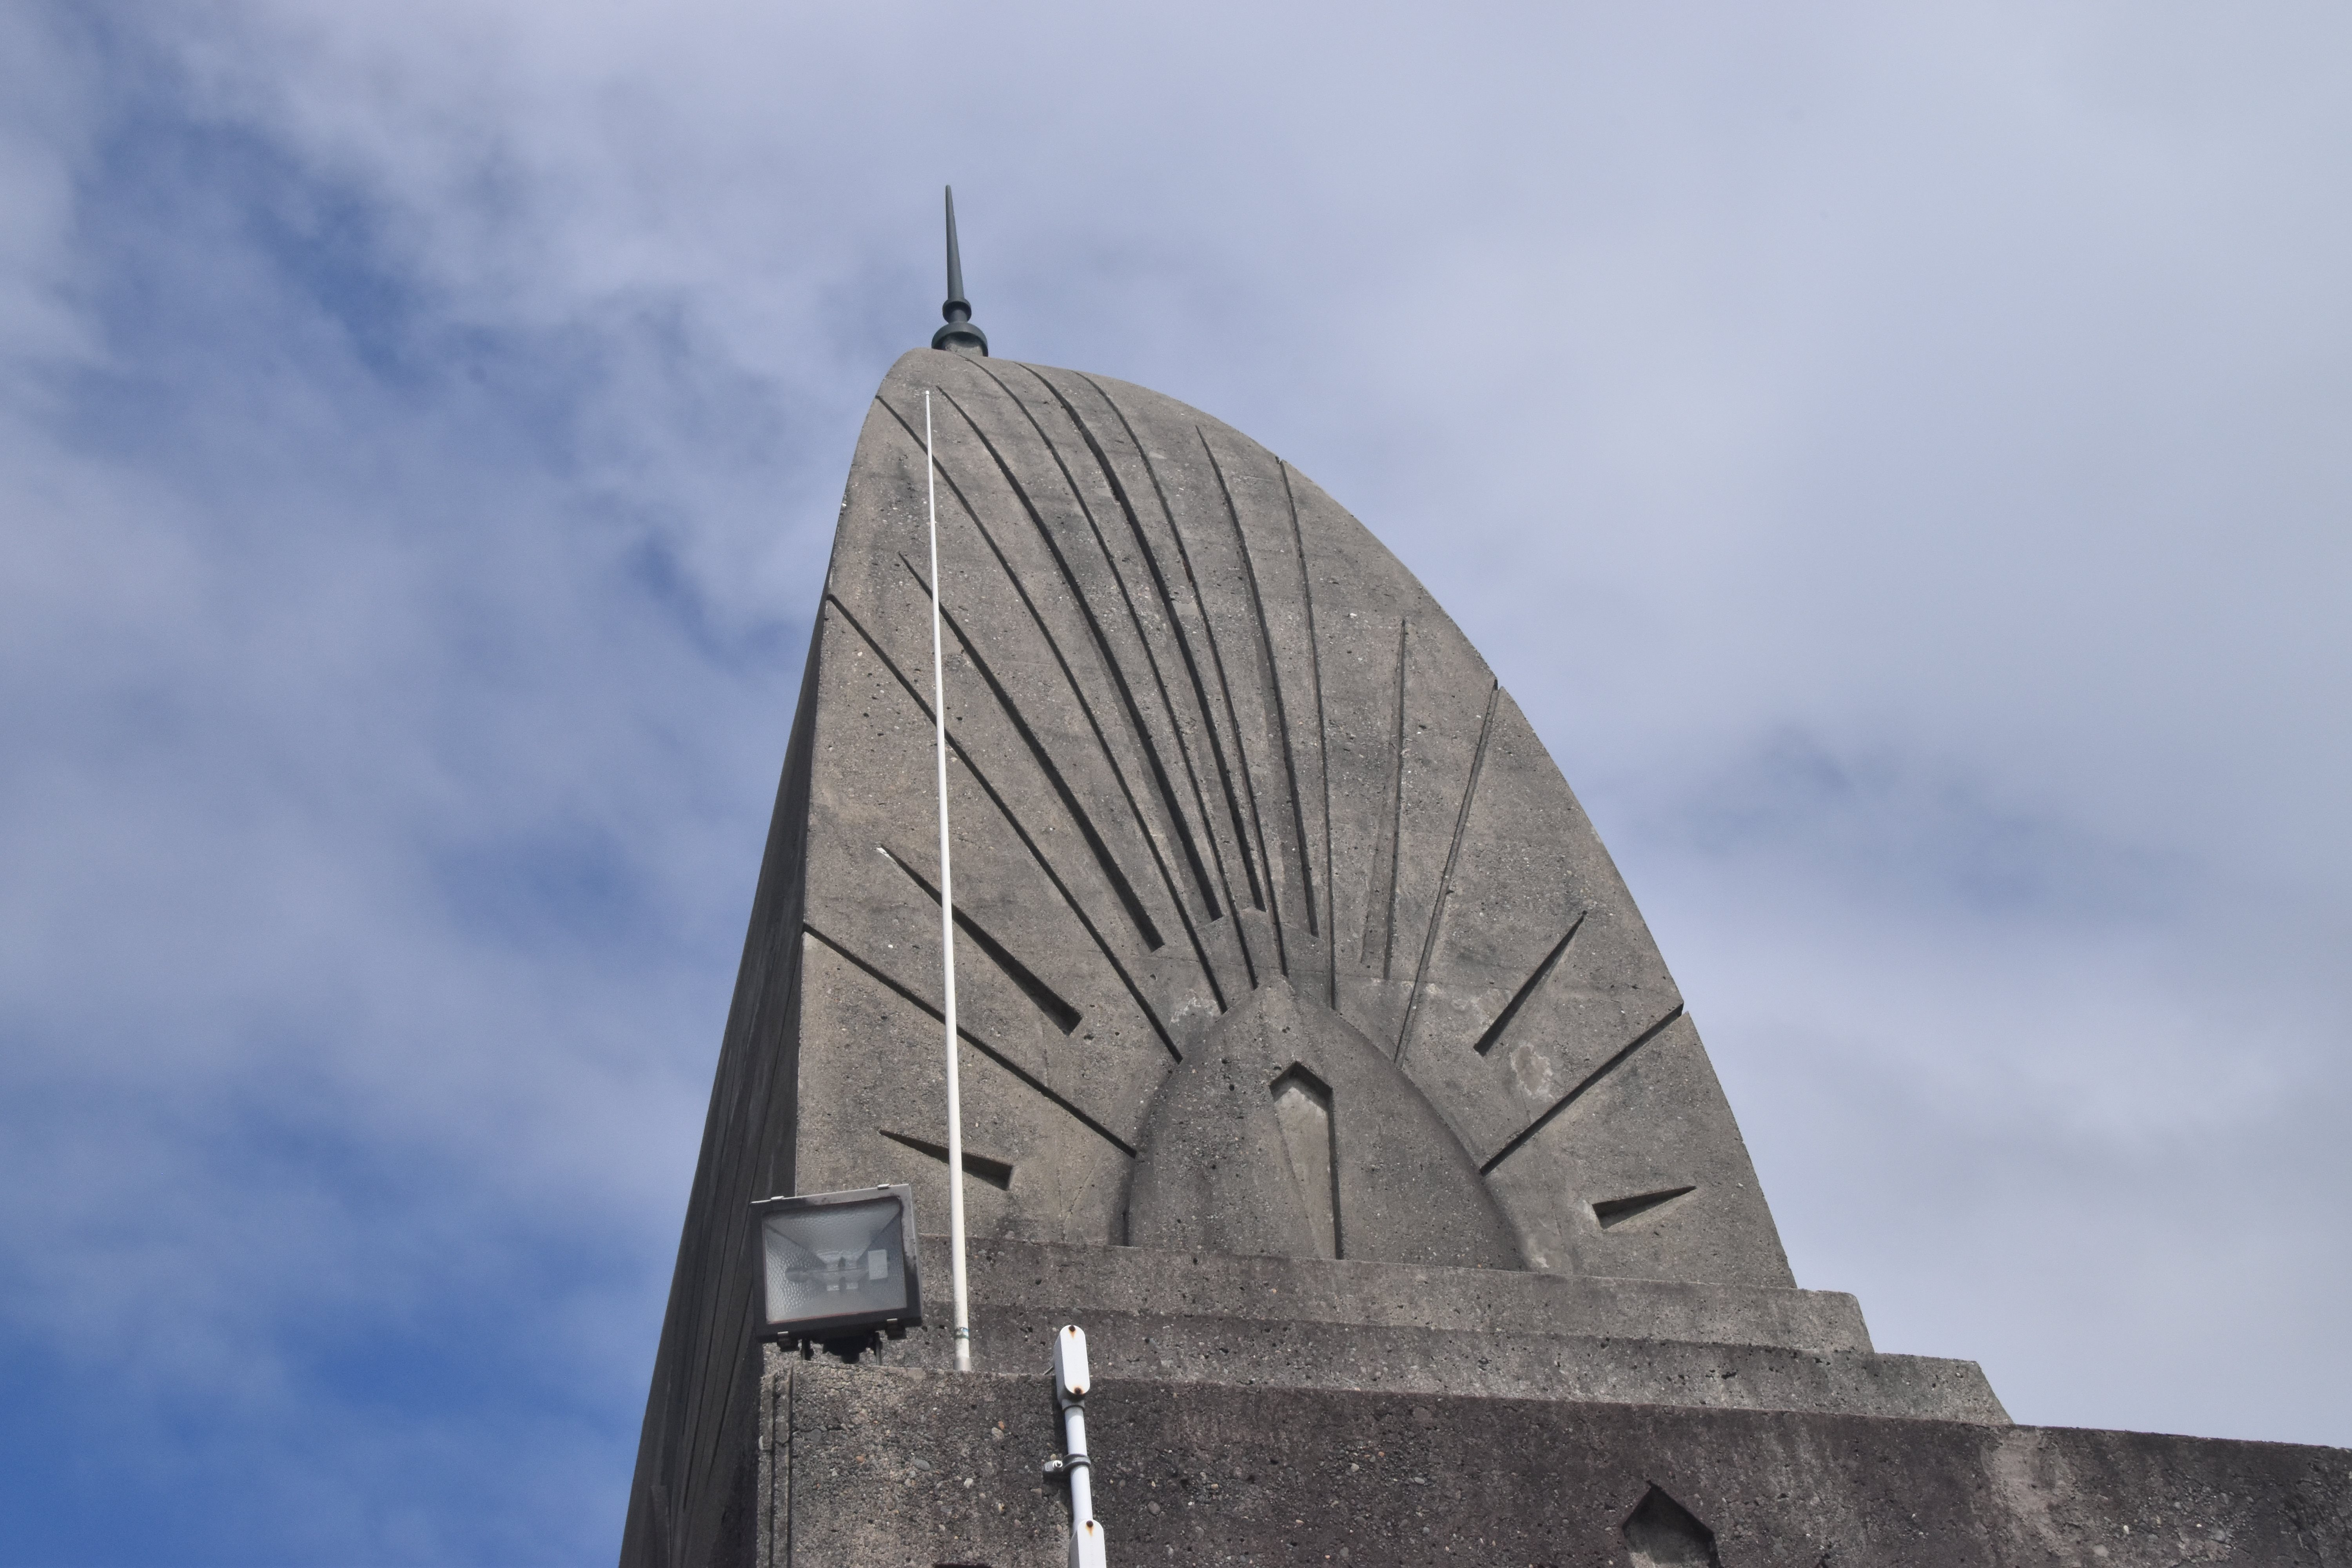
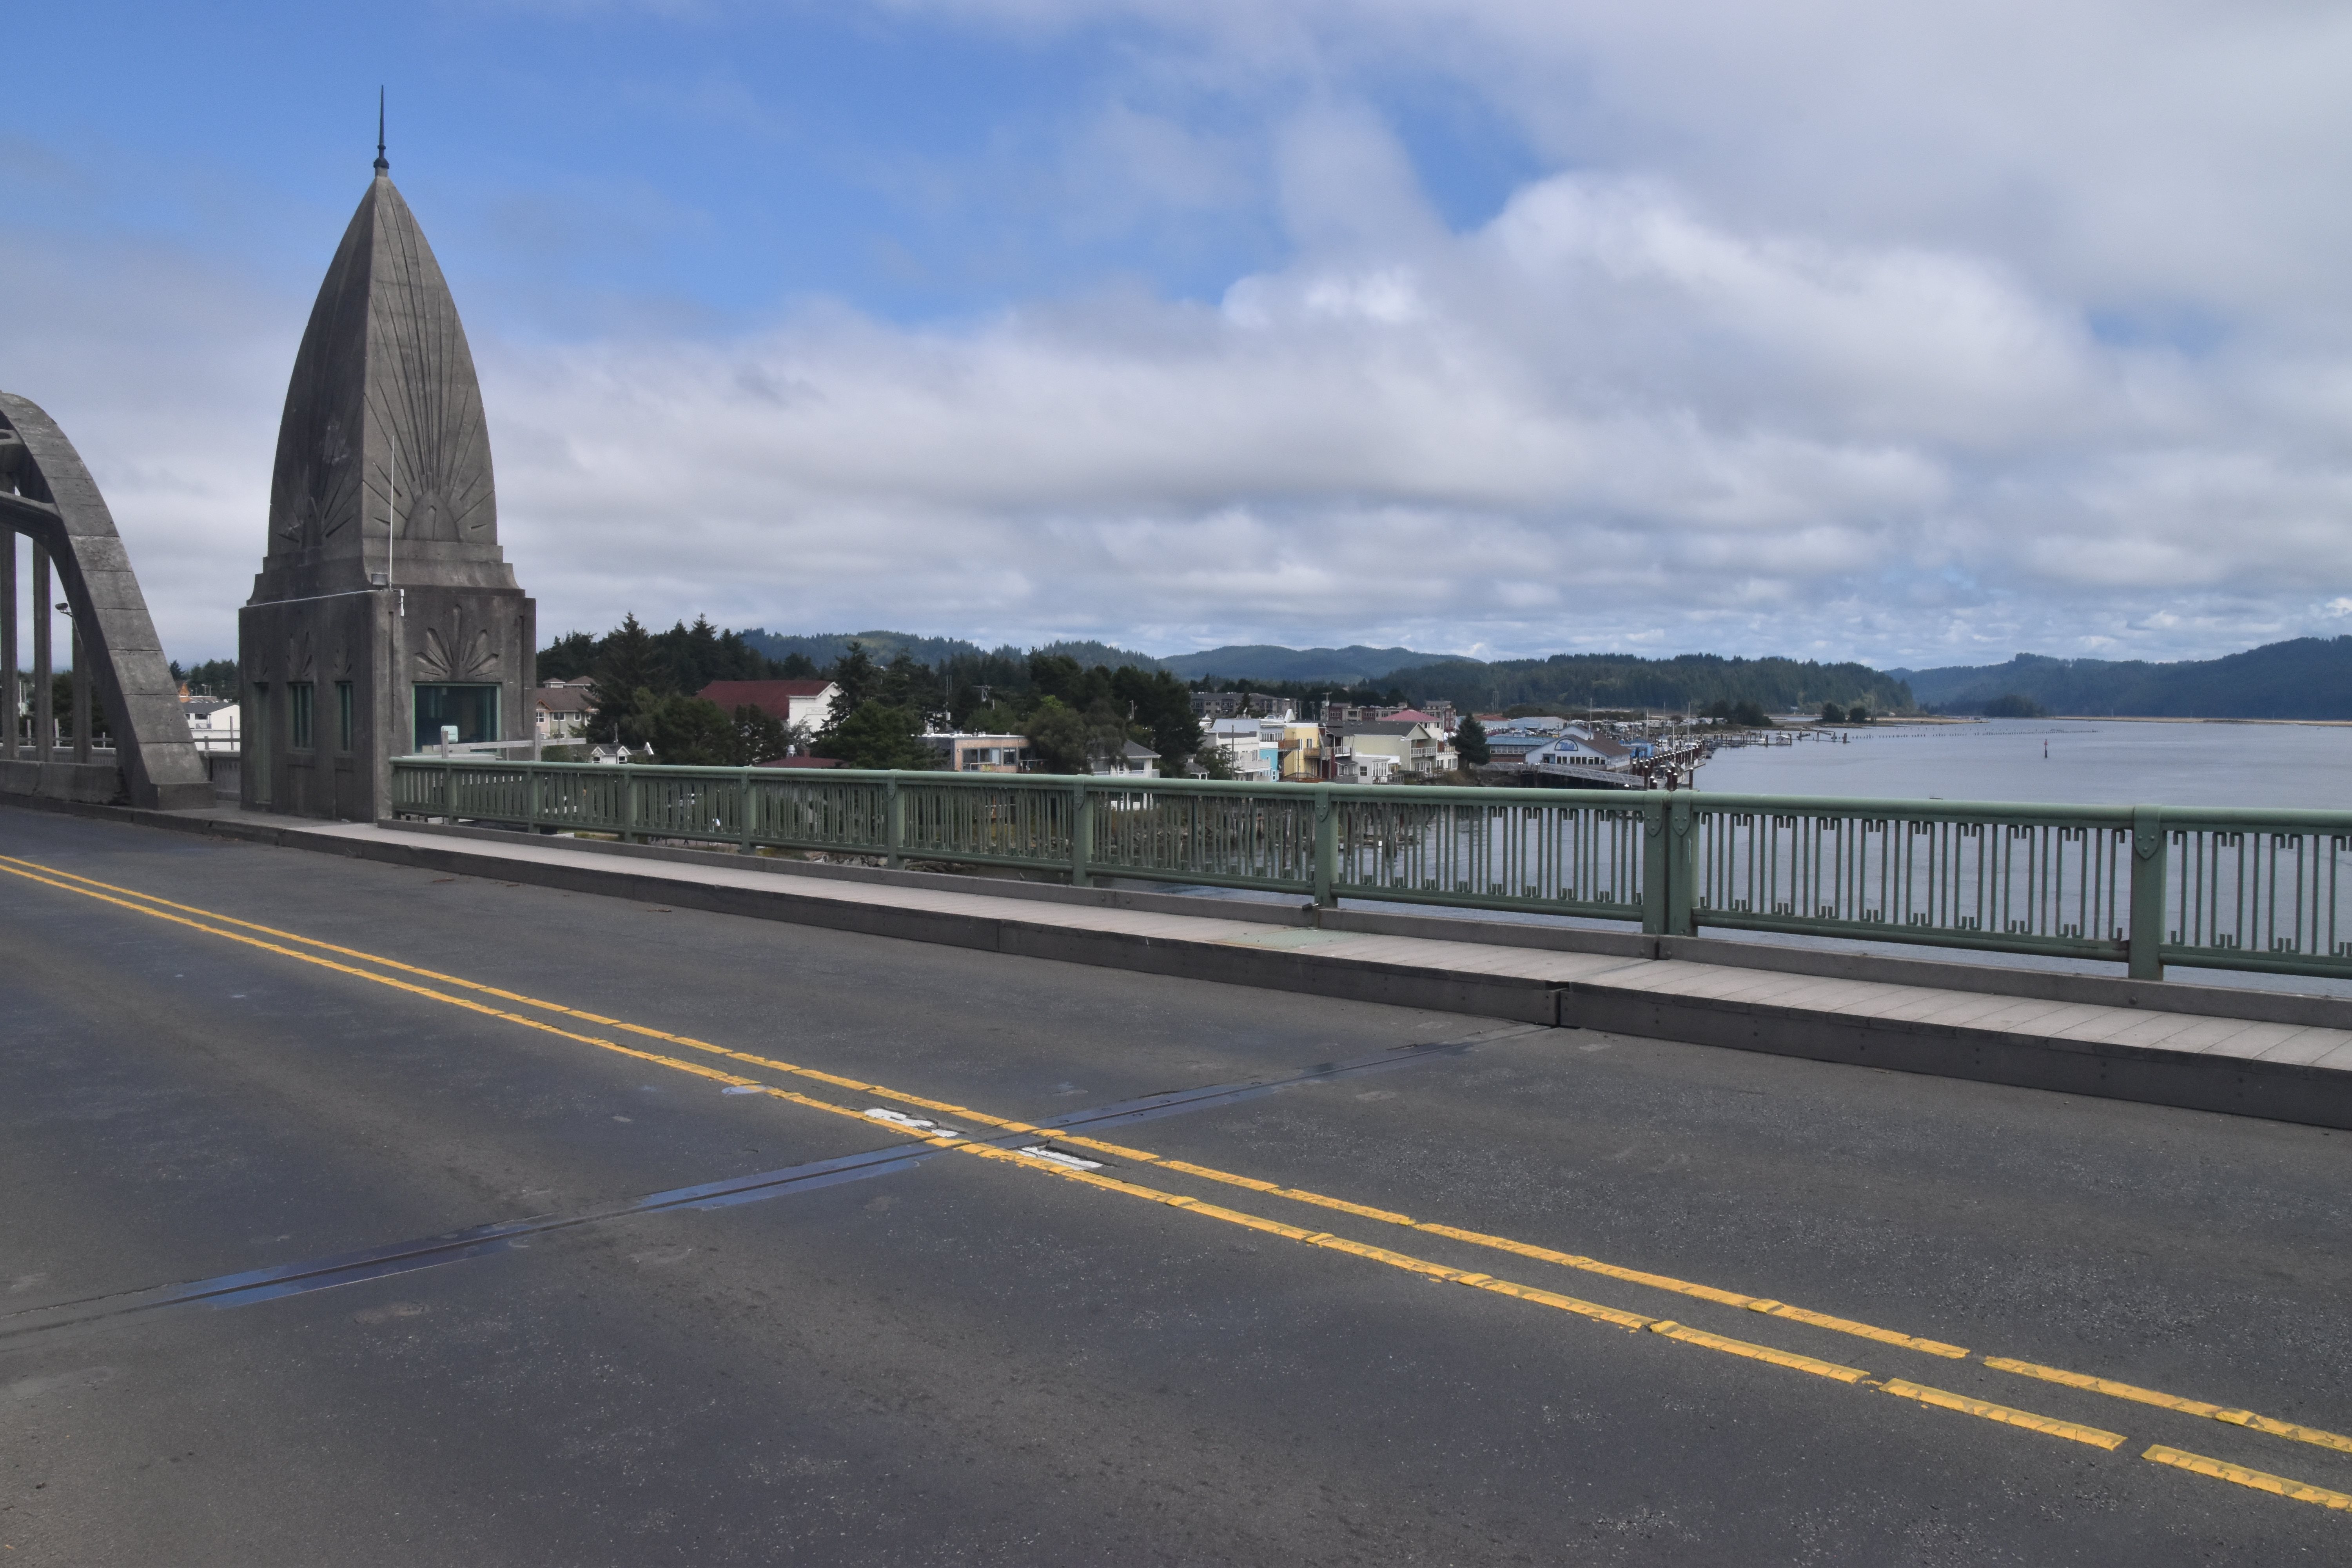
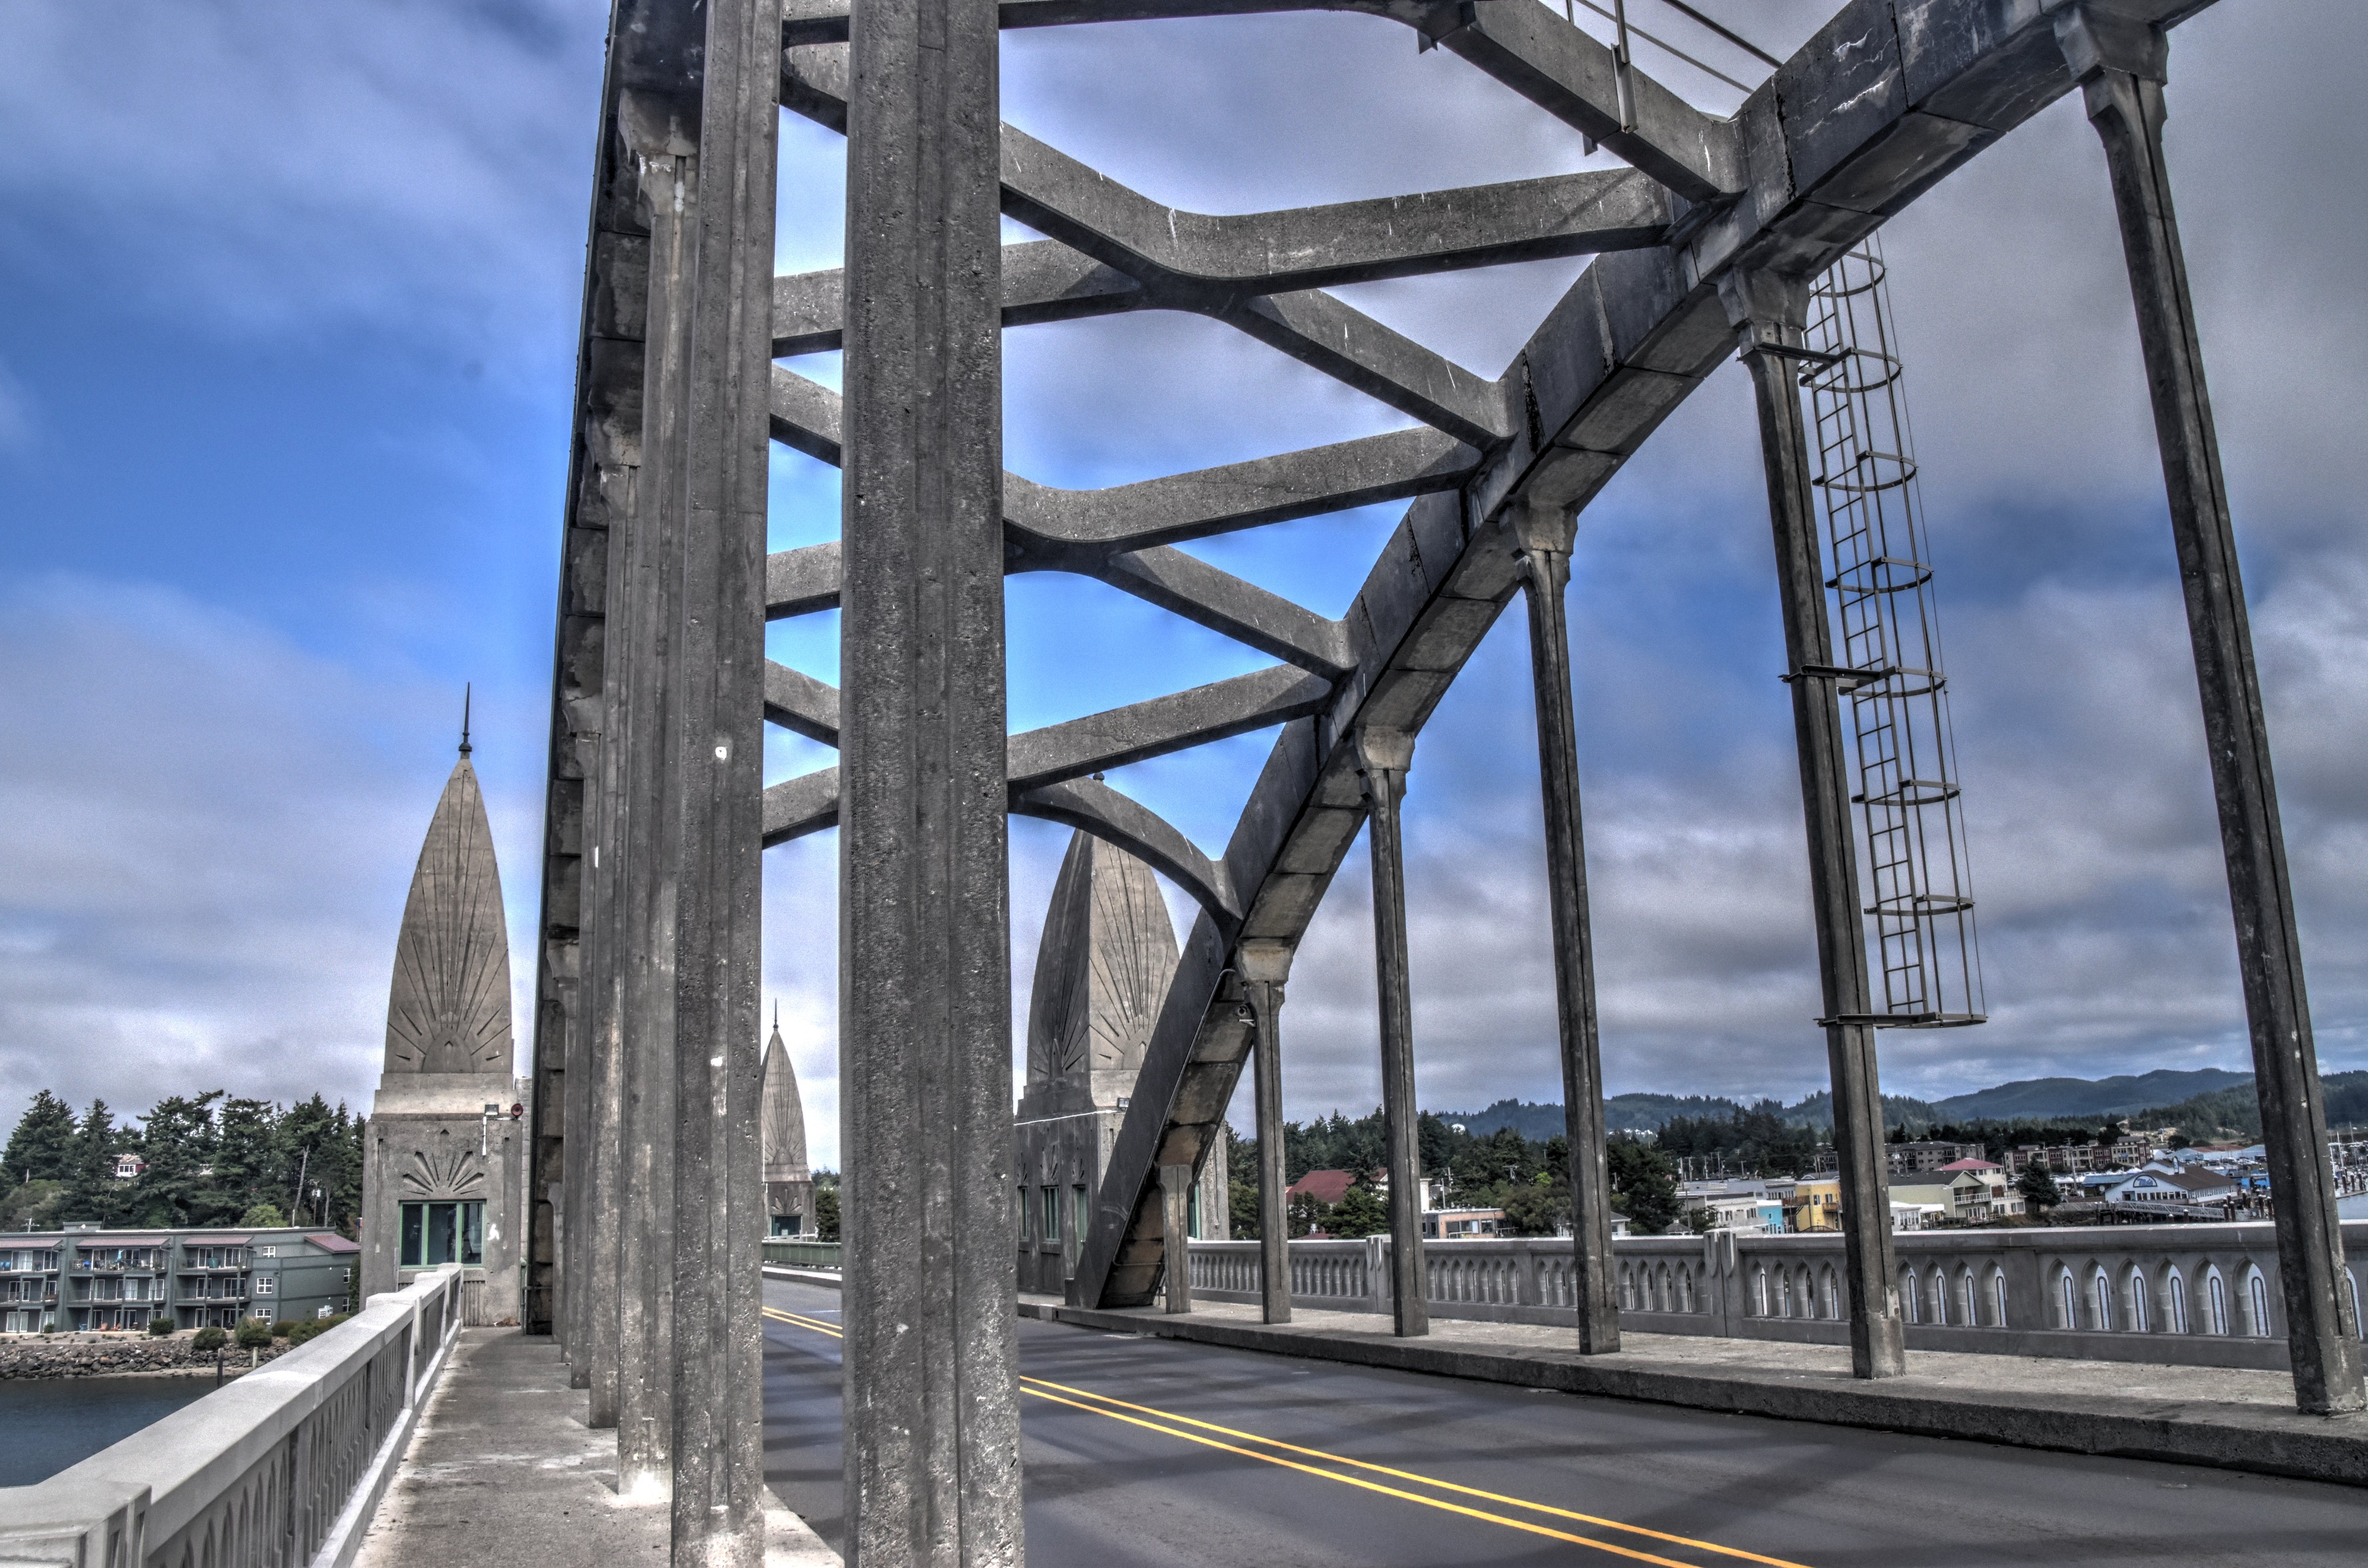
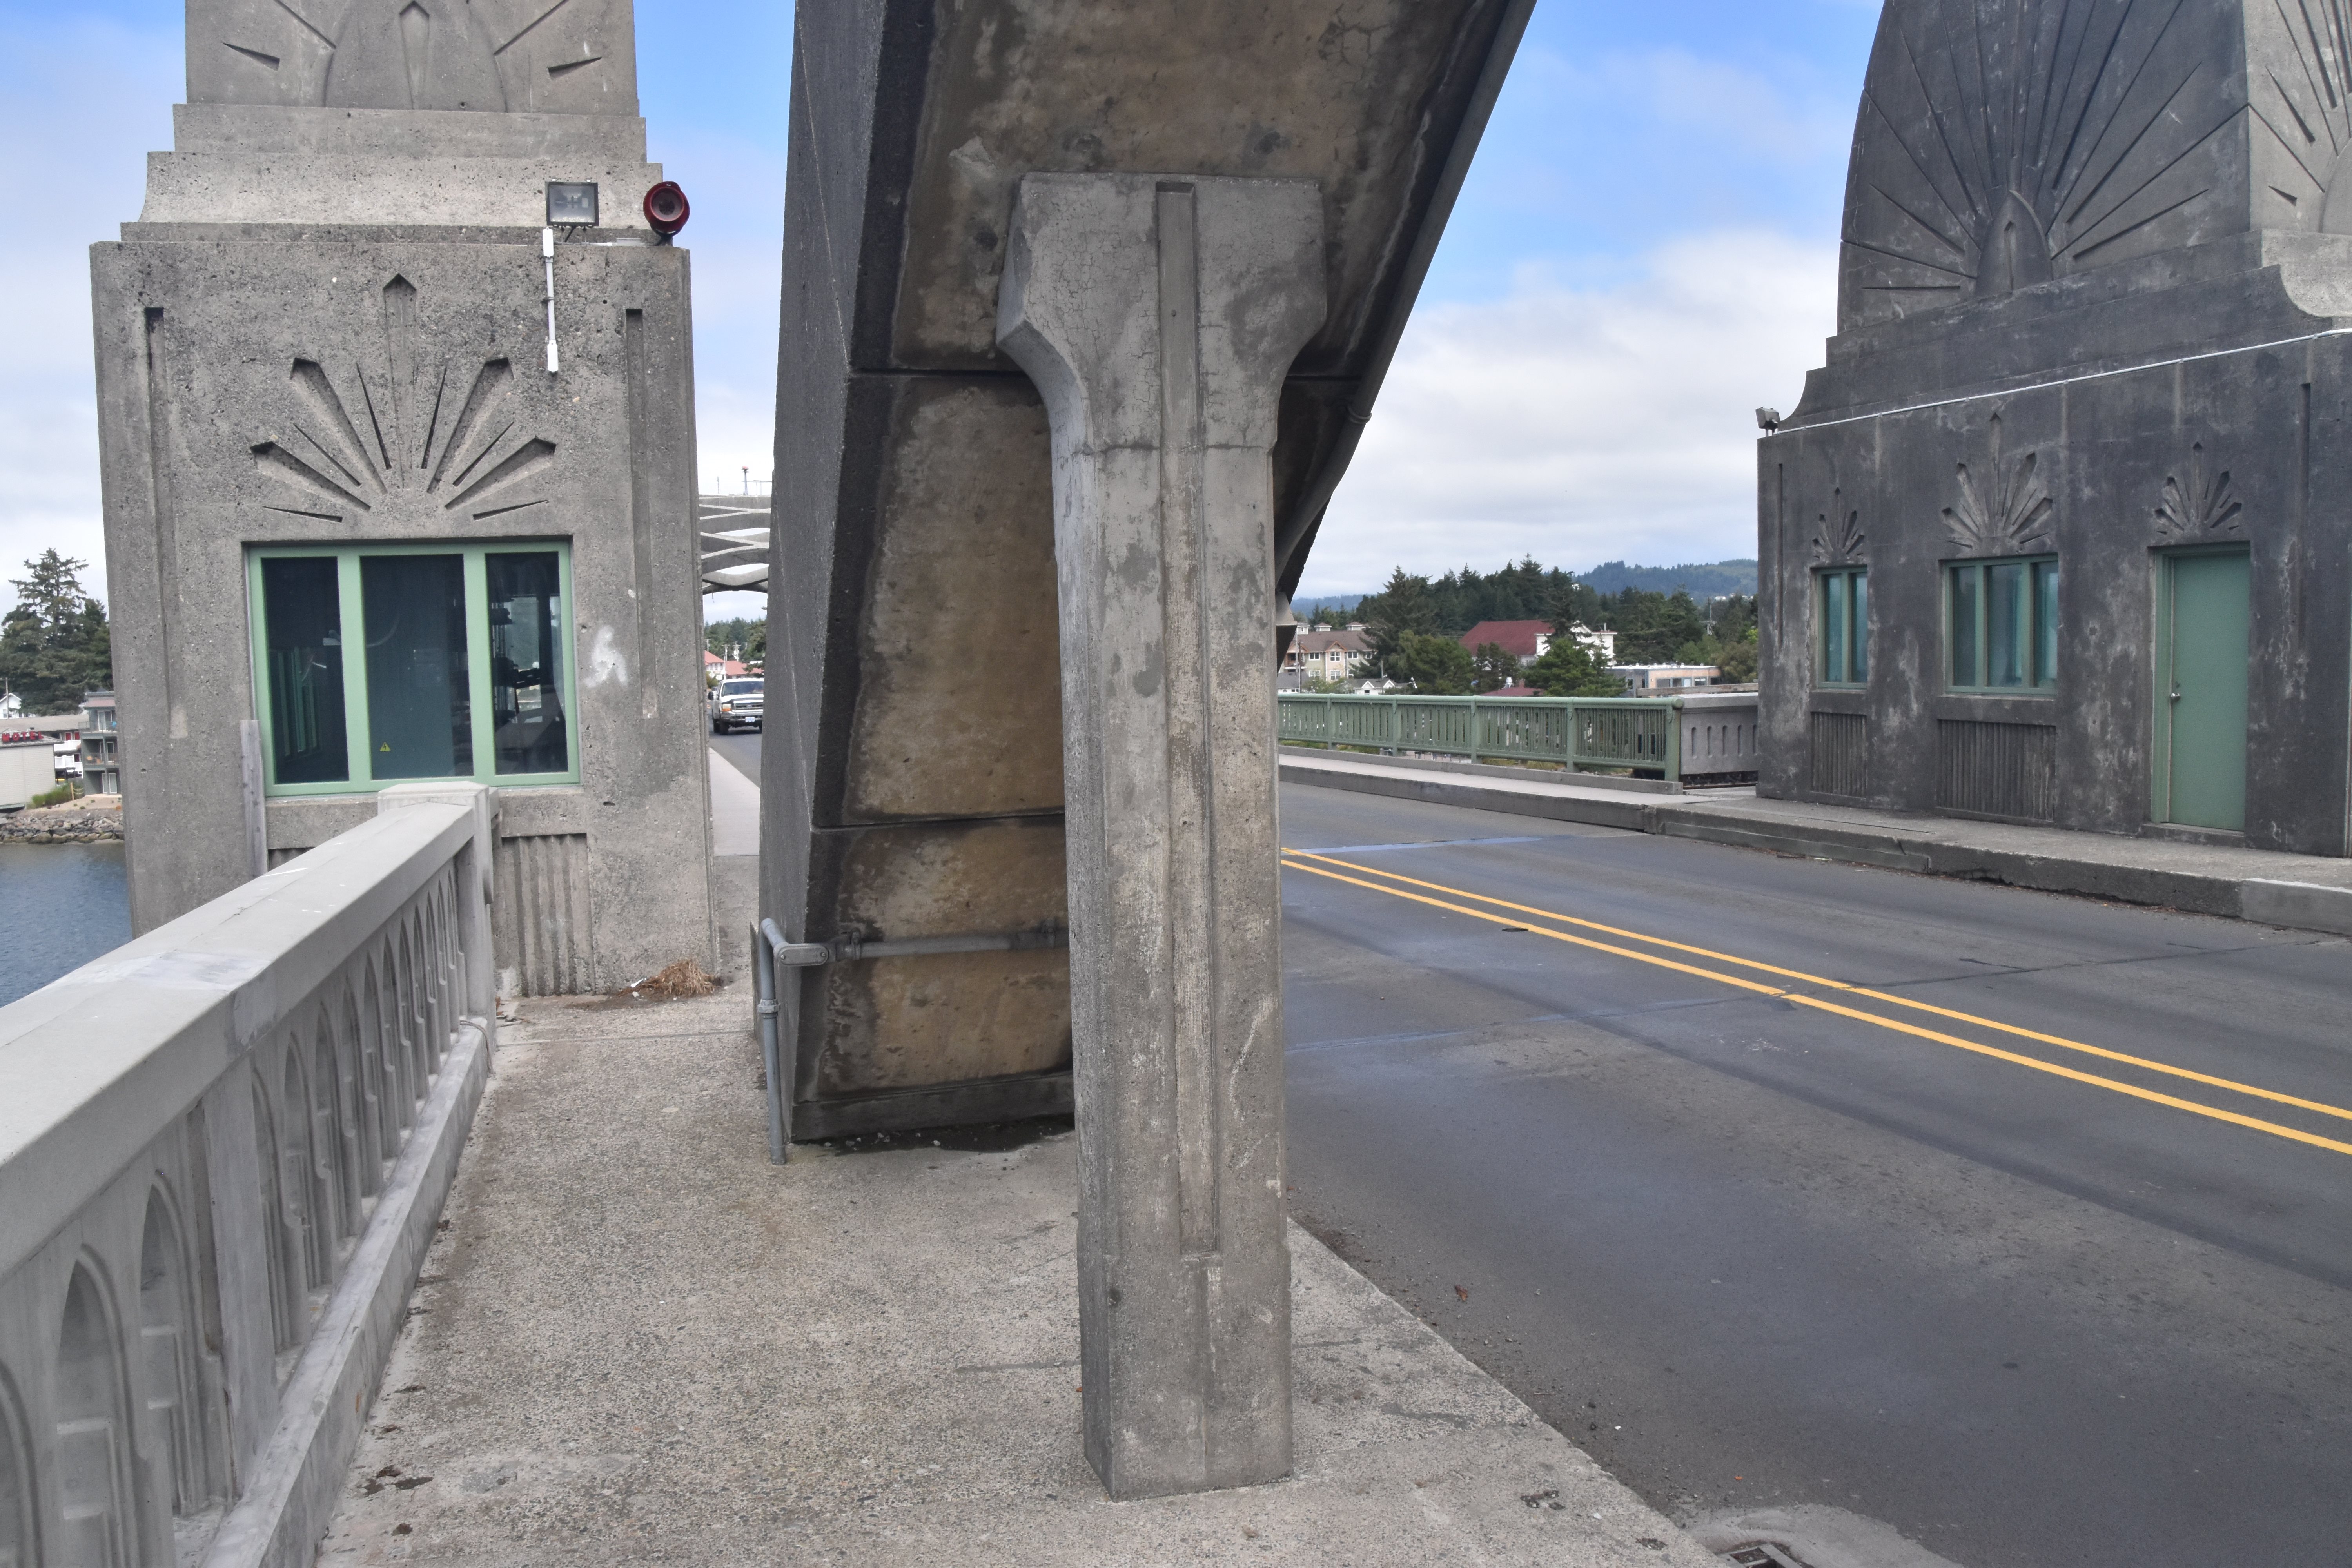
Pillars at end of bridge.
![]()
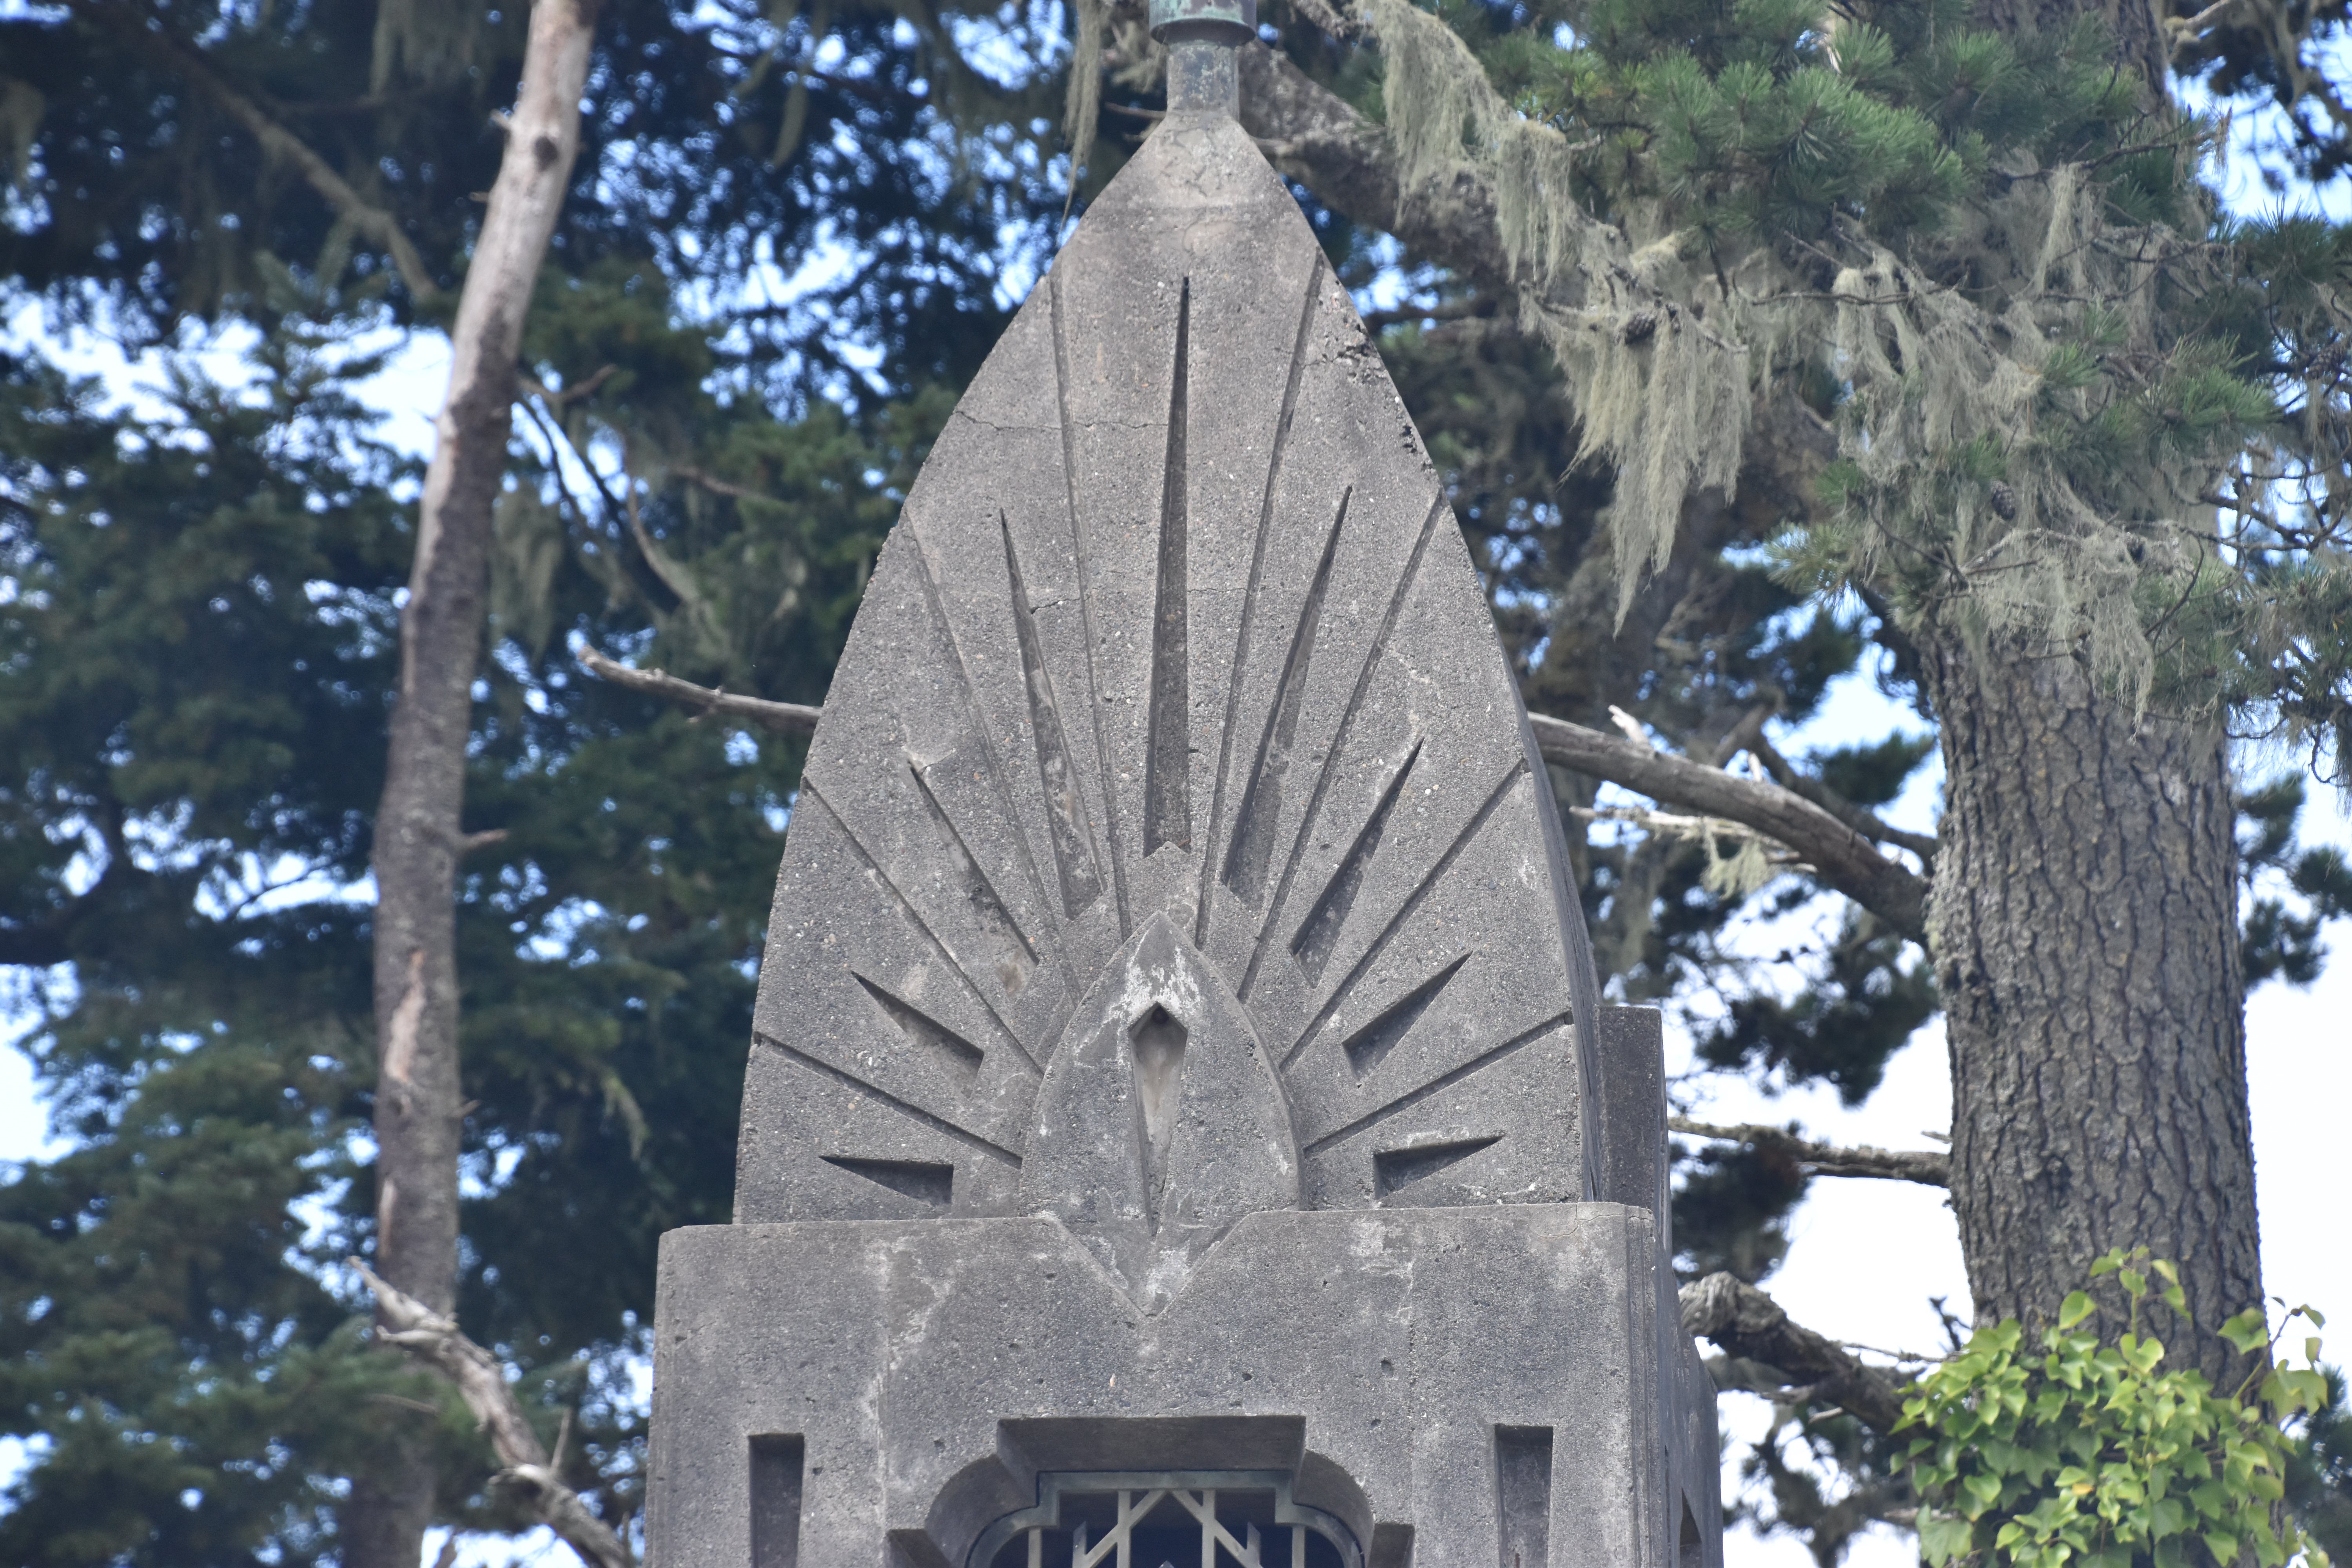

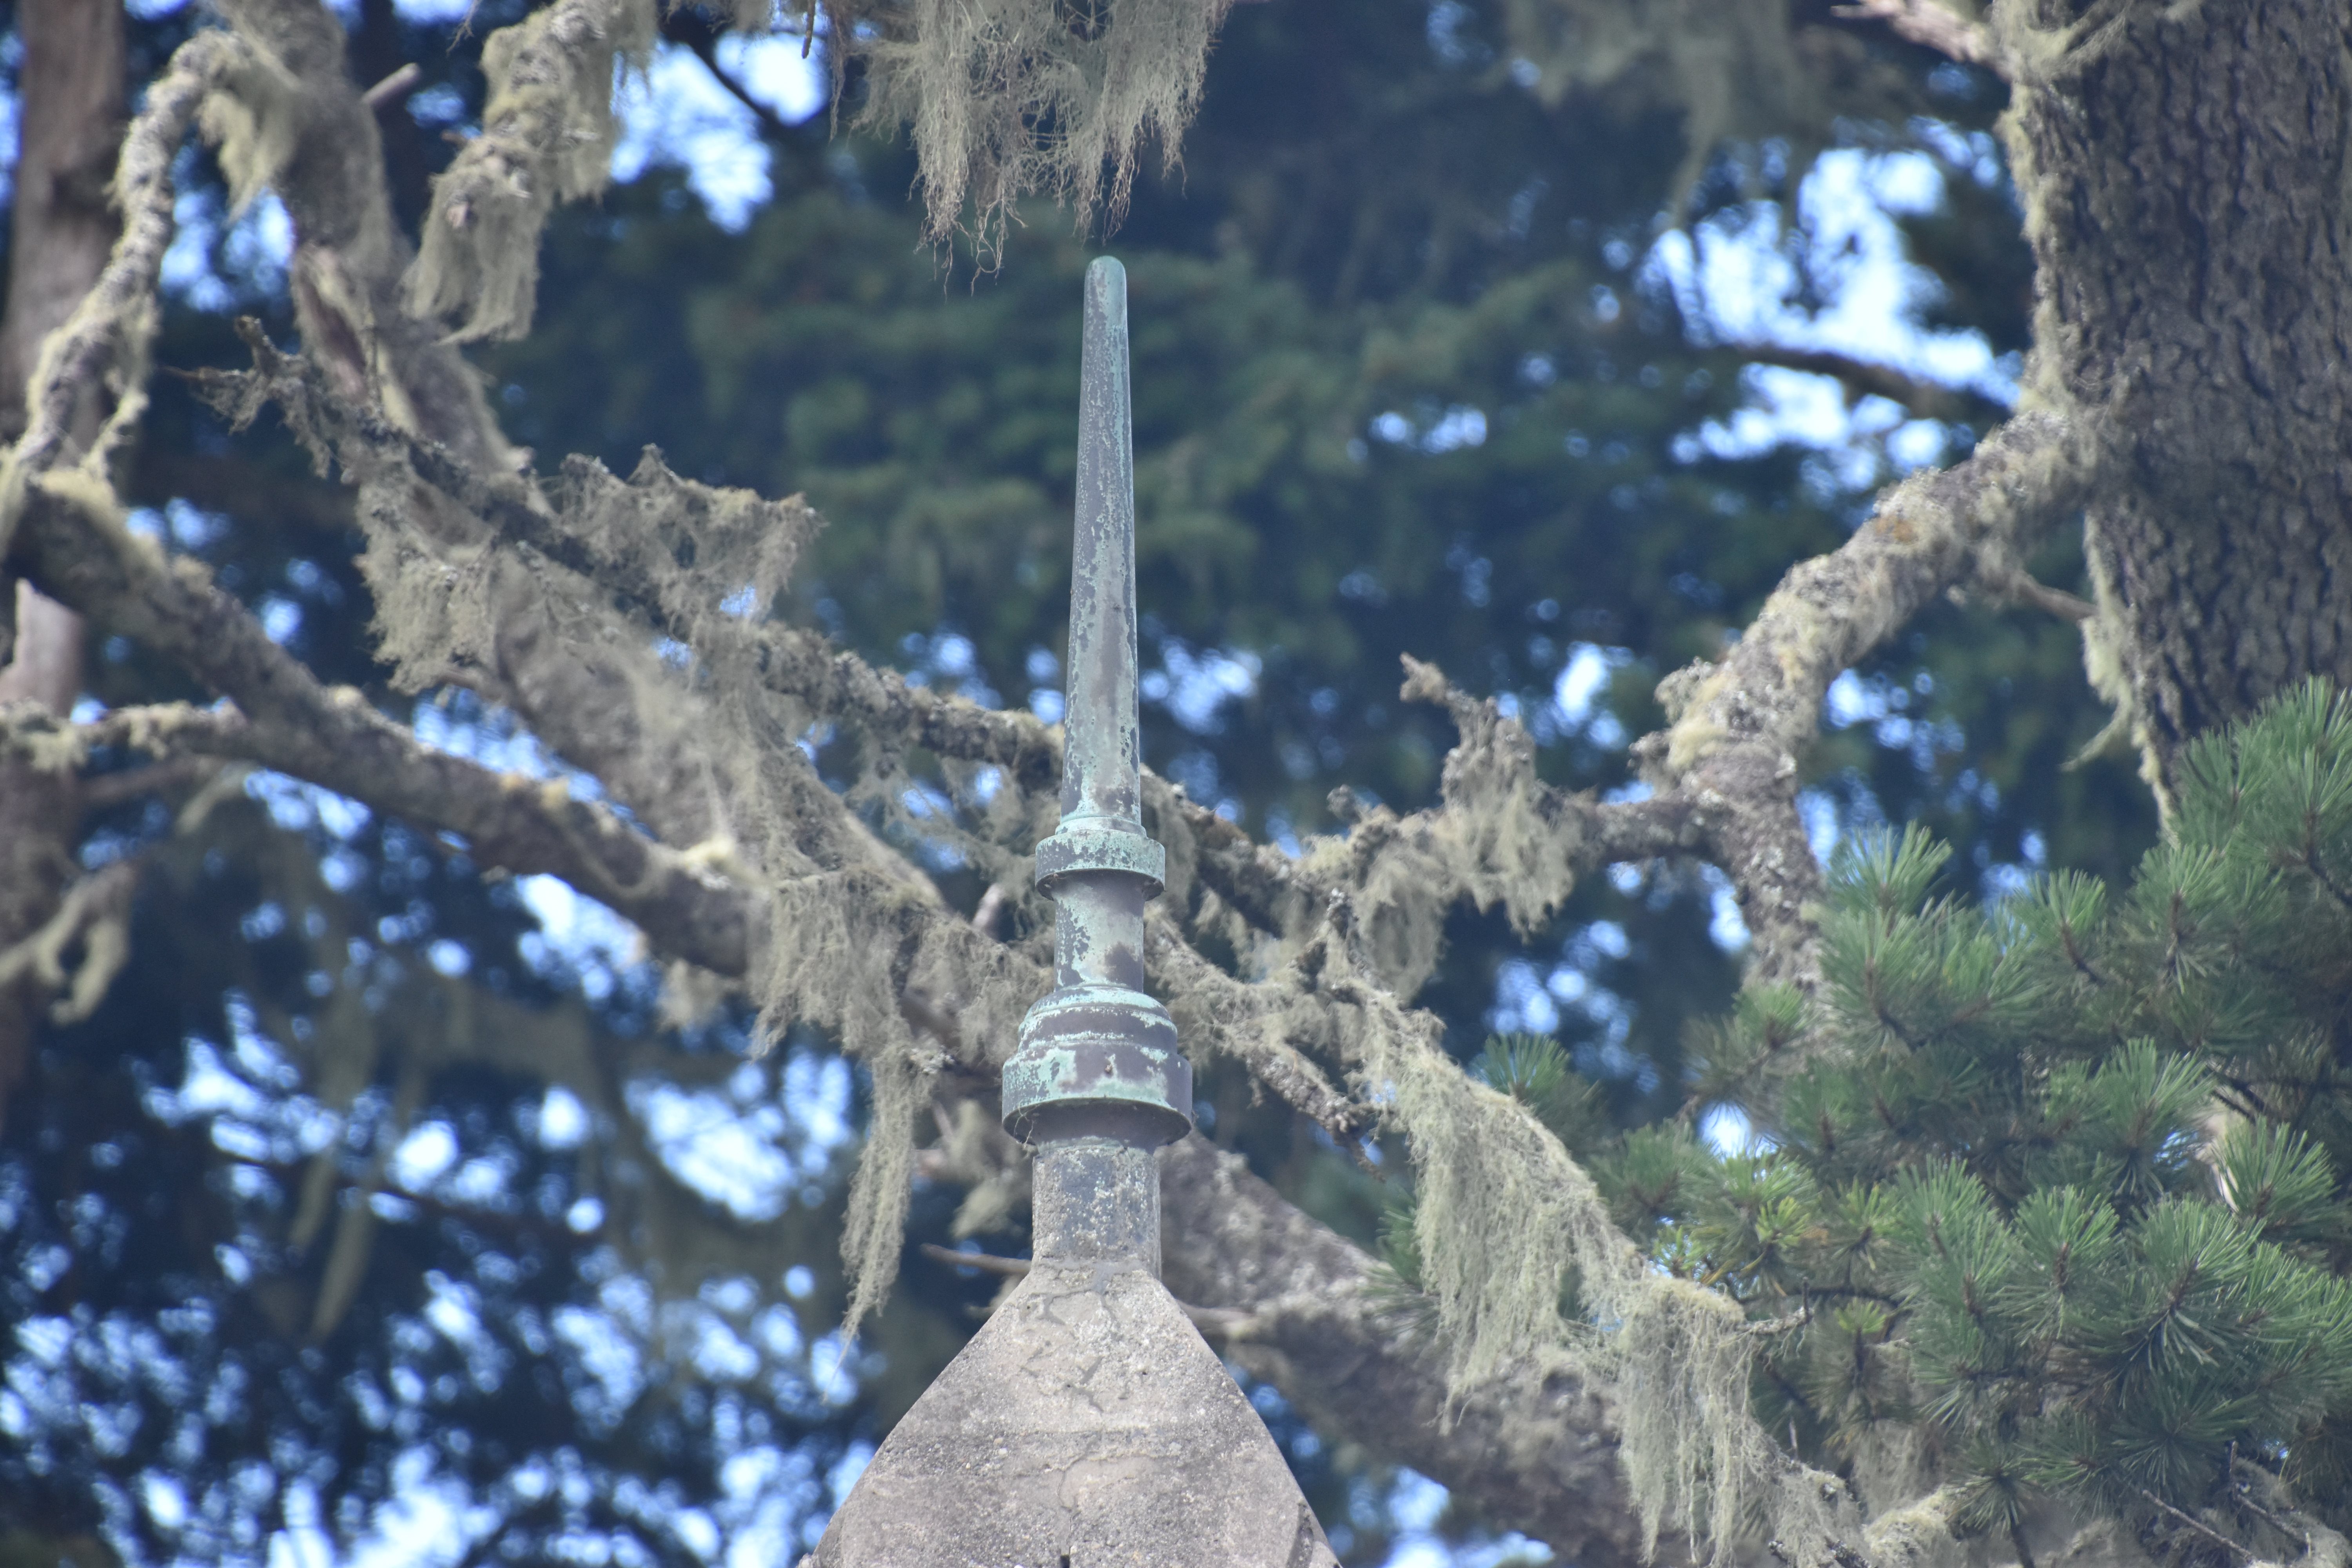


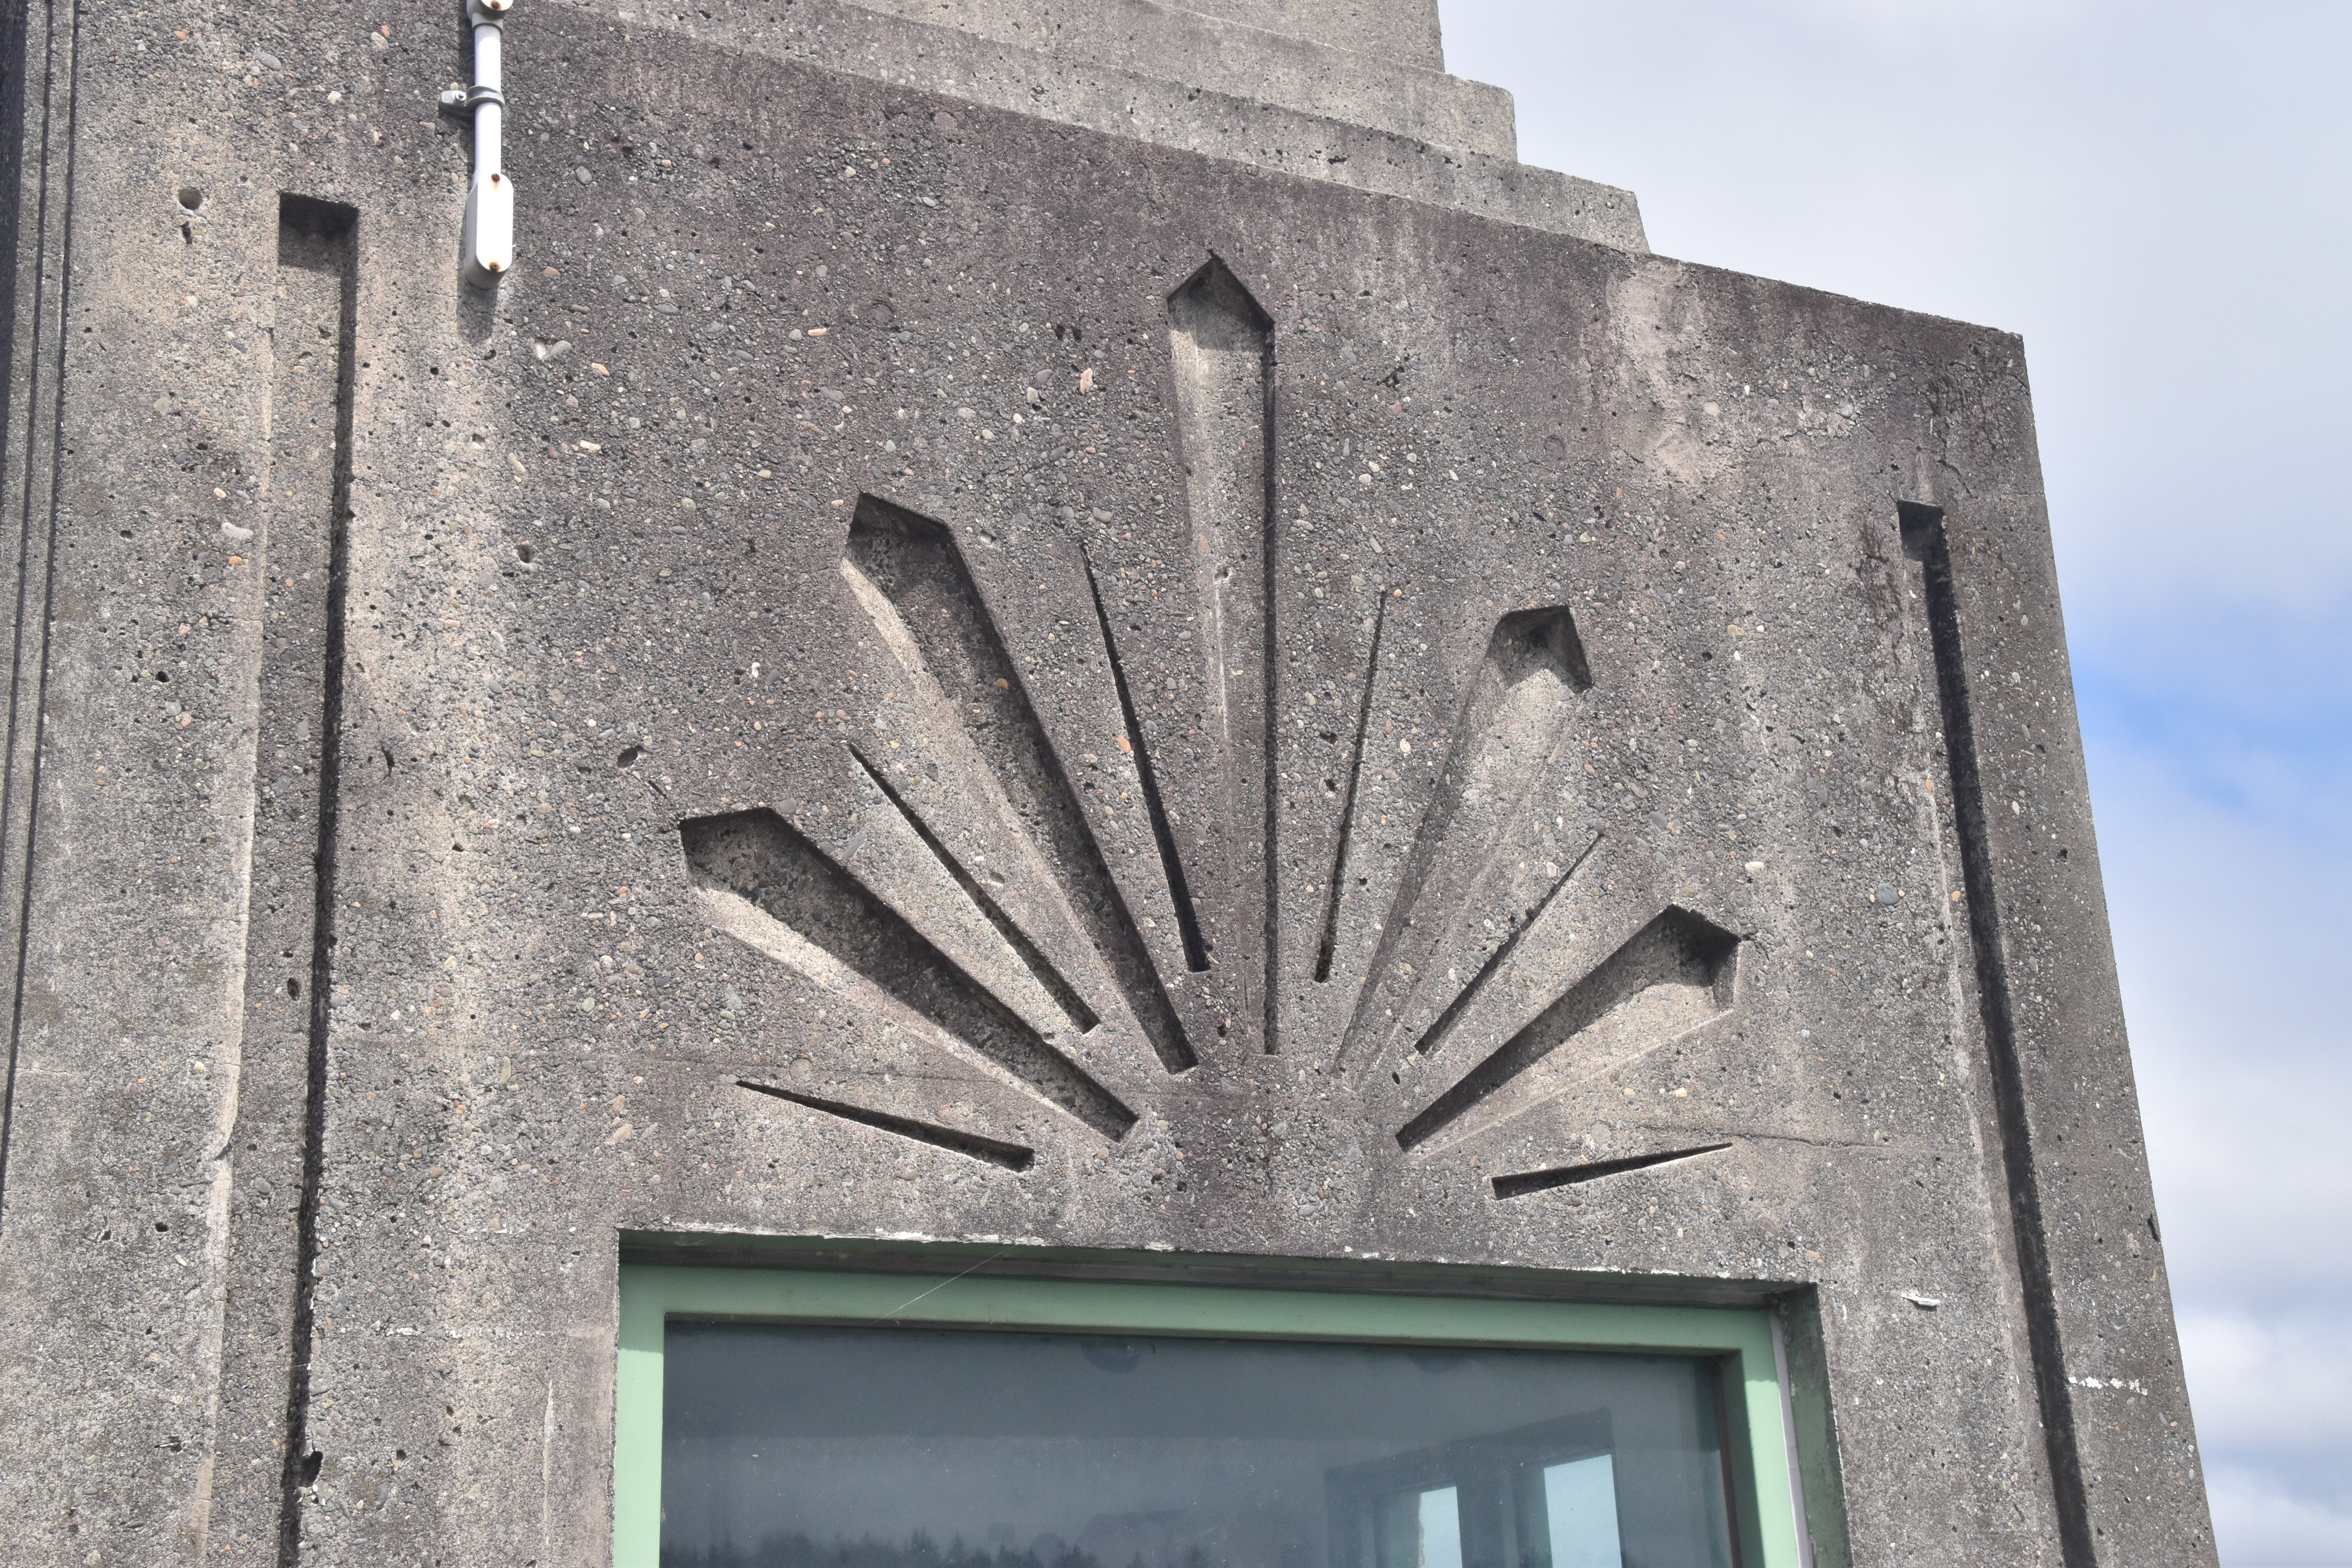
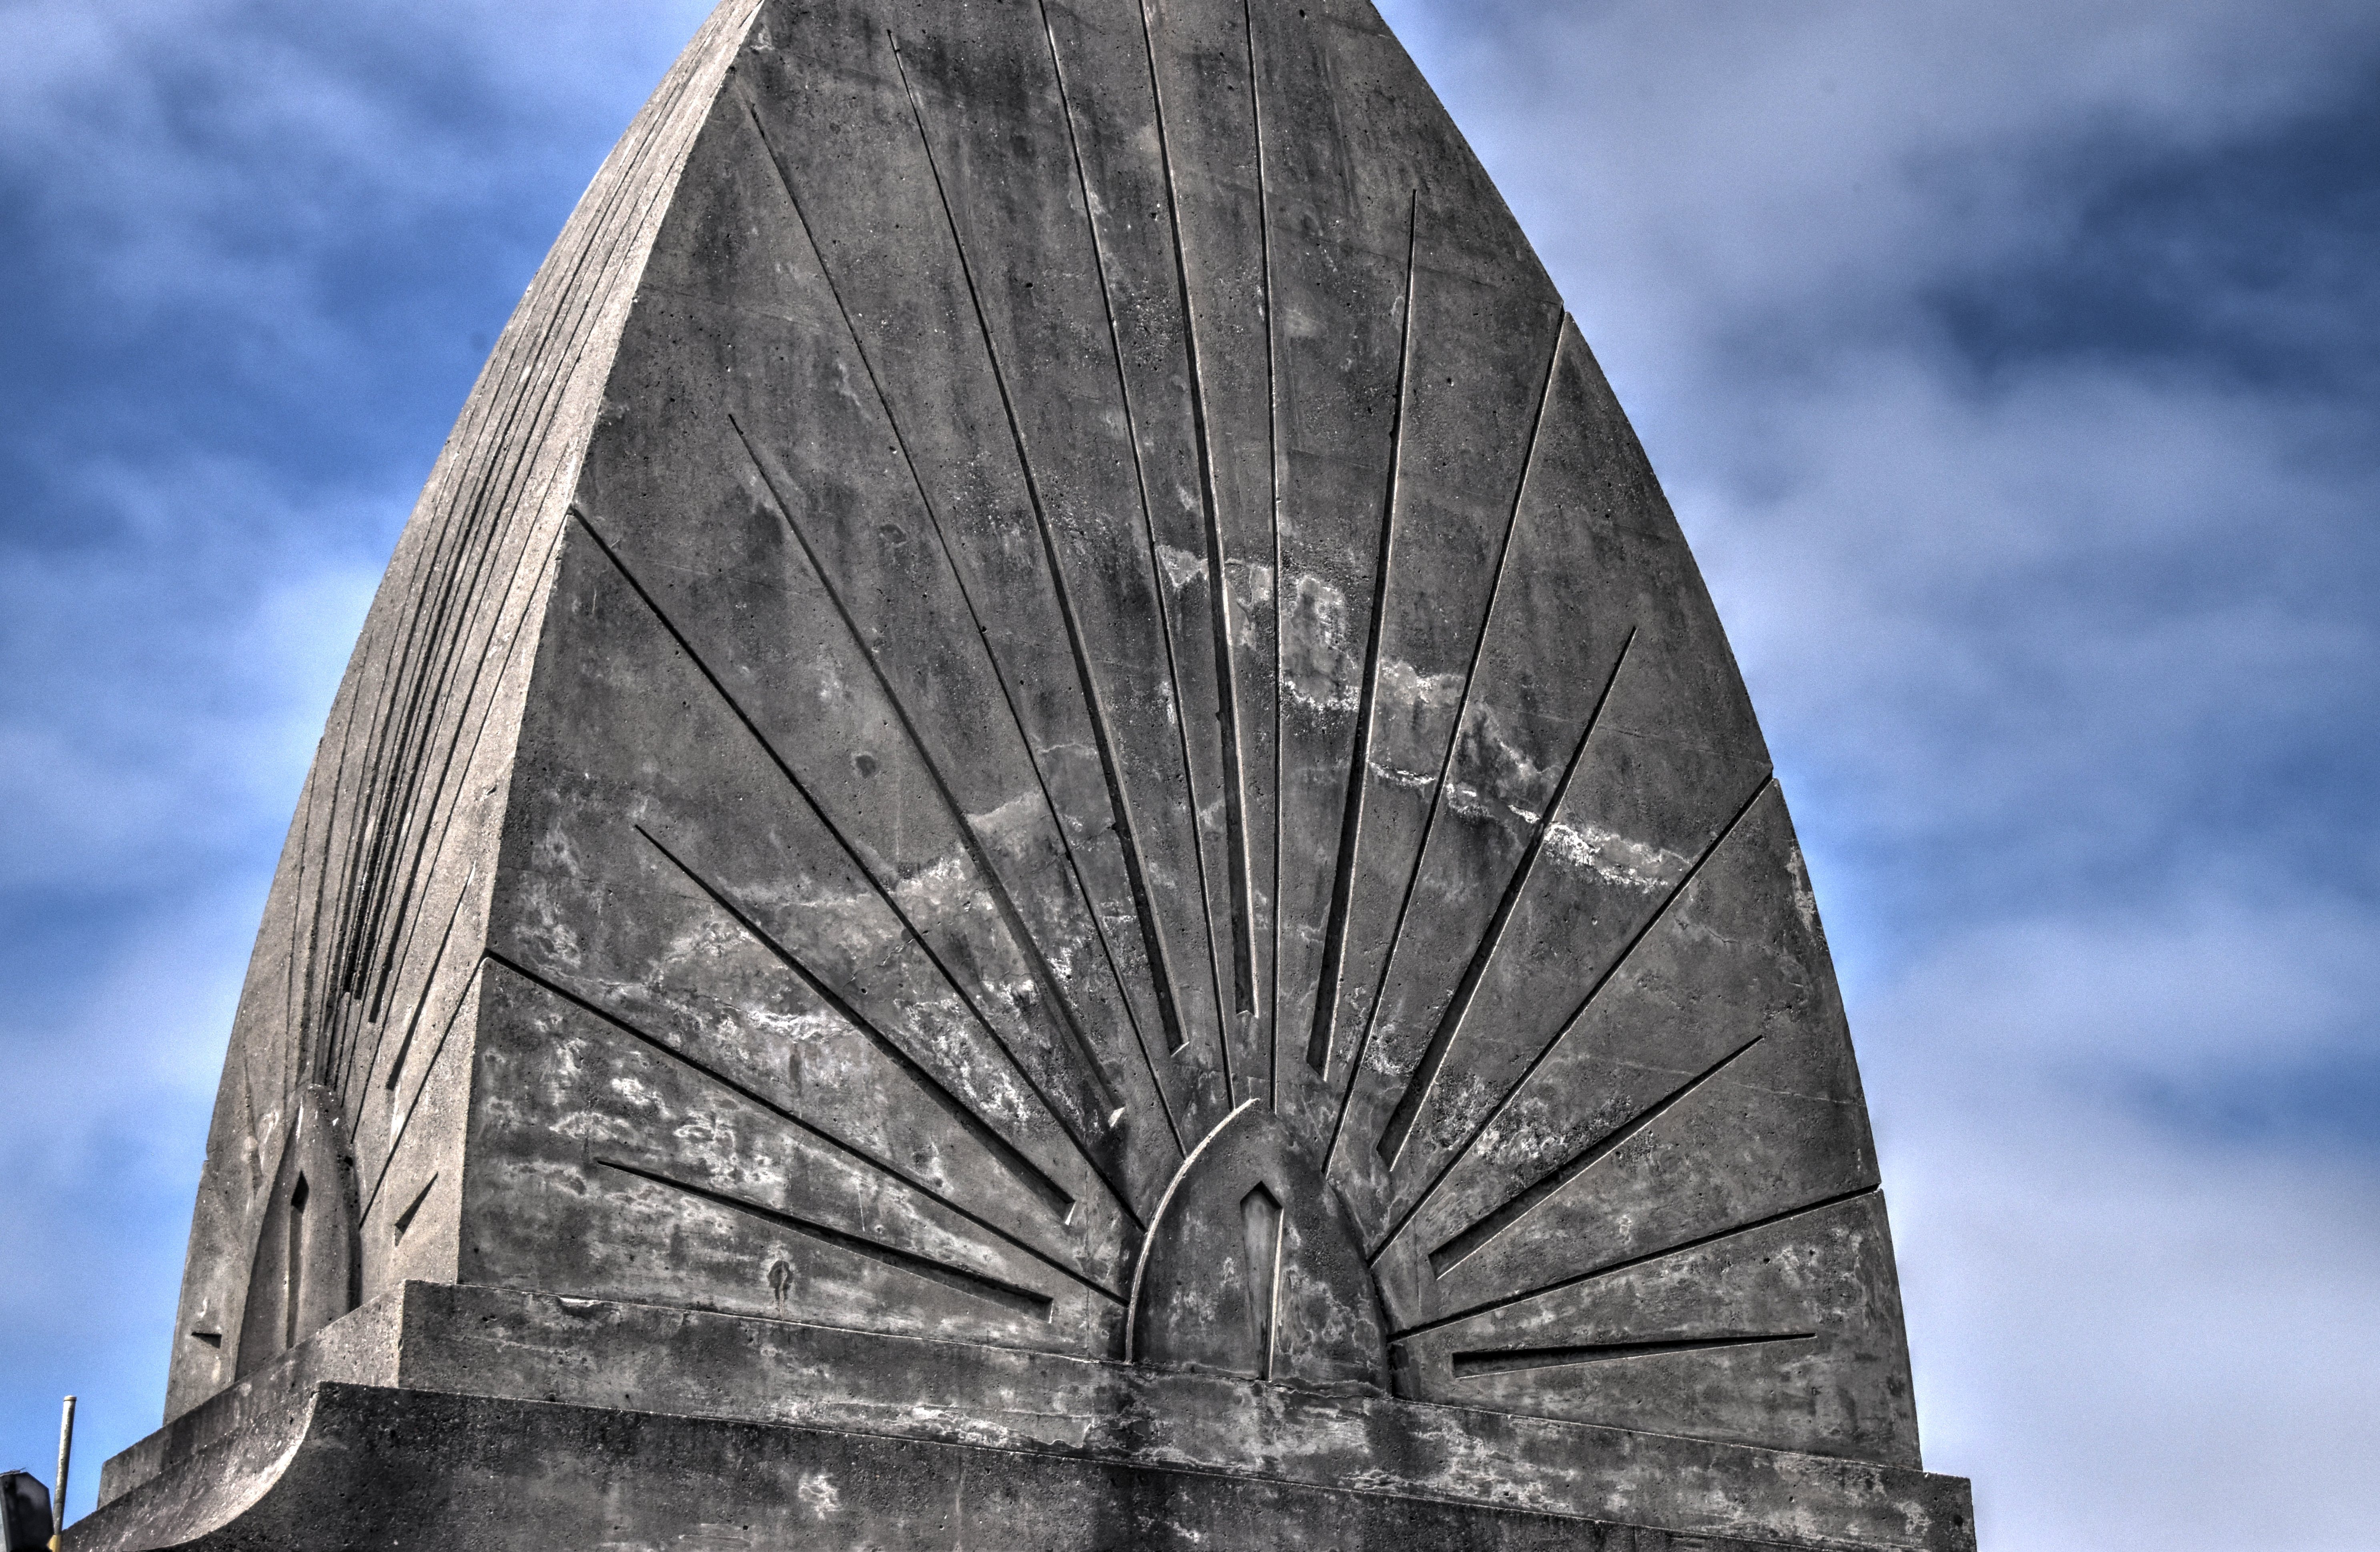
Details of pillars at end of bridge.
![]()
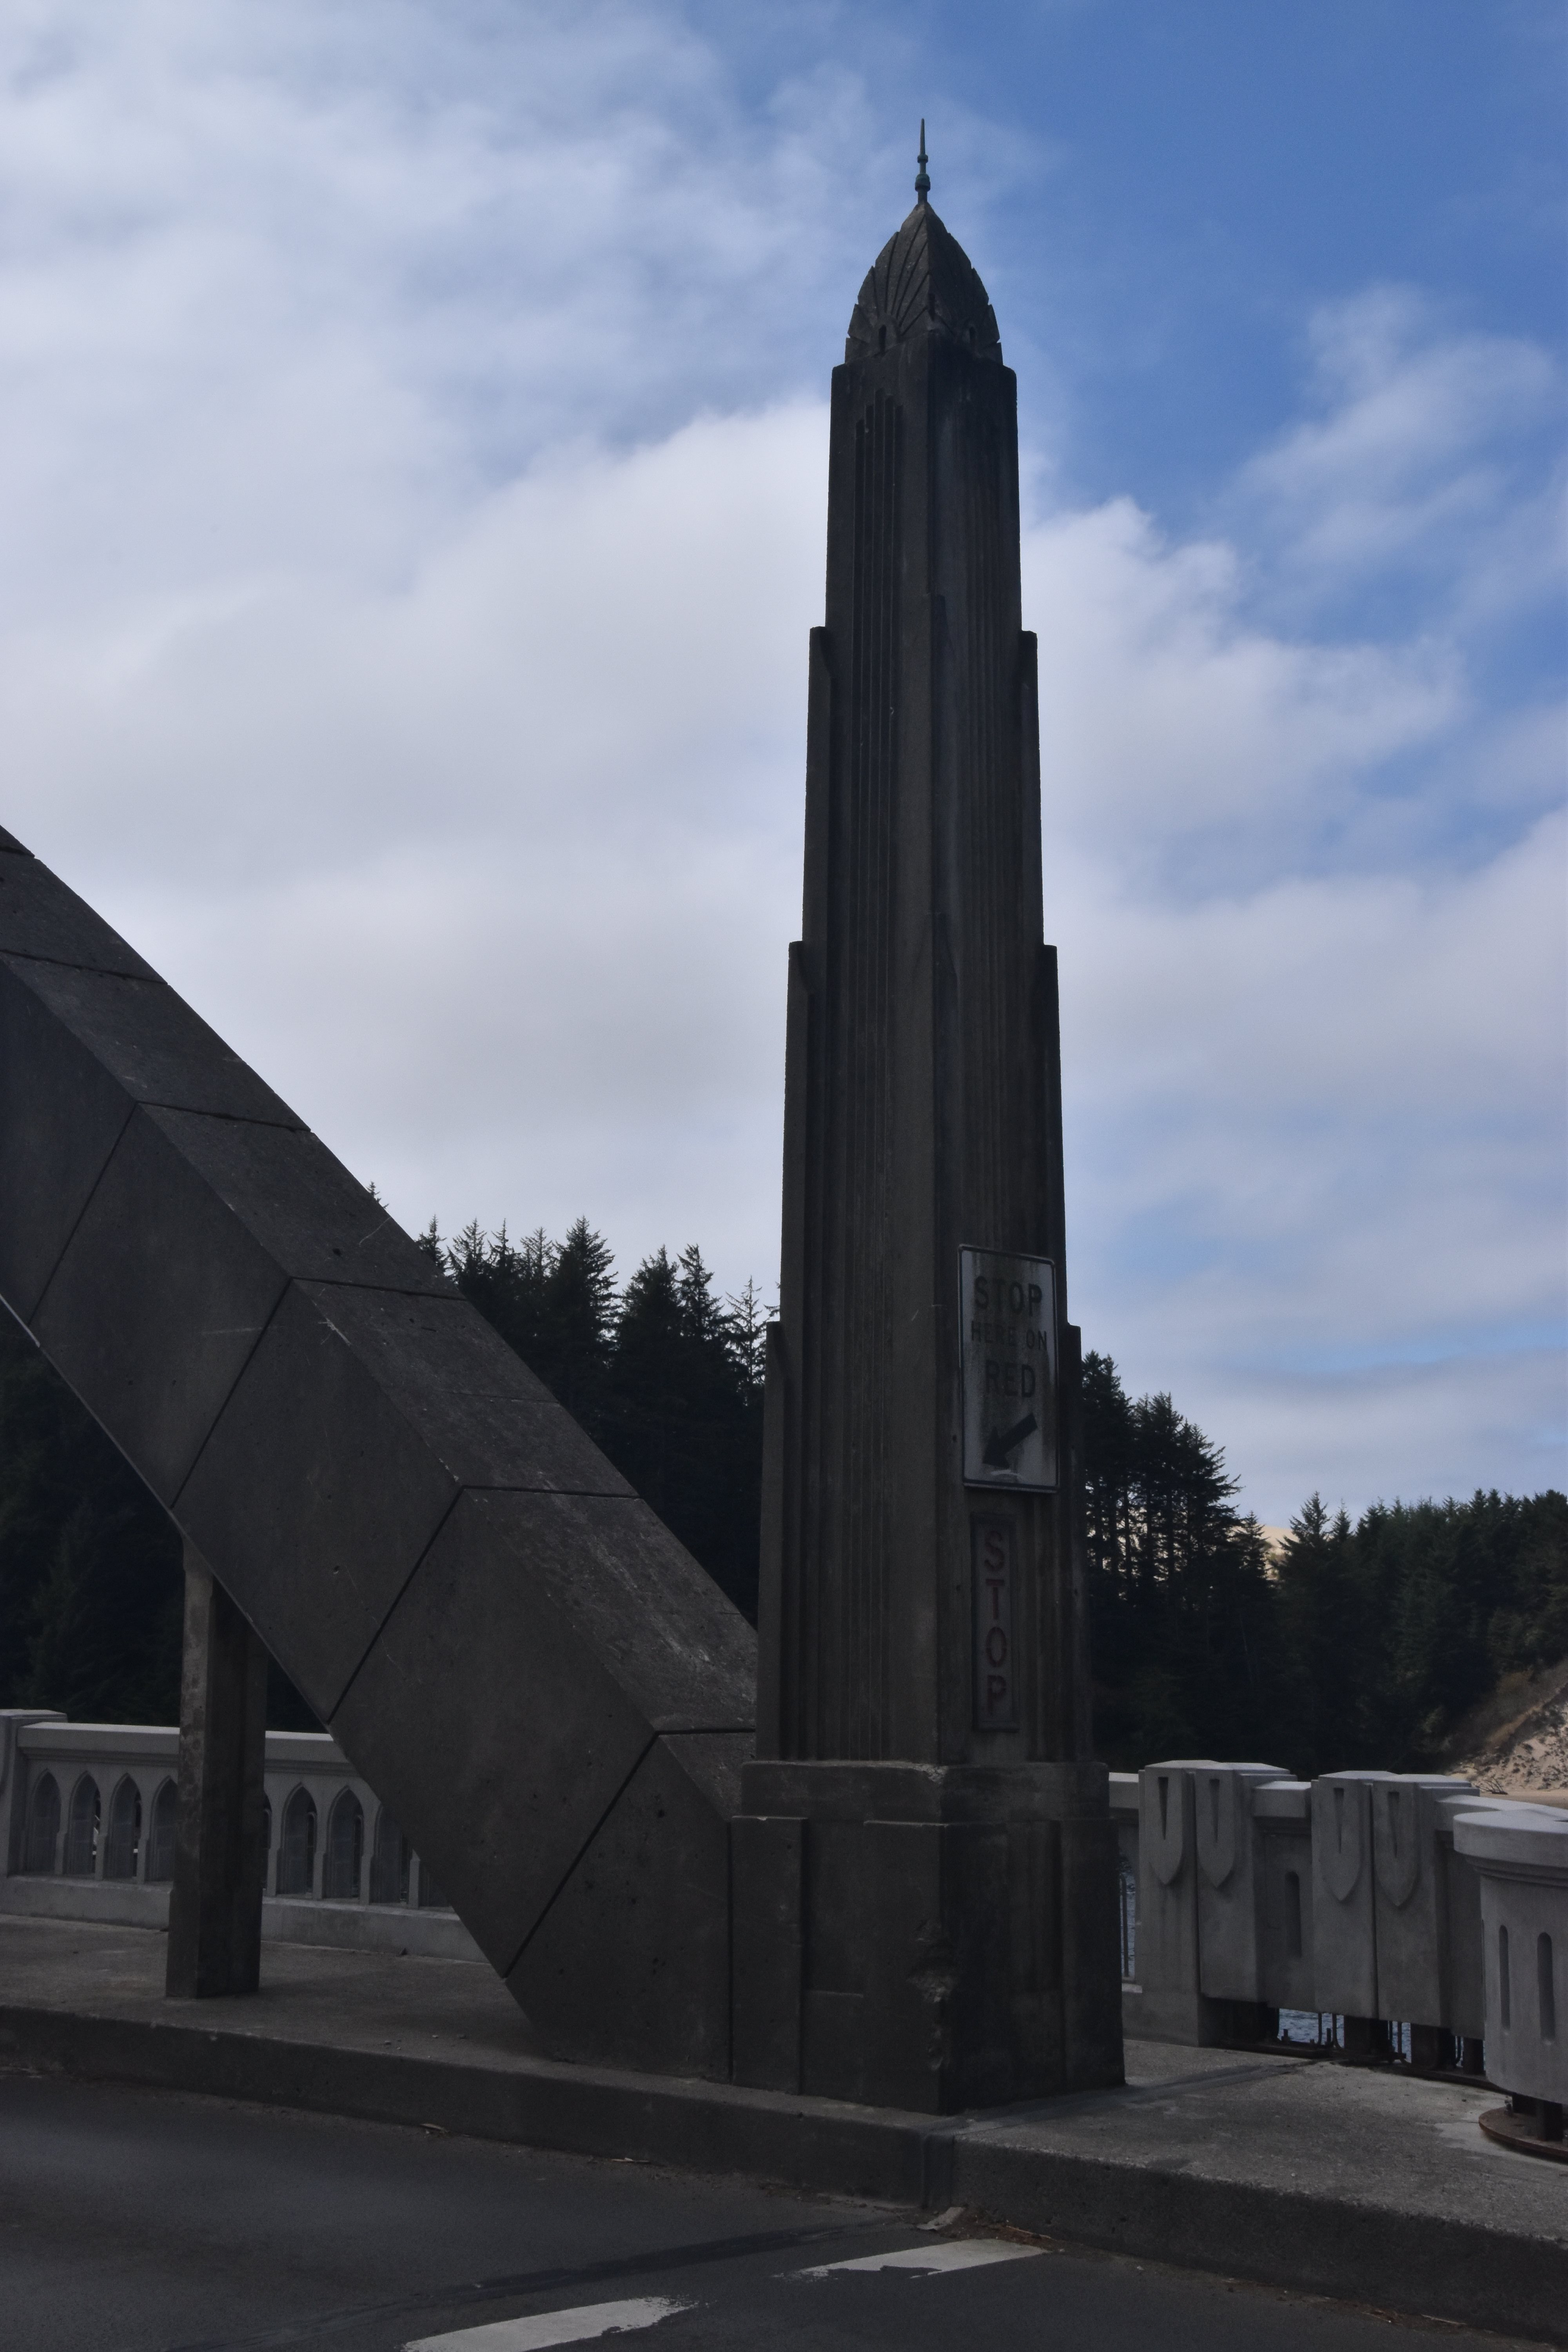
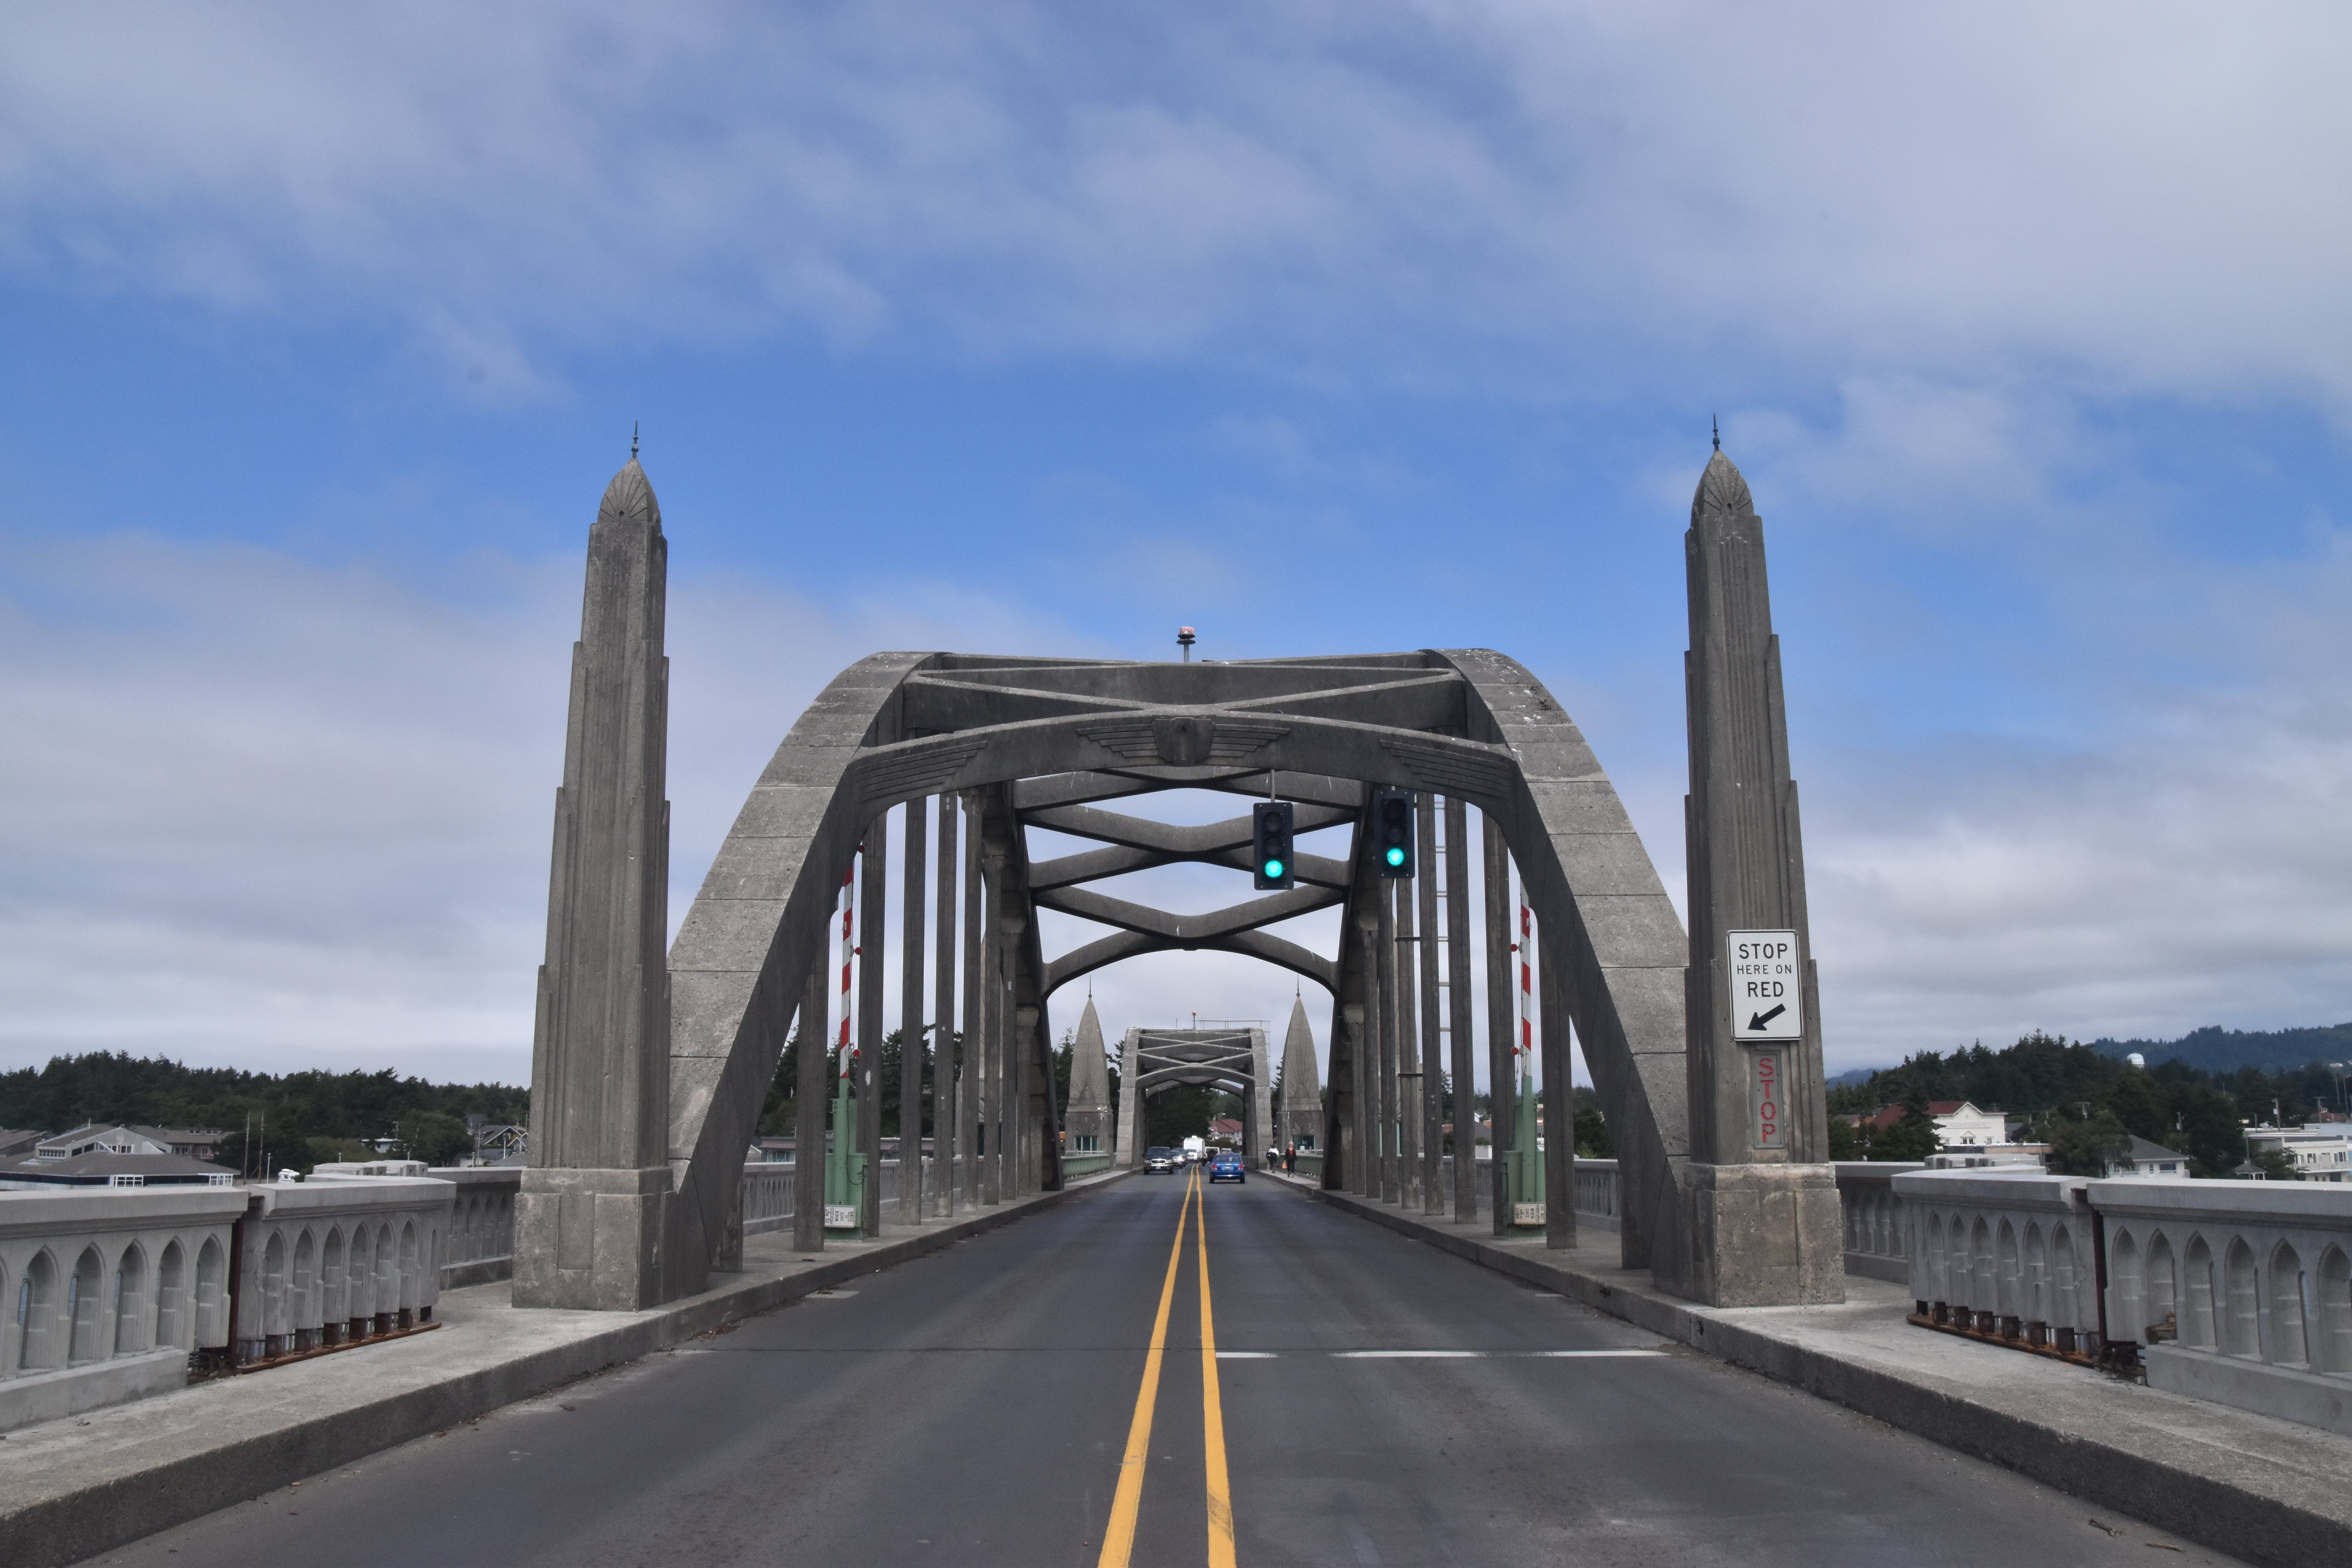
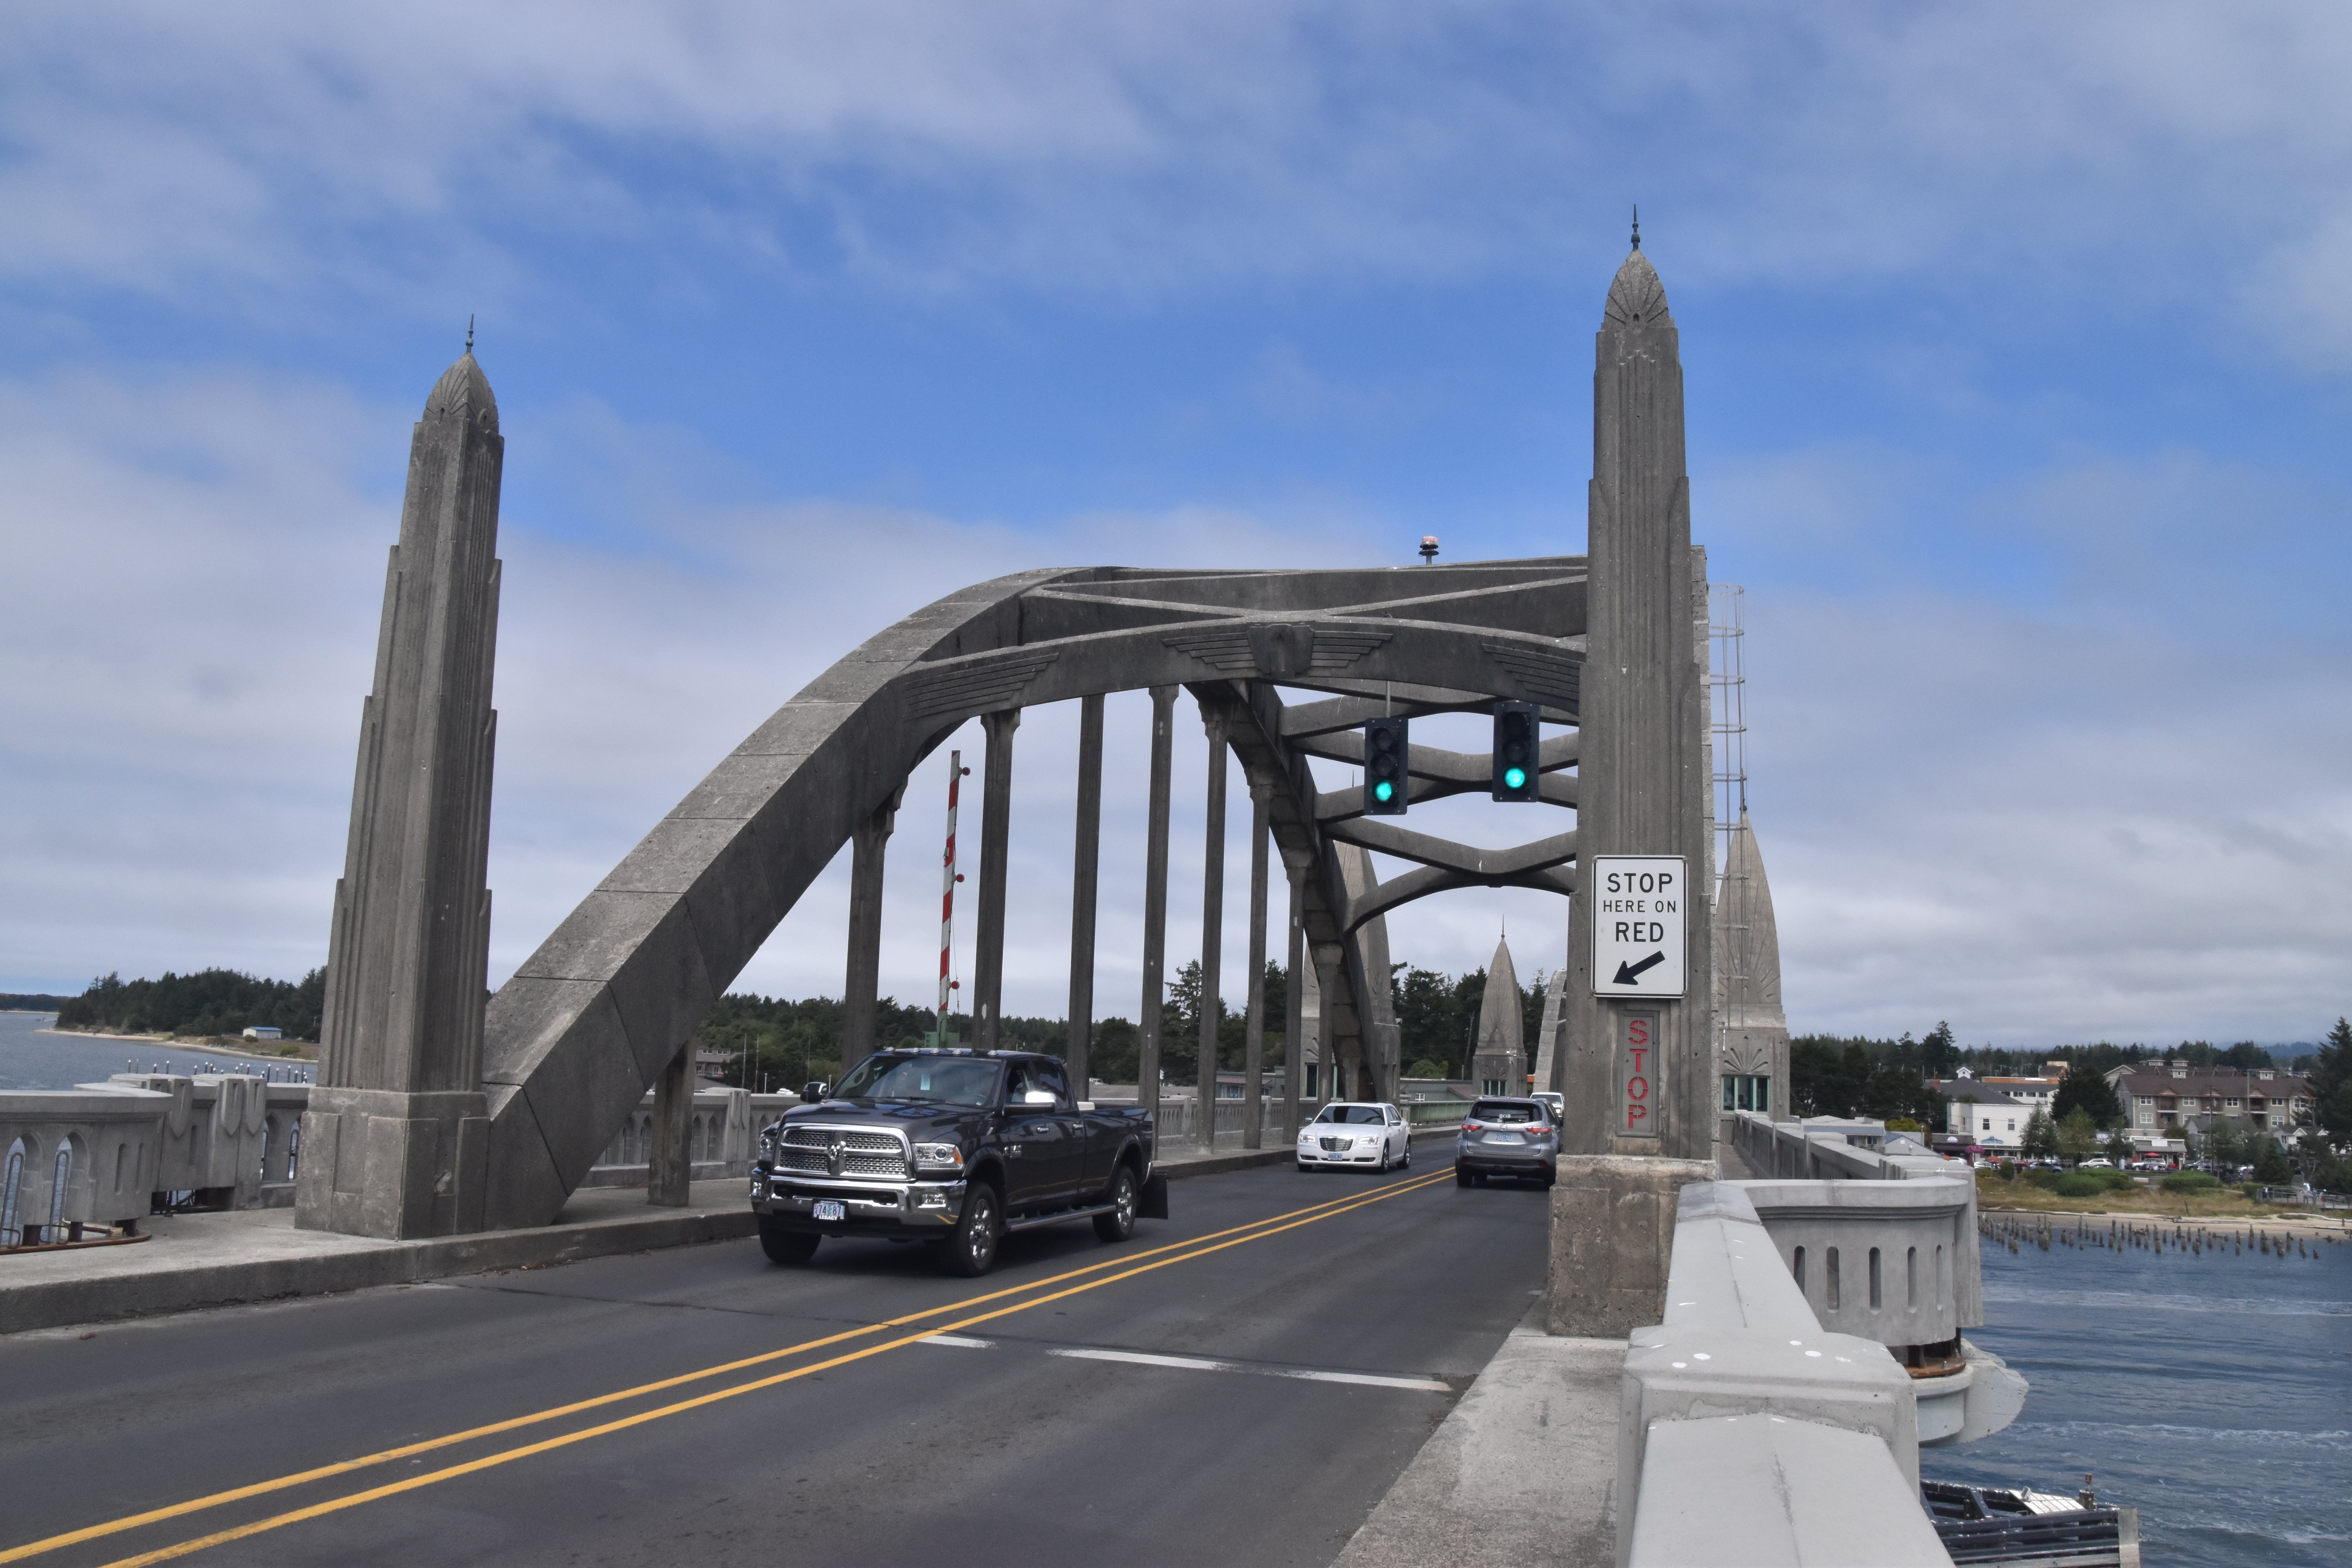
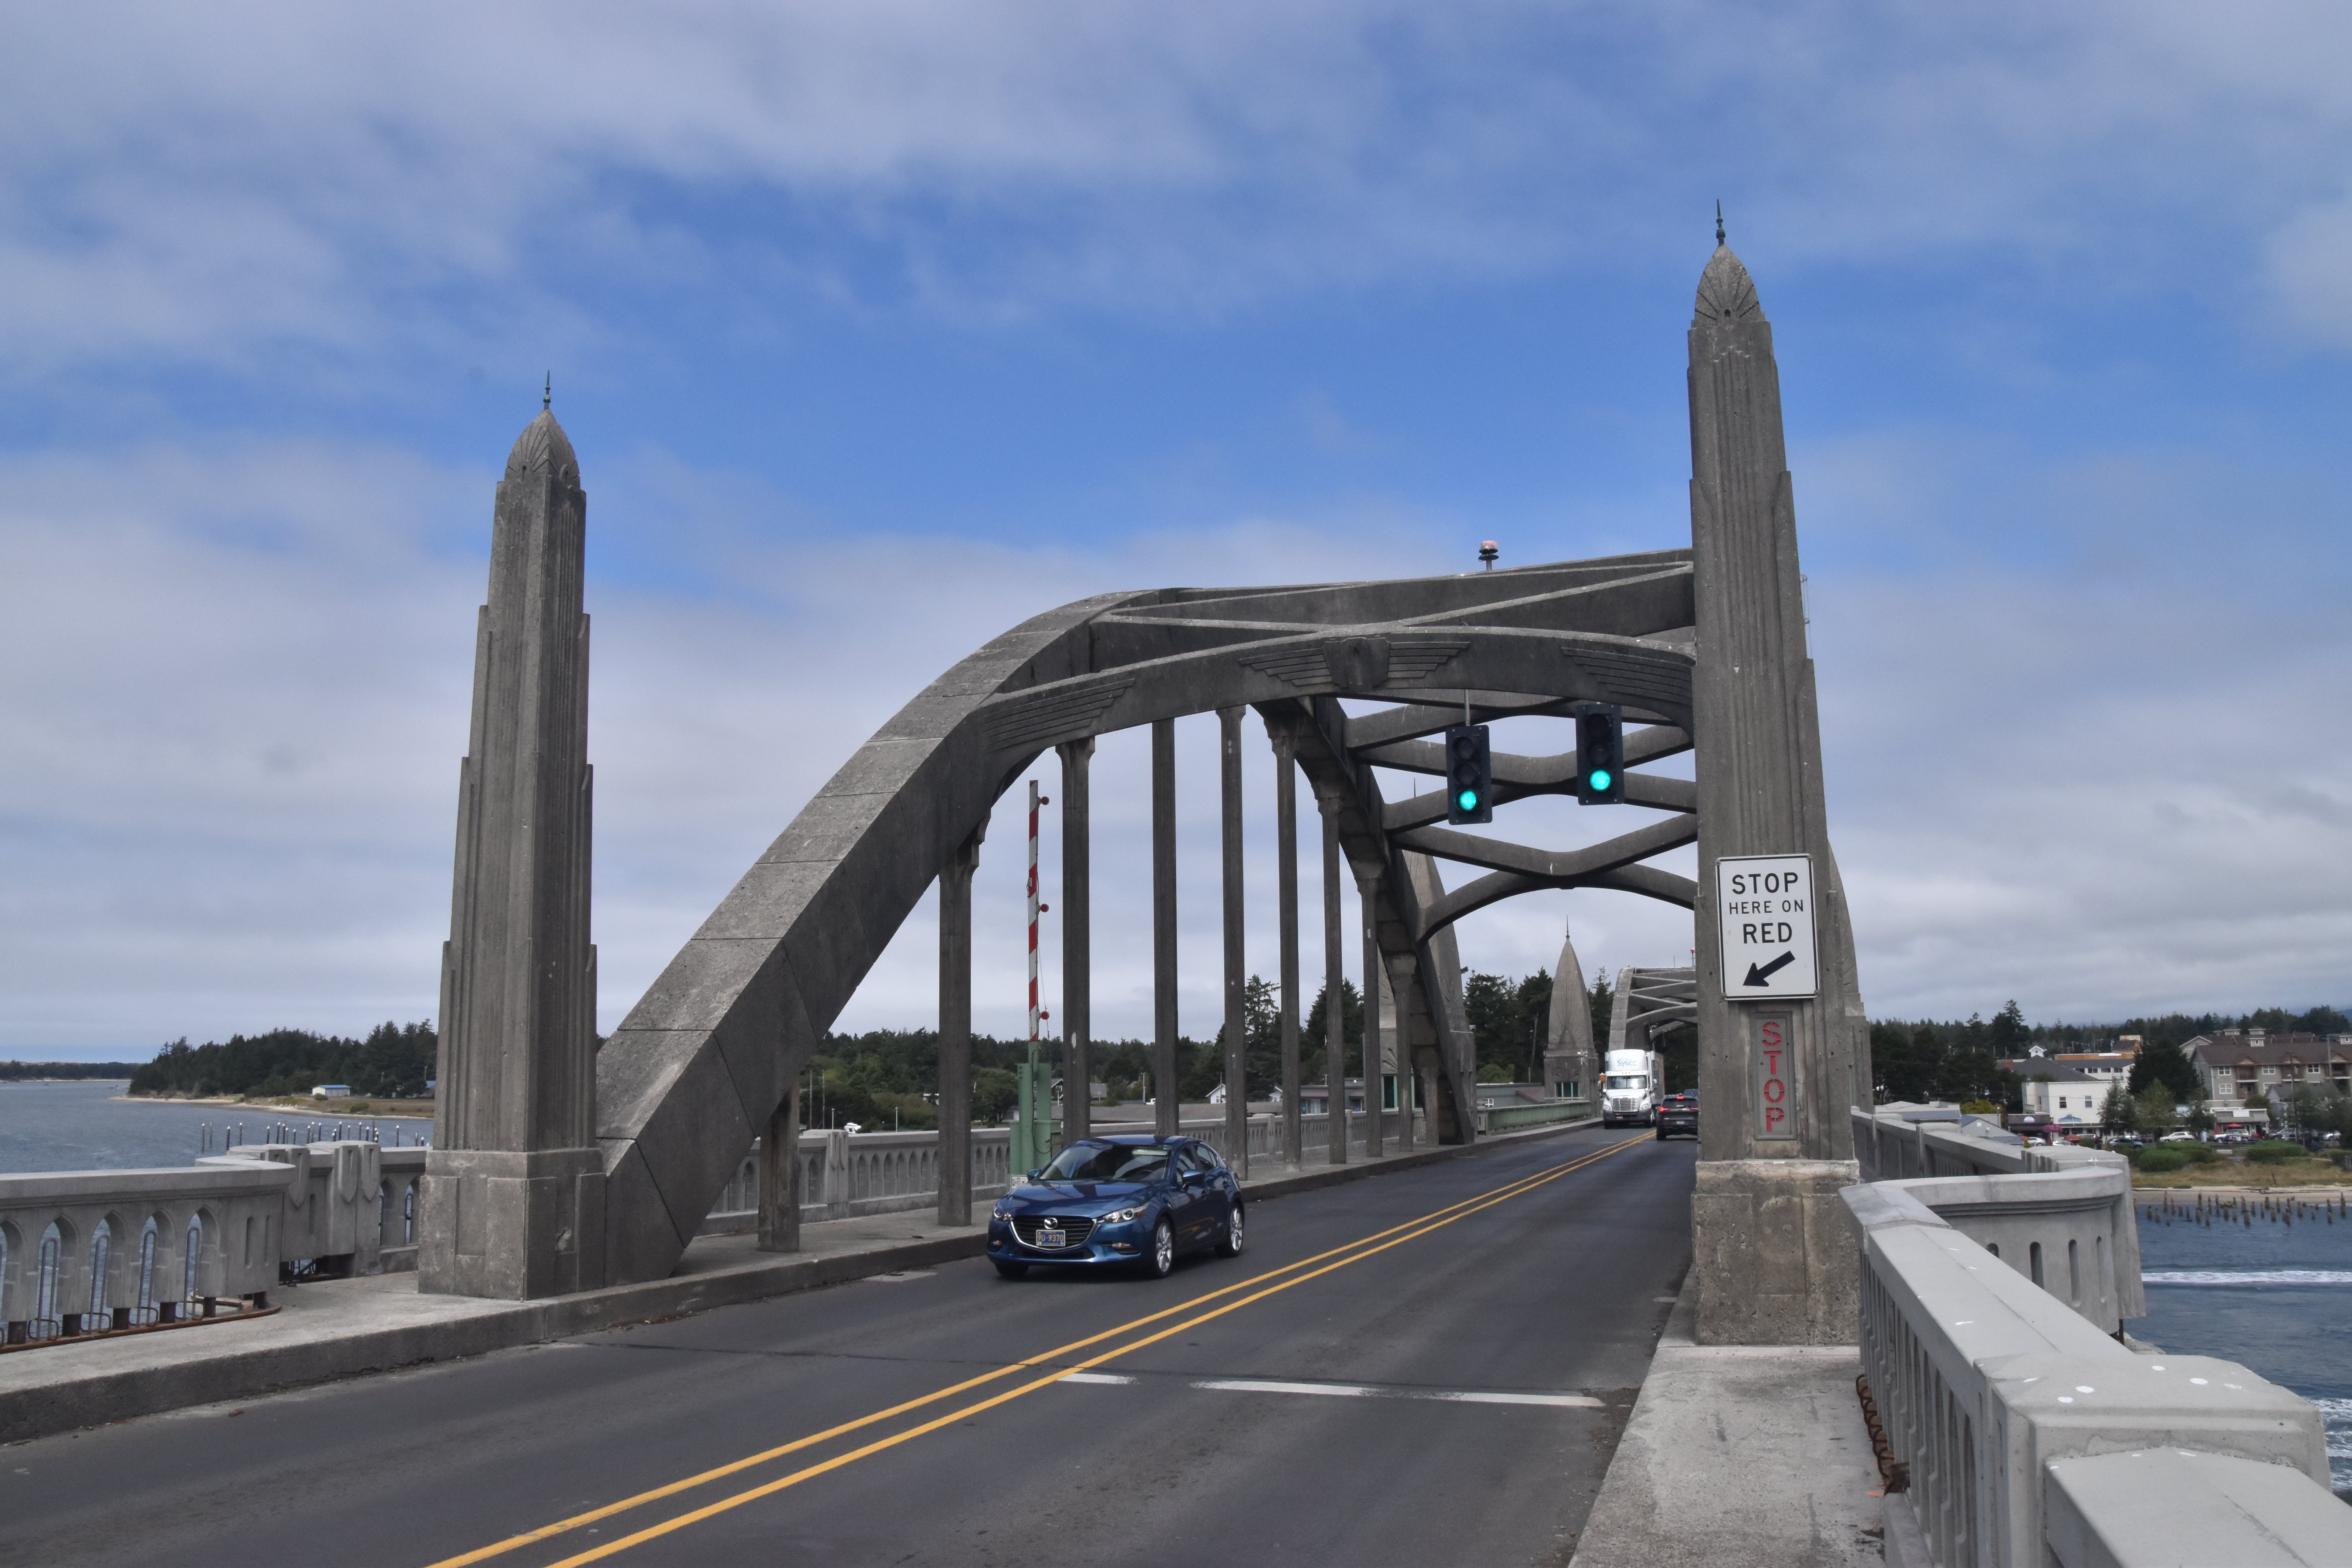
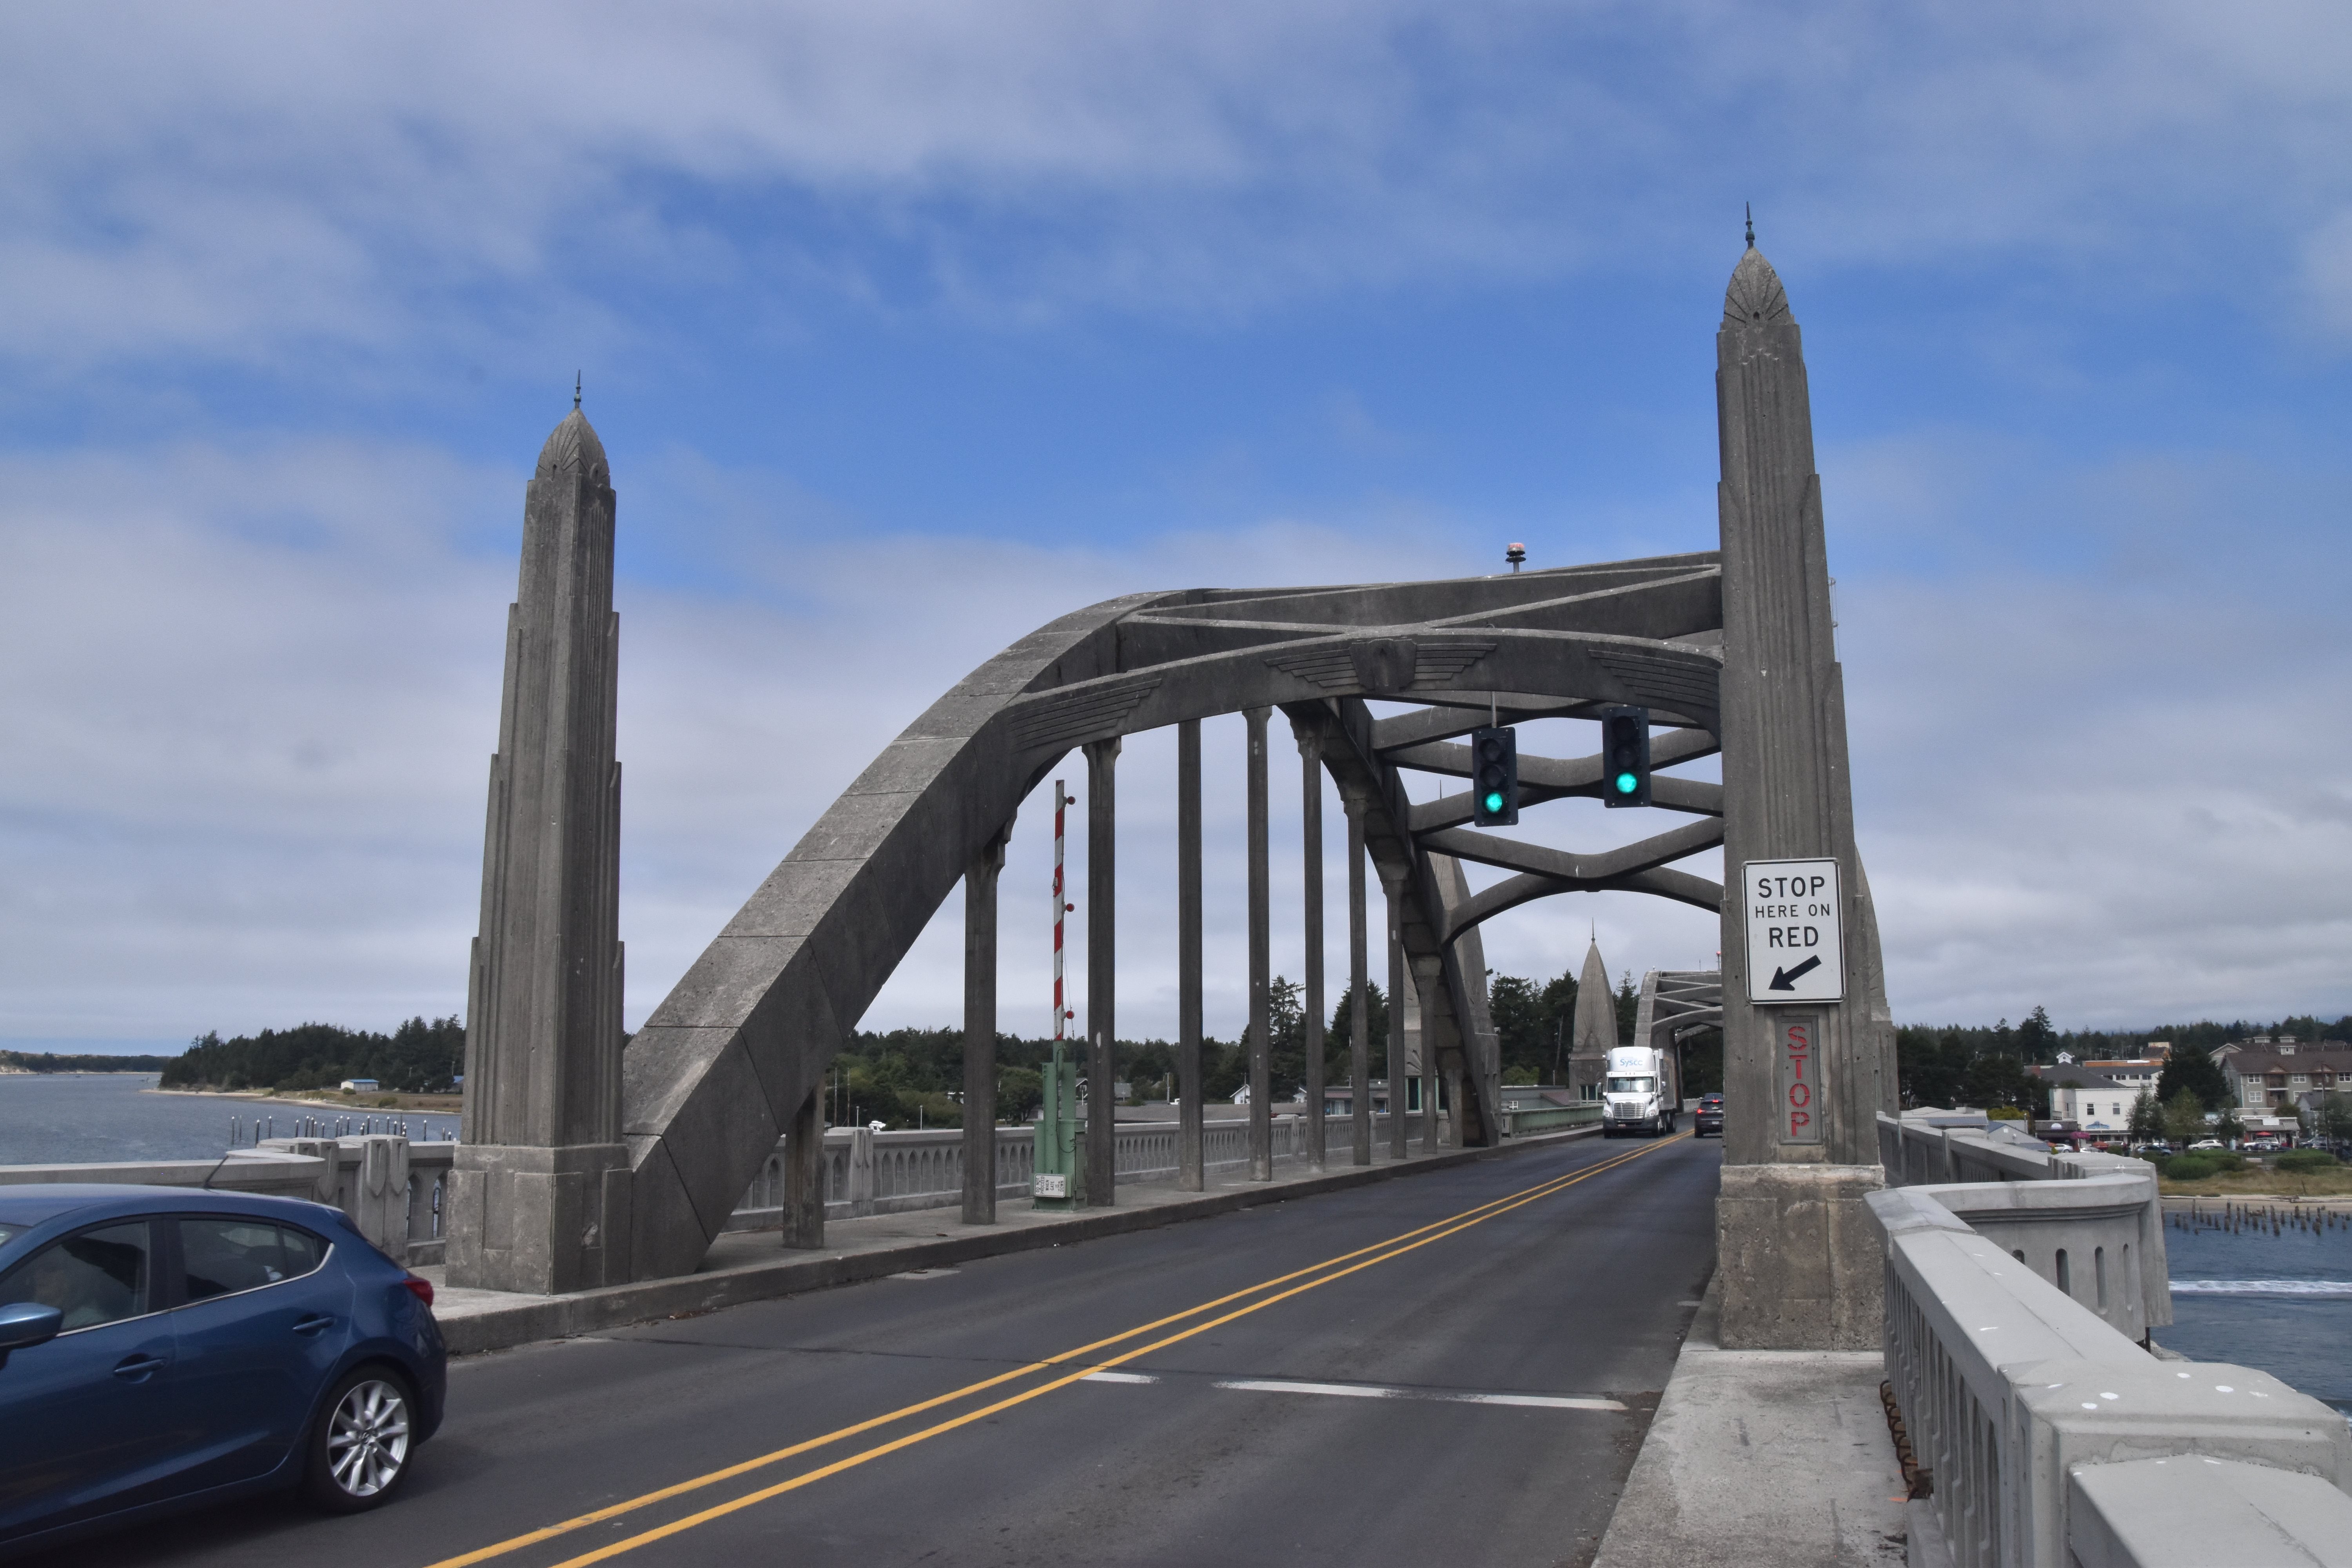
Pillars at end of arch spans, which also have built-in stop signals as part of the original design.
![]()


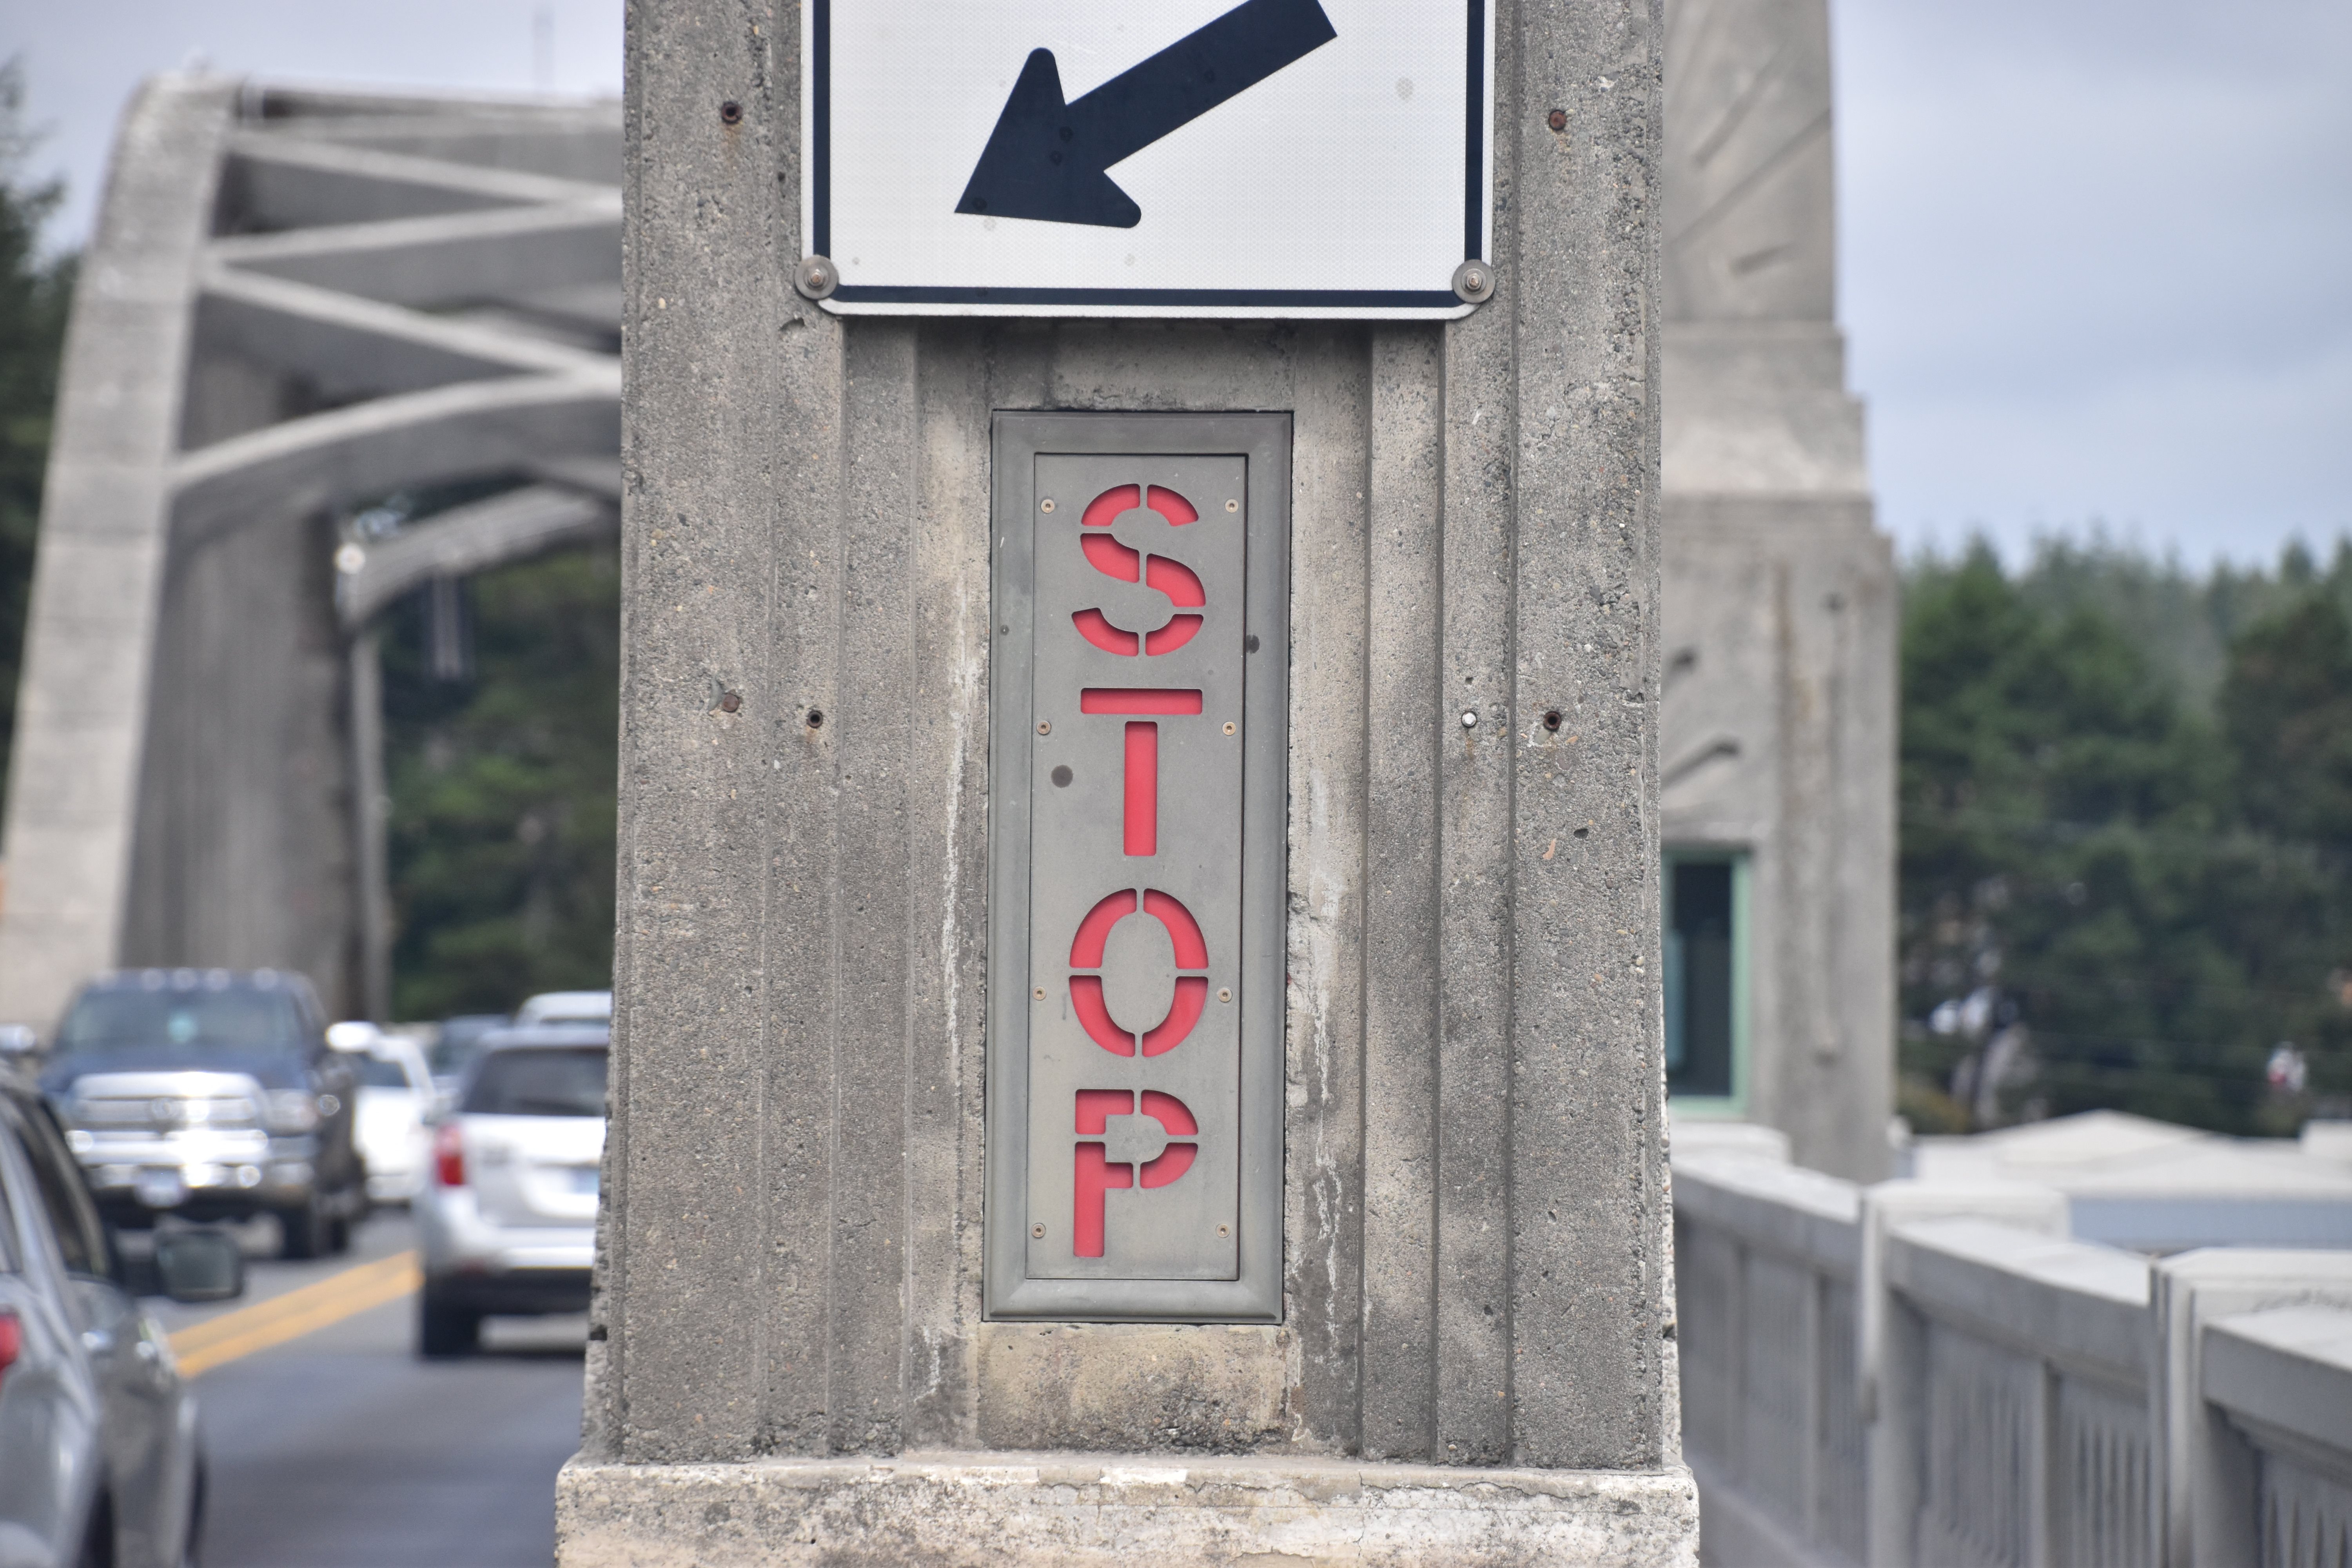
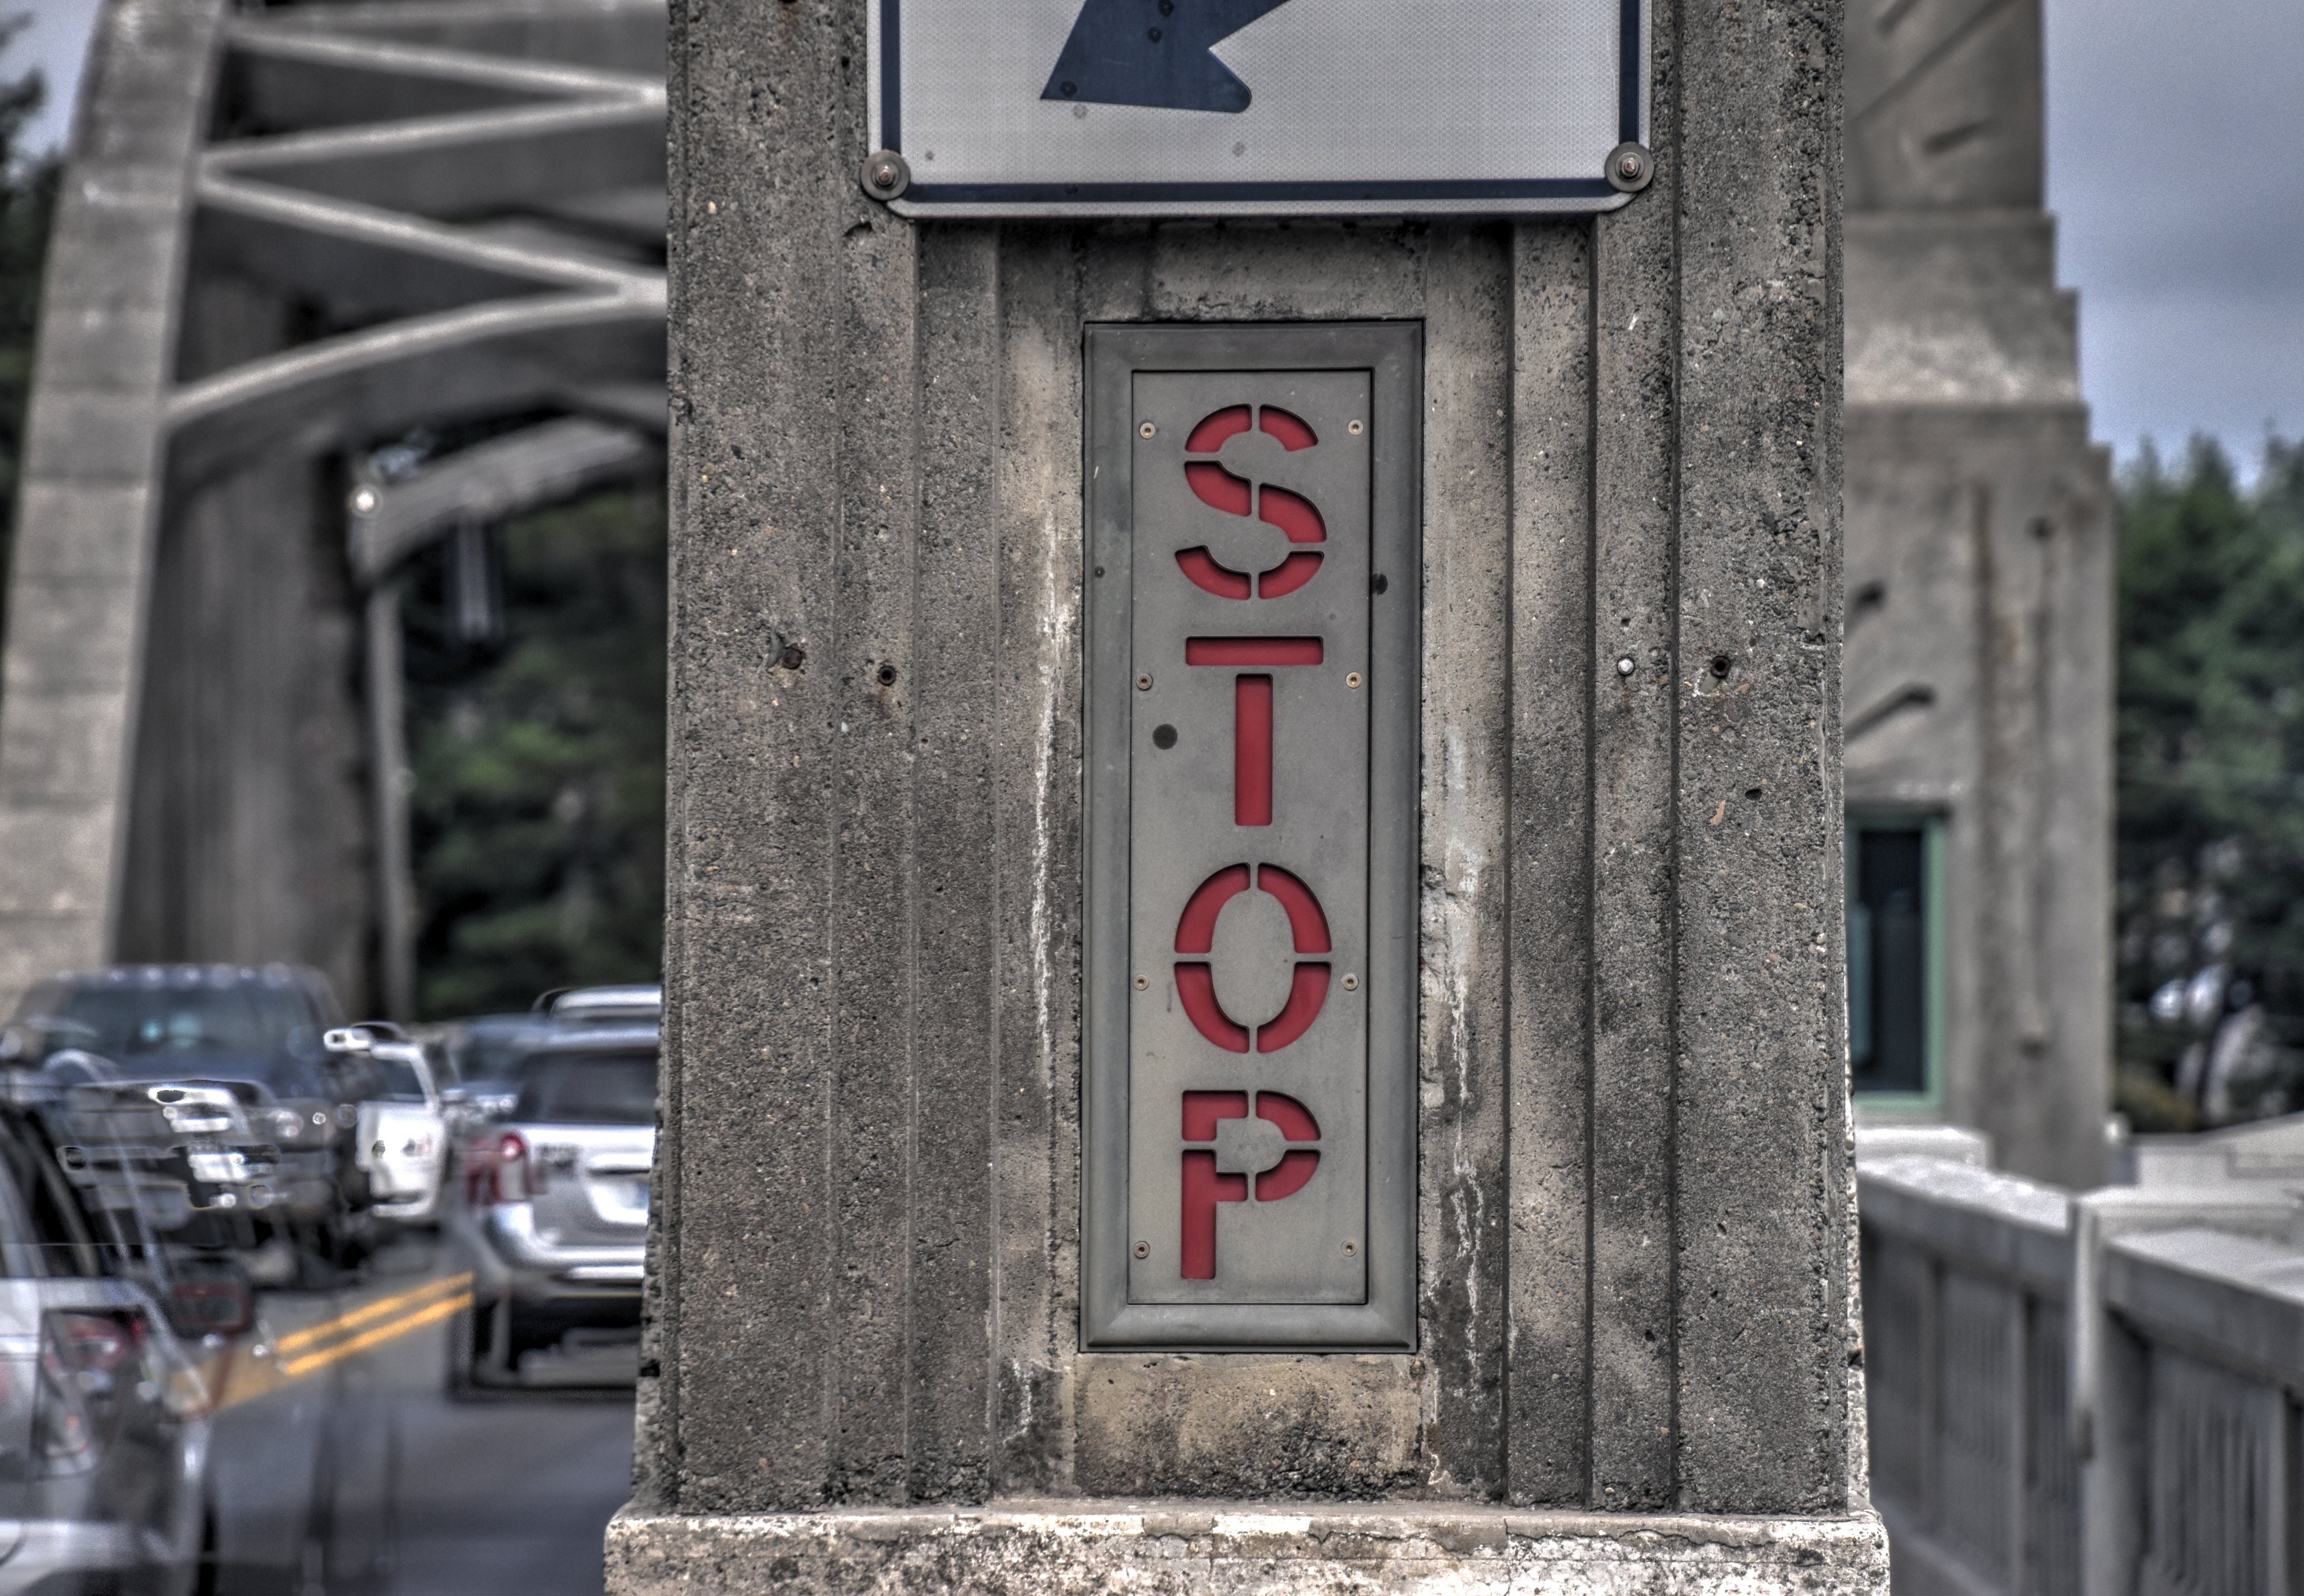
Stop signal on arch span pillar.
![]()


Details of arch span pillars.
![]()
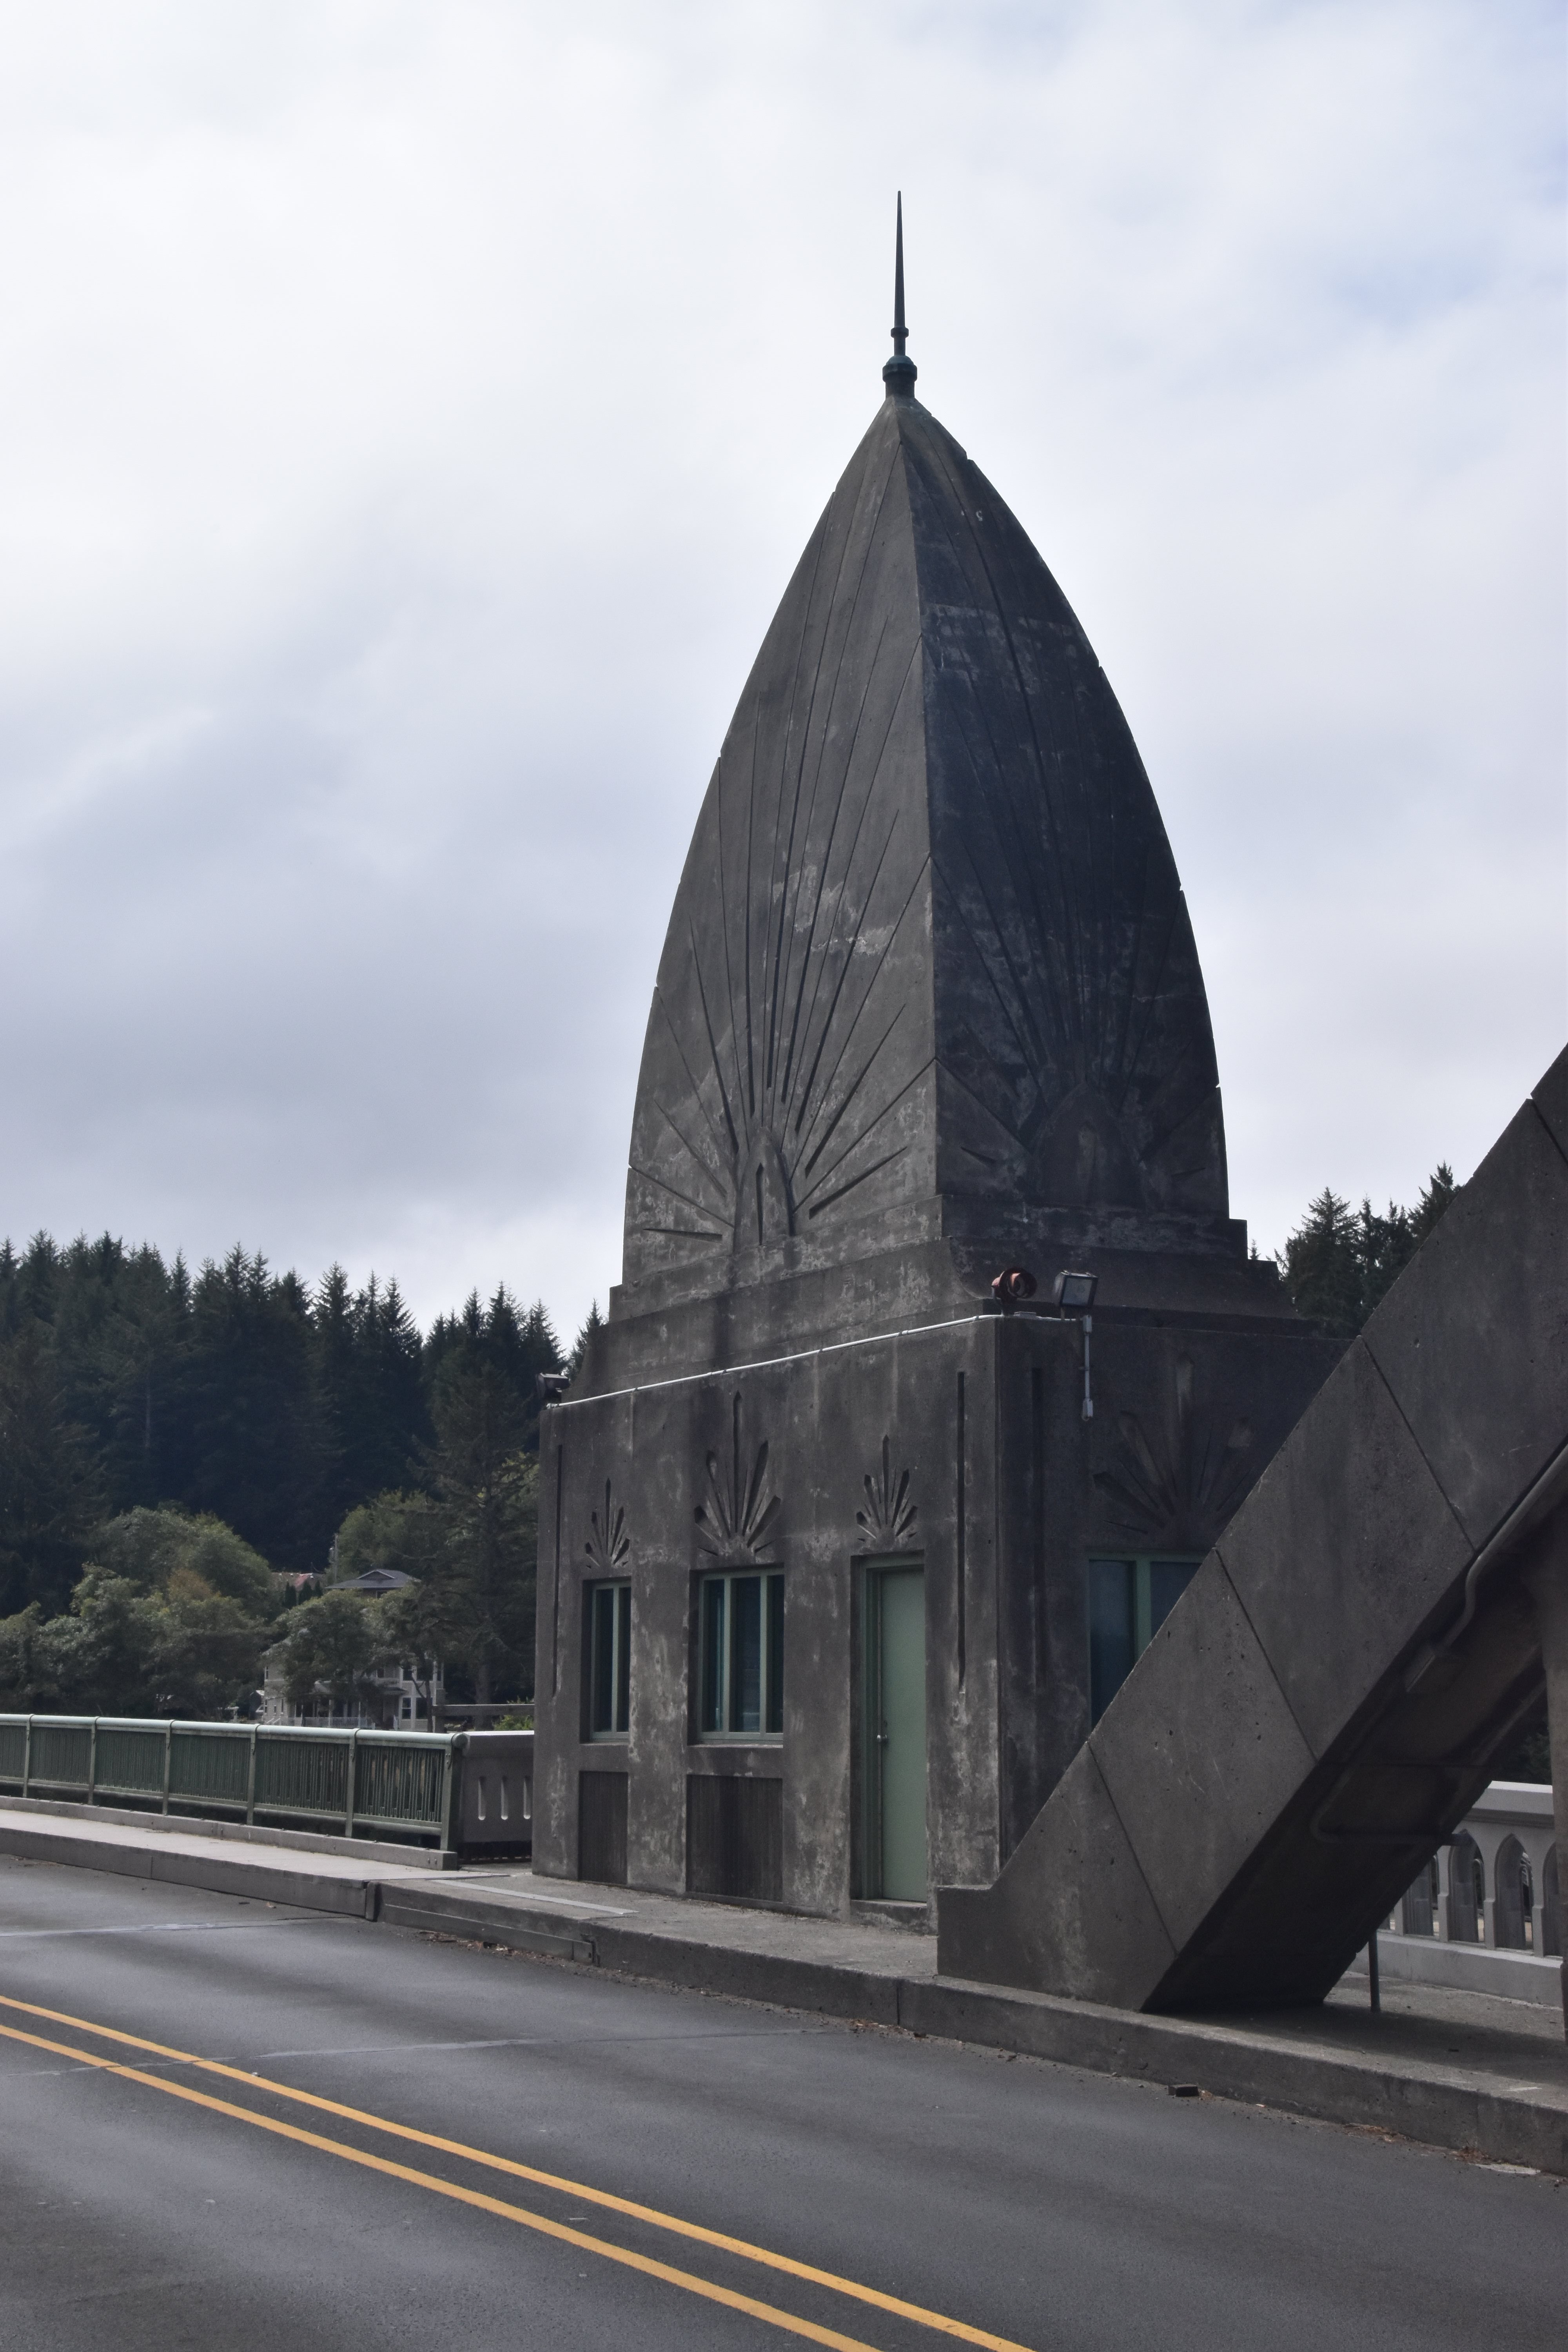
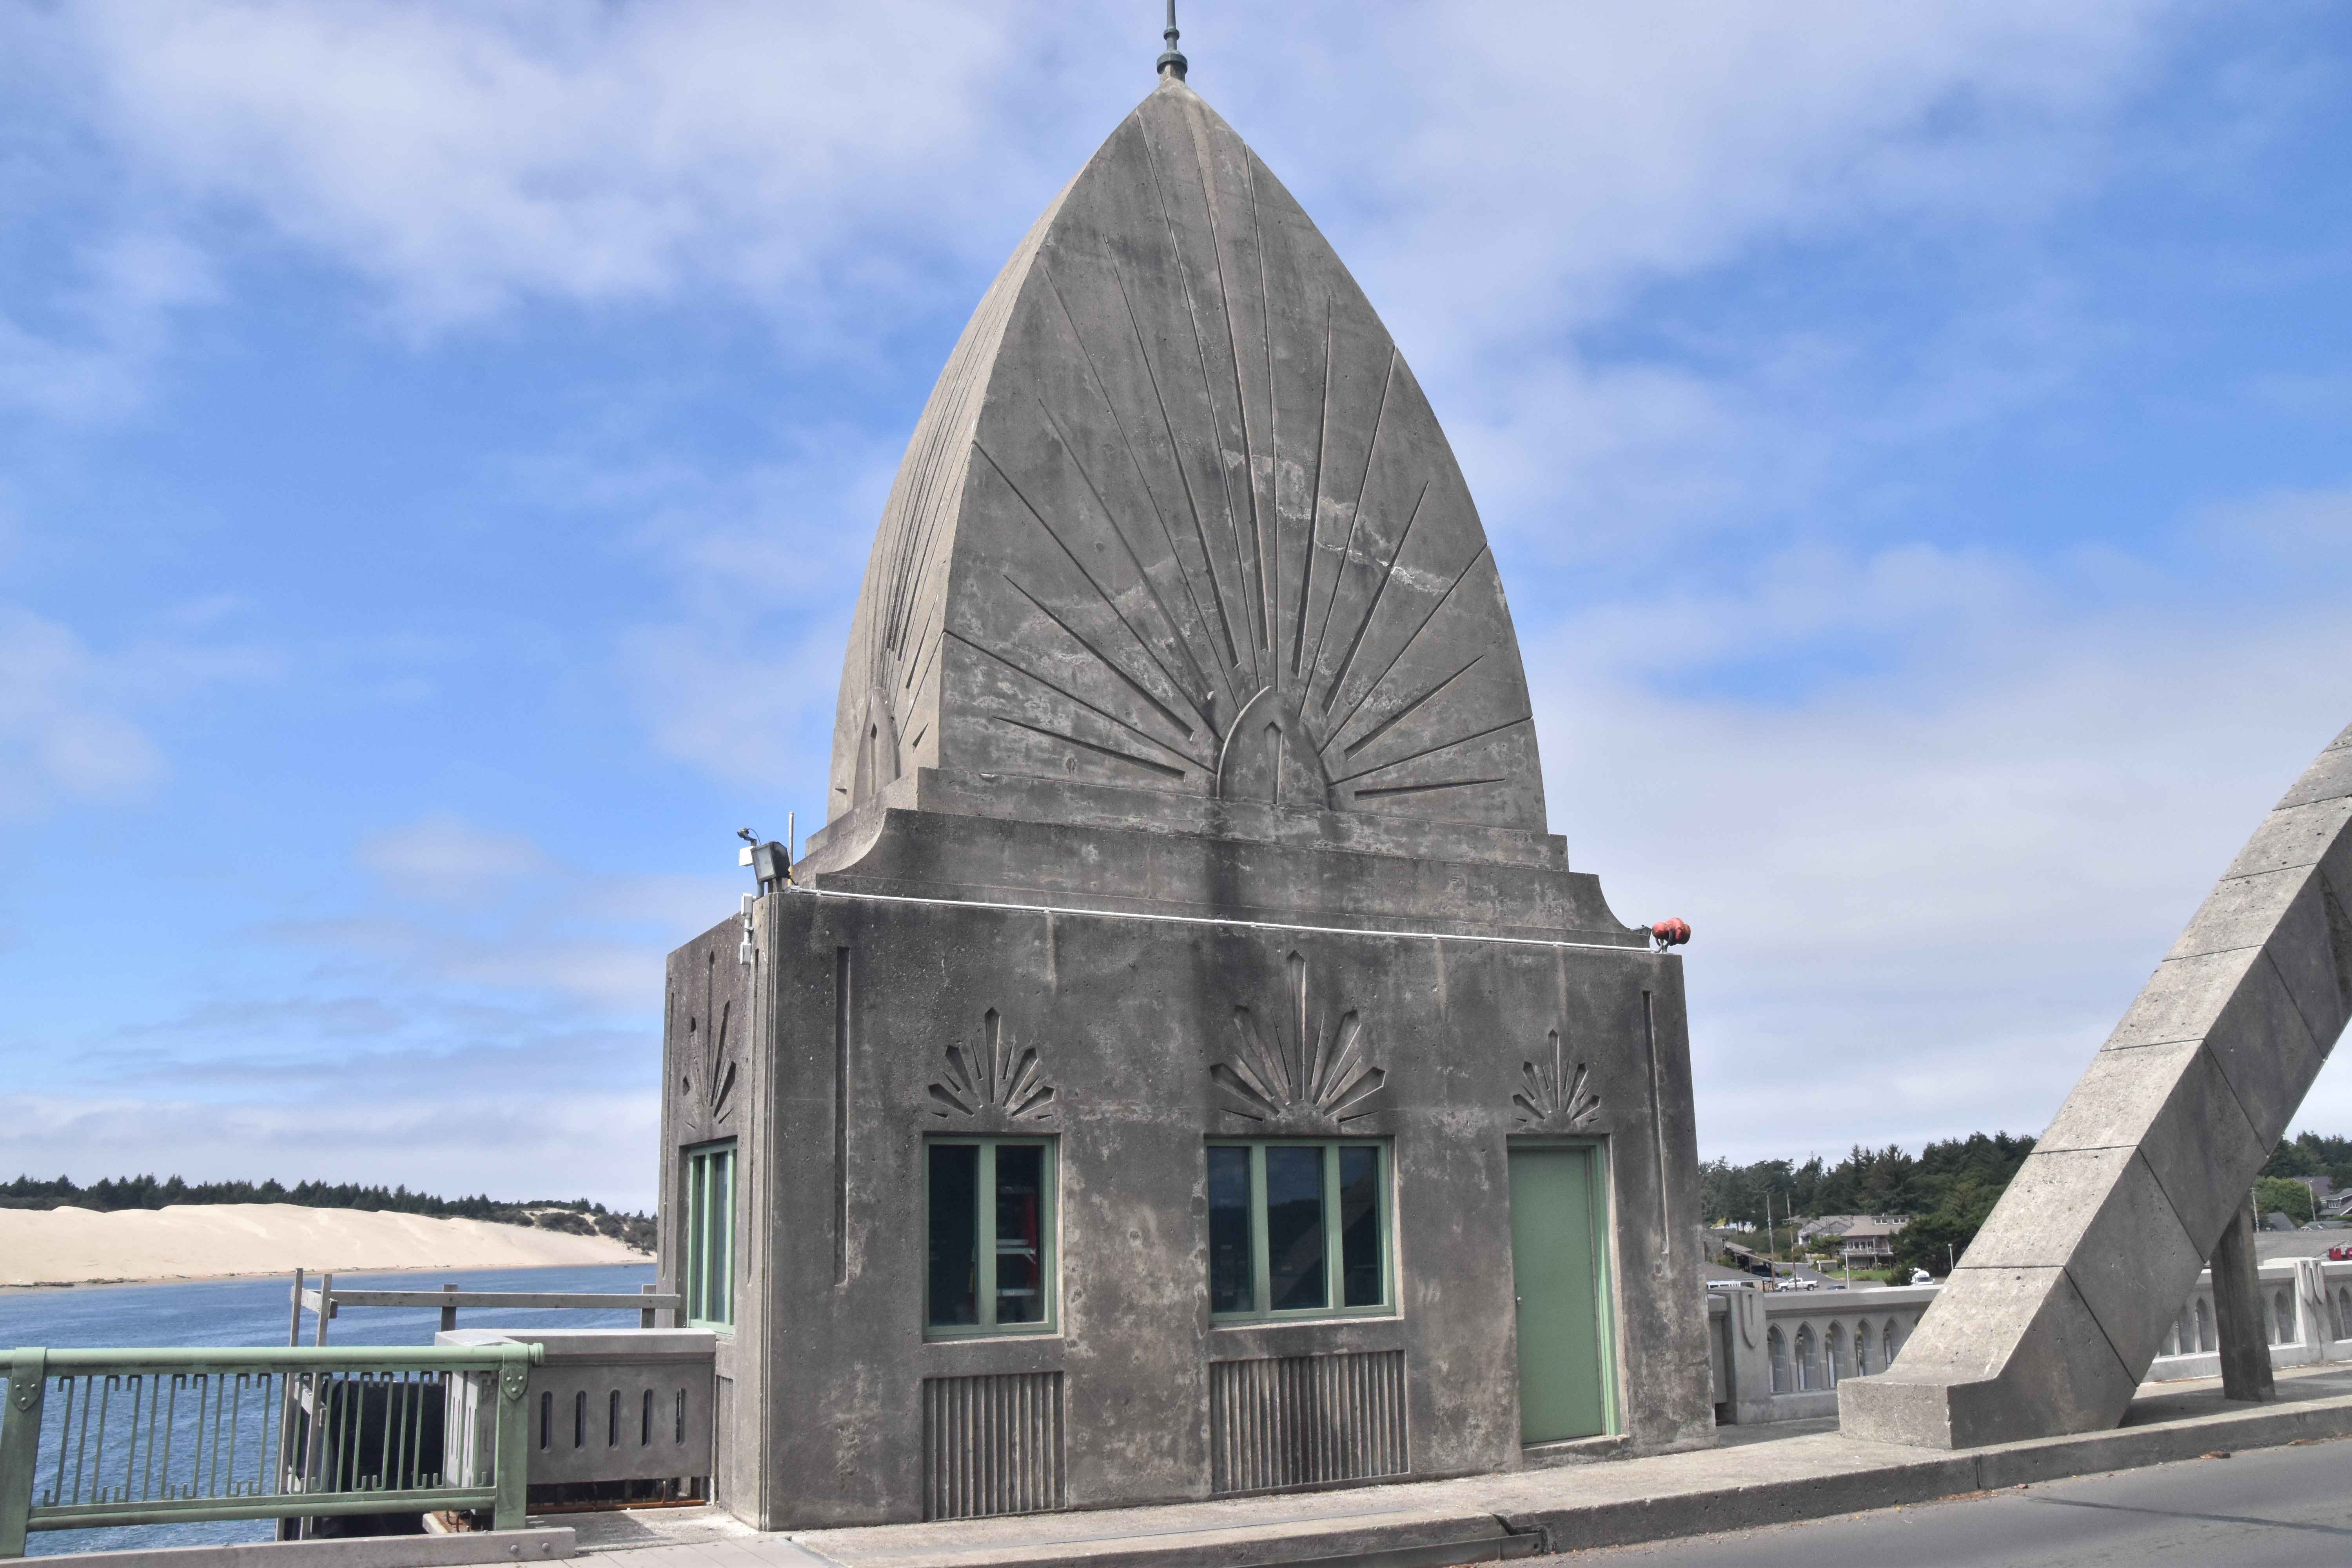
Oblique views of bridge house as seen from on bridge.
![]()
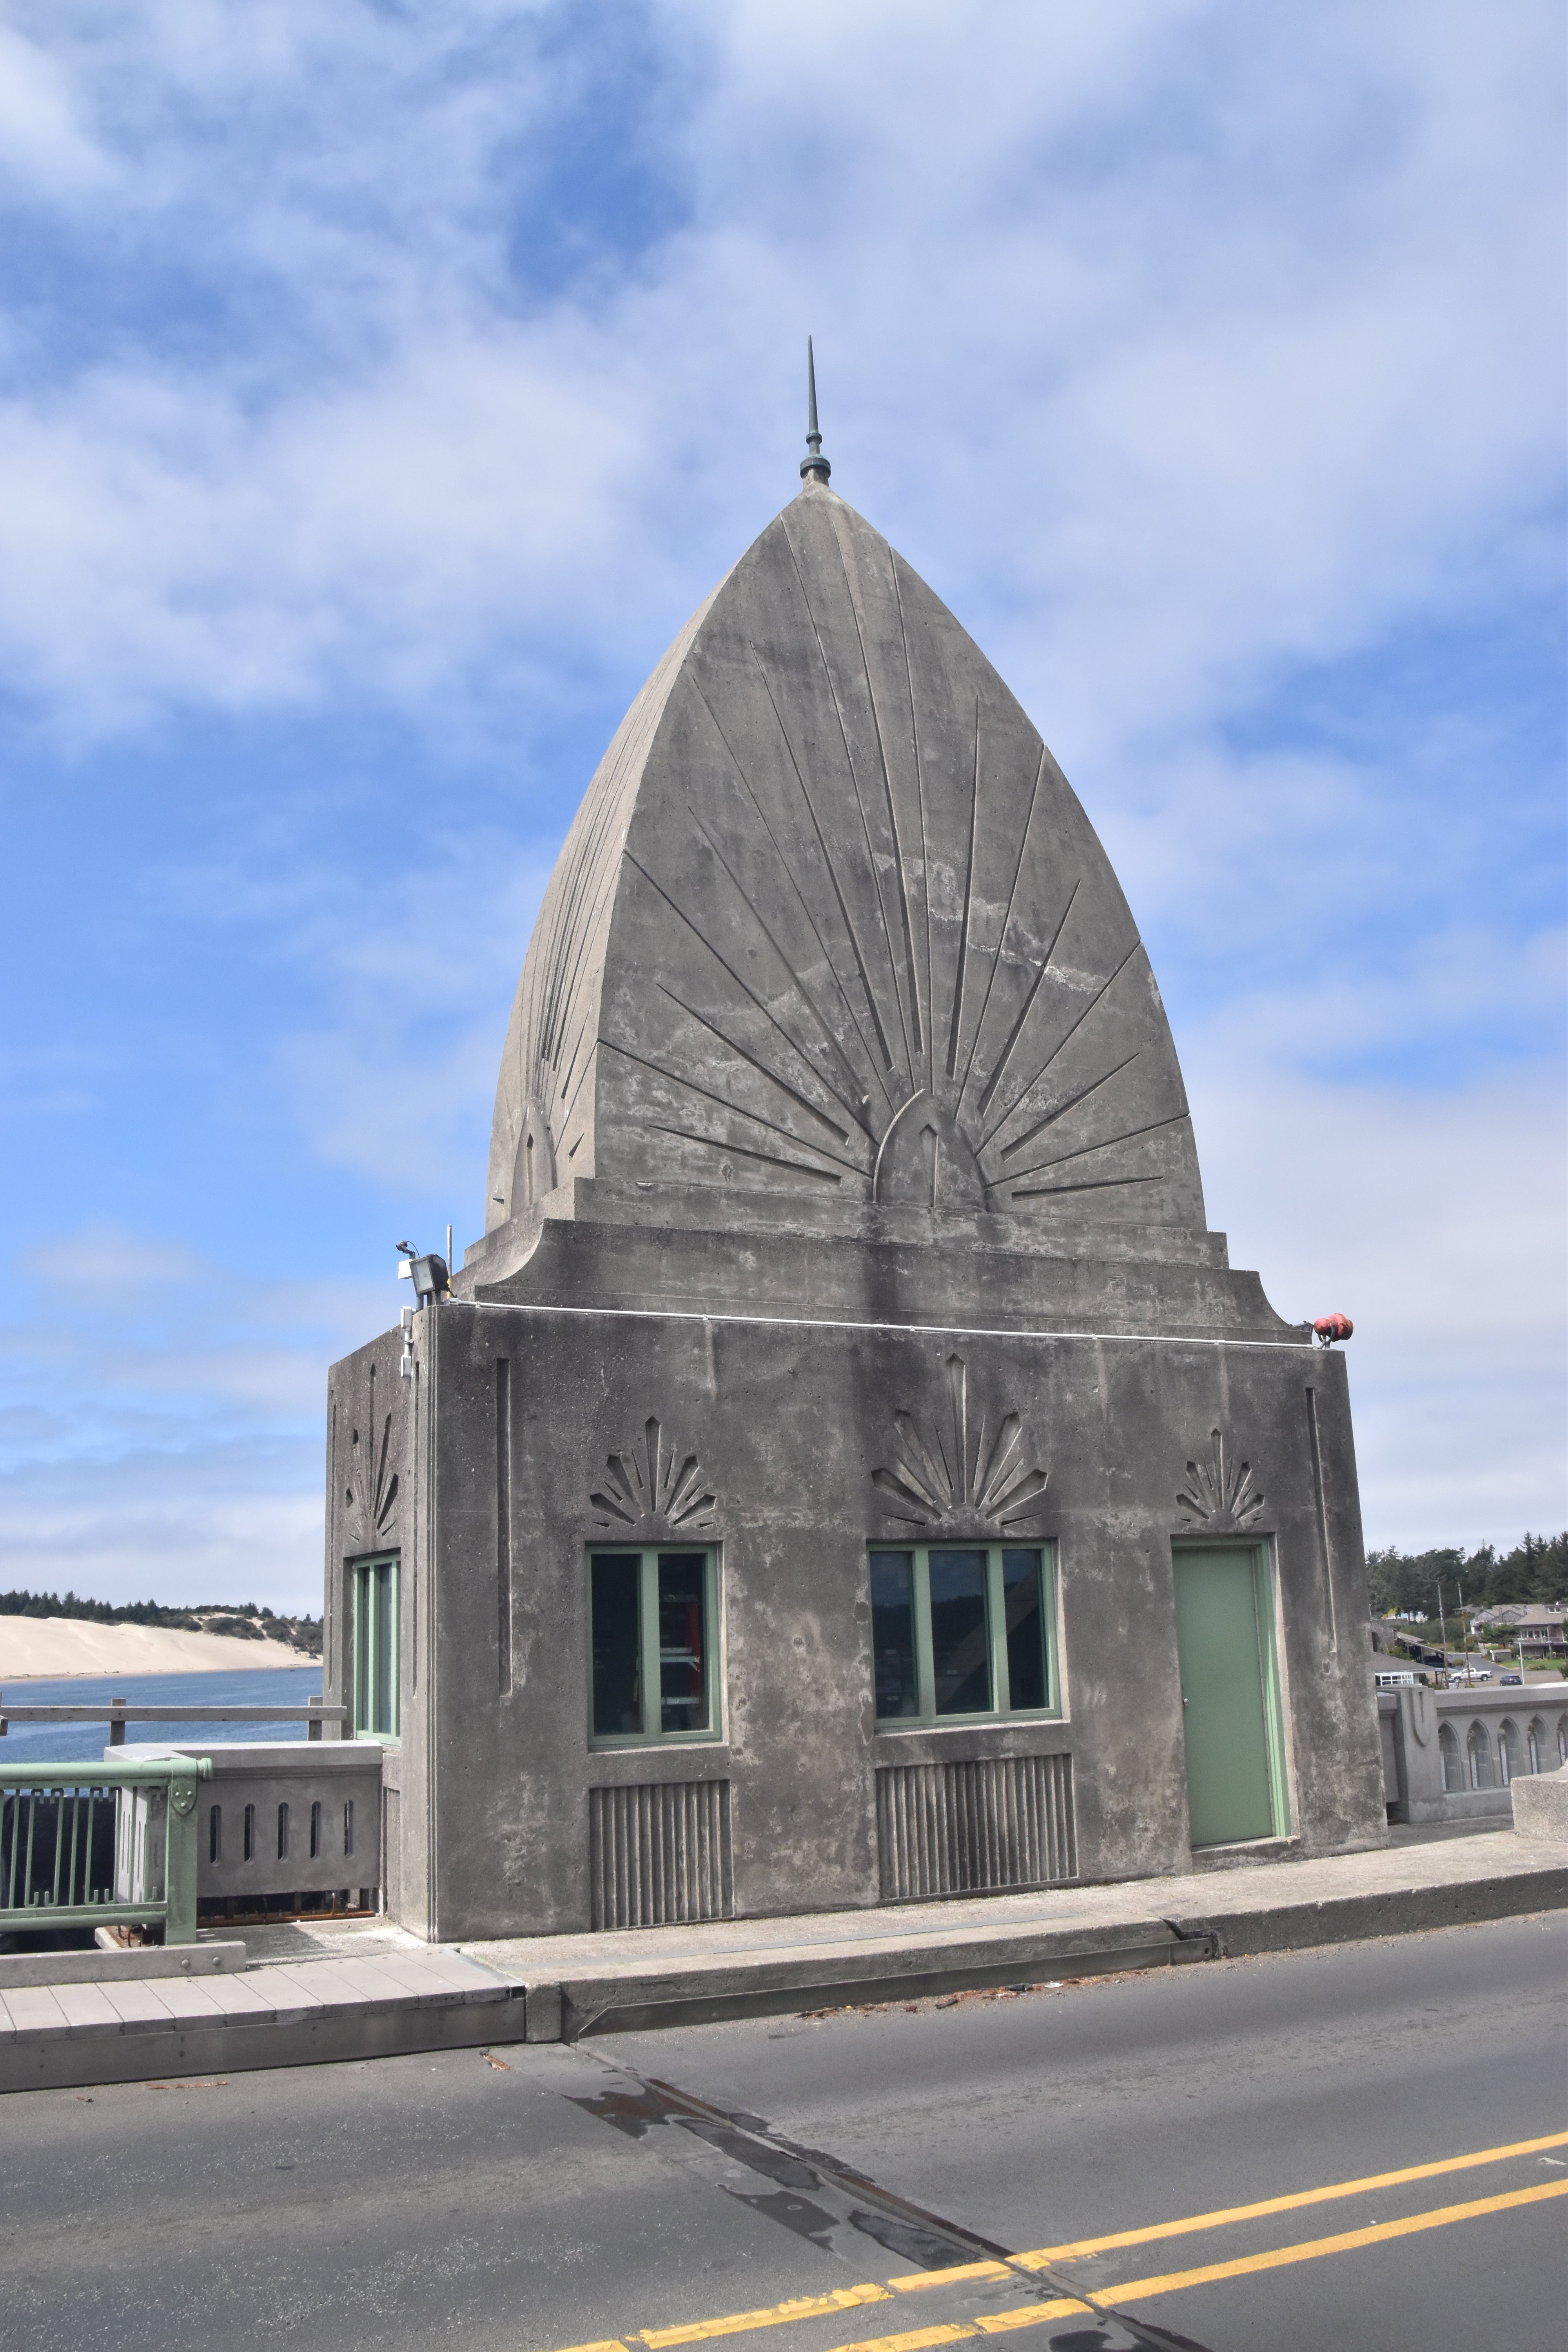


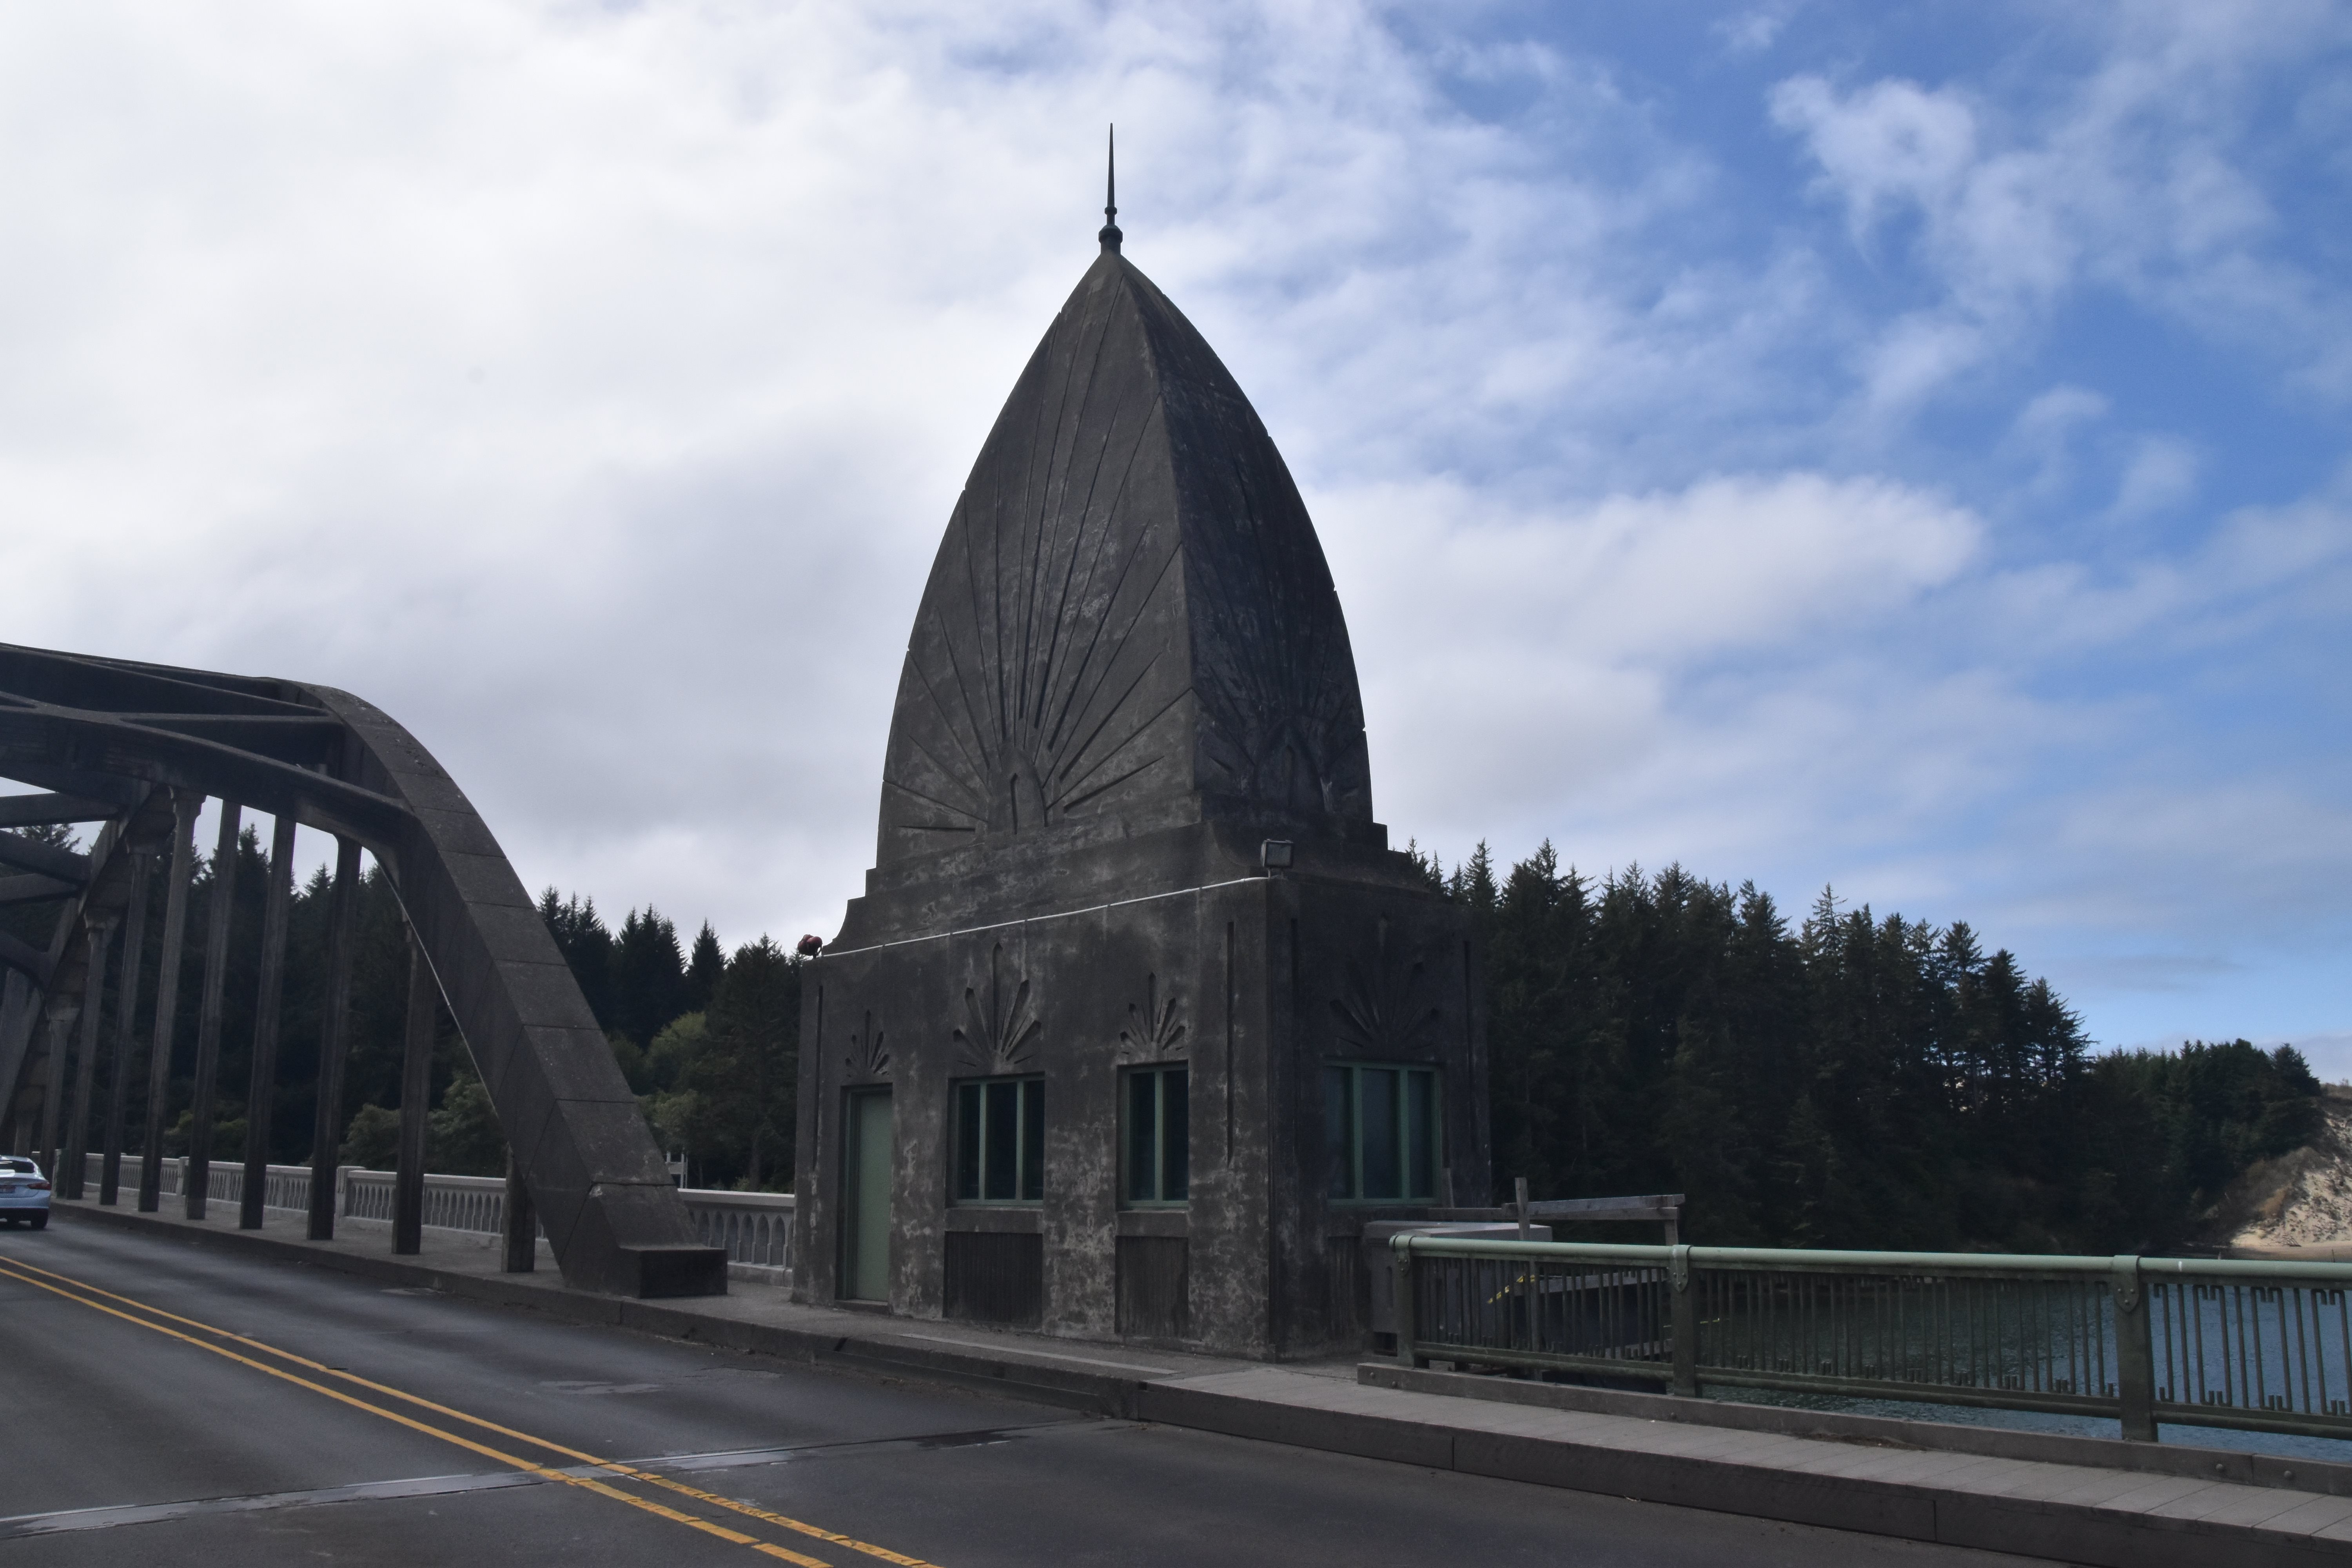
Views of bridge houses from on bridge, side facing roadway.
![]()


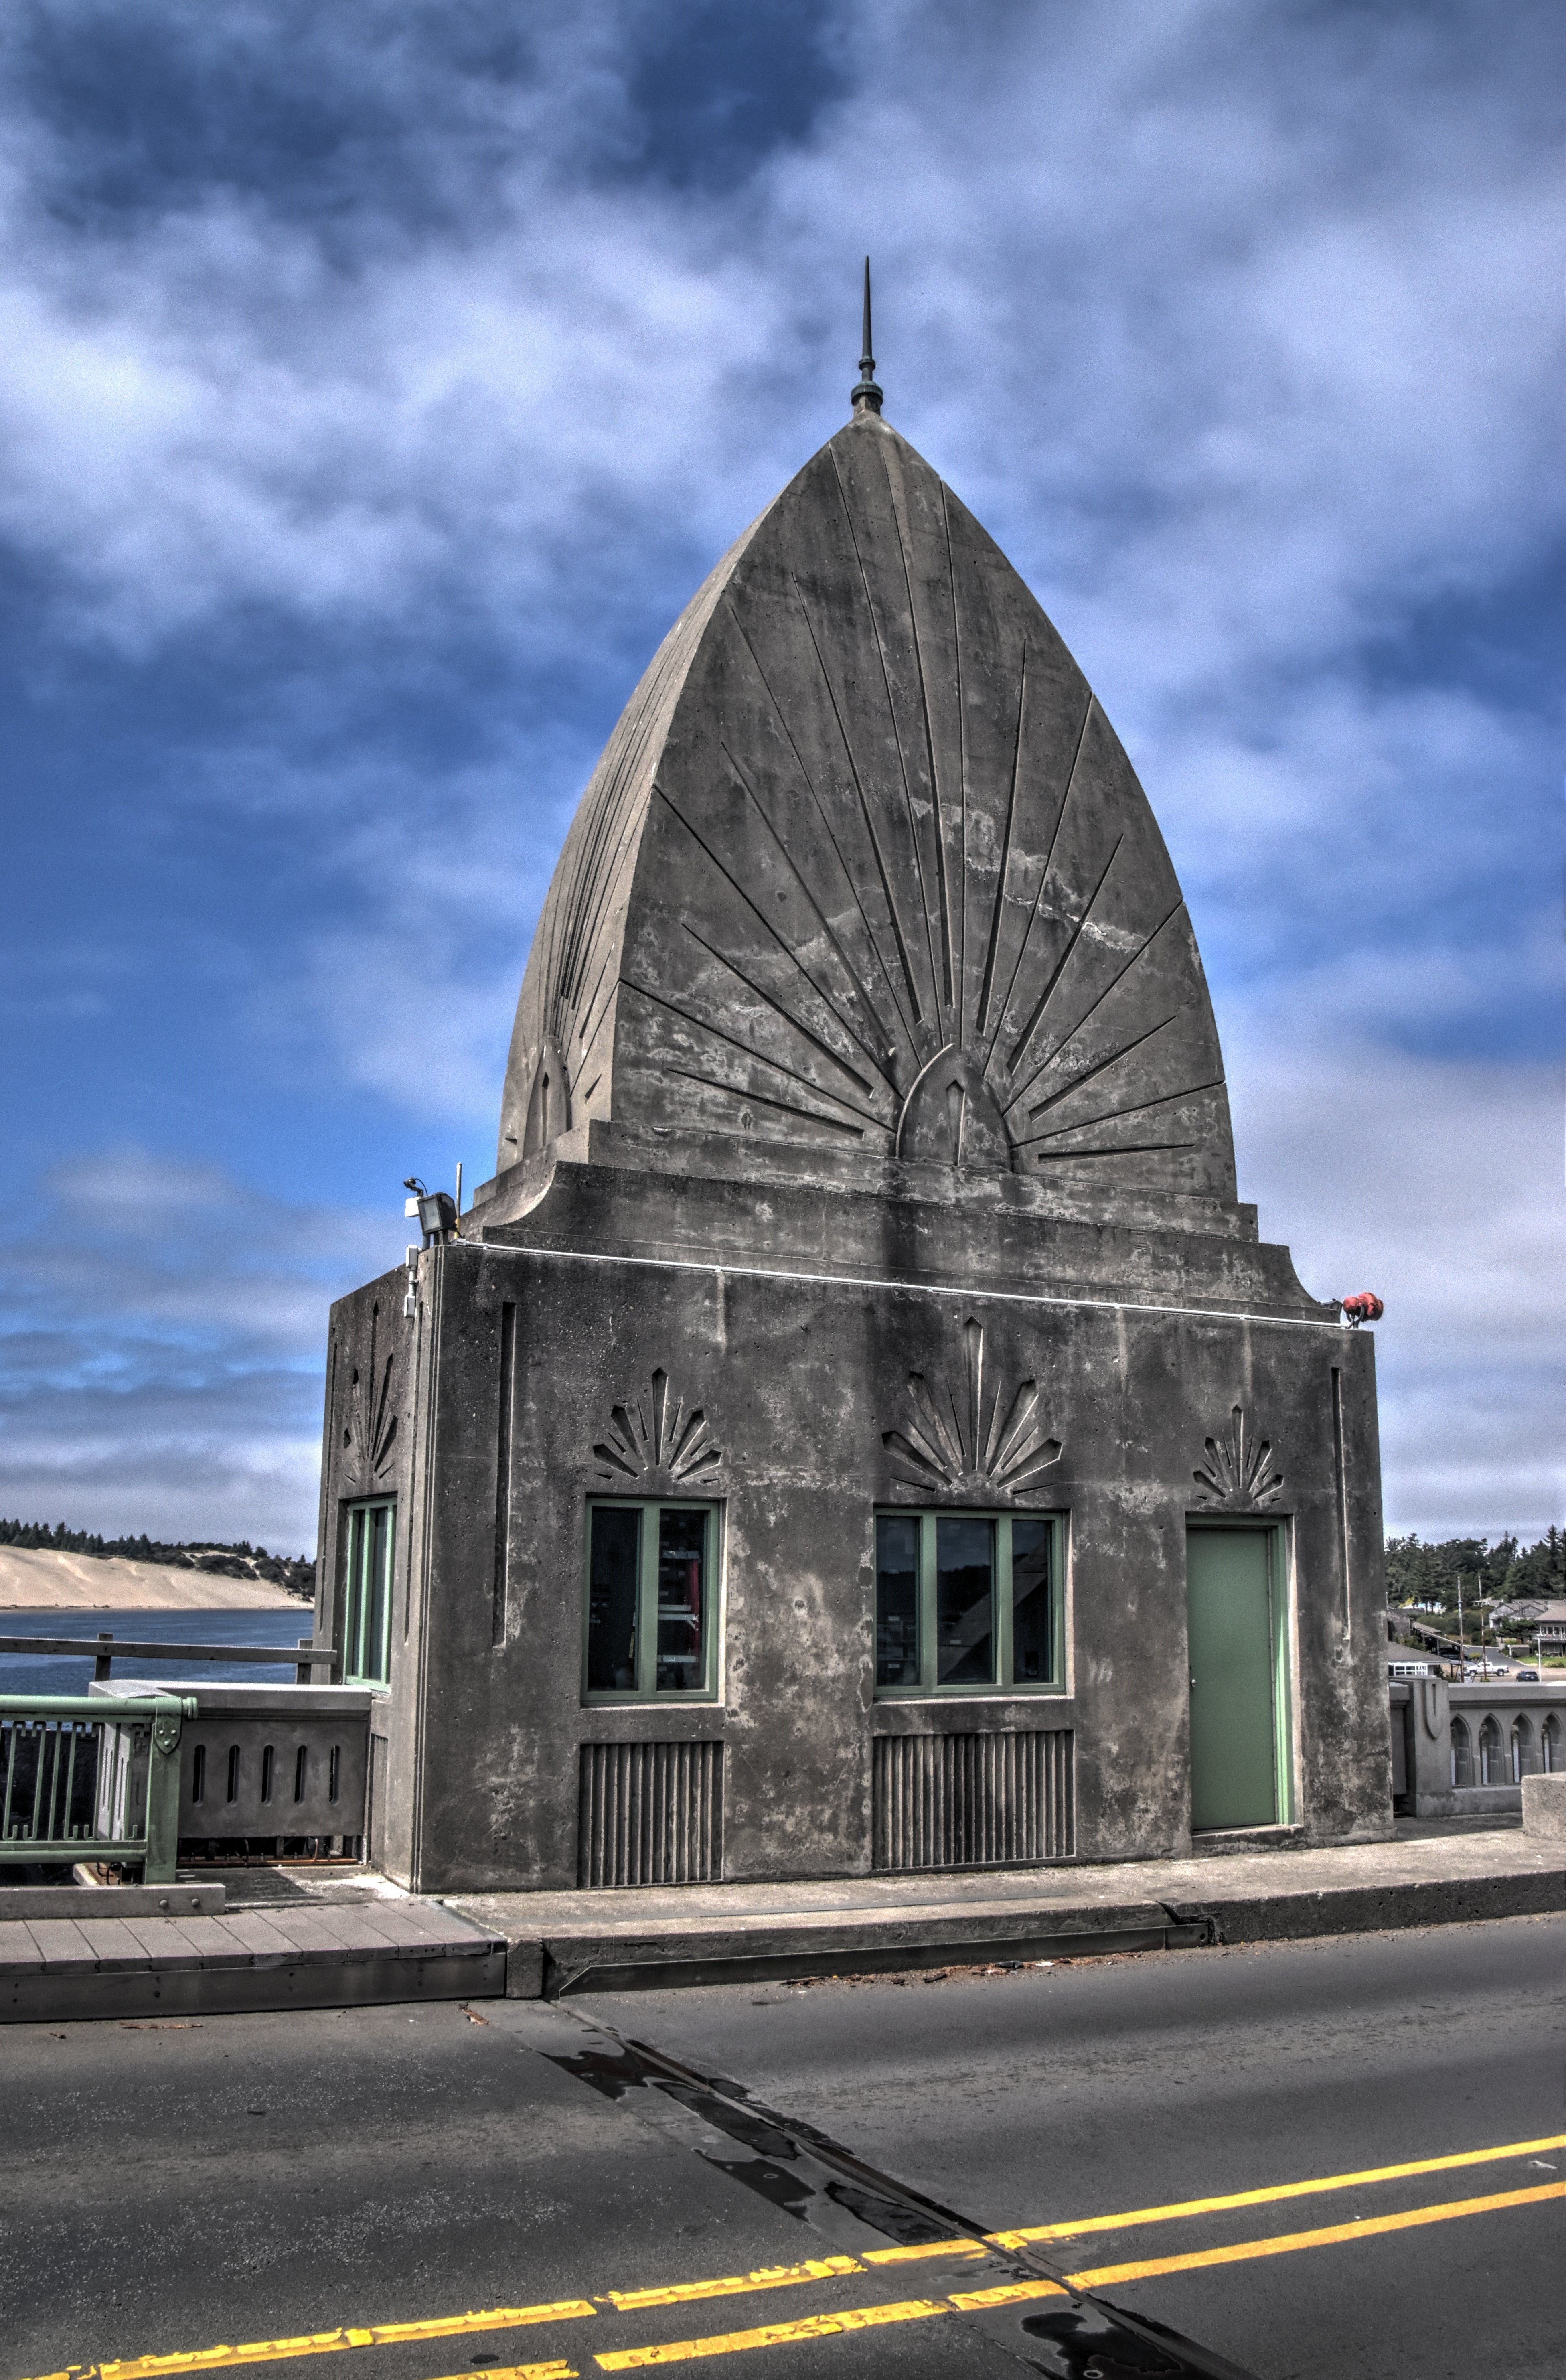
Views of bridge houses from on bridge, side facing span.
![]()


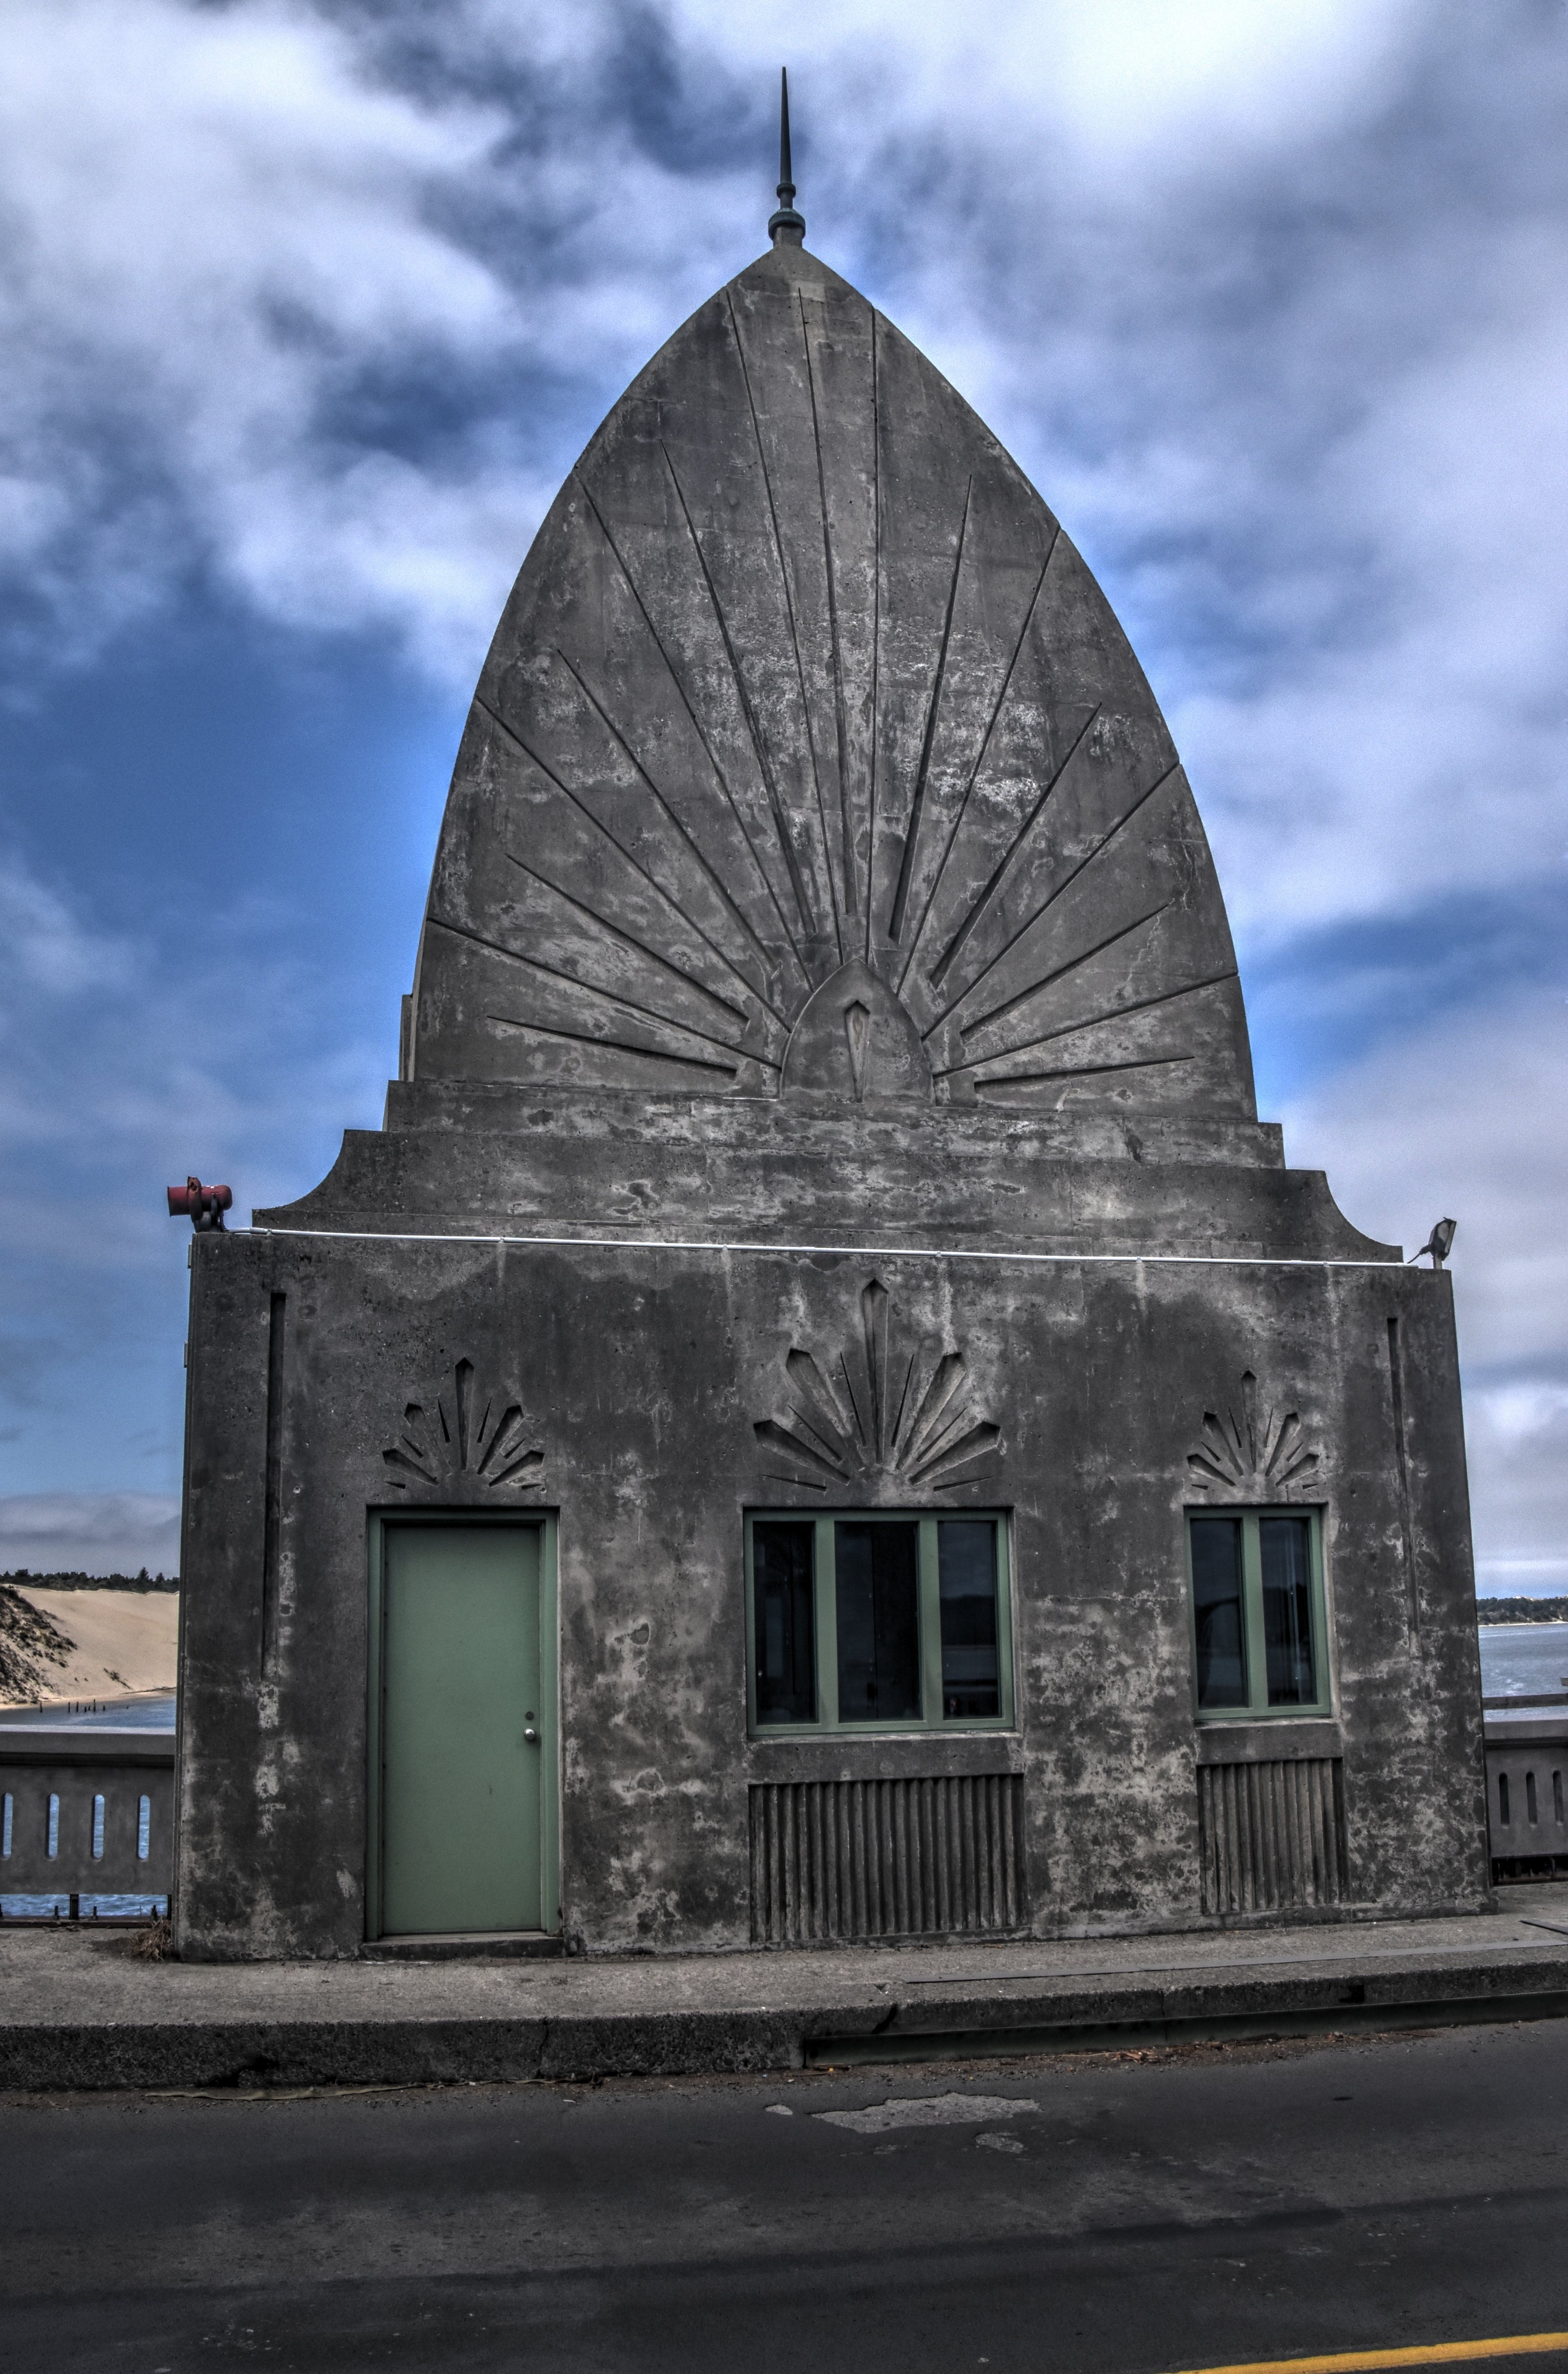
Details of bridge houses.
![]()

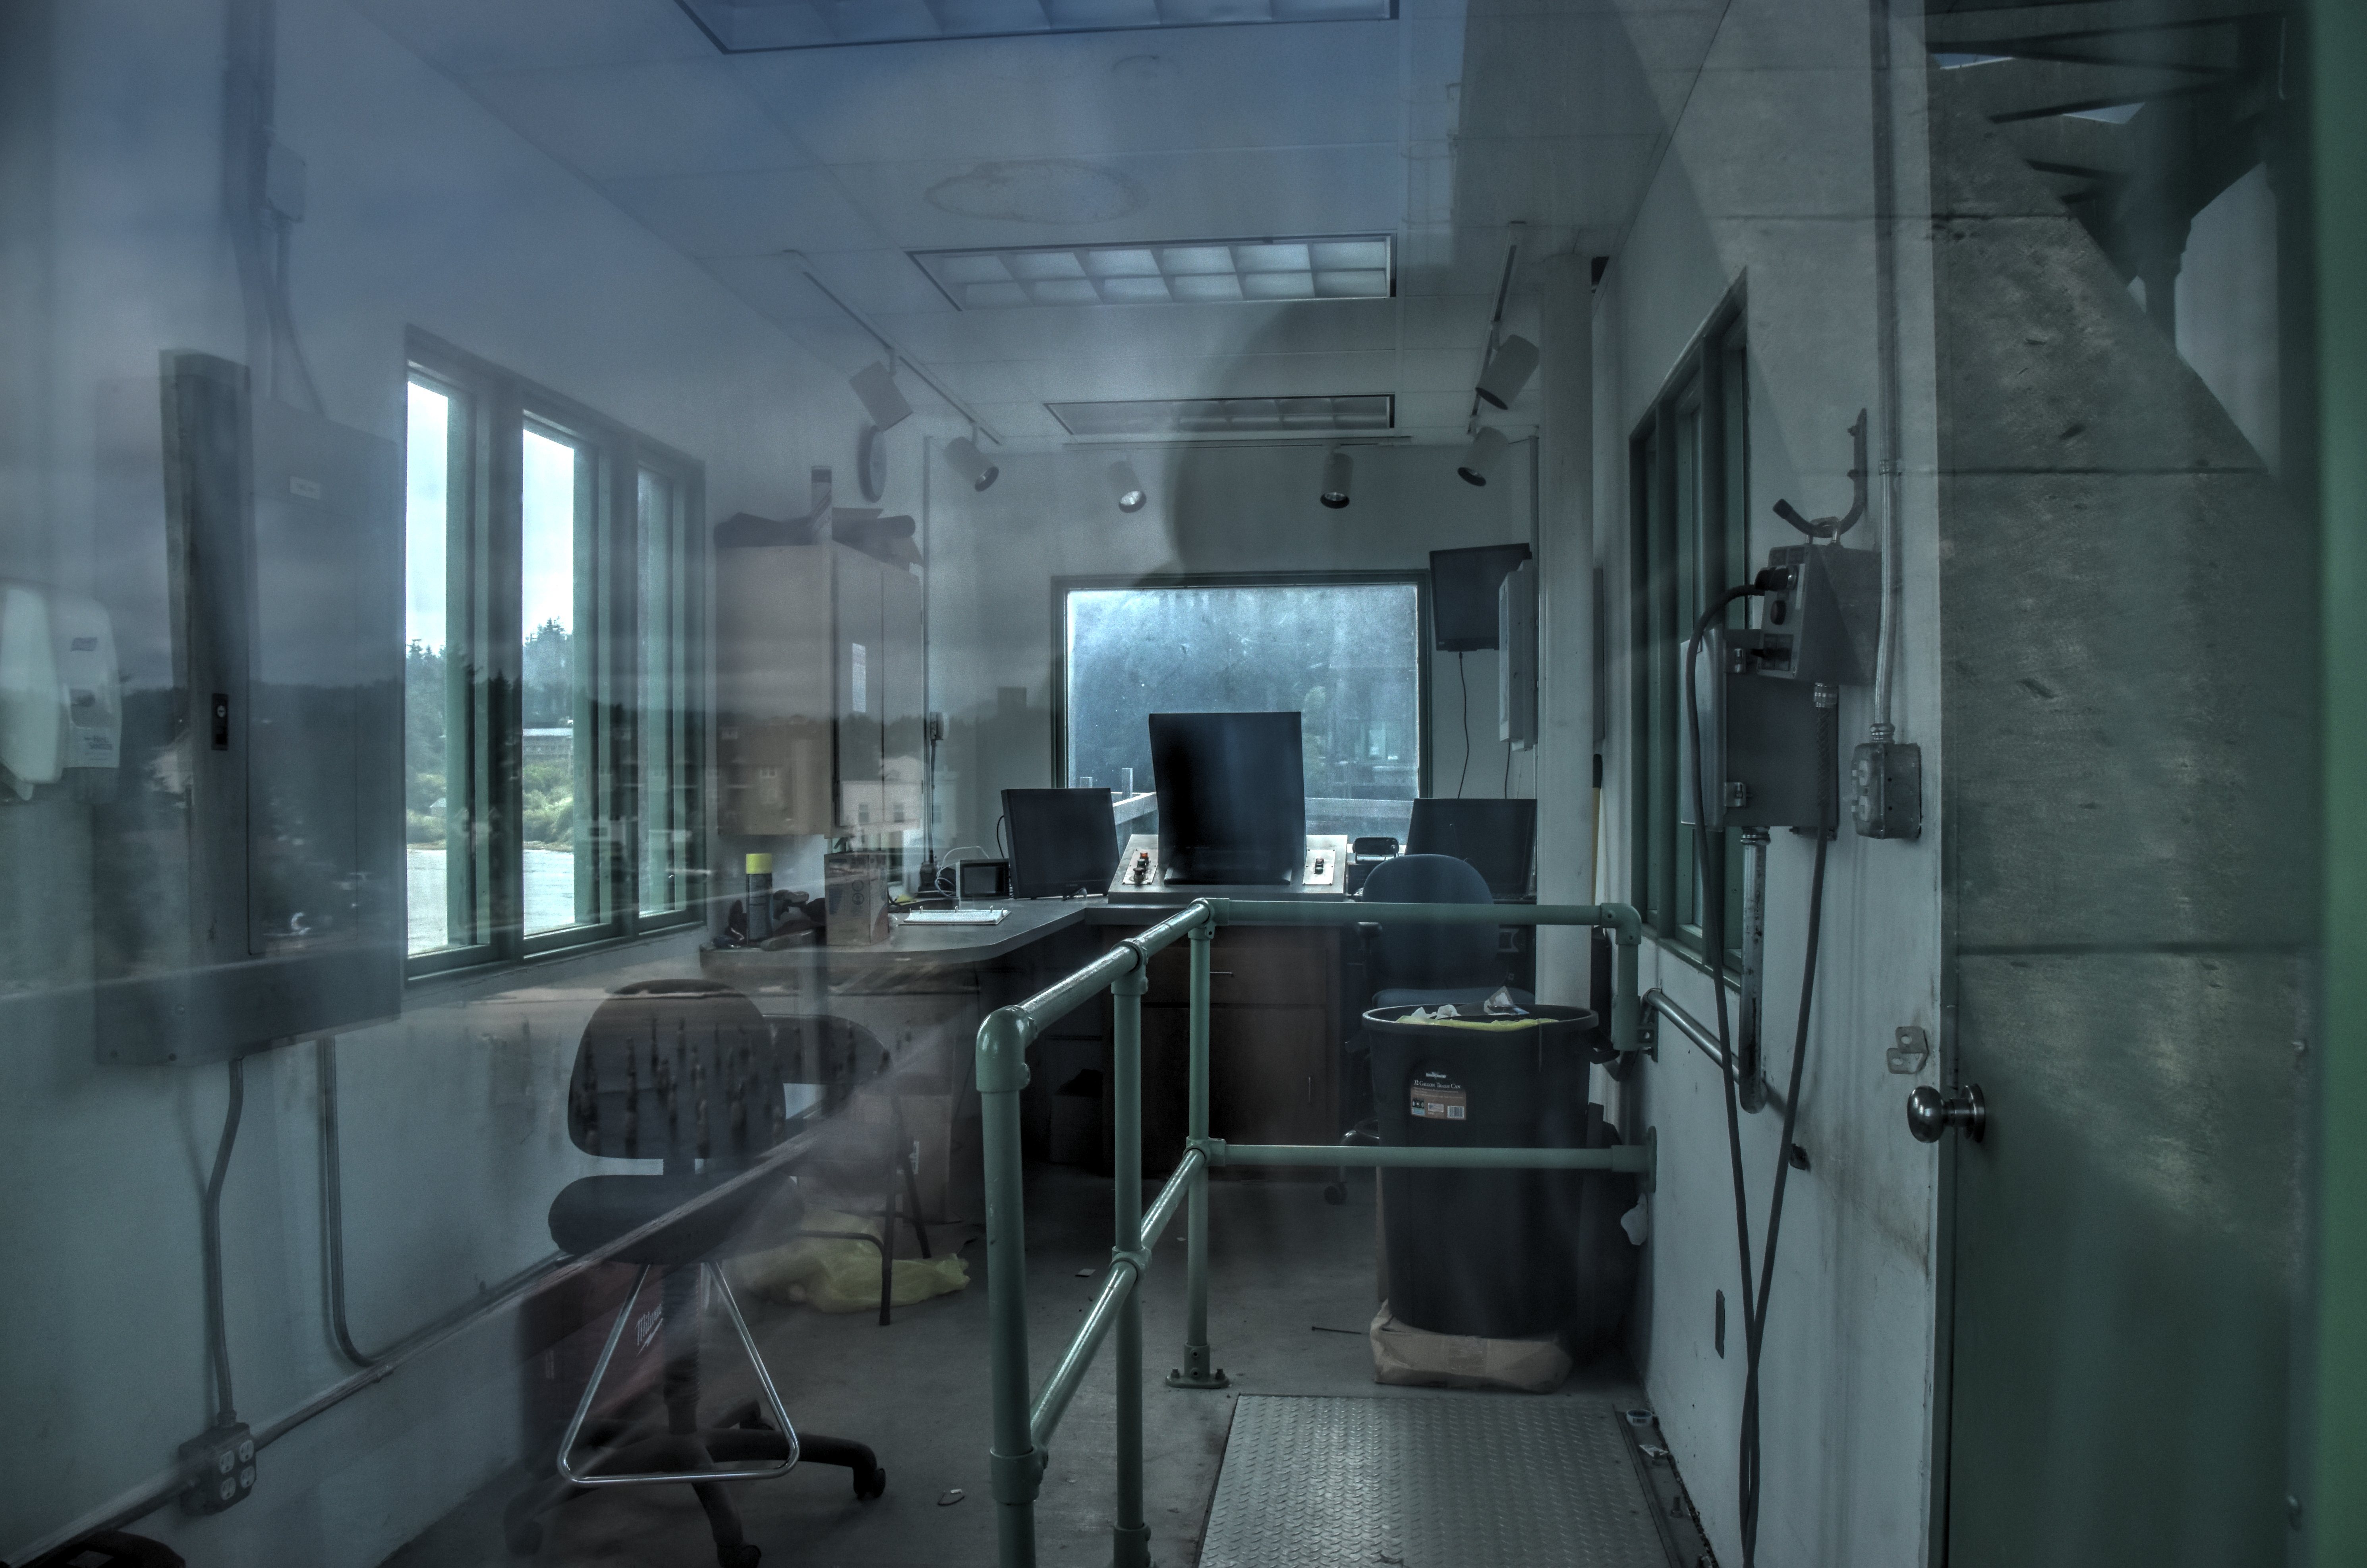


Bridge house interior.
![]()

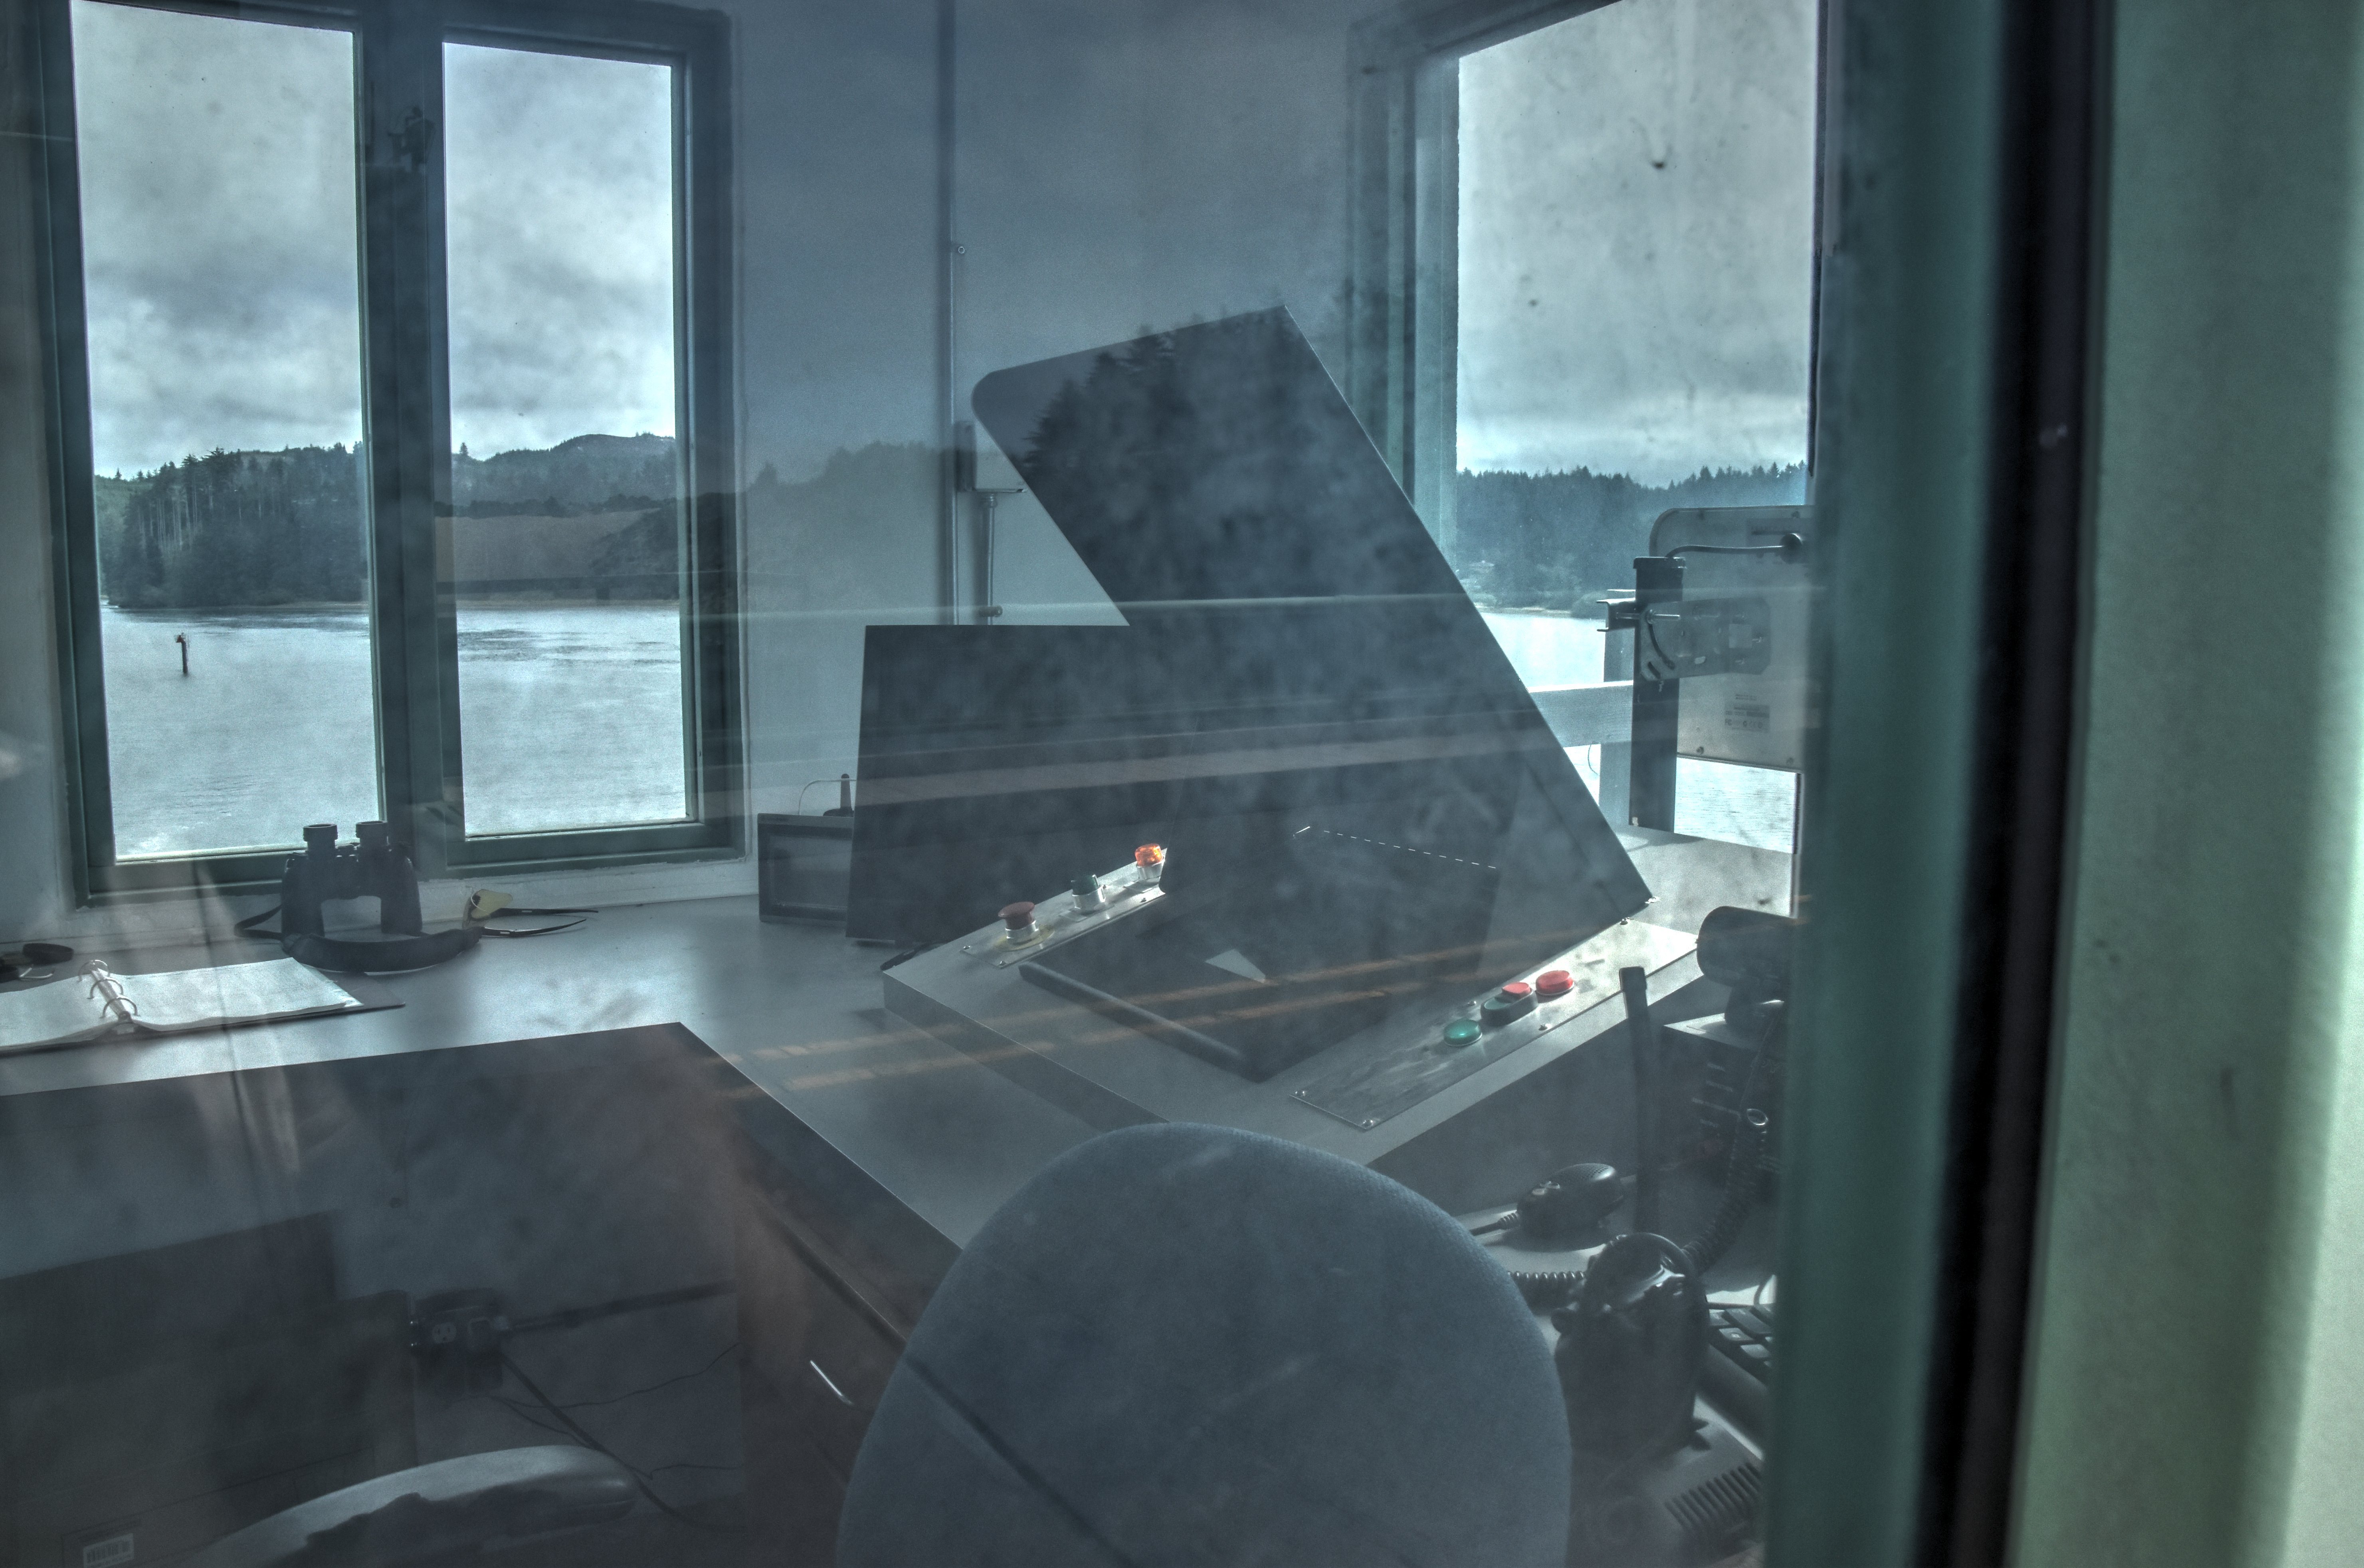
Bridge house interior showing bridge control panel.
![]()

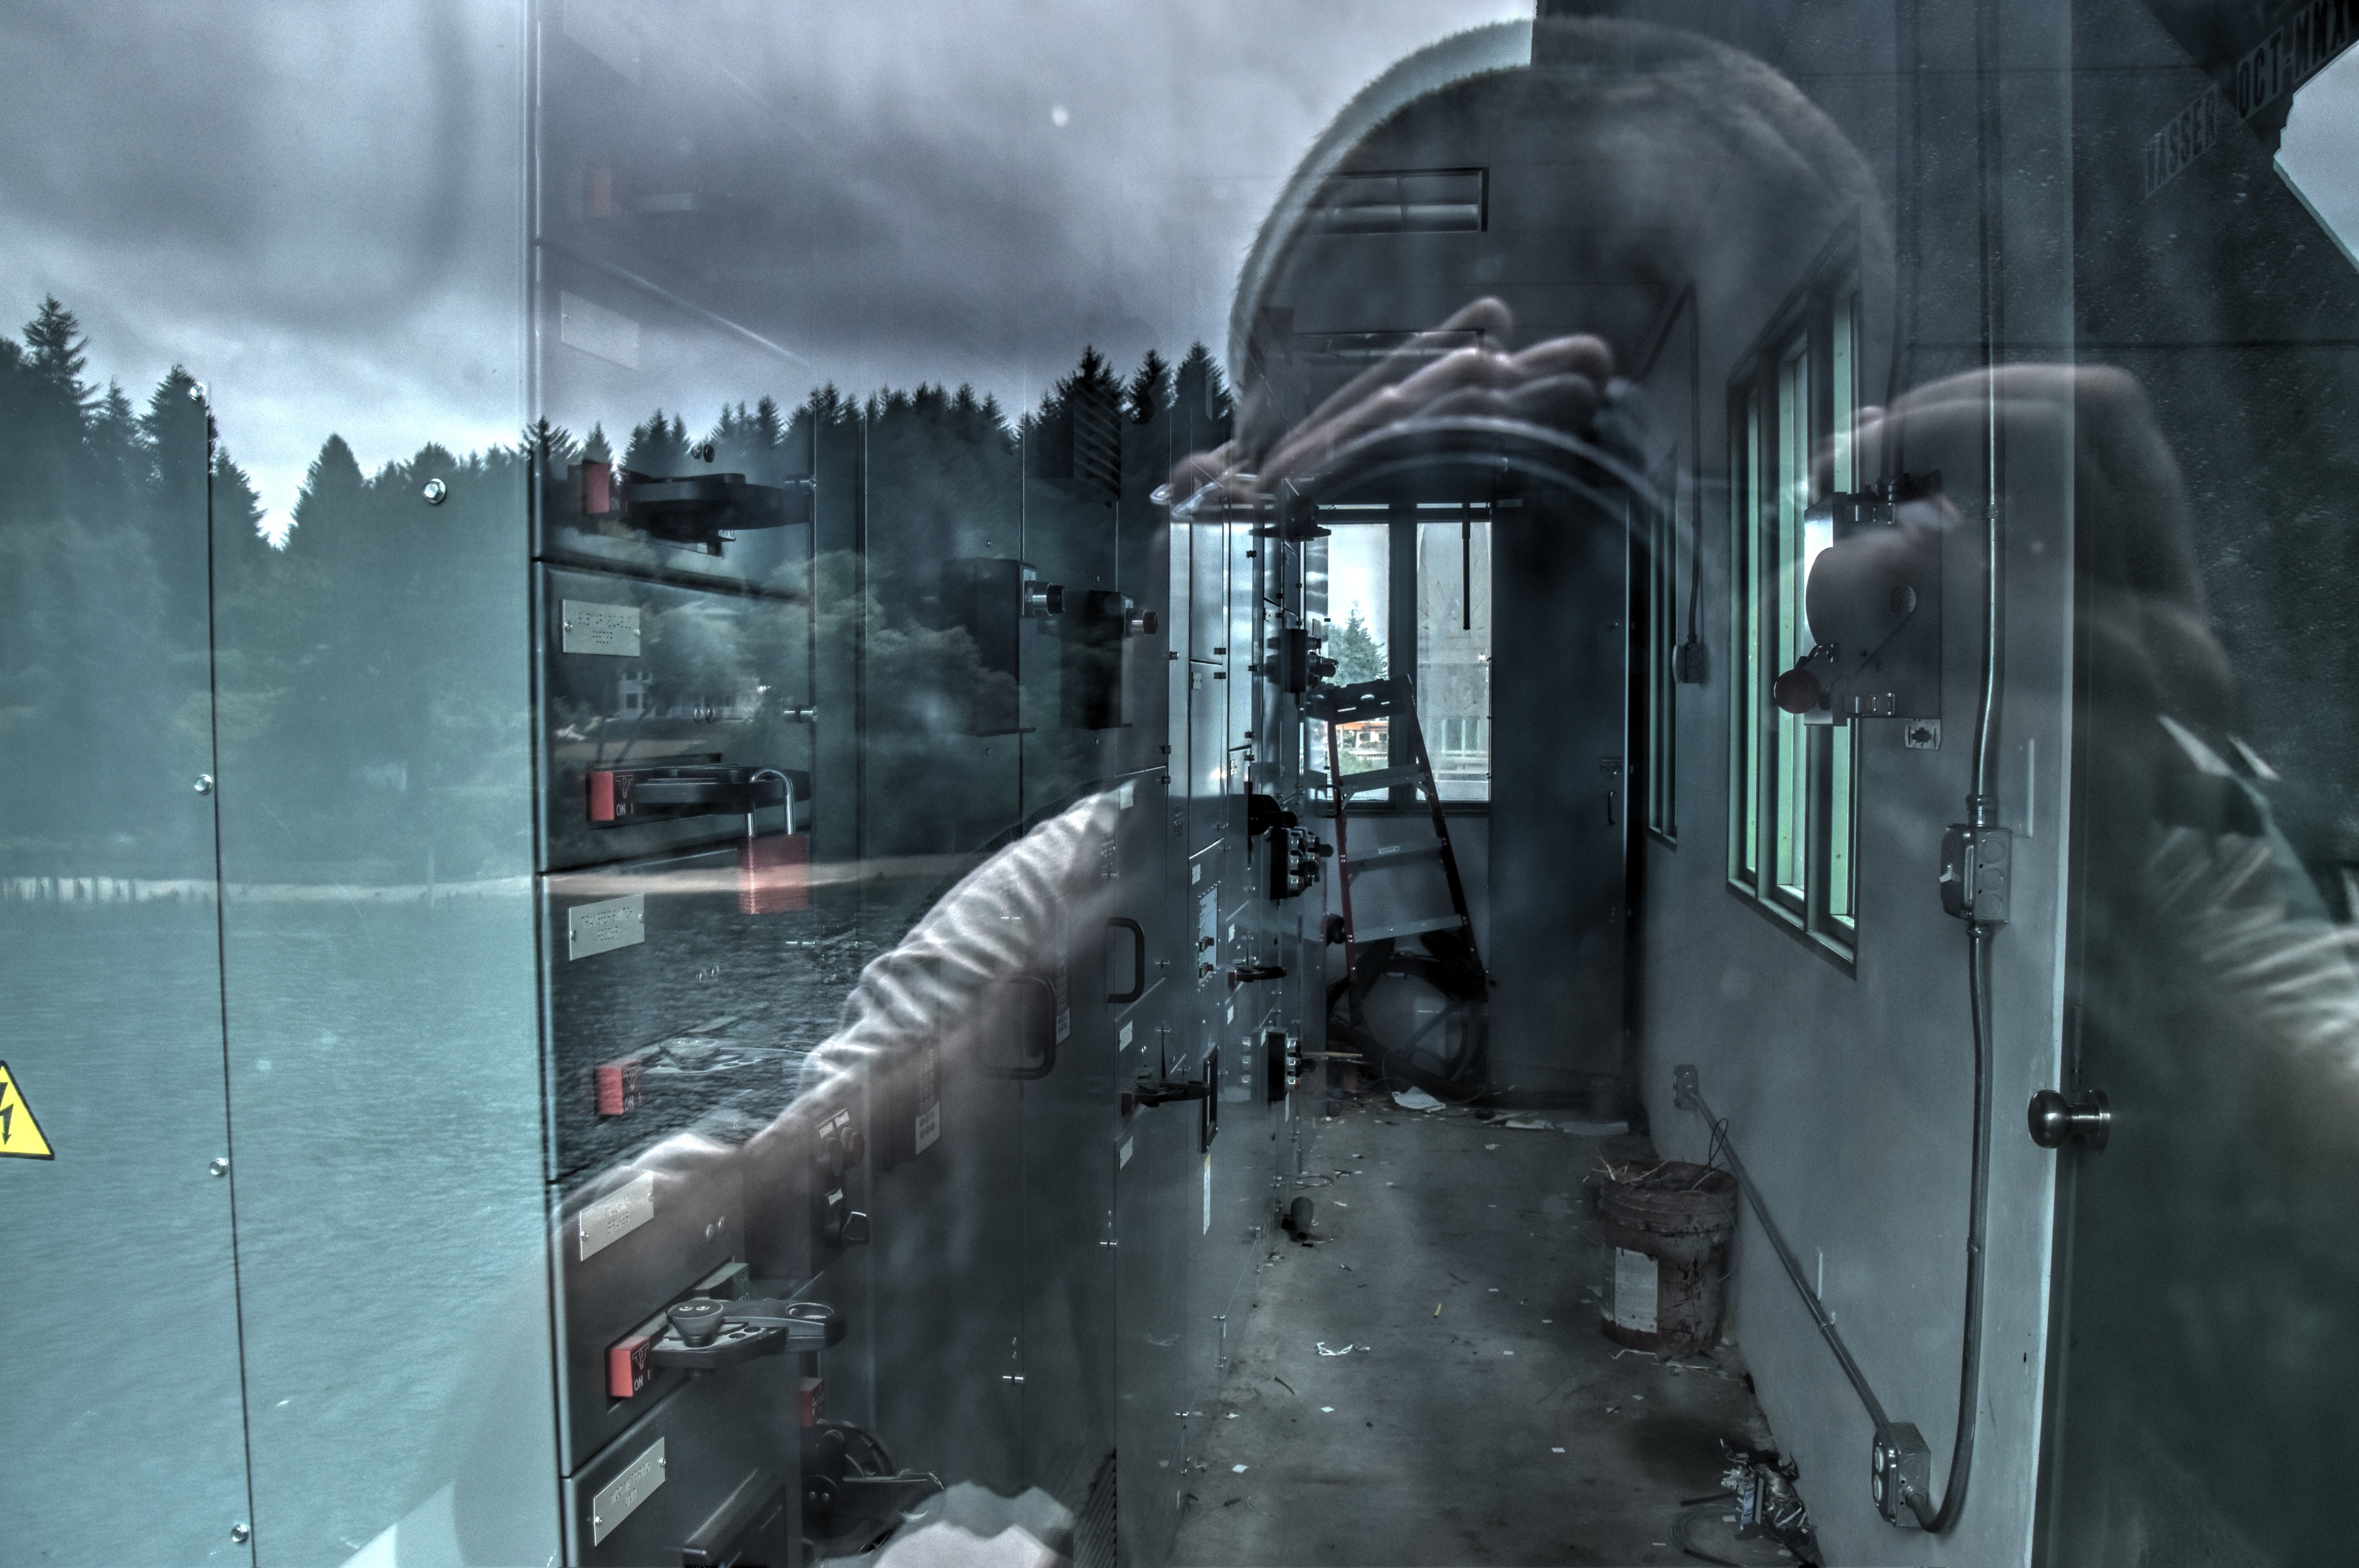

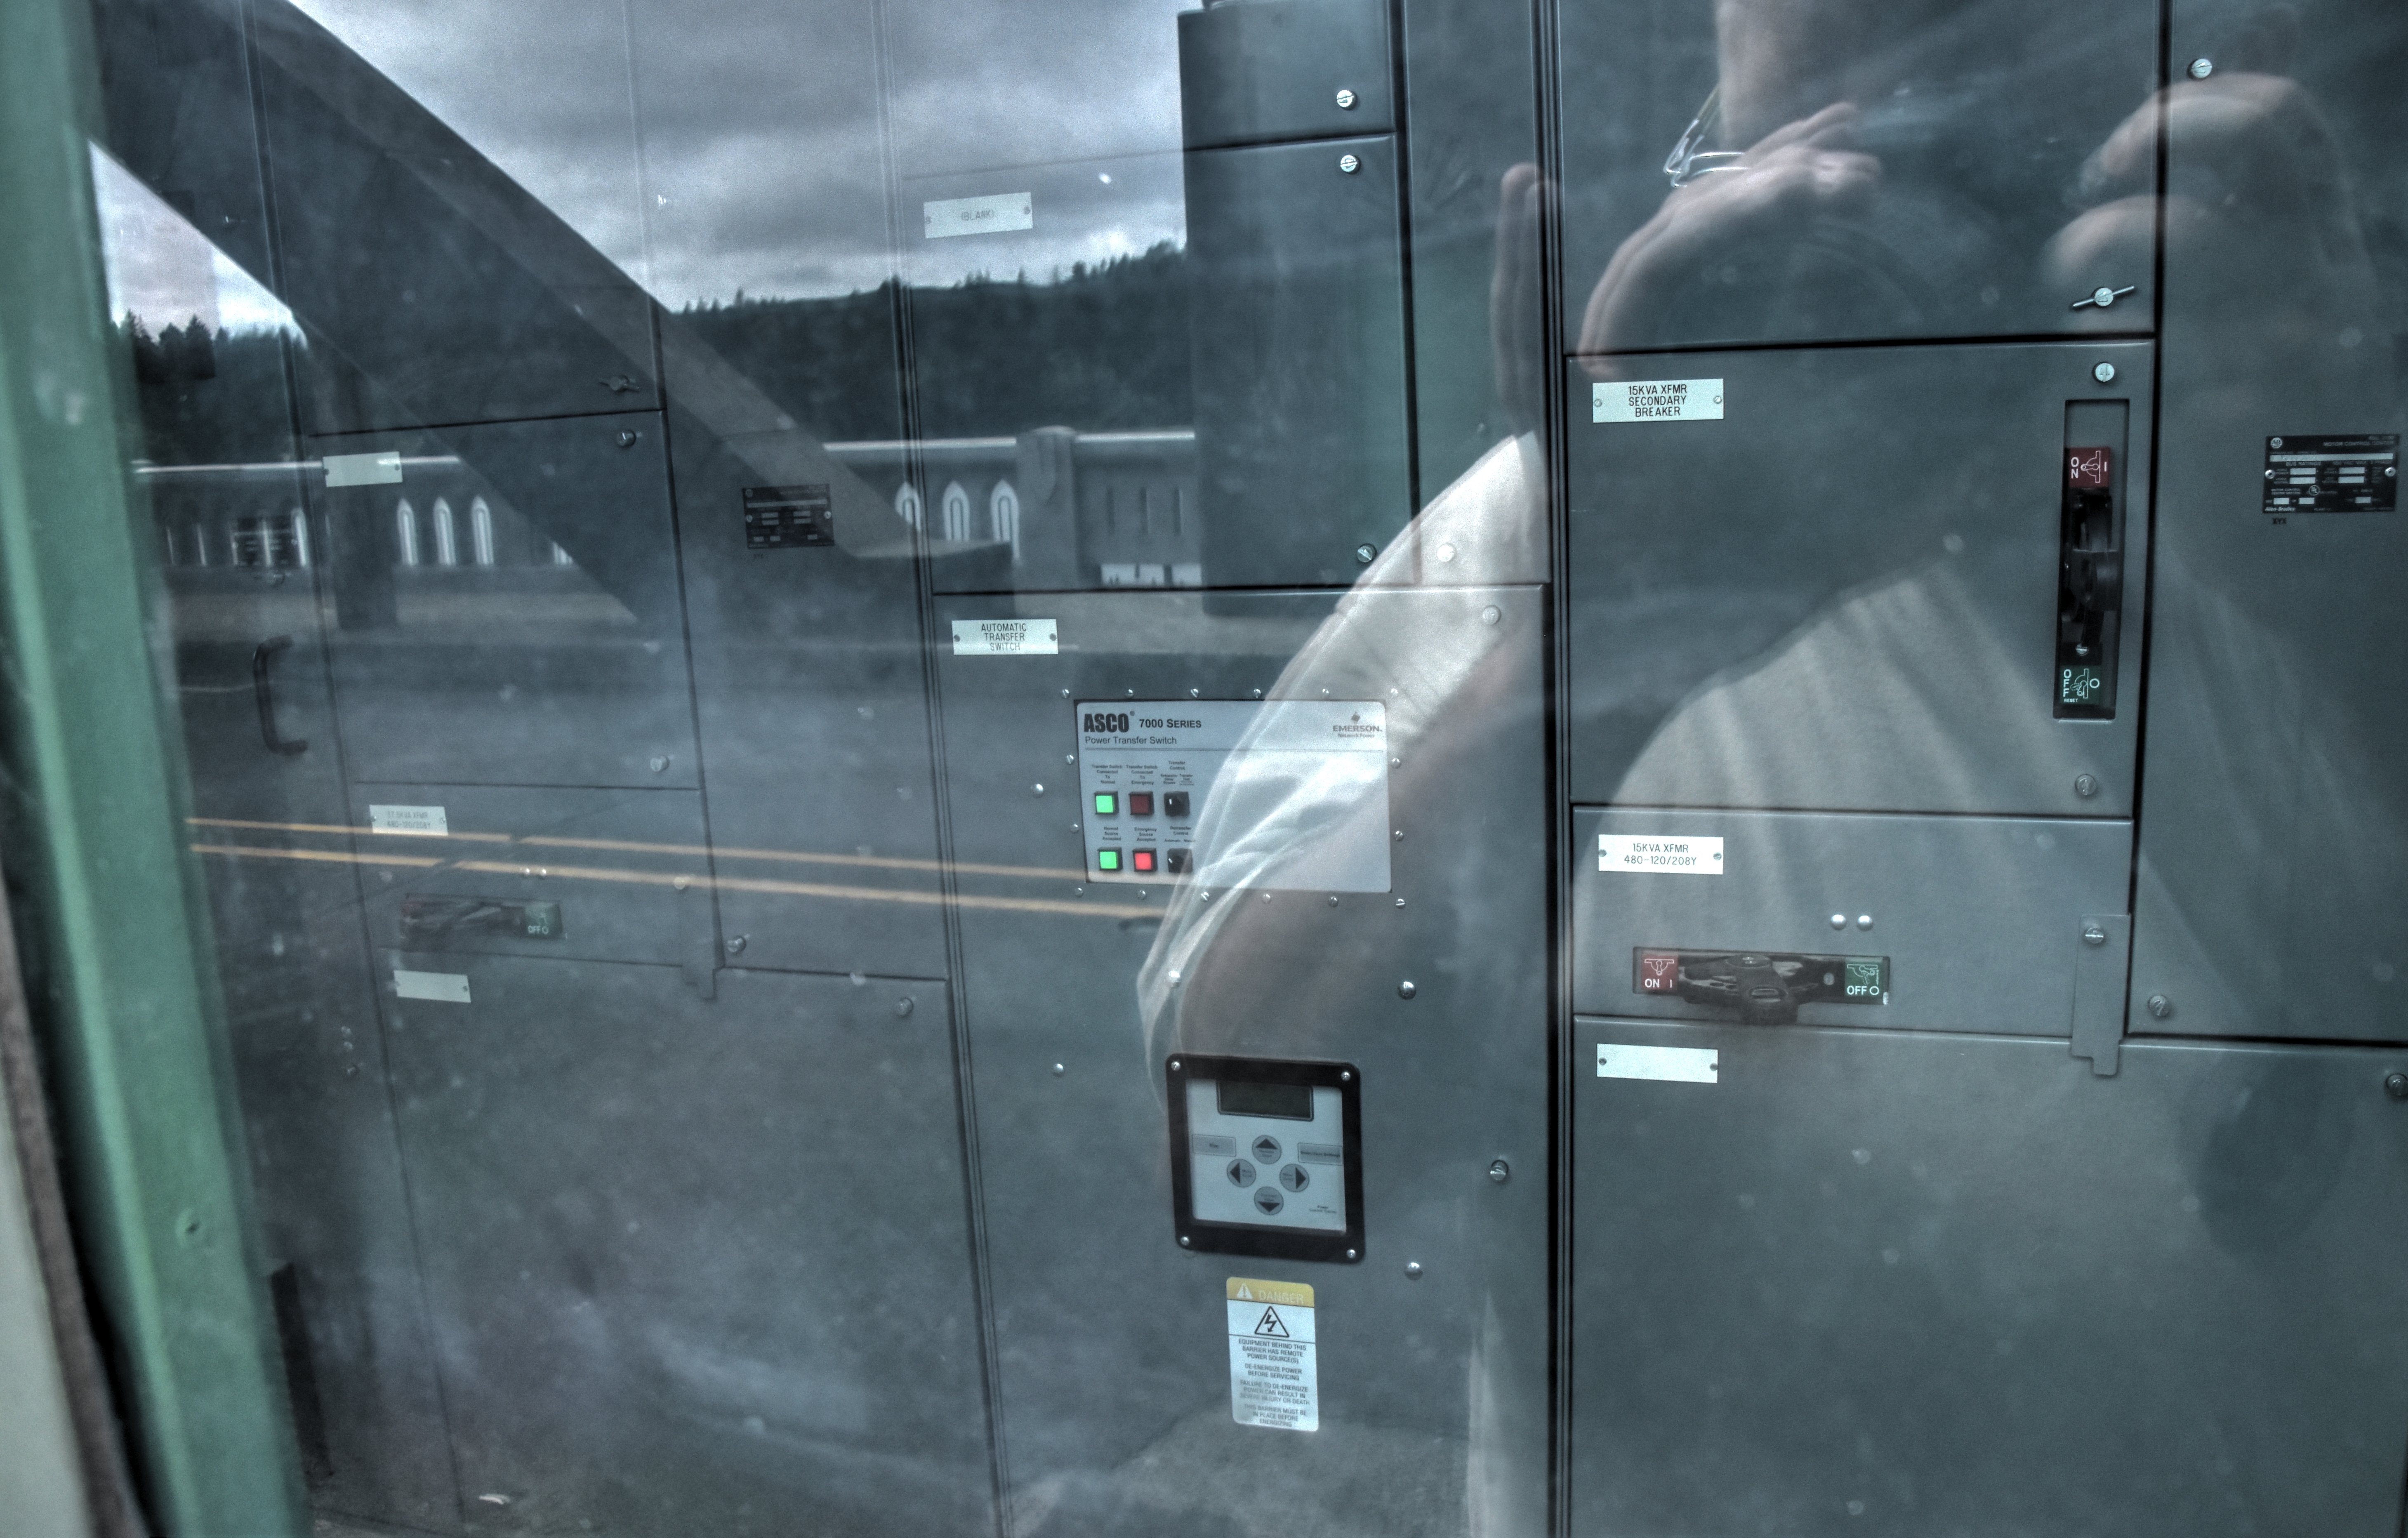
Bridge house interior showing electrical room.
![]()


Bascule span as seen from on bridge.
![]()


Bascule span deck and railing overview.
![]()


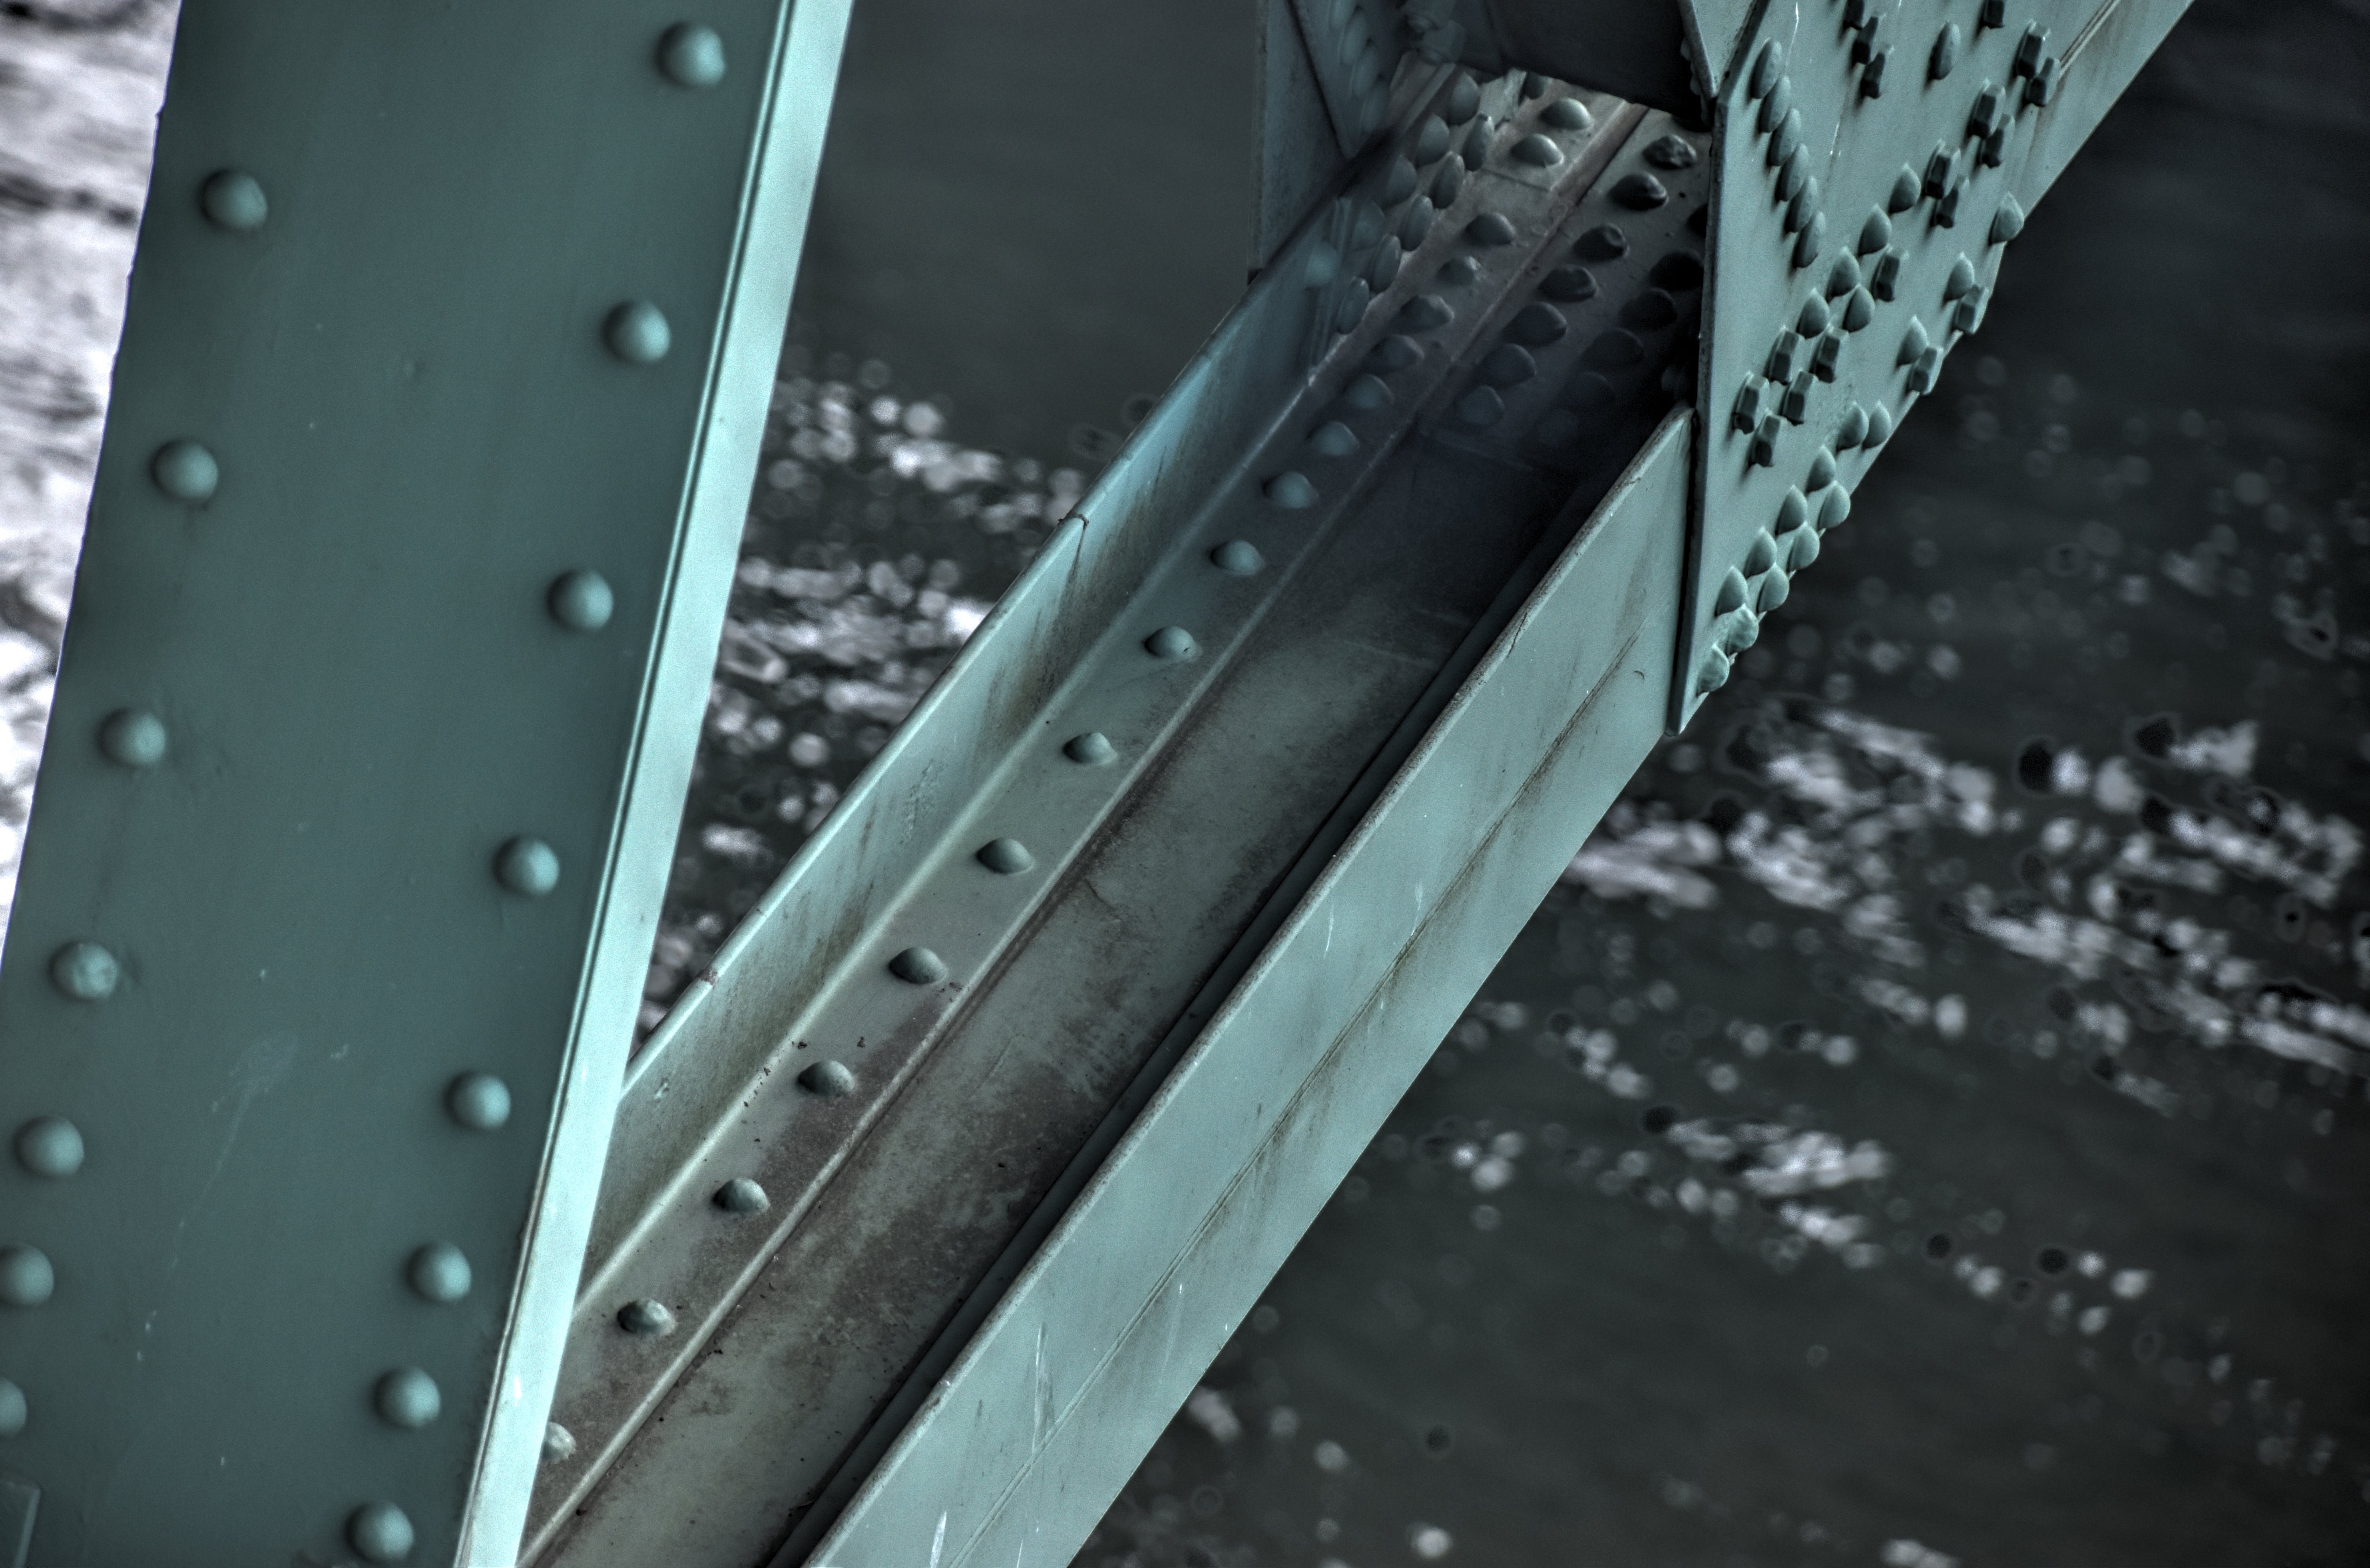
Bascule span truss web.
![]()
Bascule span railing.
![]()
Bascule span vertical members.
![]()


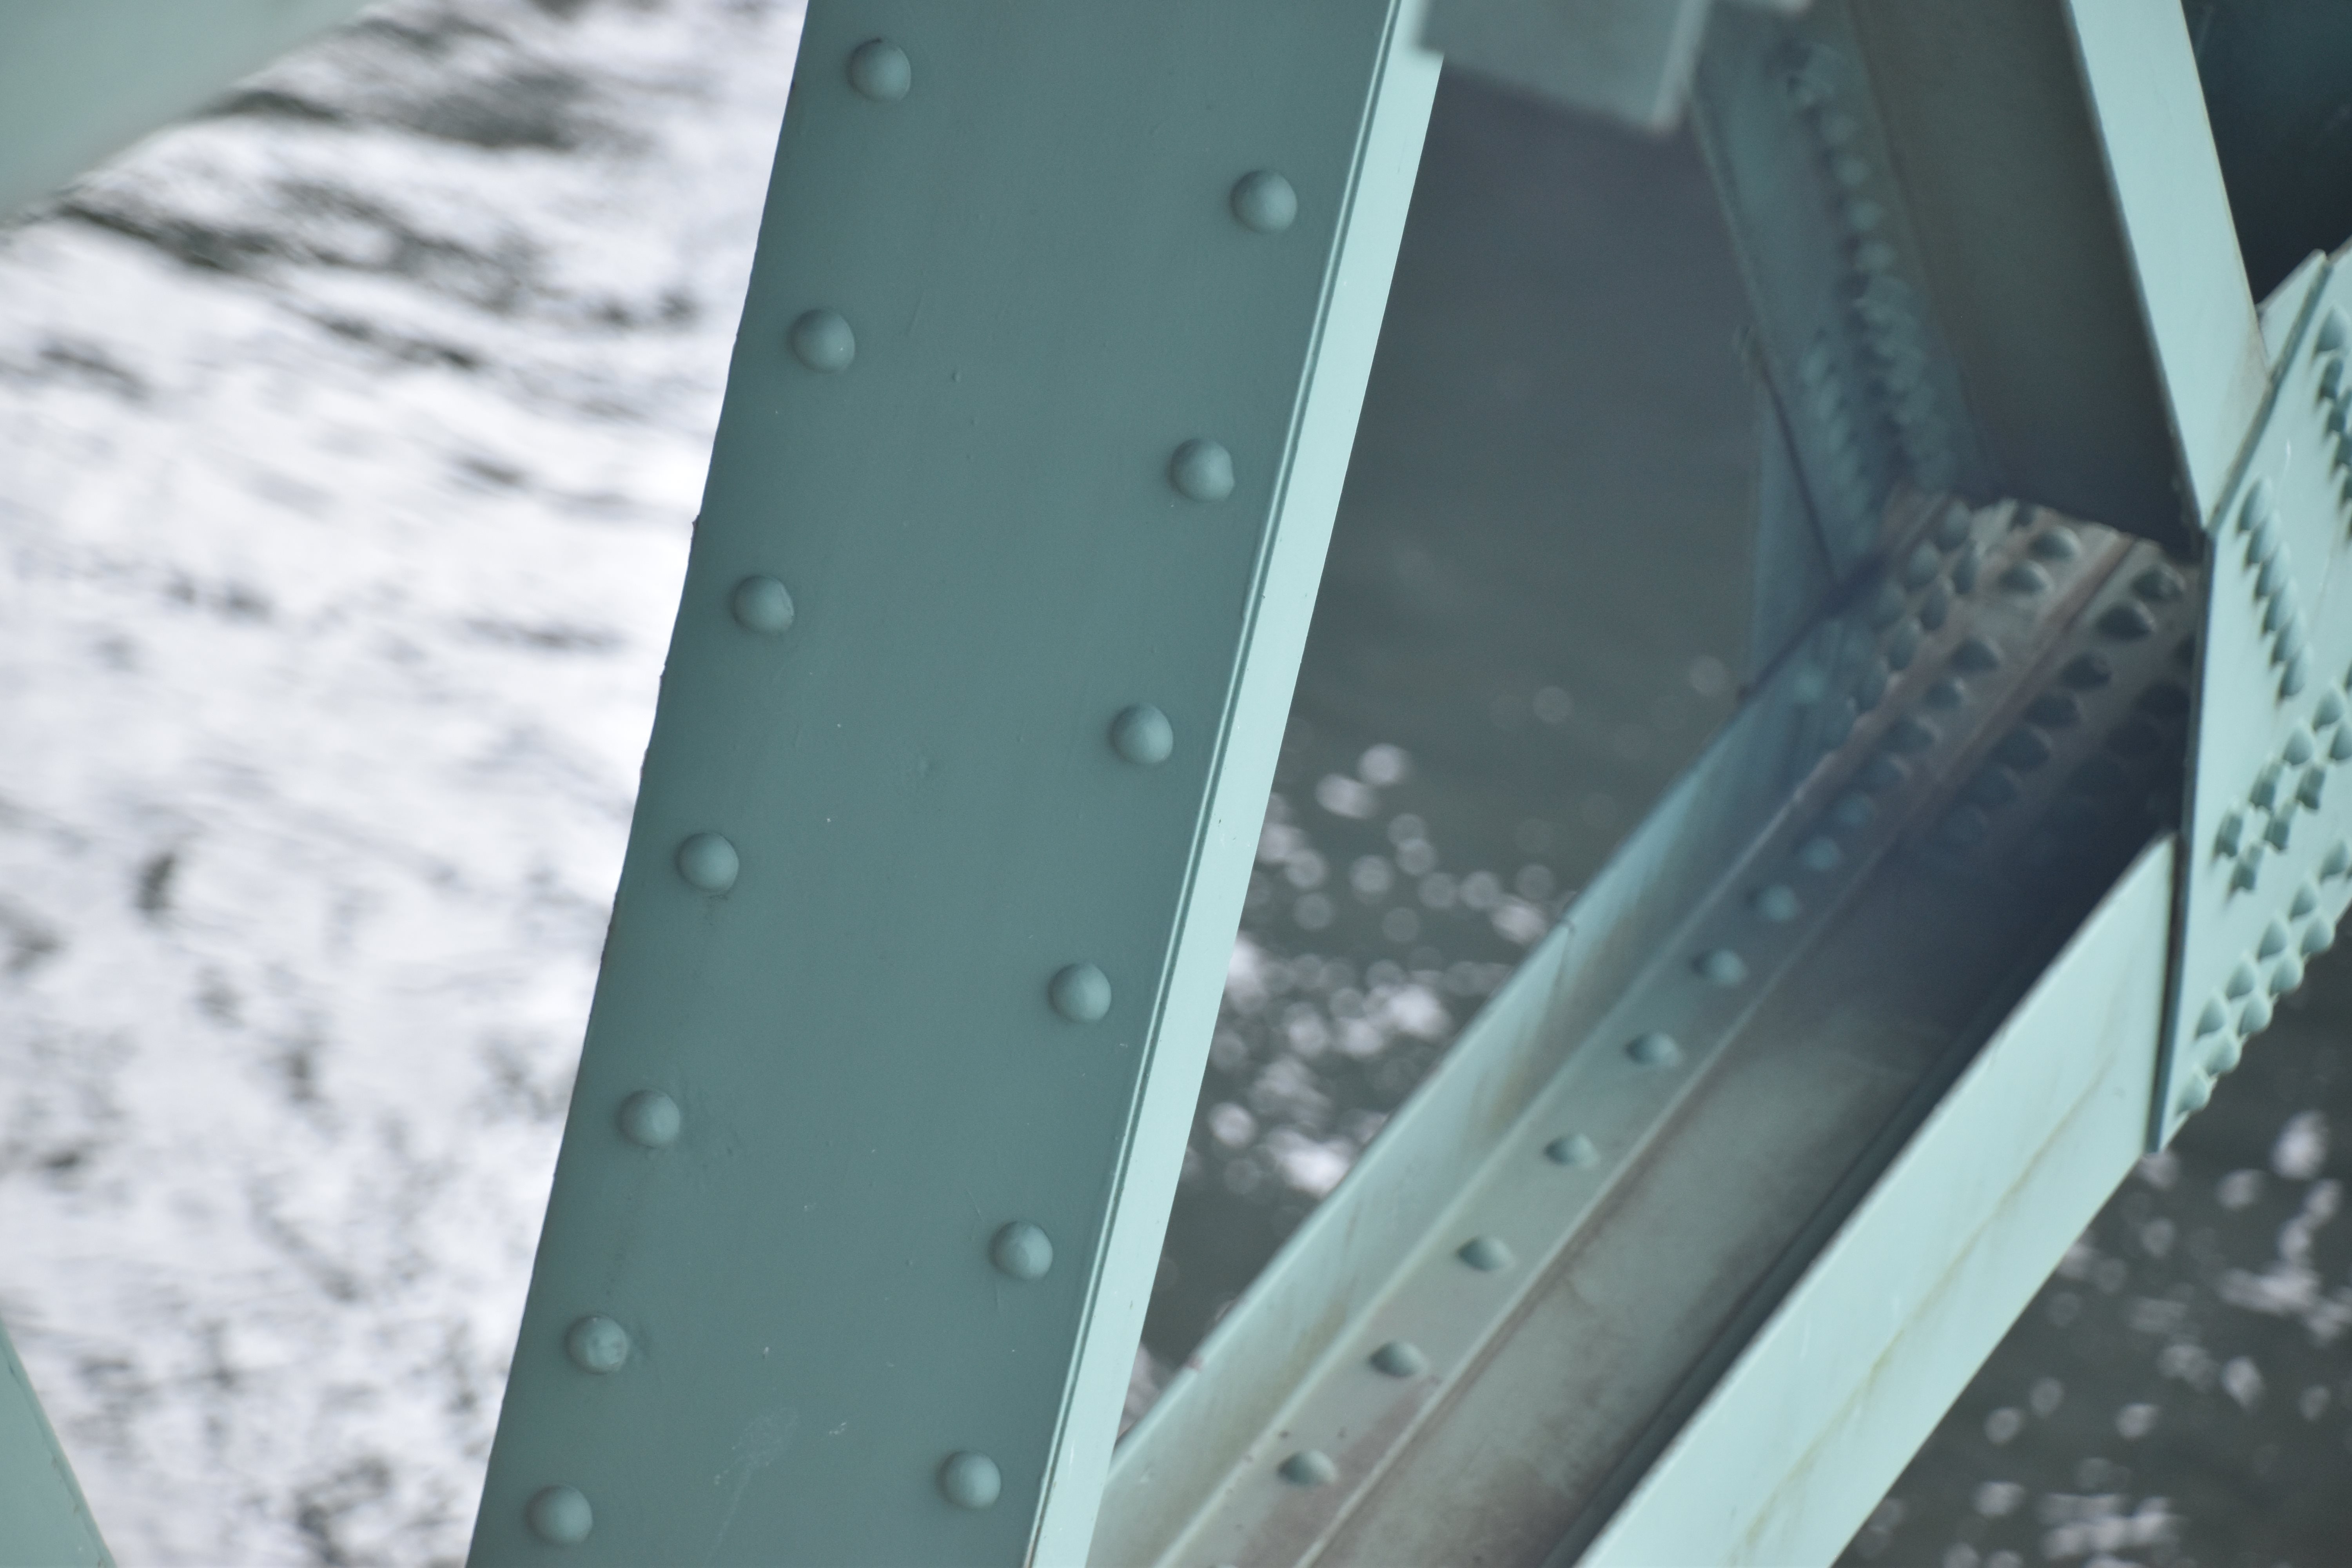
Bascule span bottom chord connections.
![]()


Bascule span top chord connections.
![]()
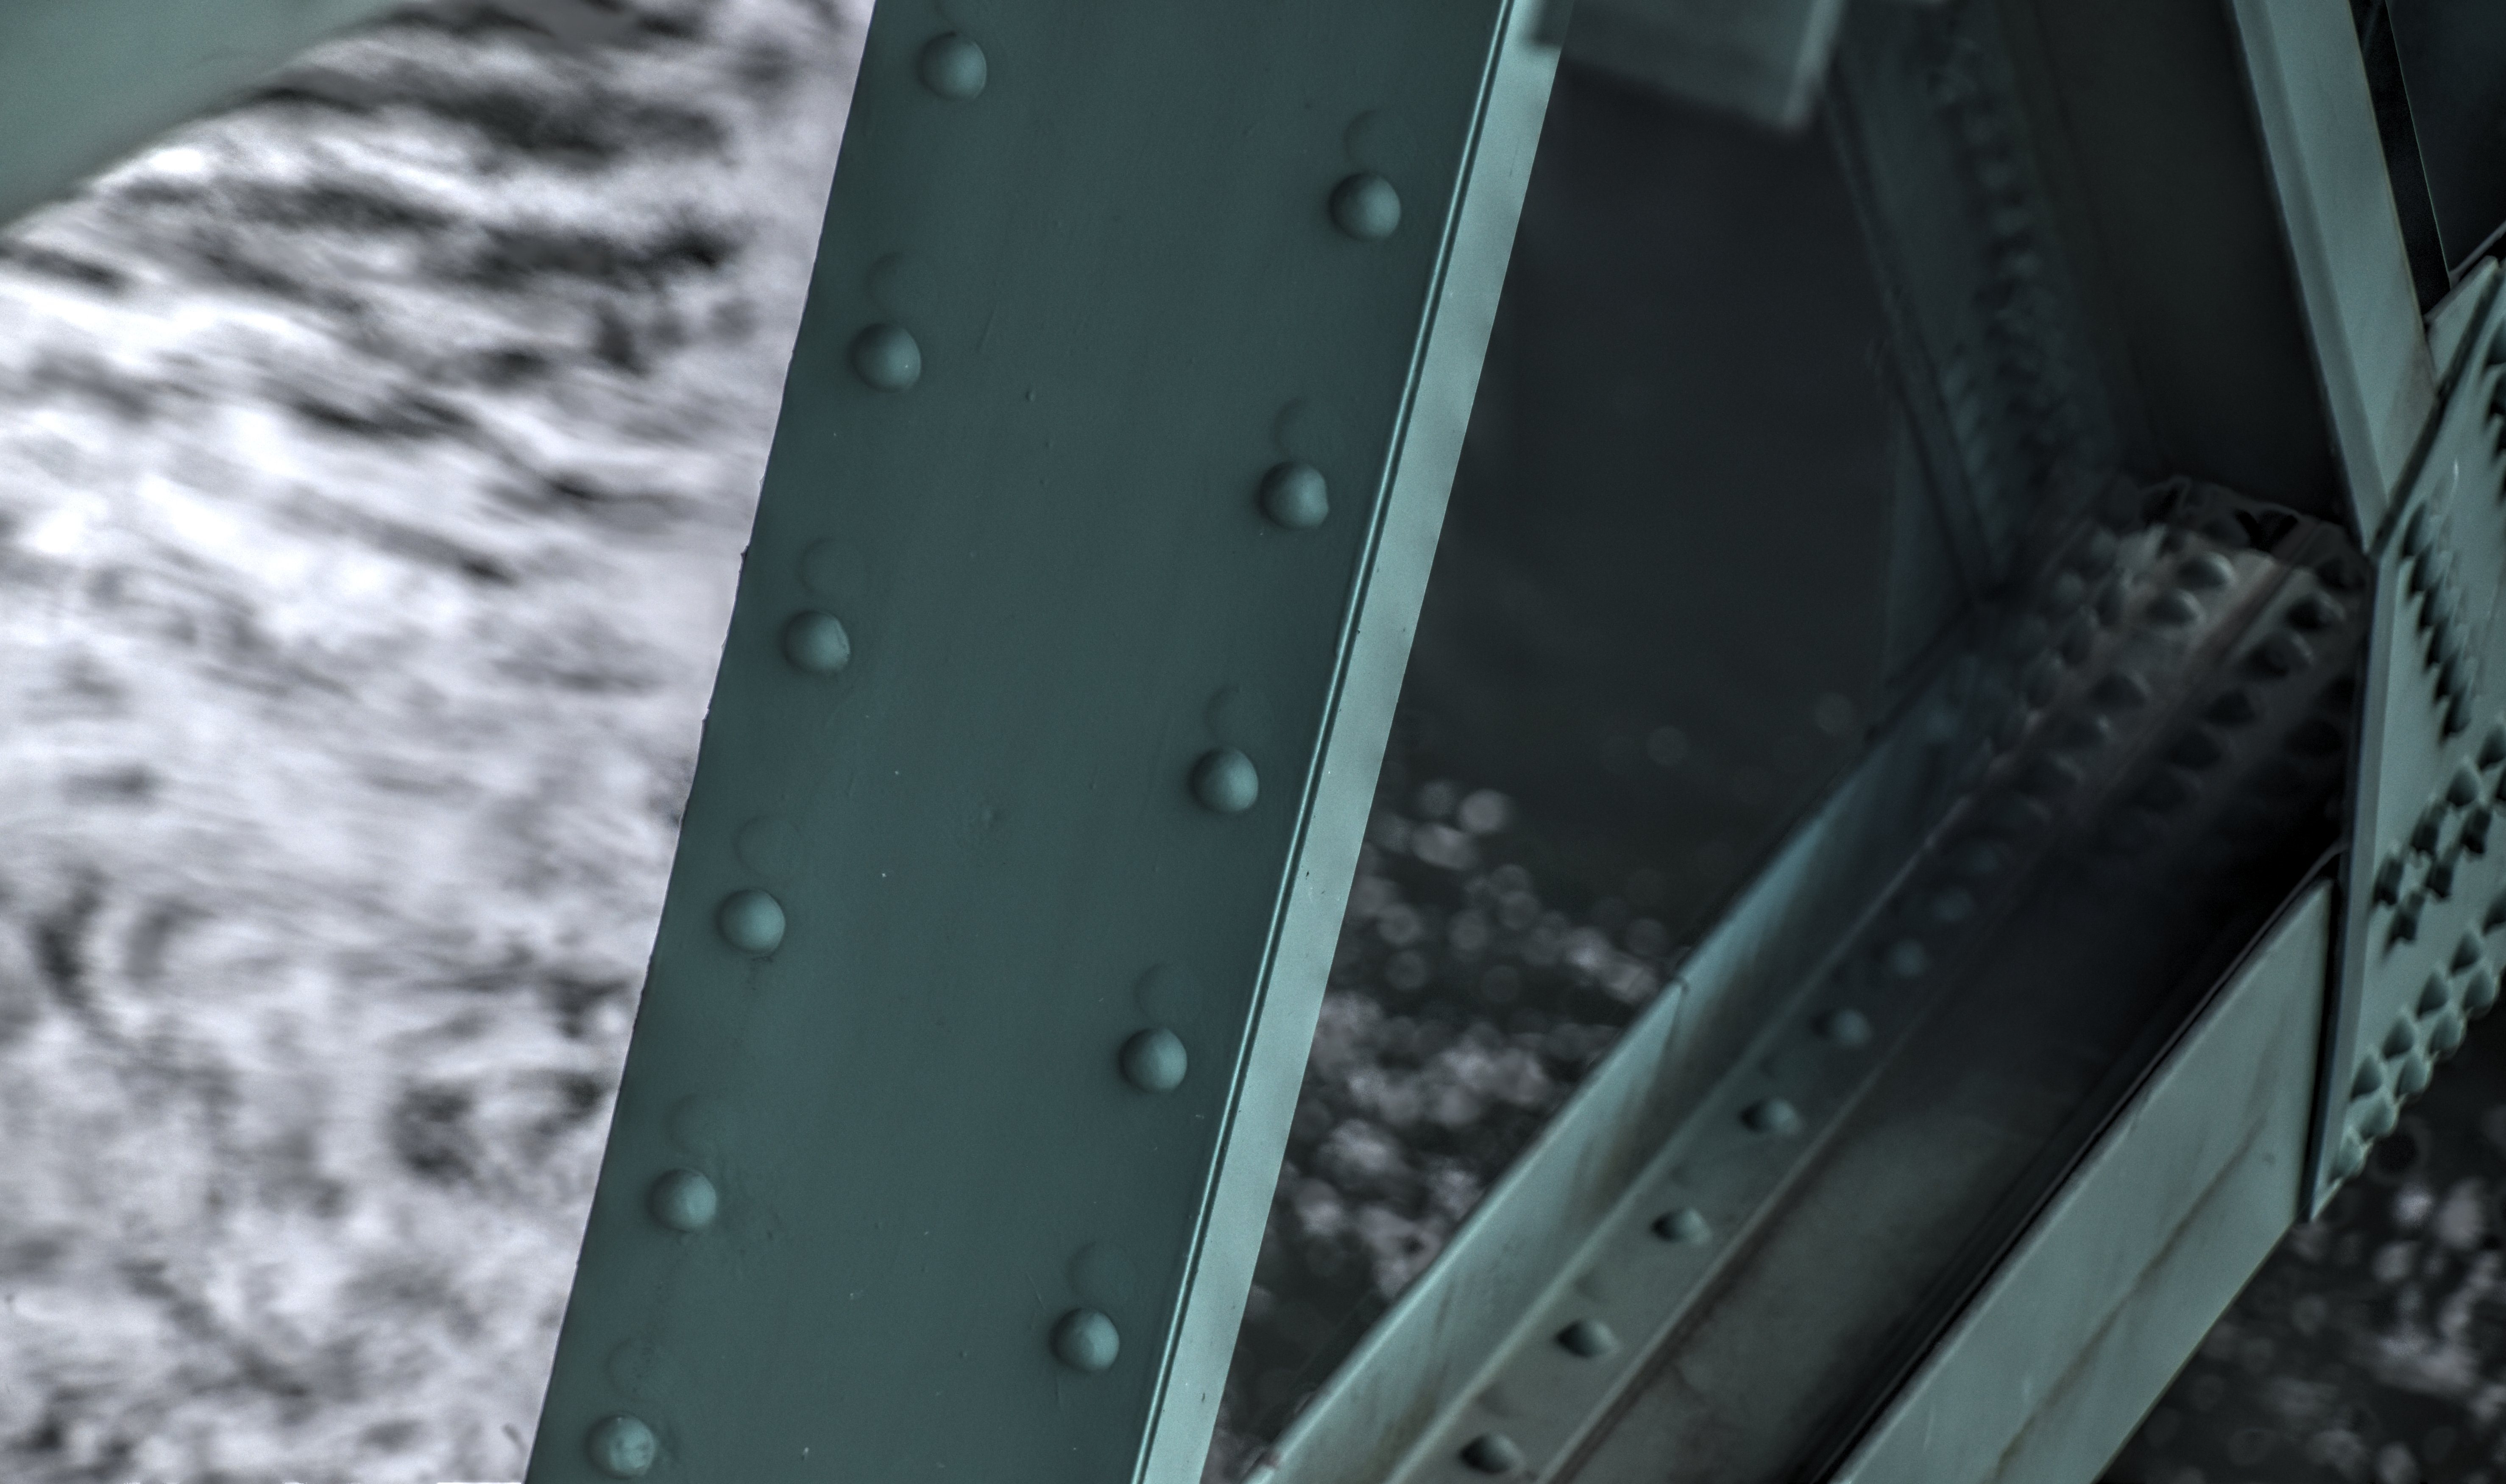
Bascule span diagonal member.
![]()

Bascule span bottom chord.
![]()
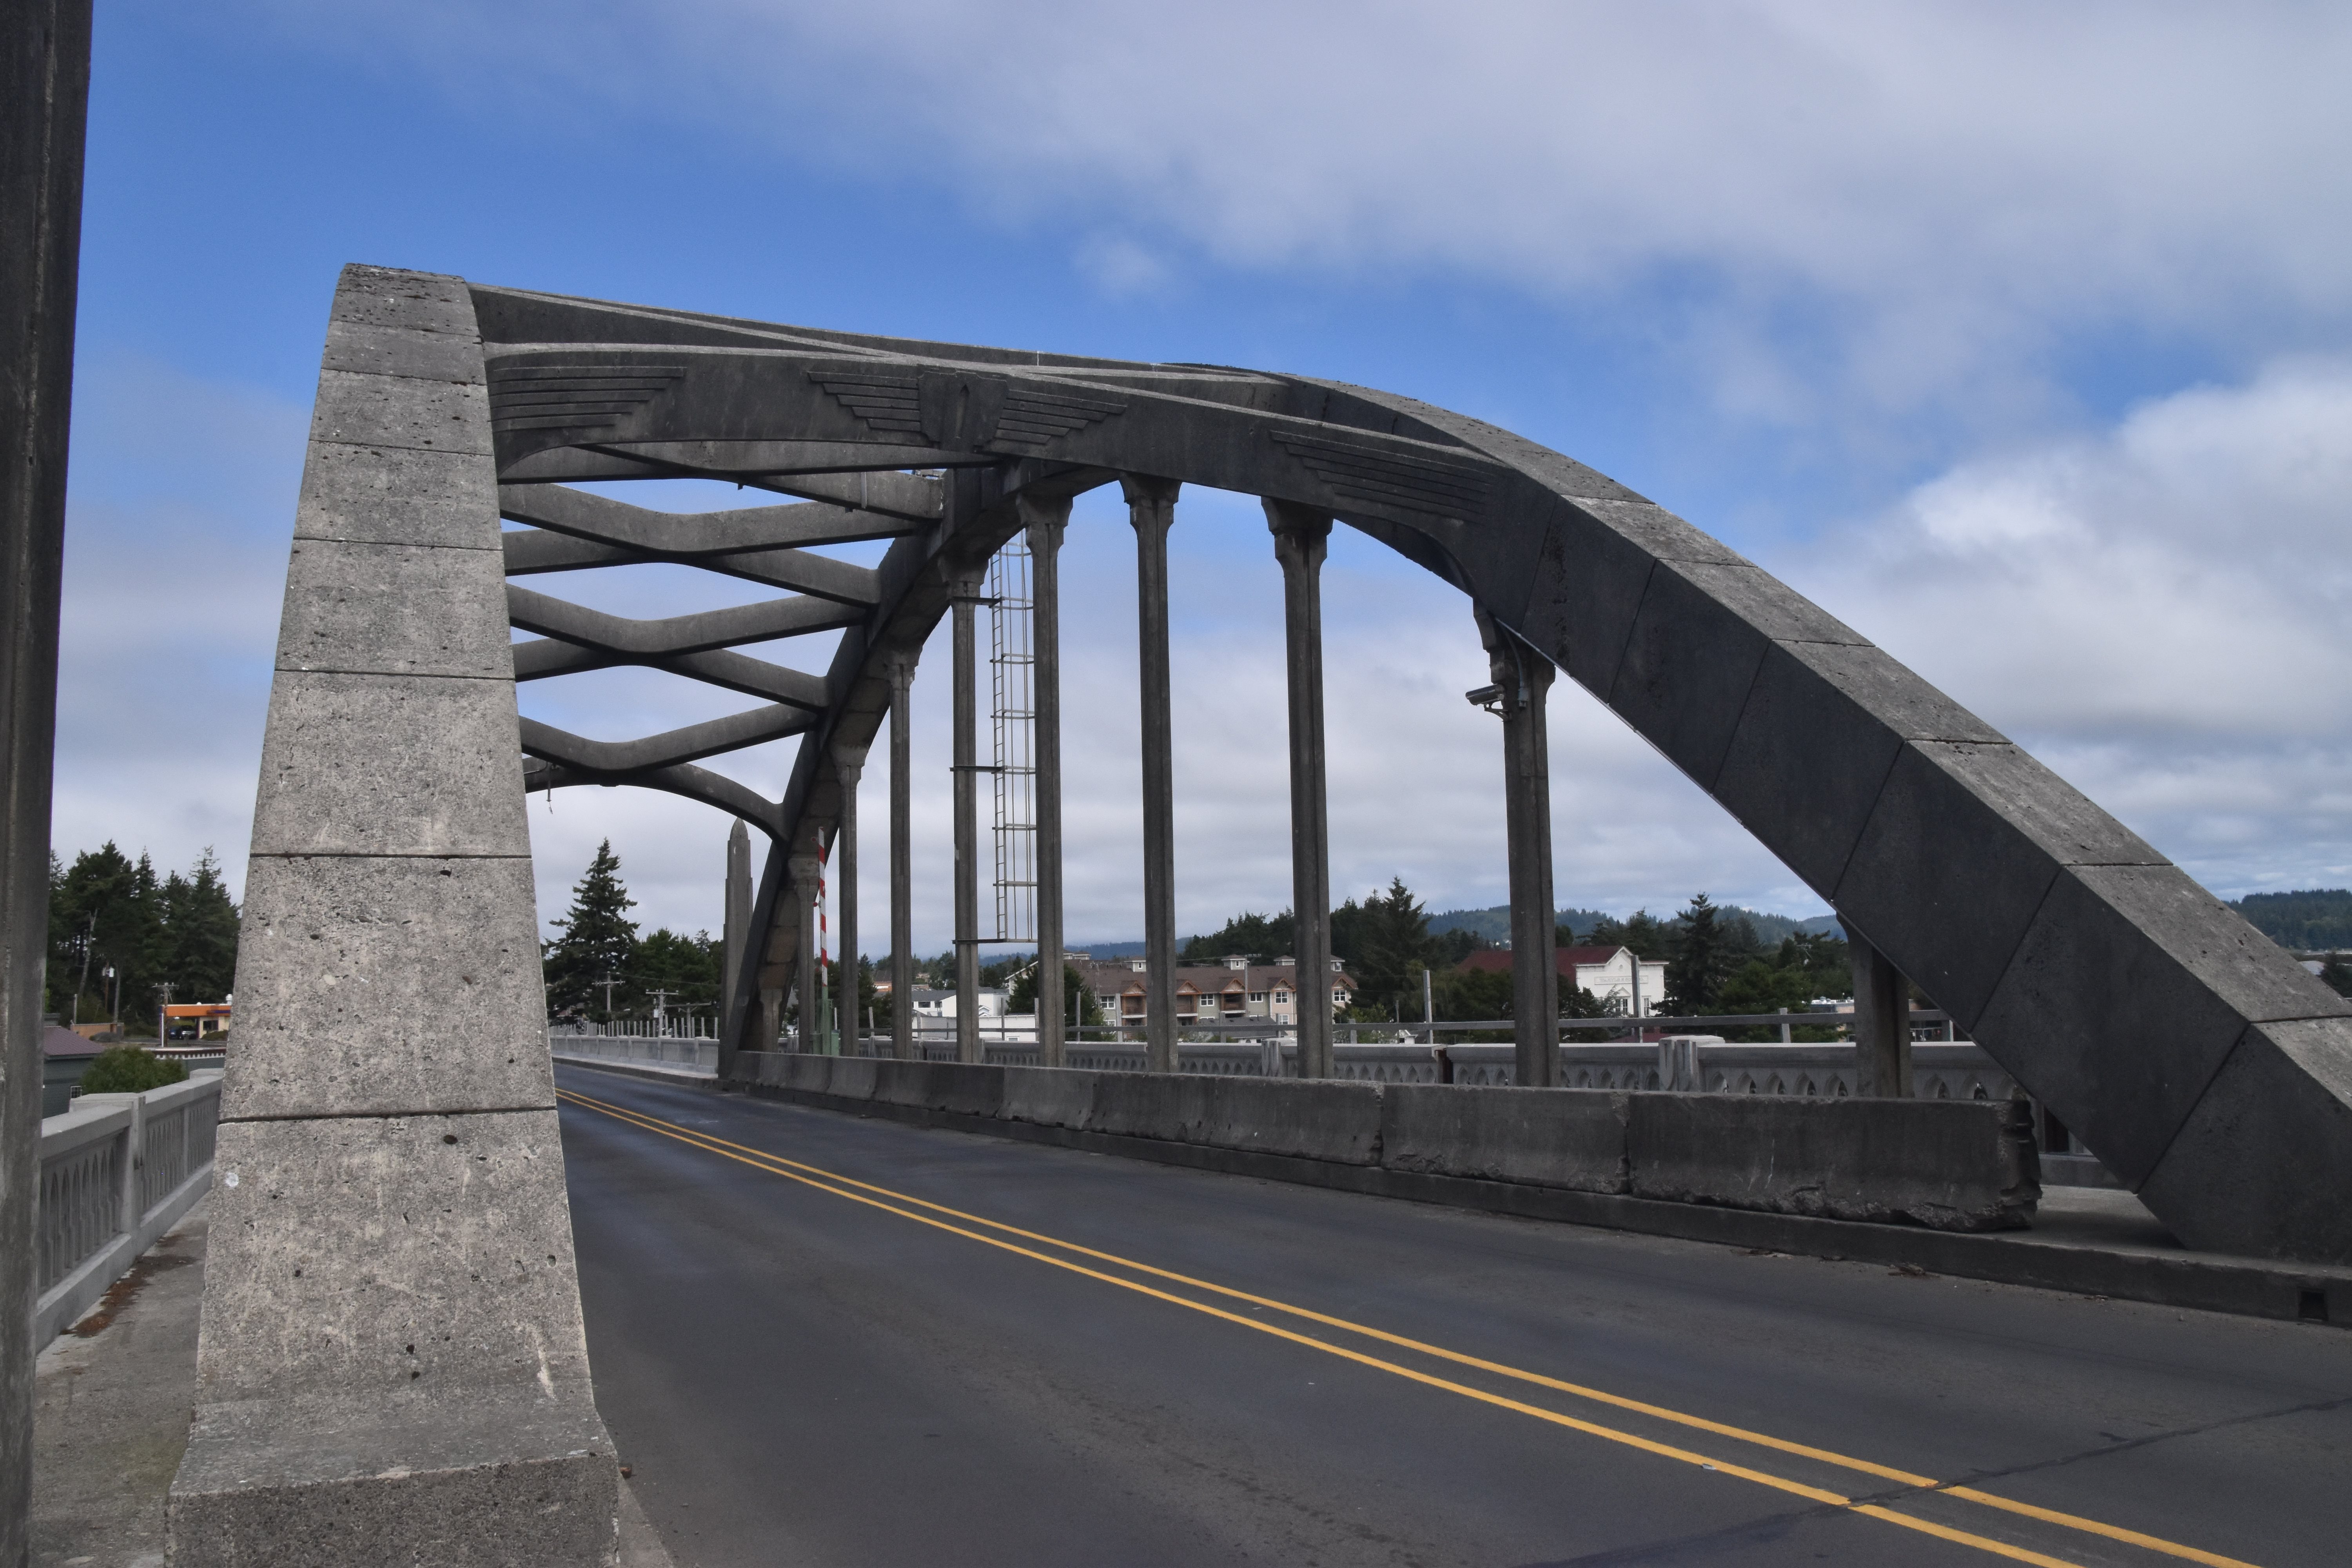


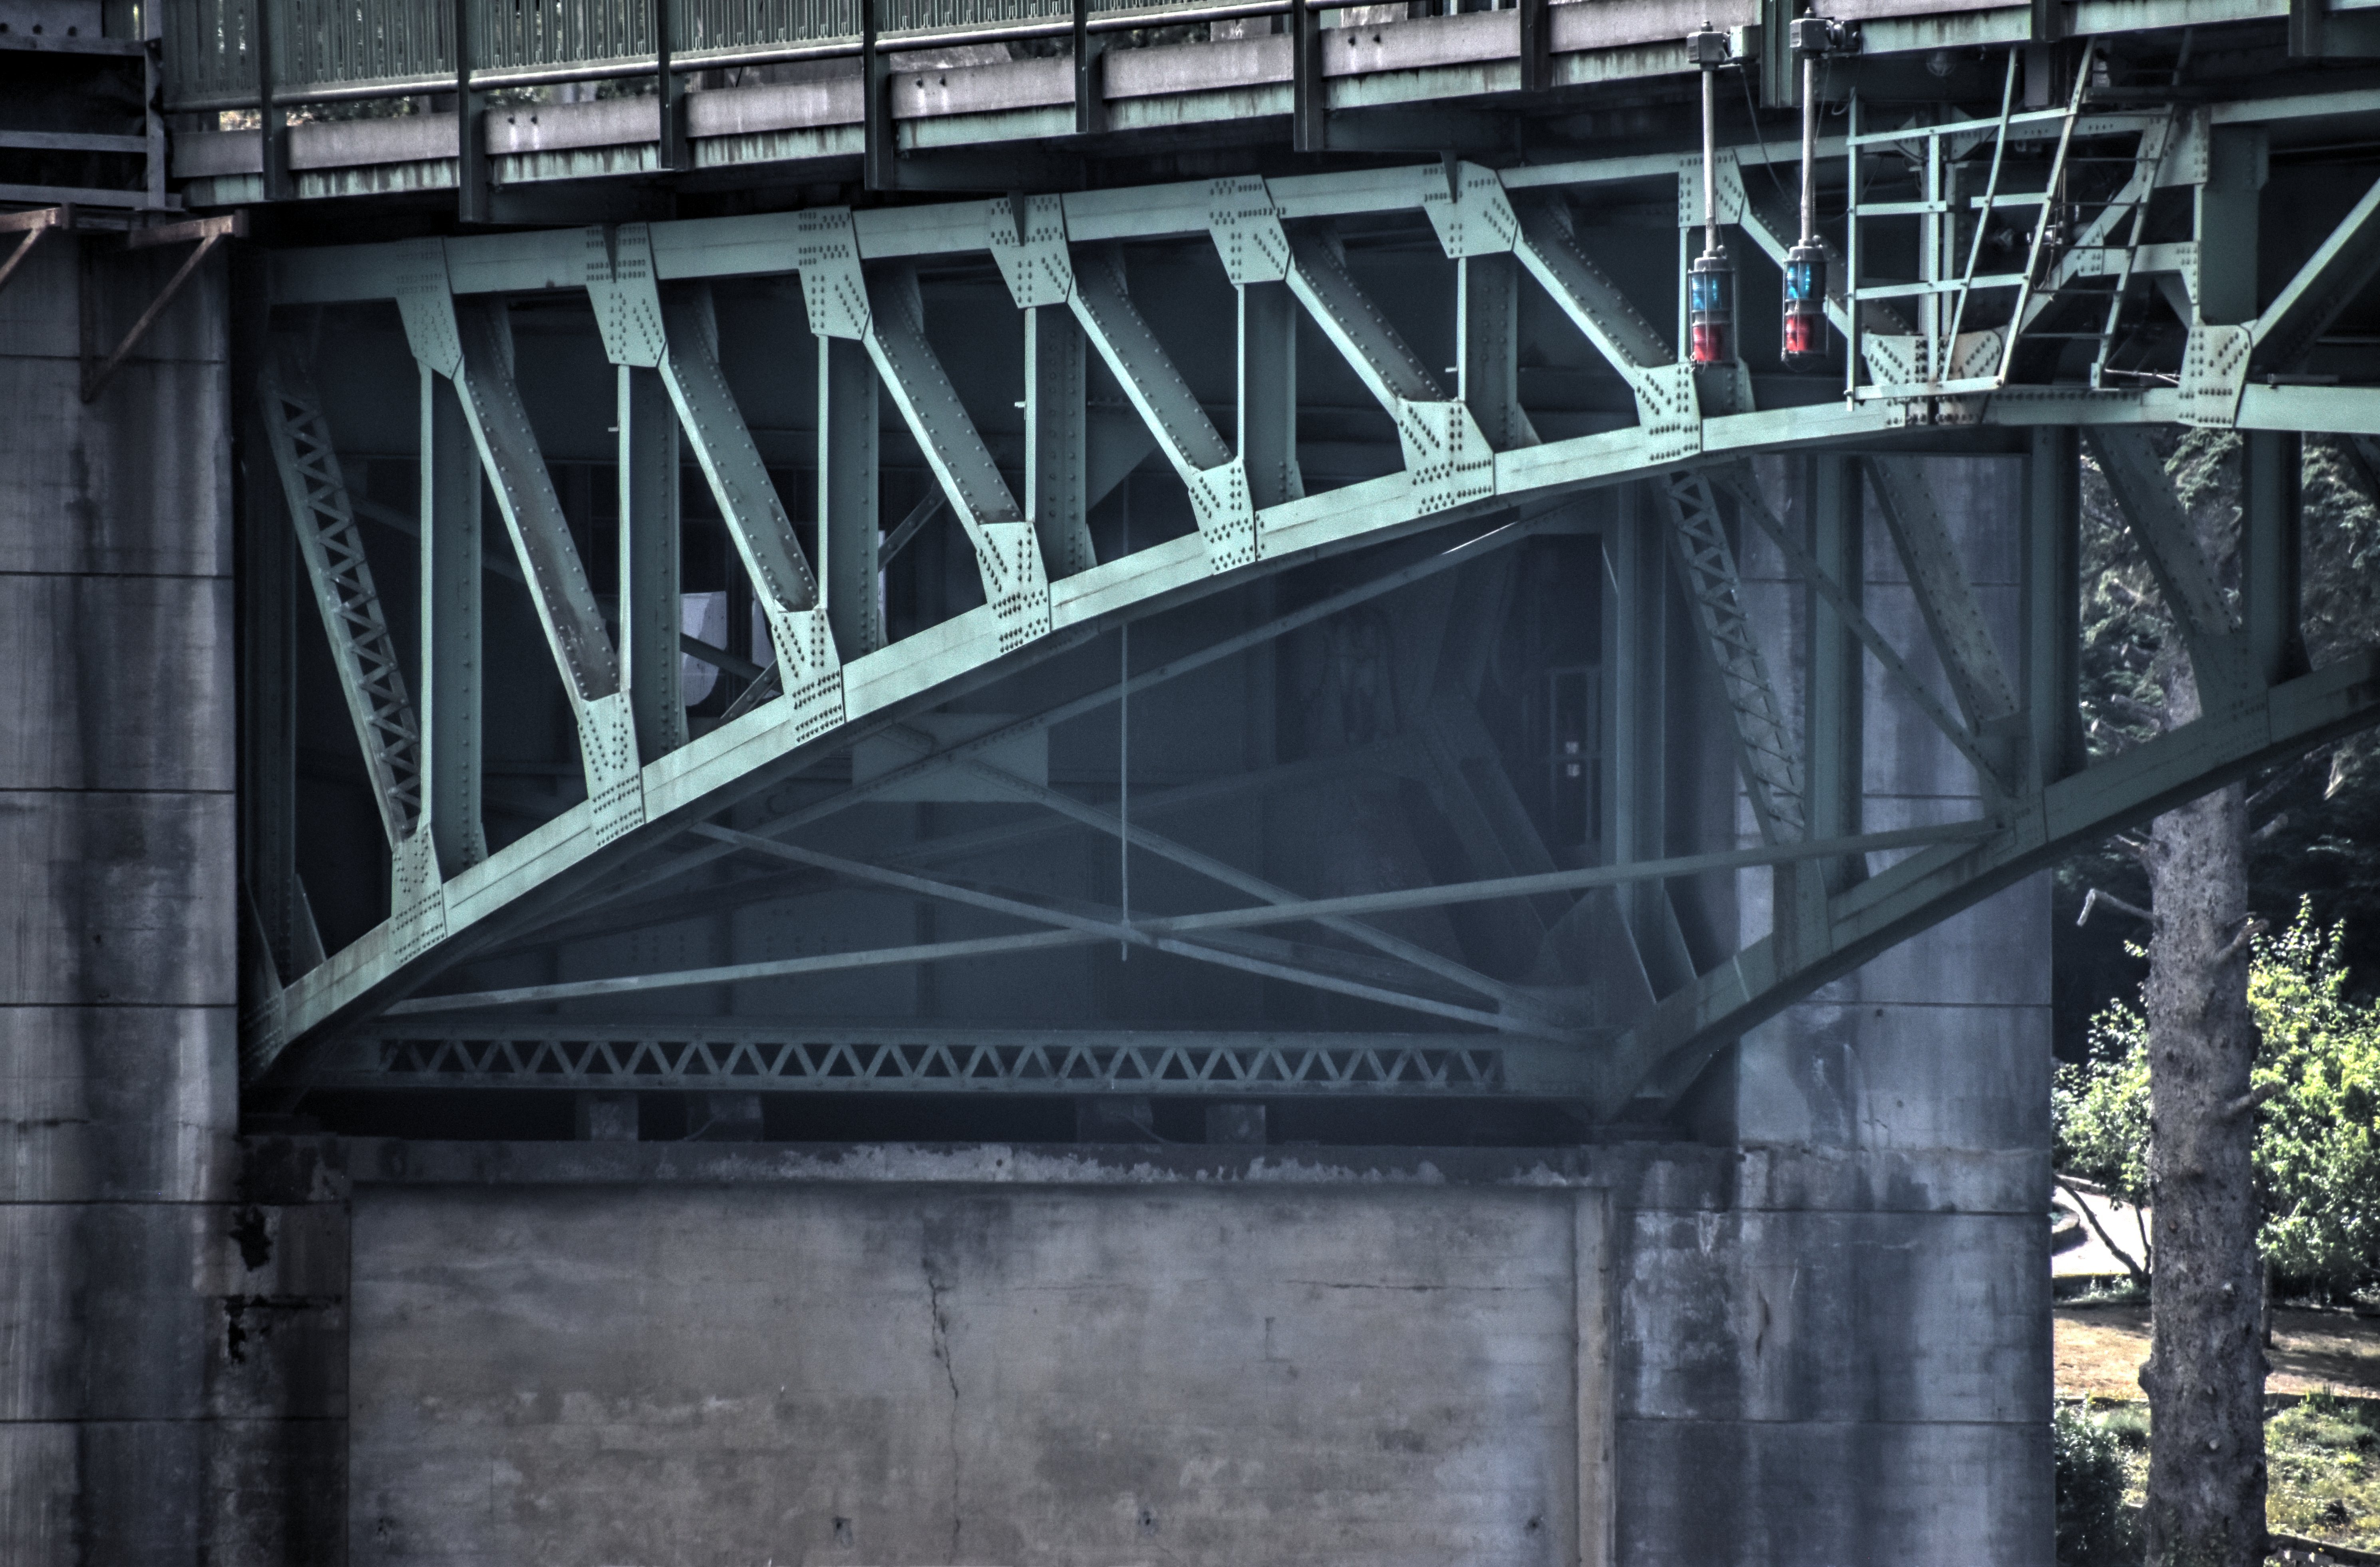
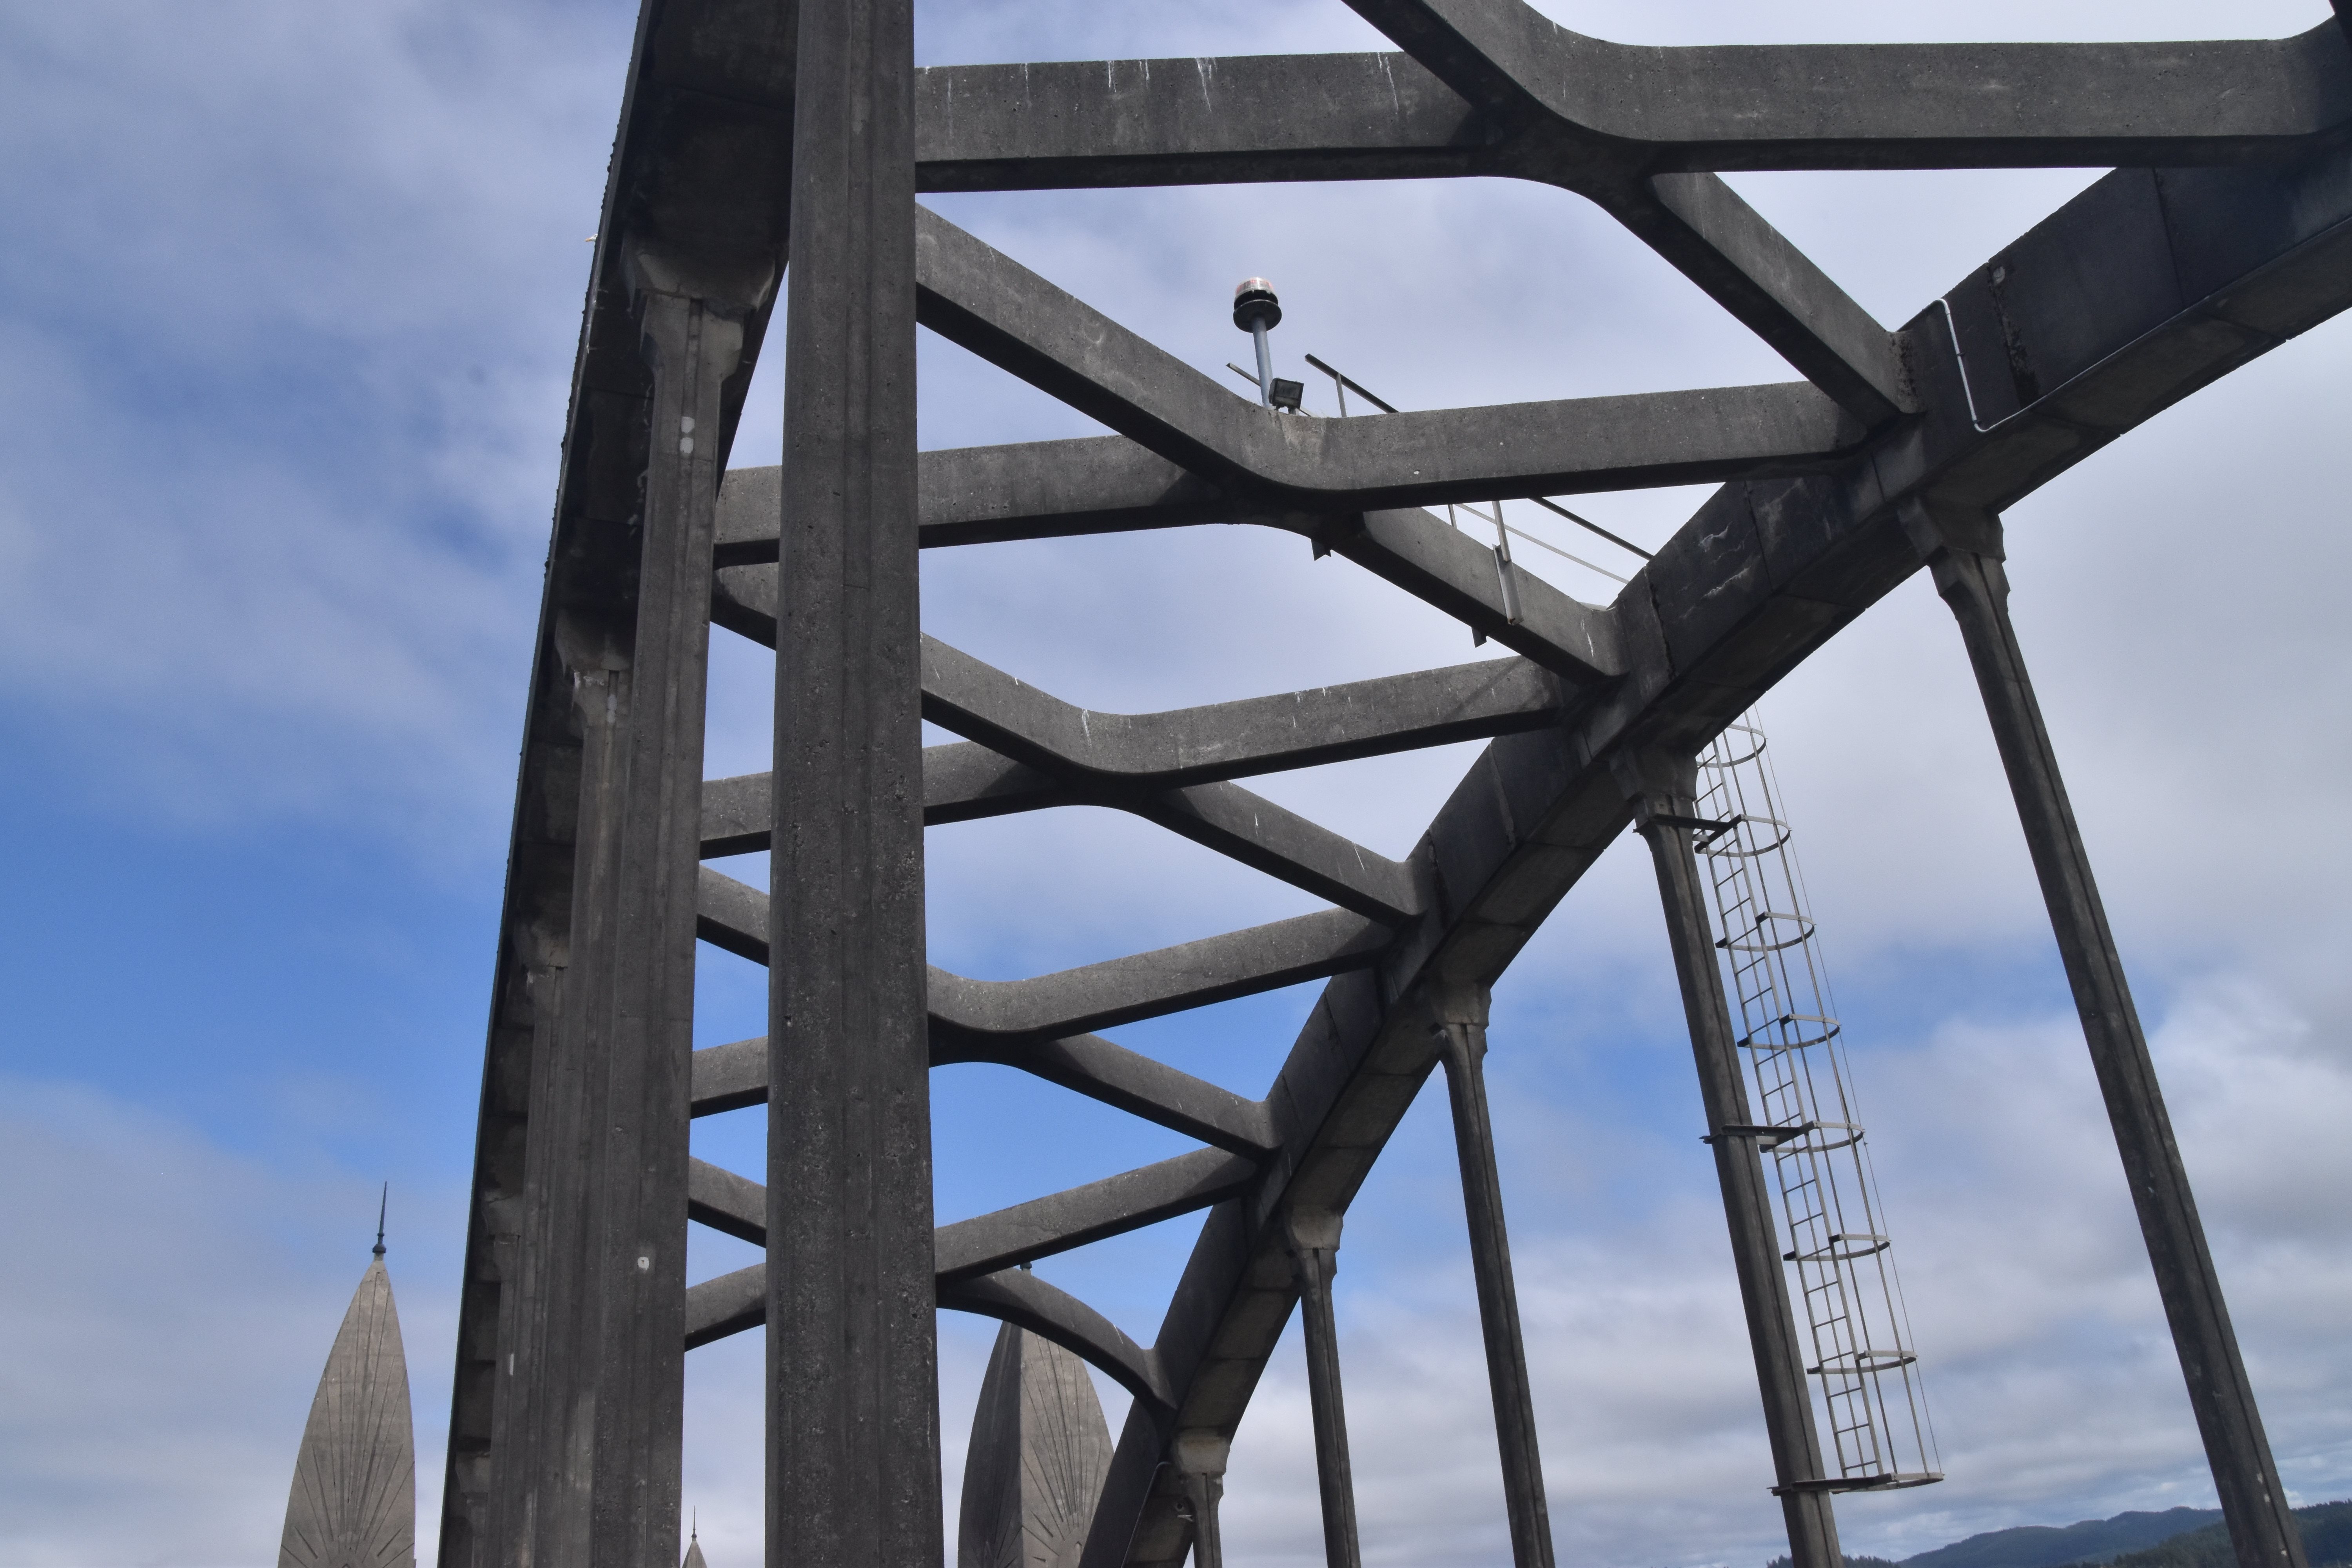
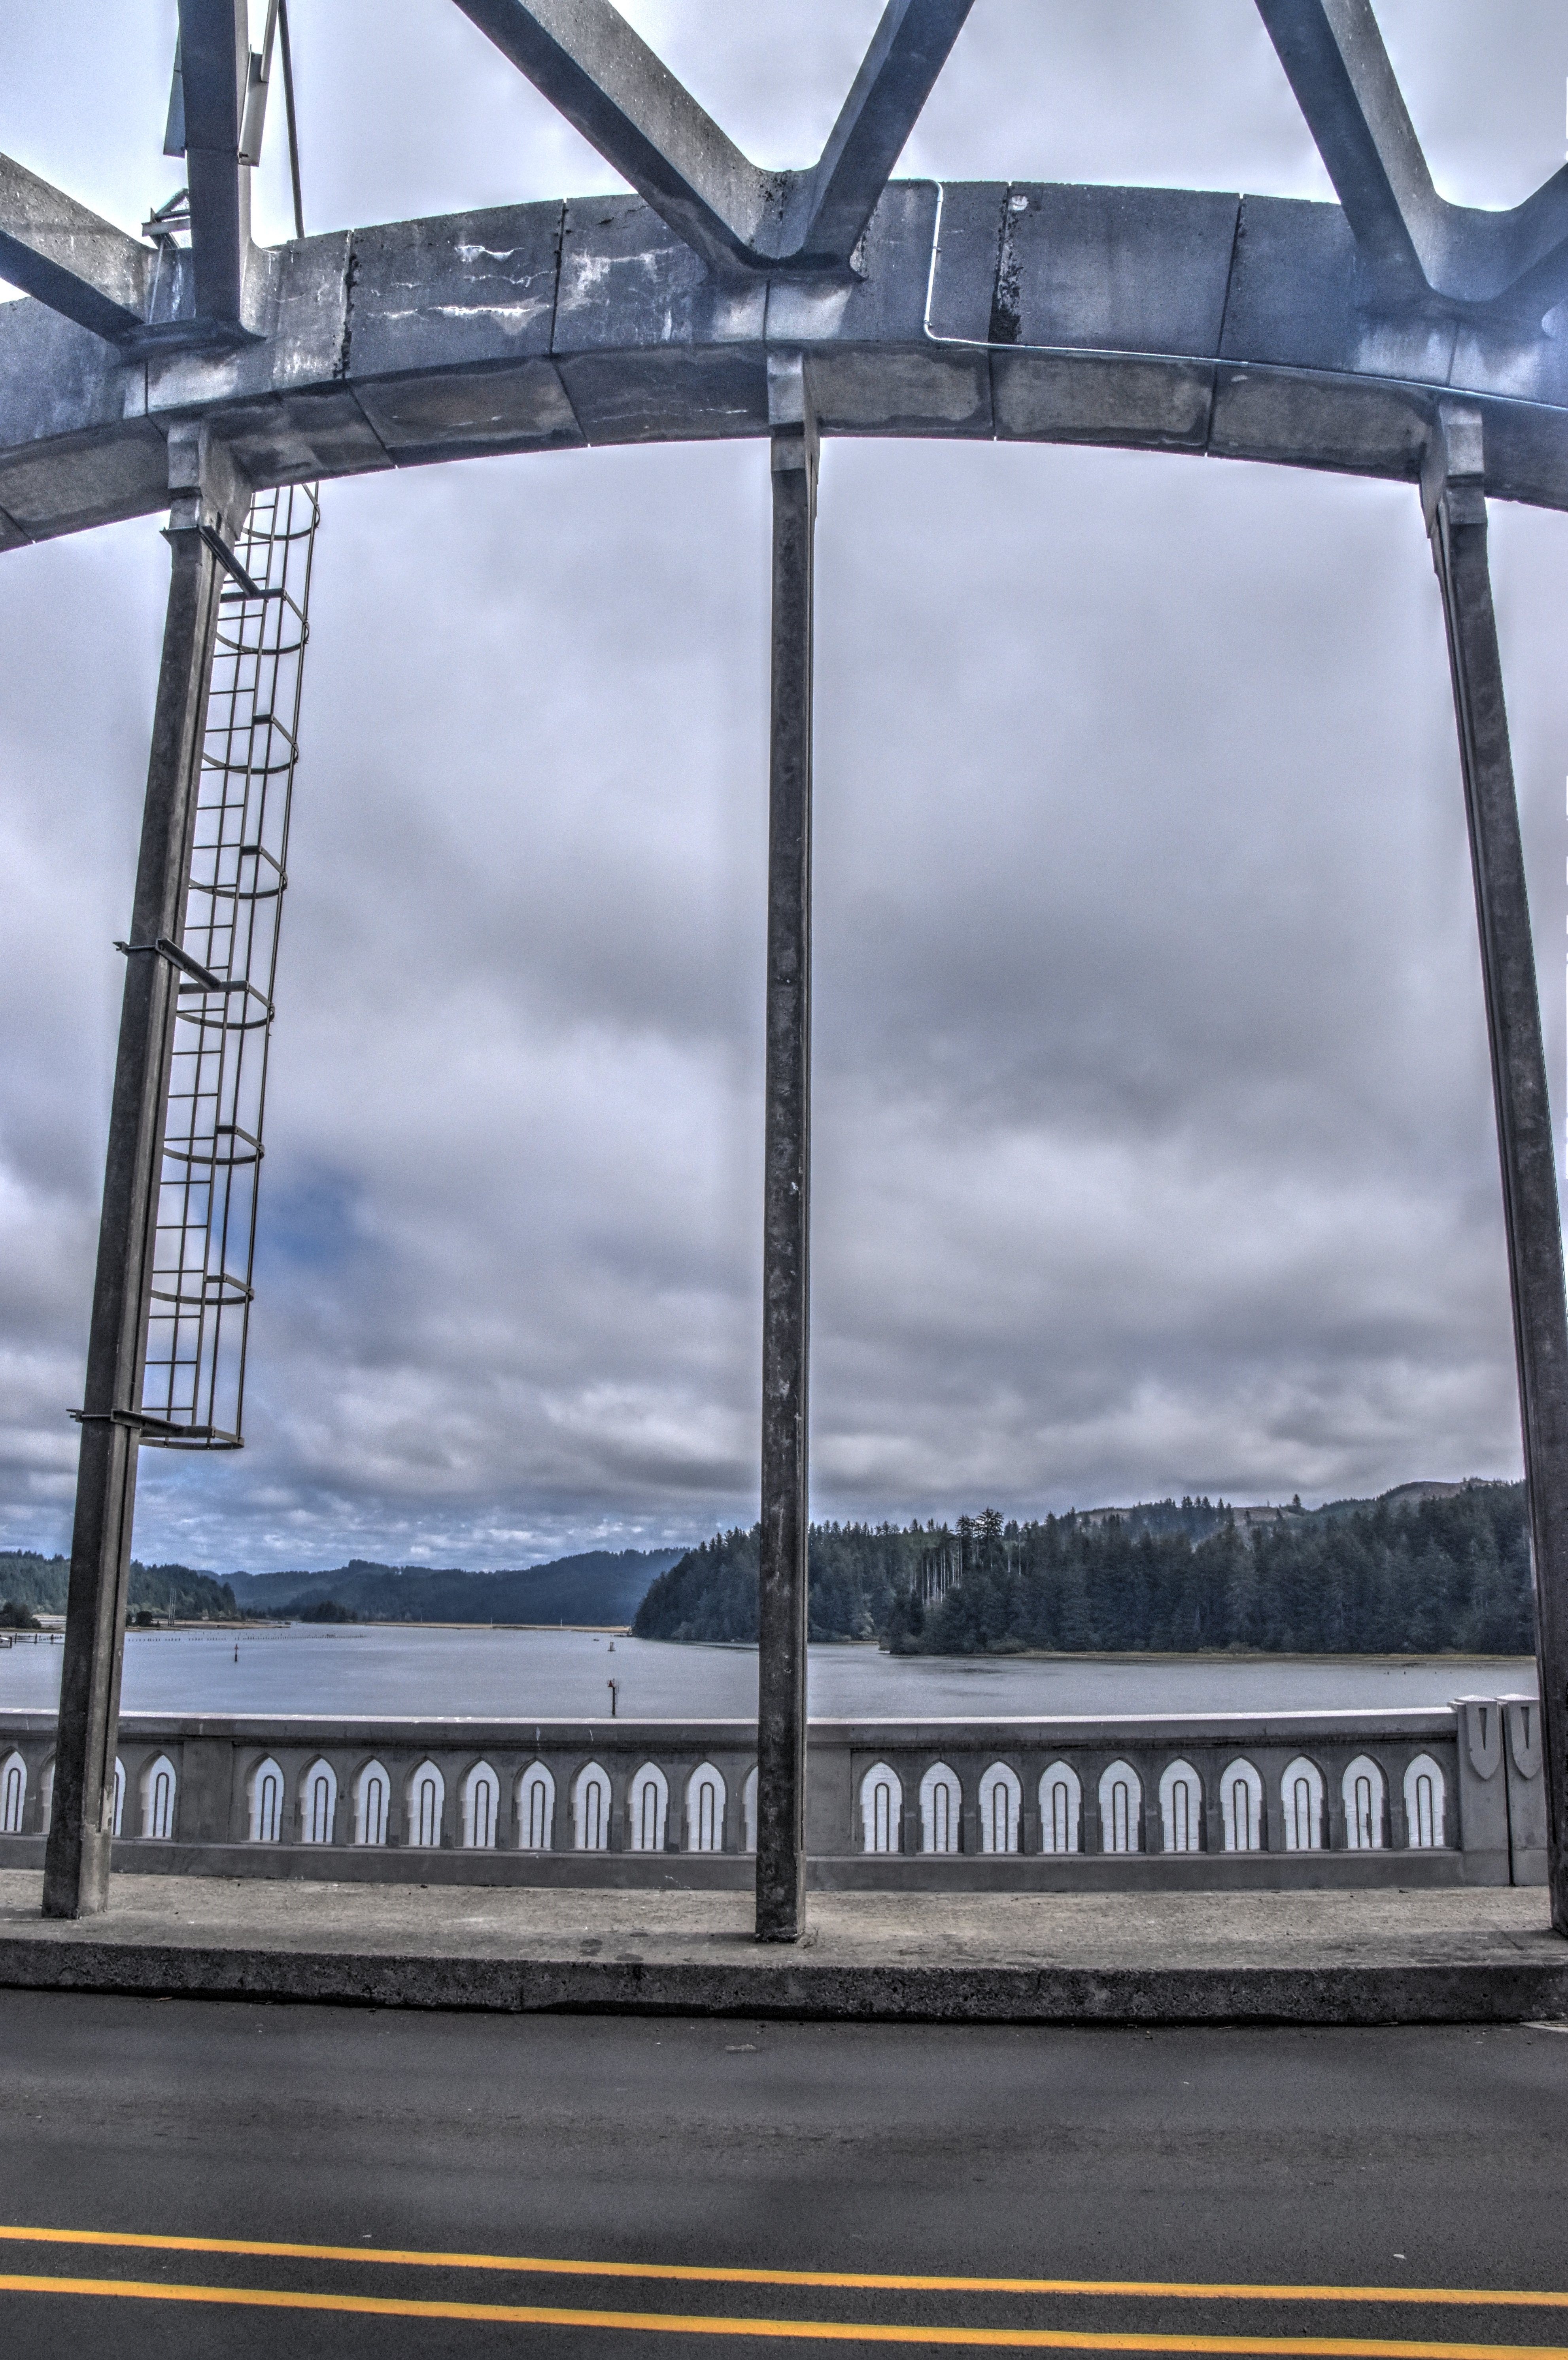
Arch overview.
![]()


Arch span portal bracing detail.
![]()
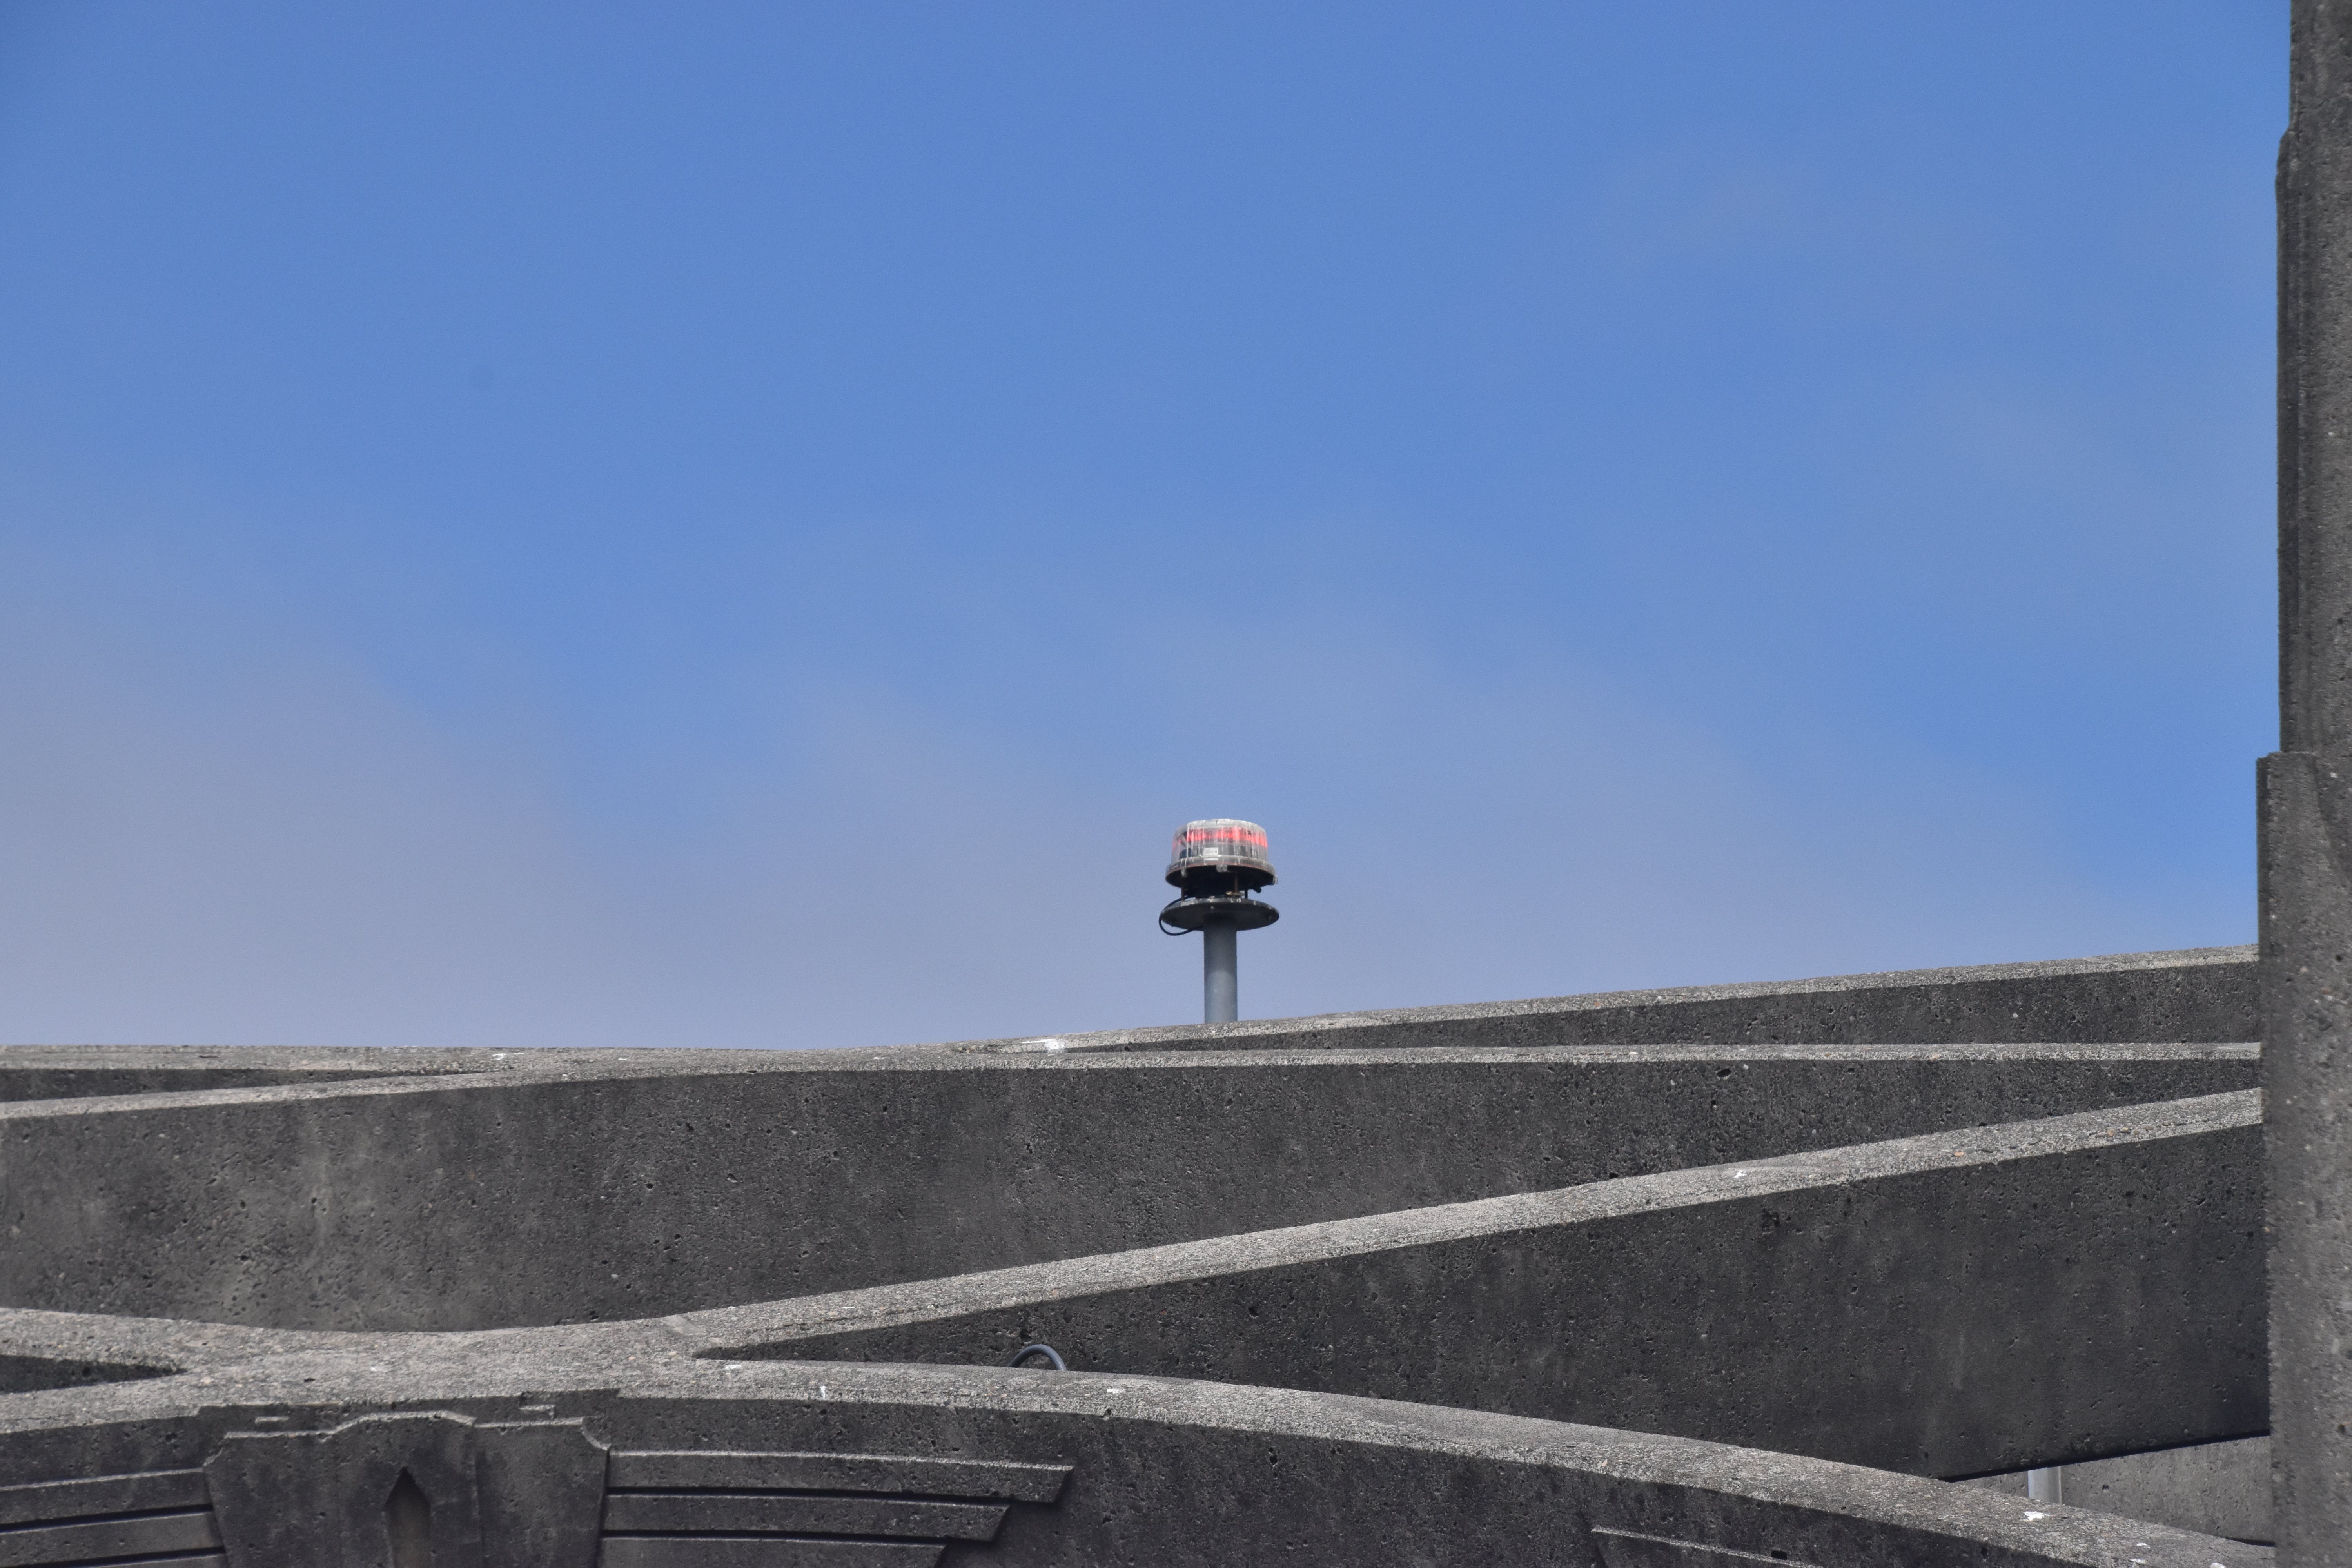
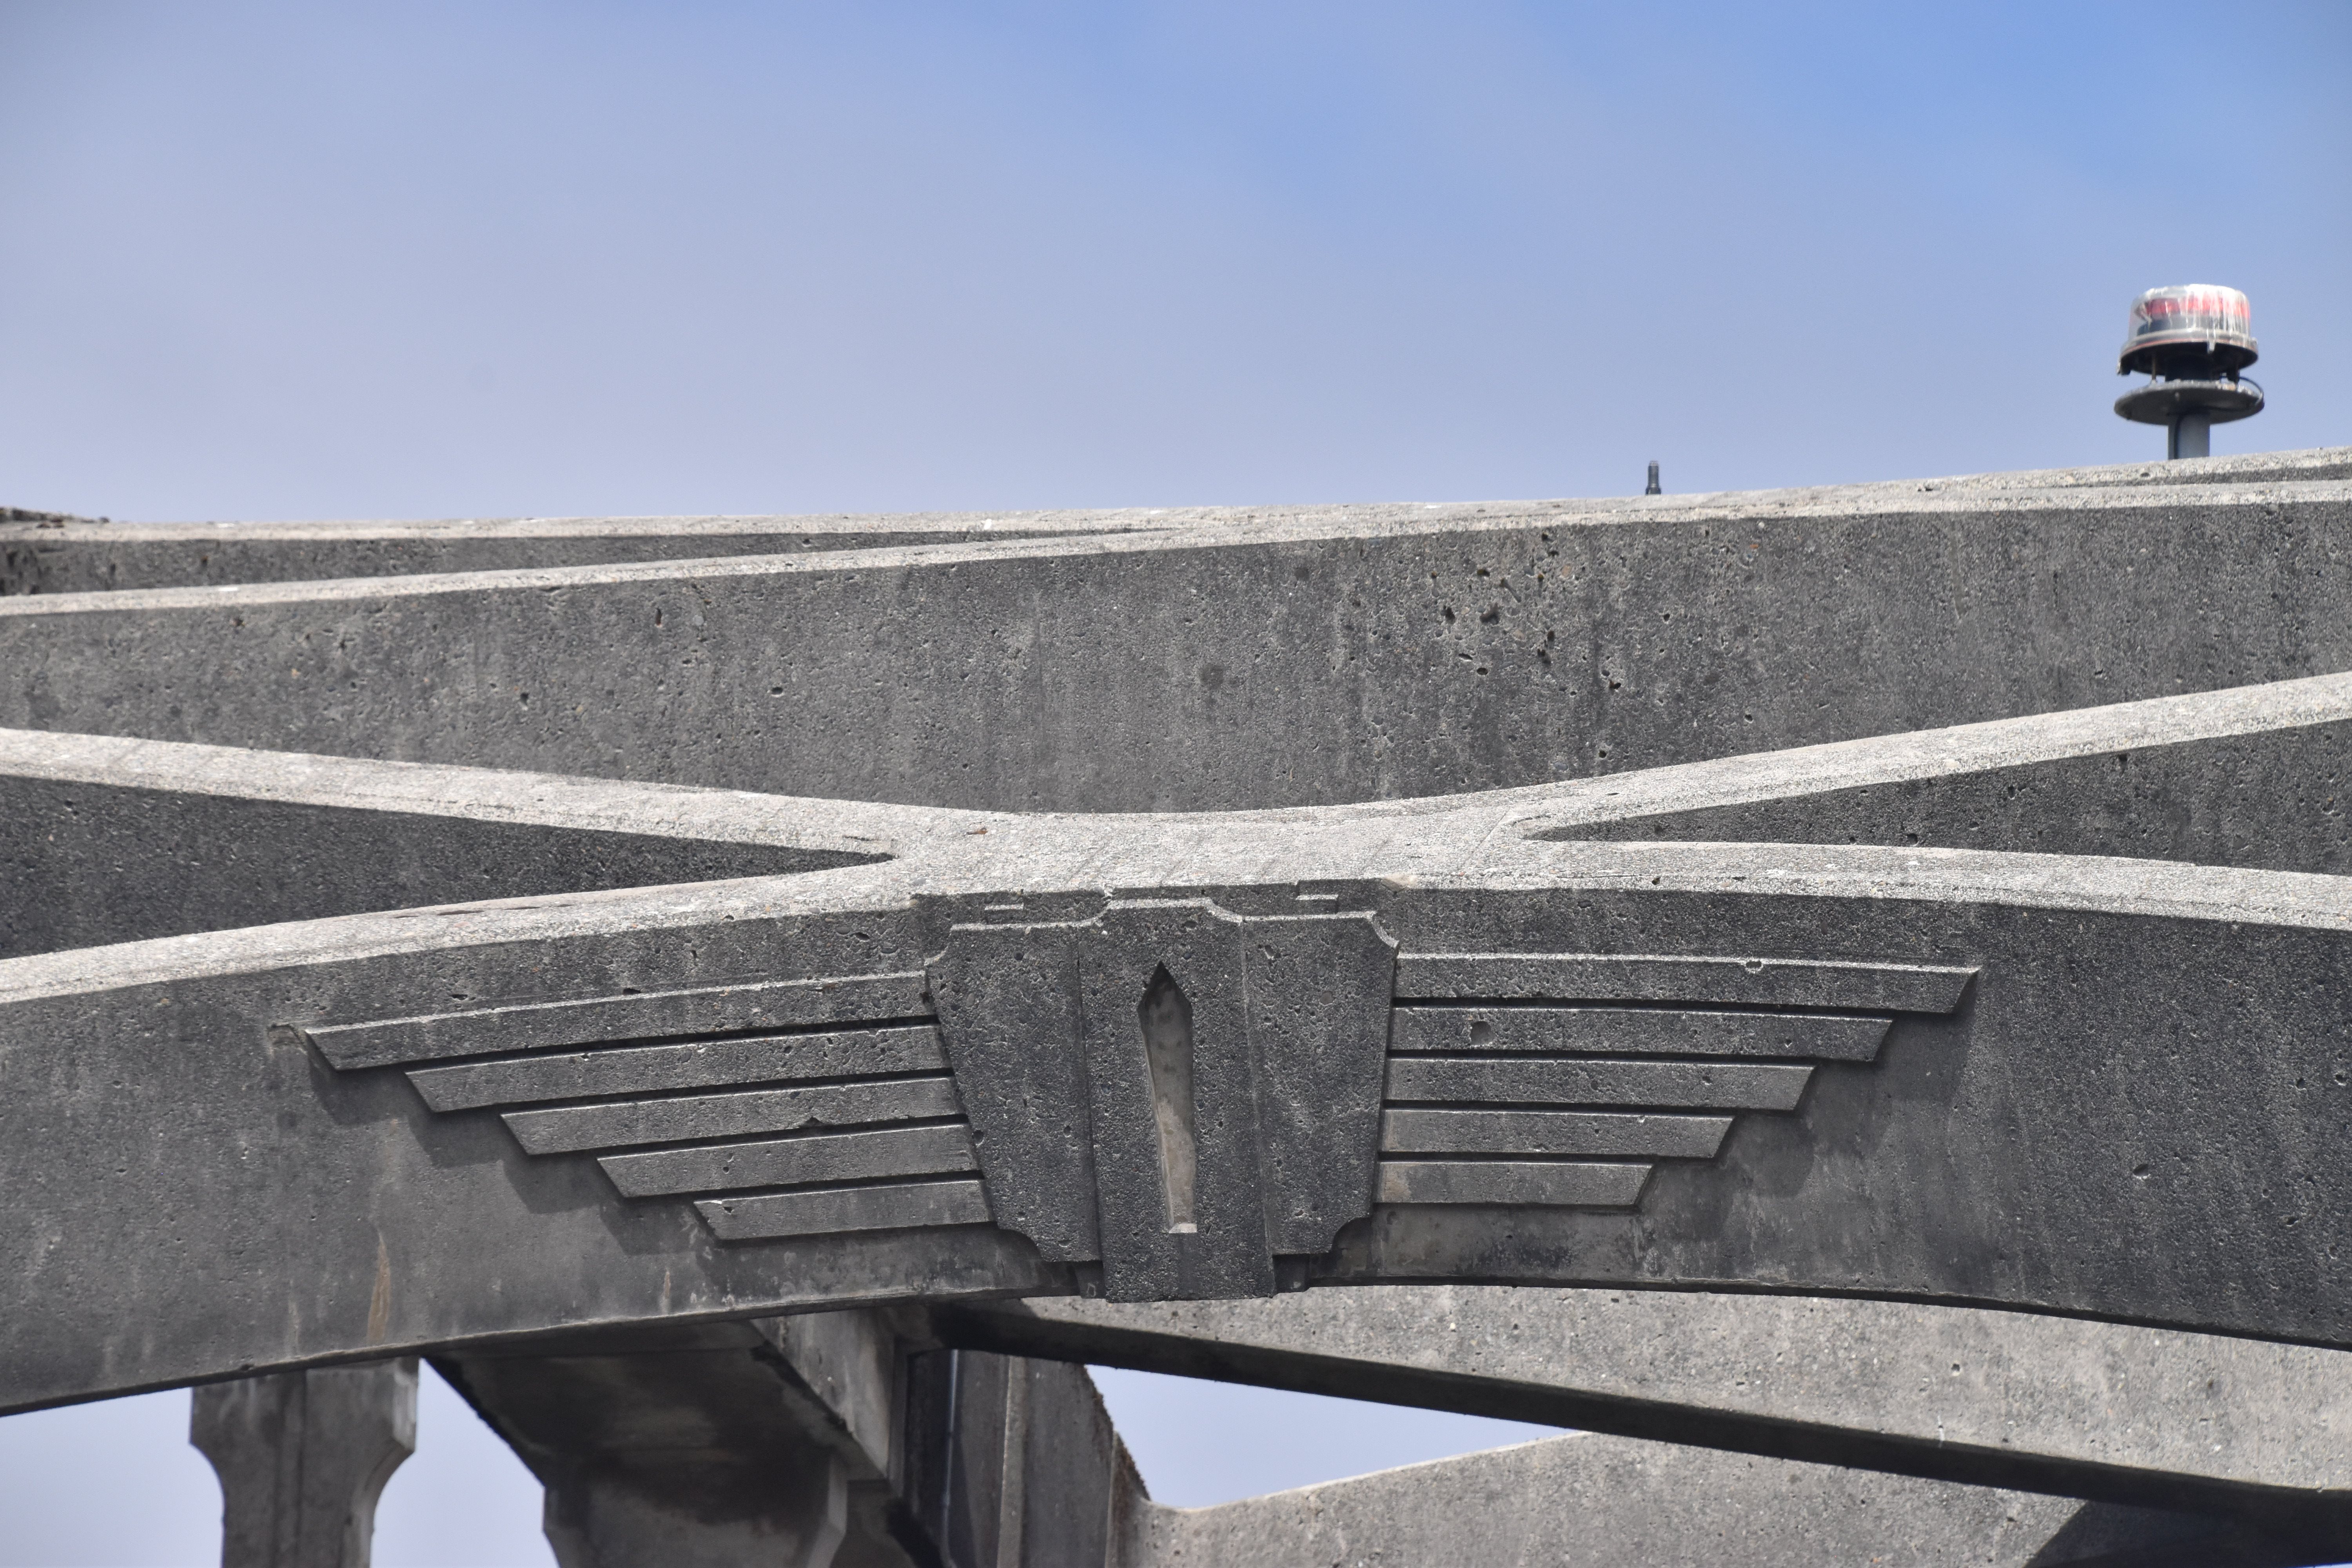
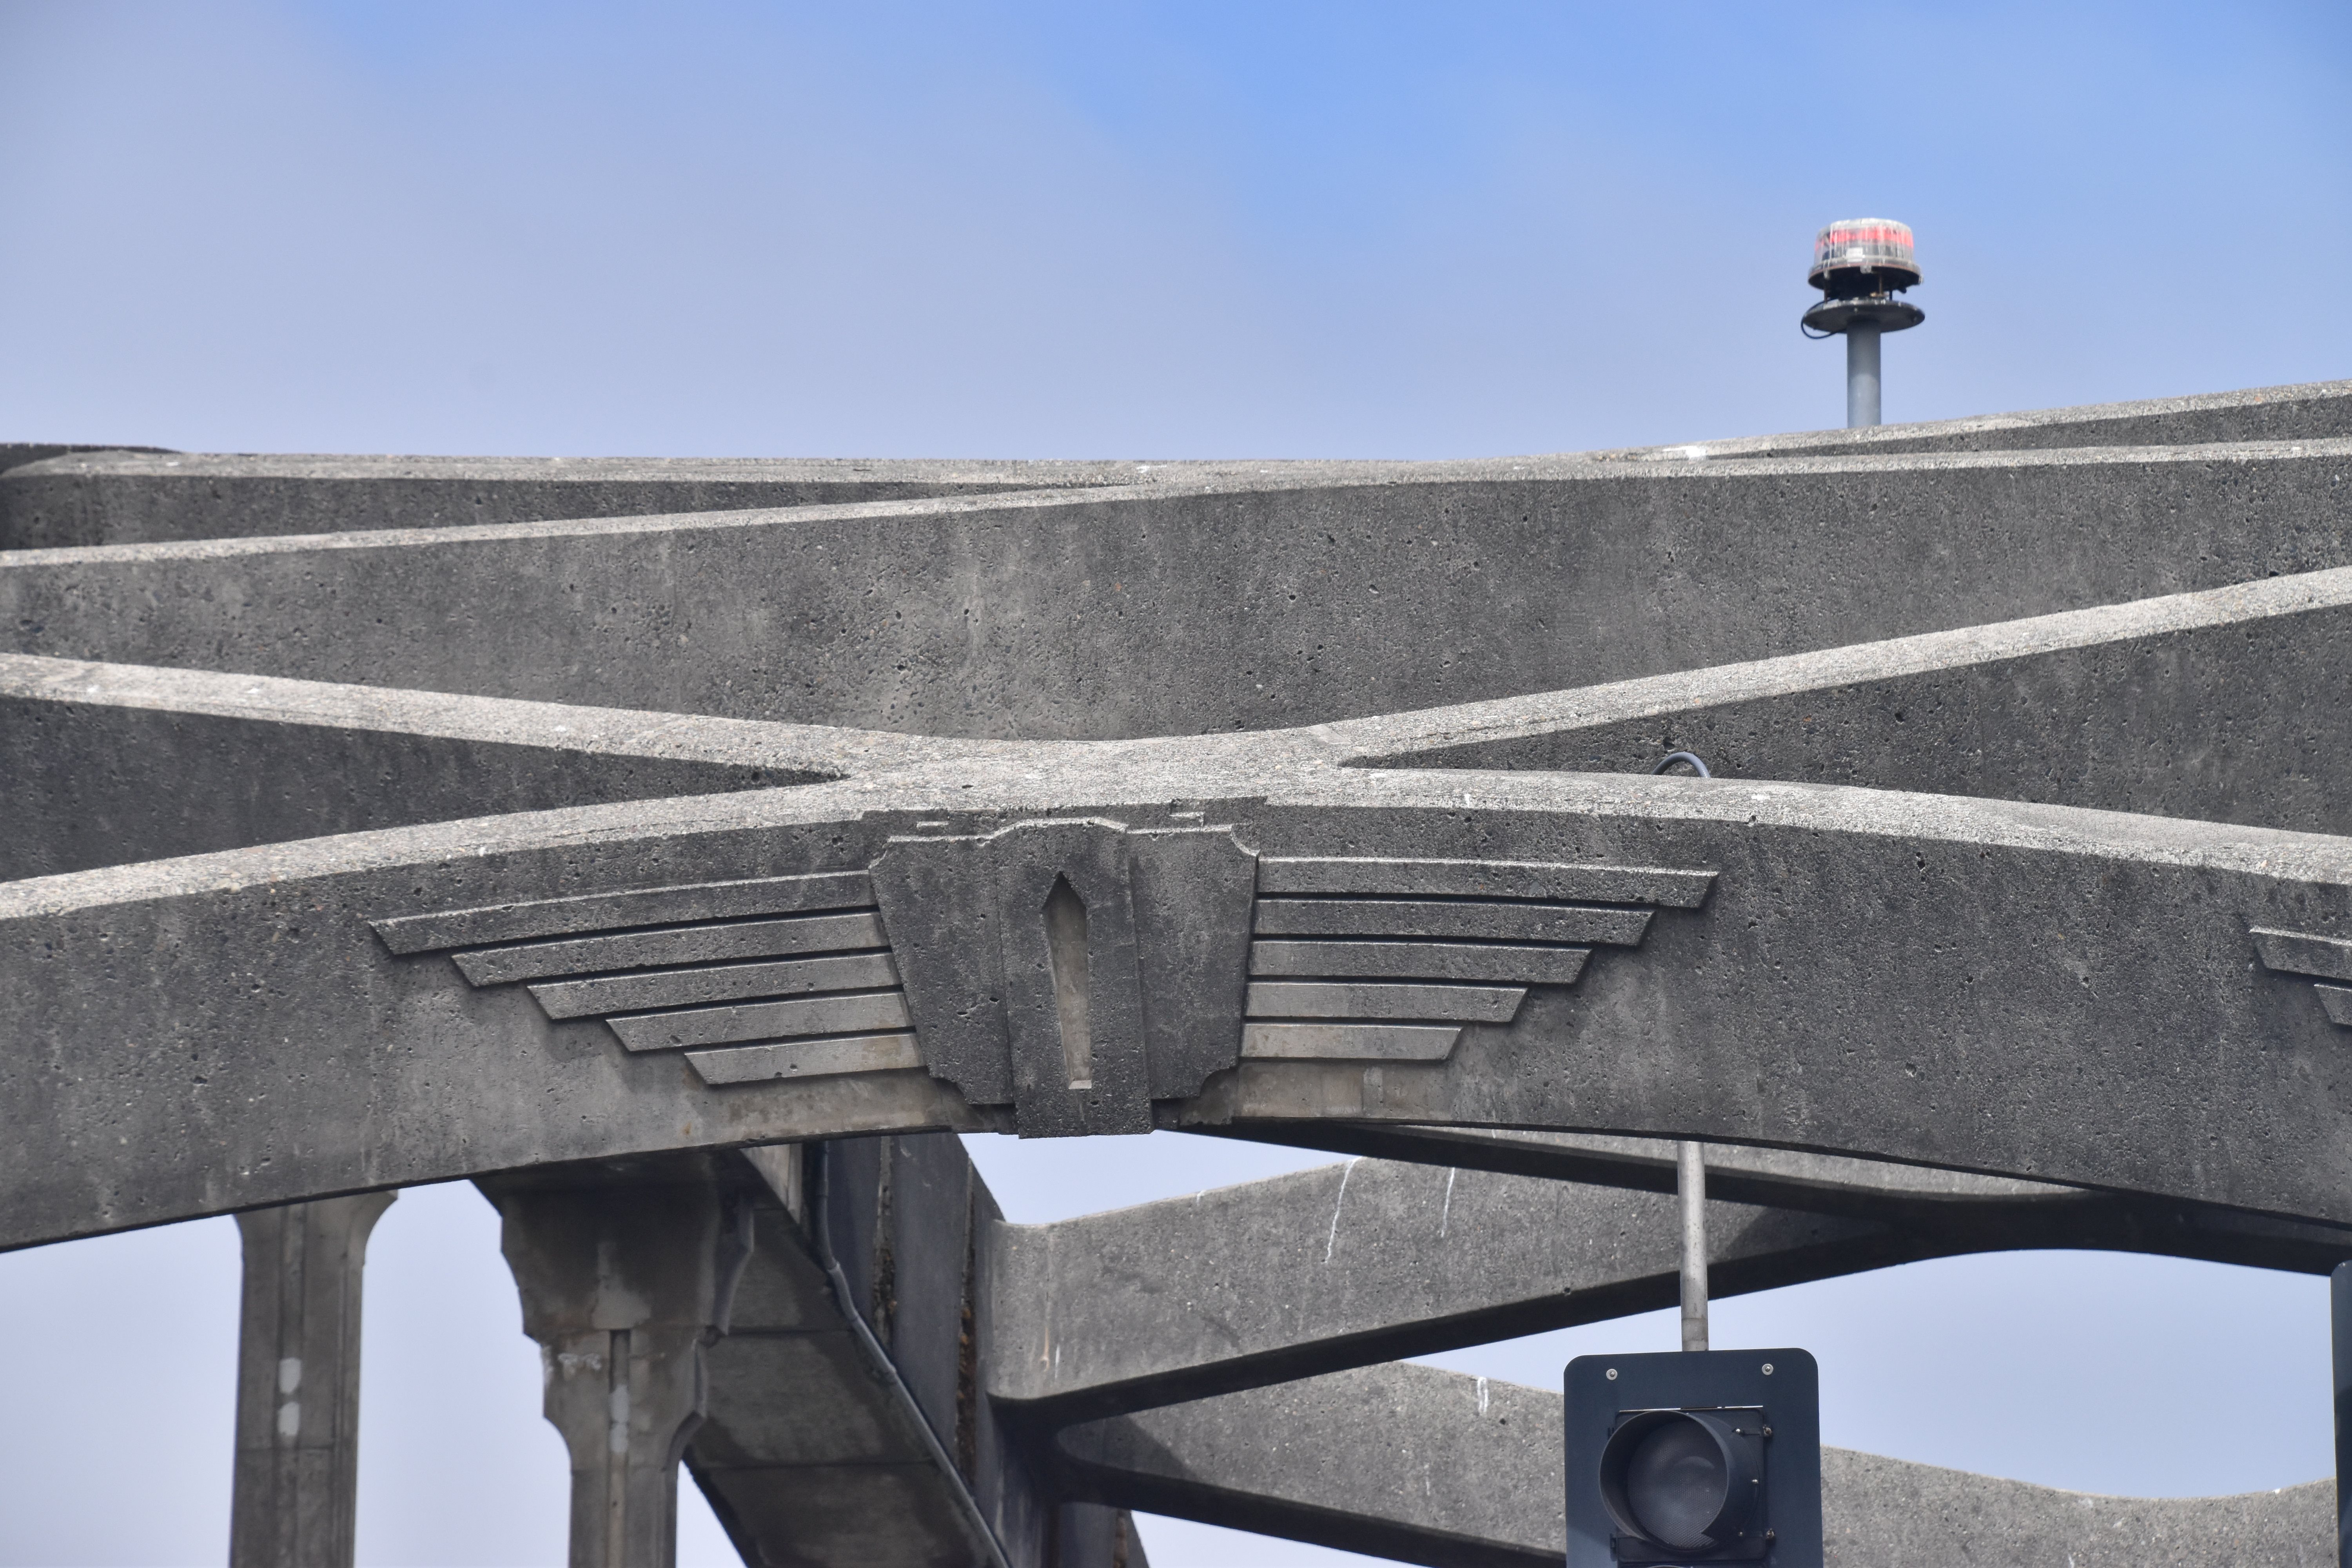
Light on arch span.
![]()


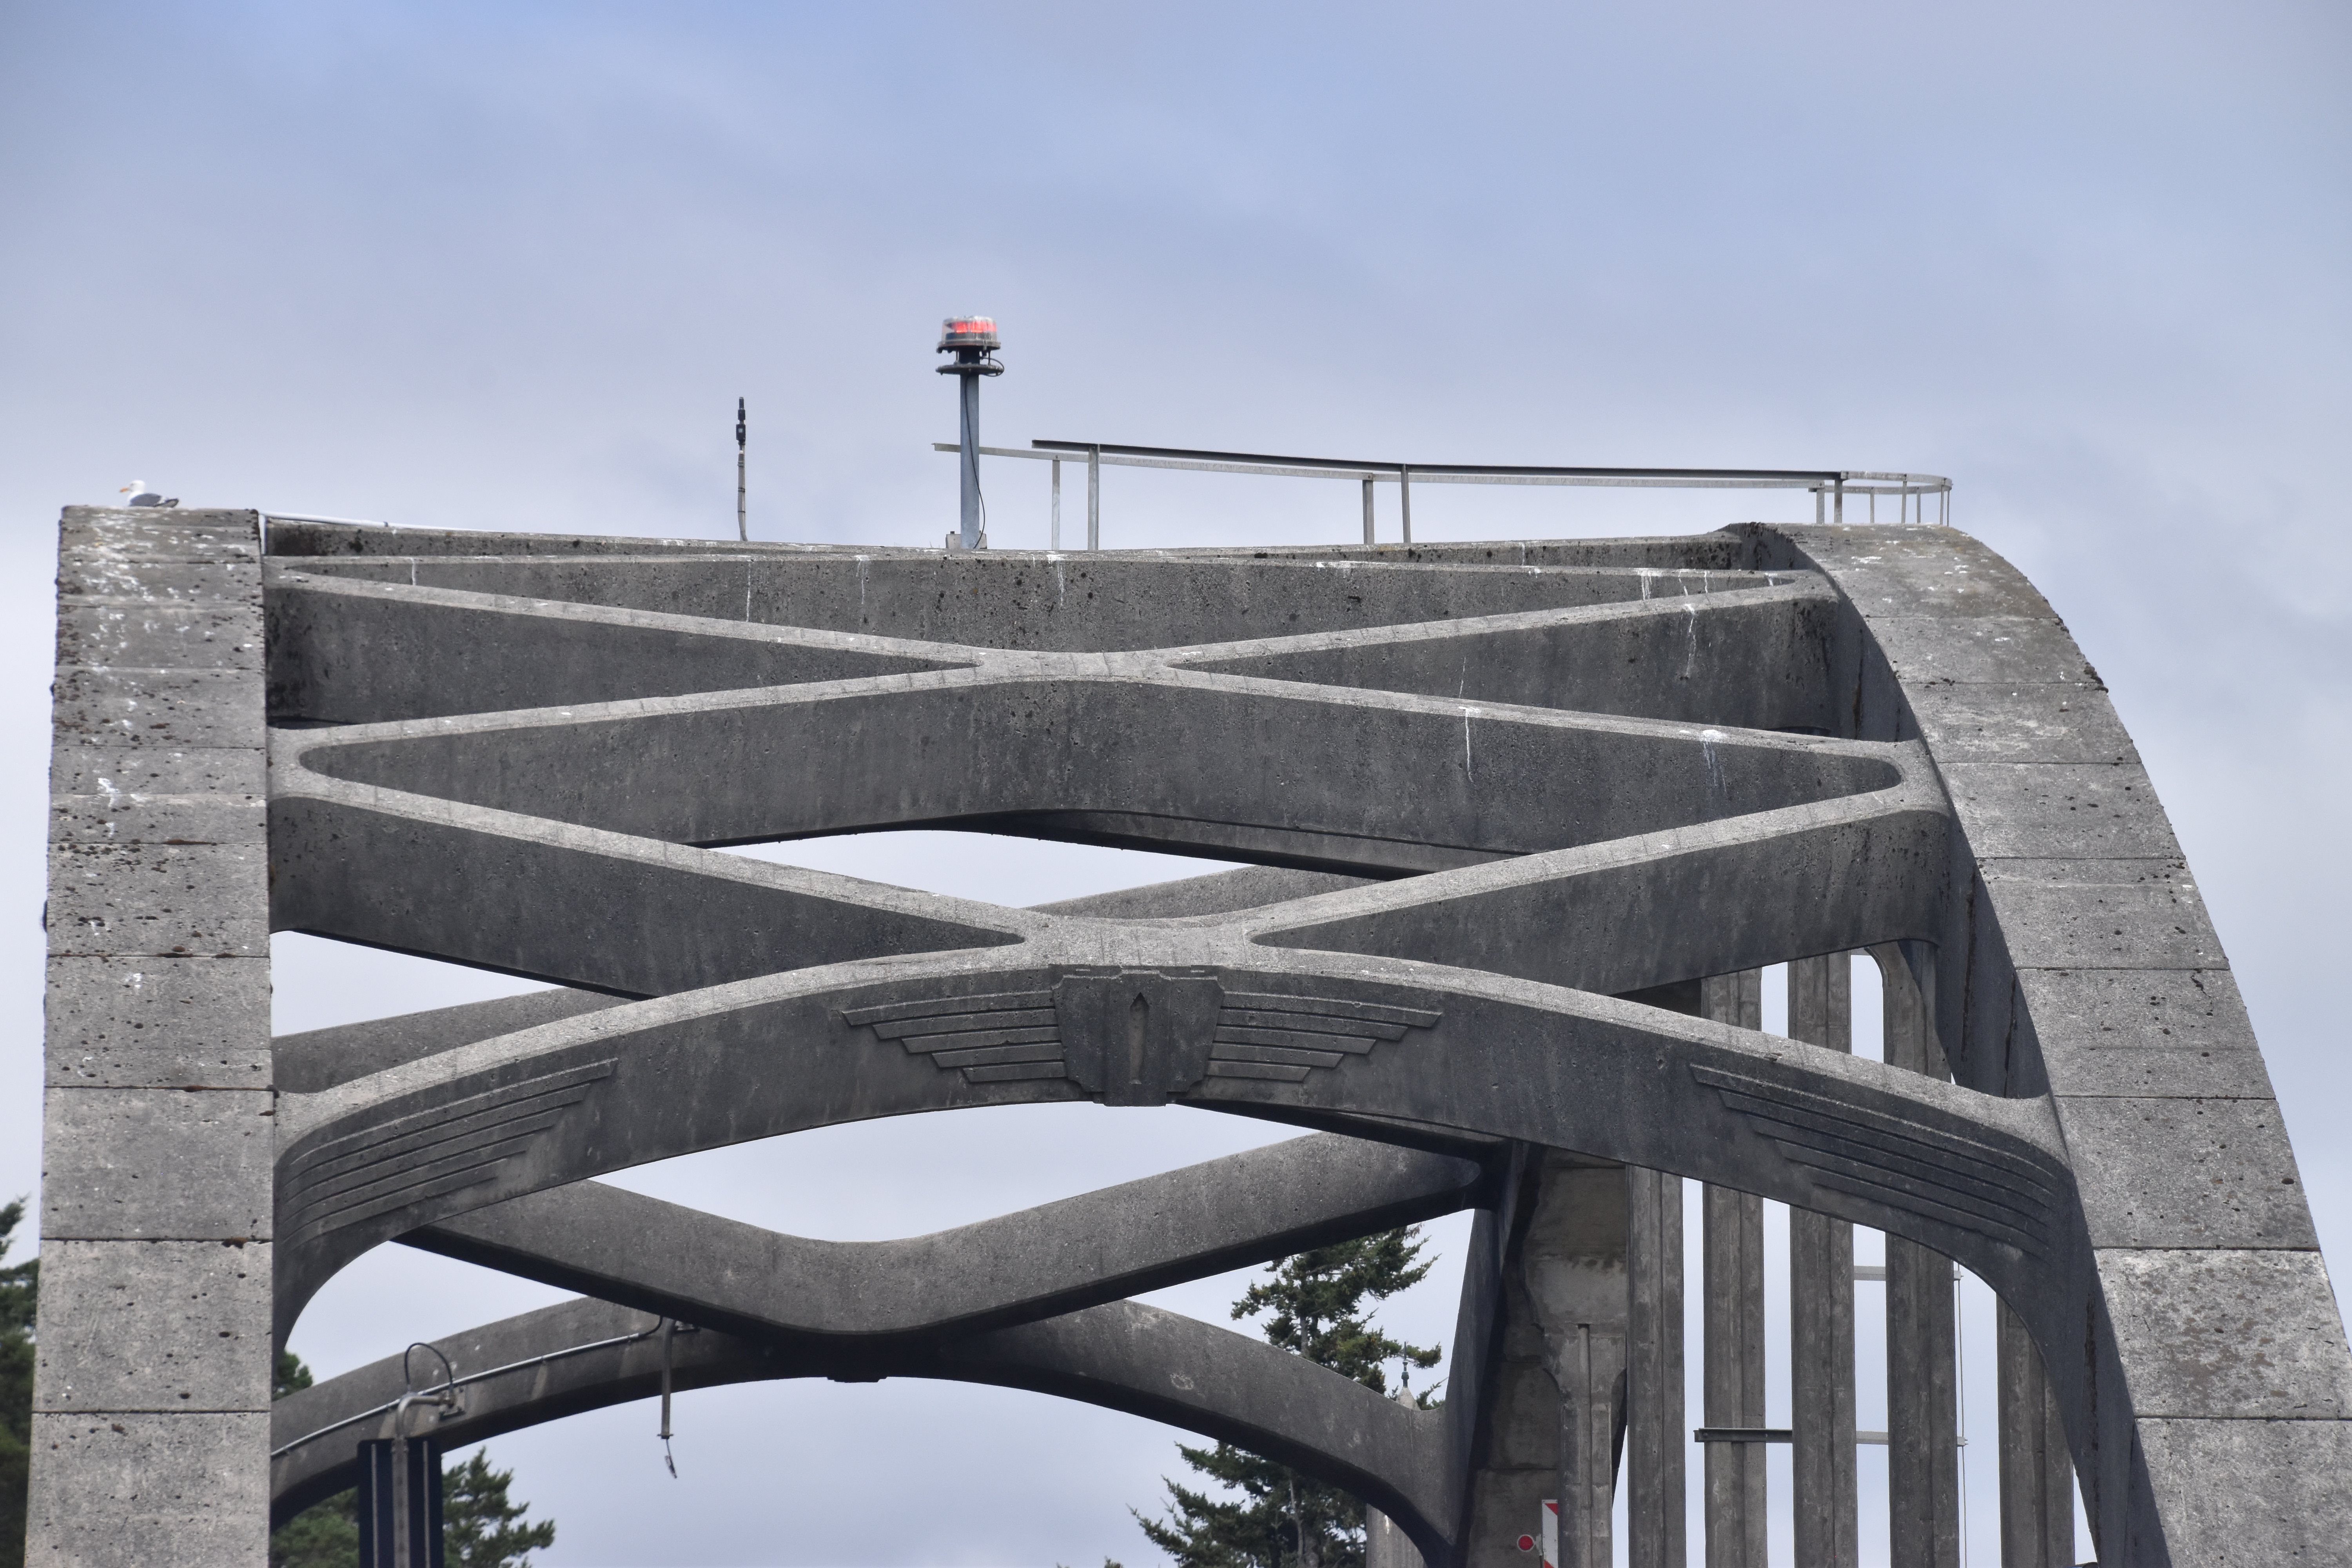

Arch span overhead bracing.
![]()


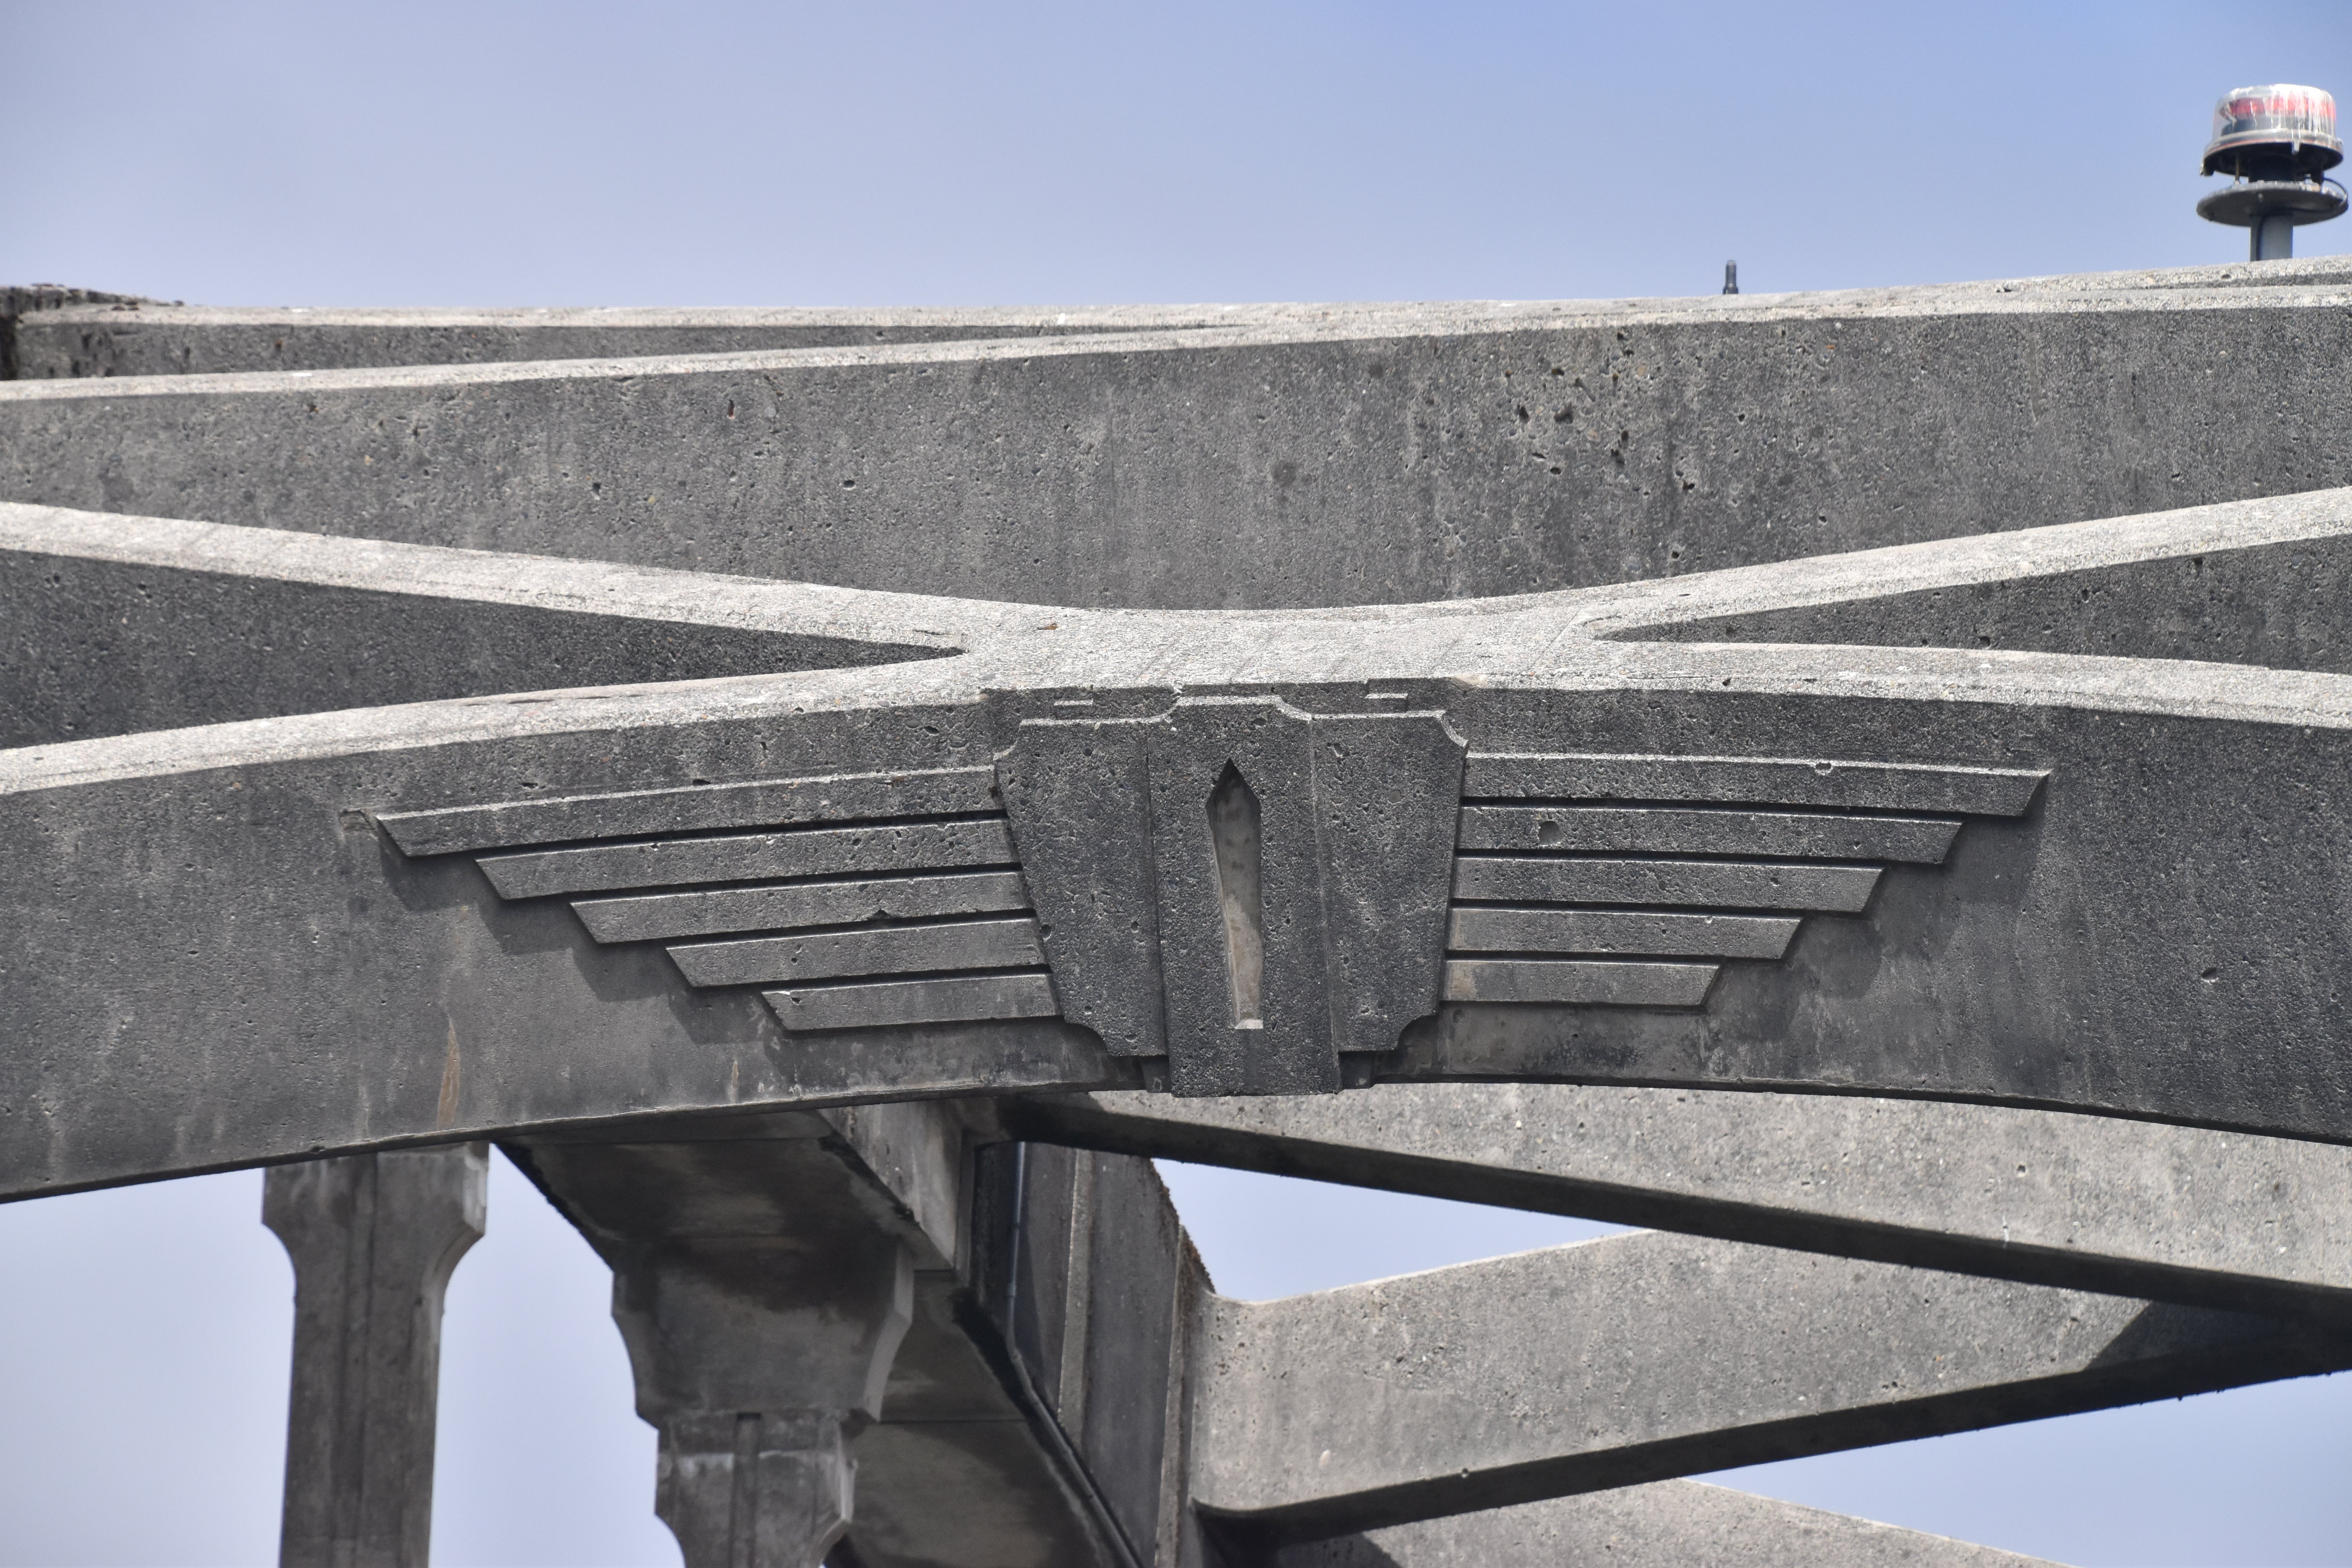
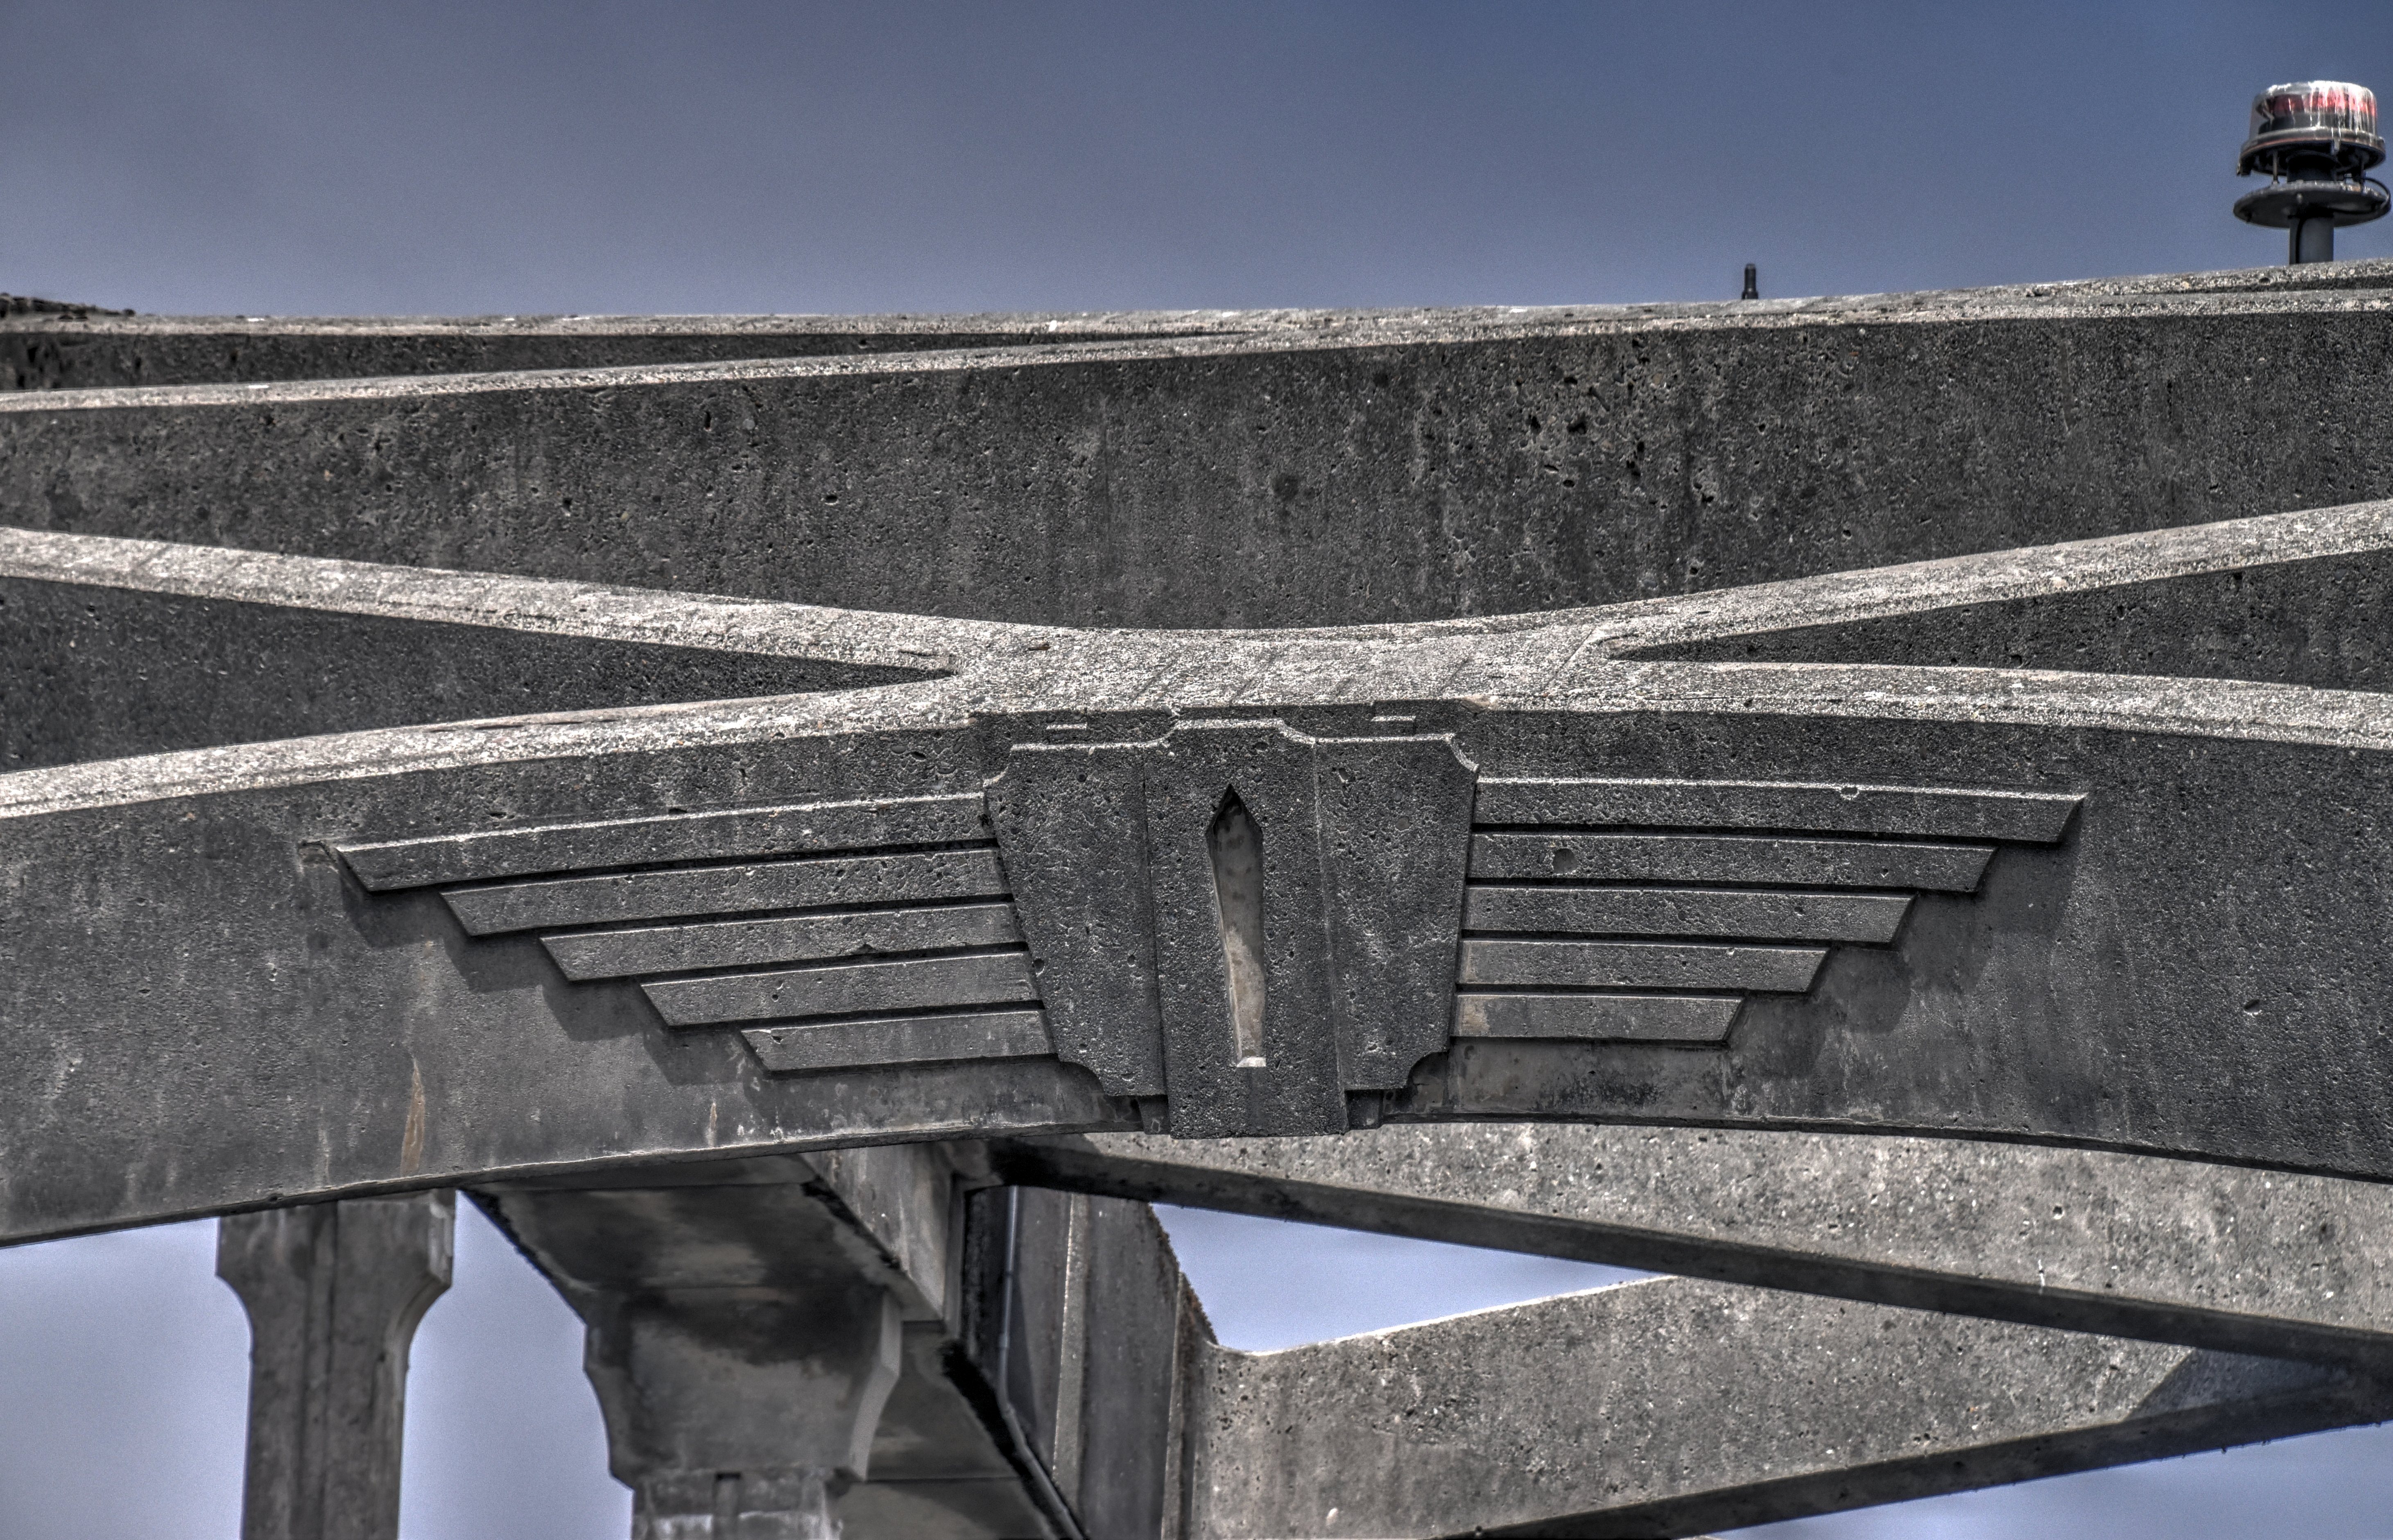
Arch span overhead bracing details.
![]()


Arch rib detail.
![]()


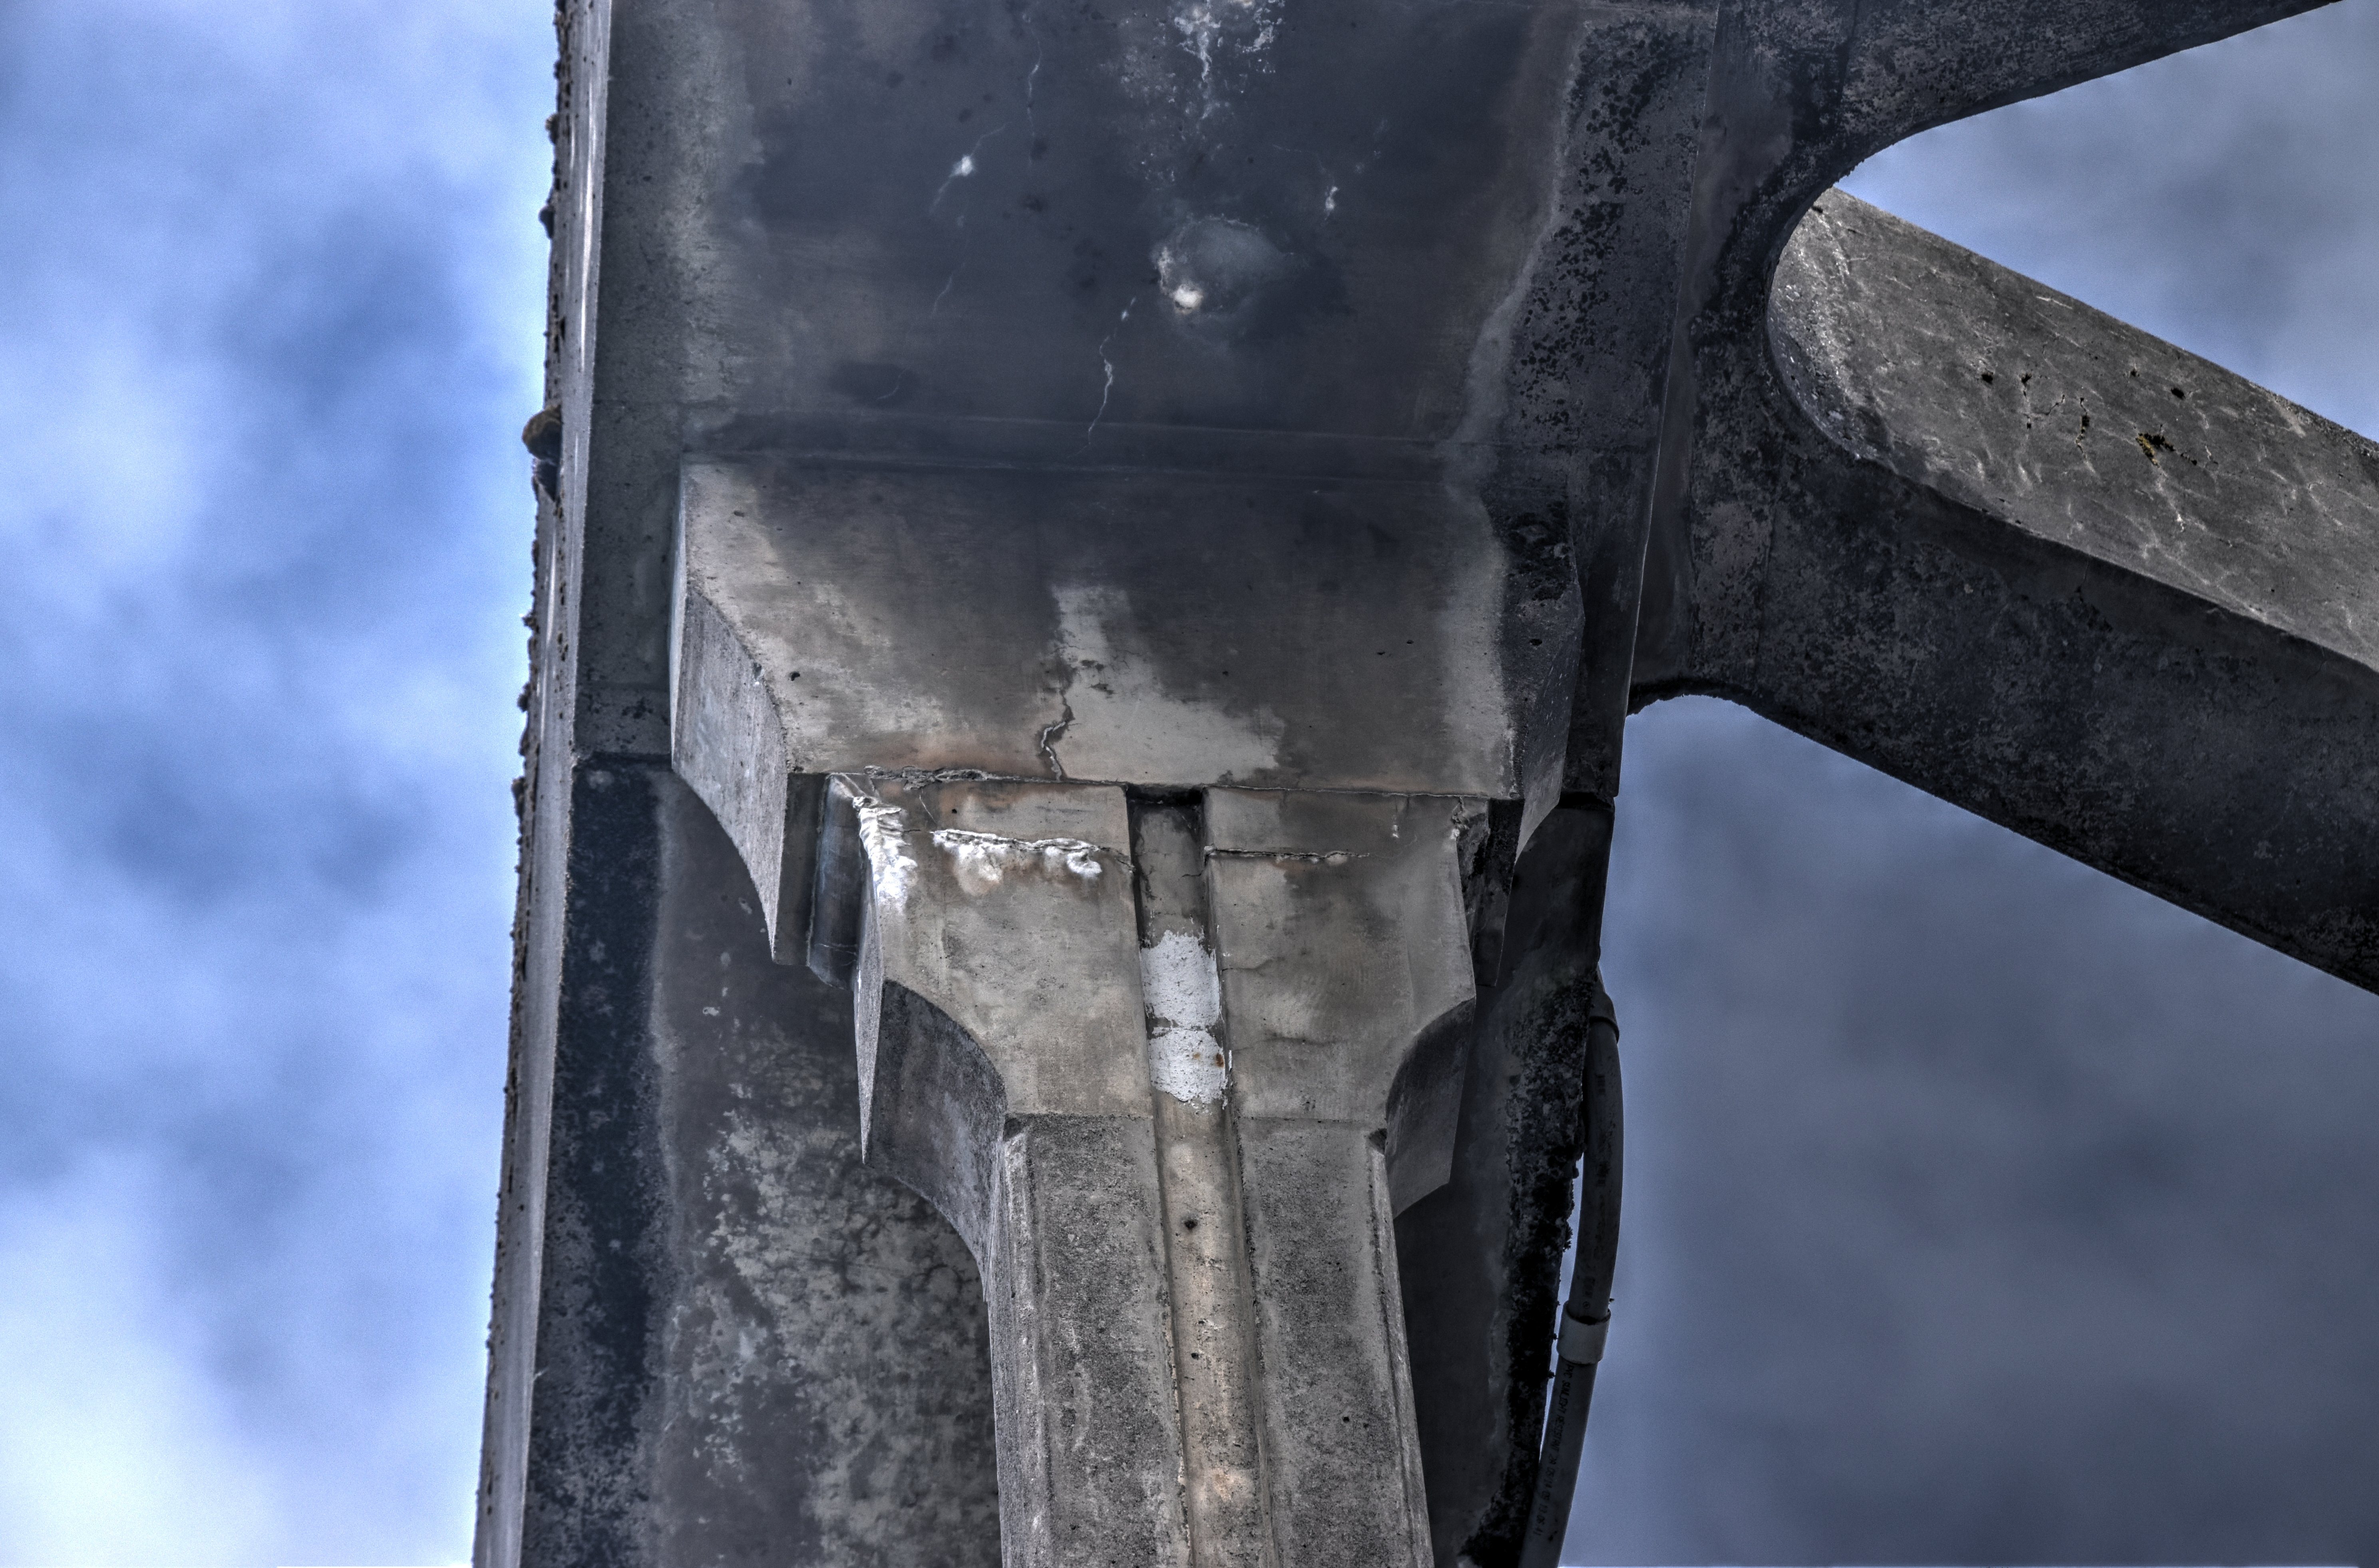
Arch rib connections.
![]()


Arch span hanger details.
![]()

Southern approach spans as seen from on bridge.
![]()

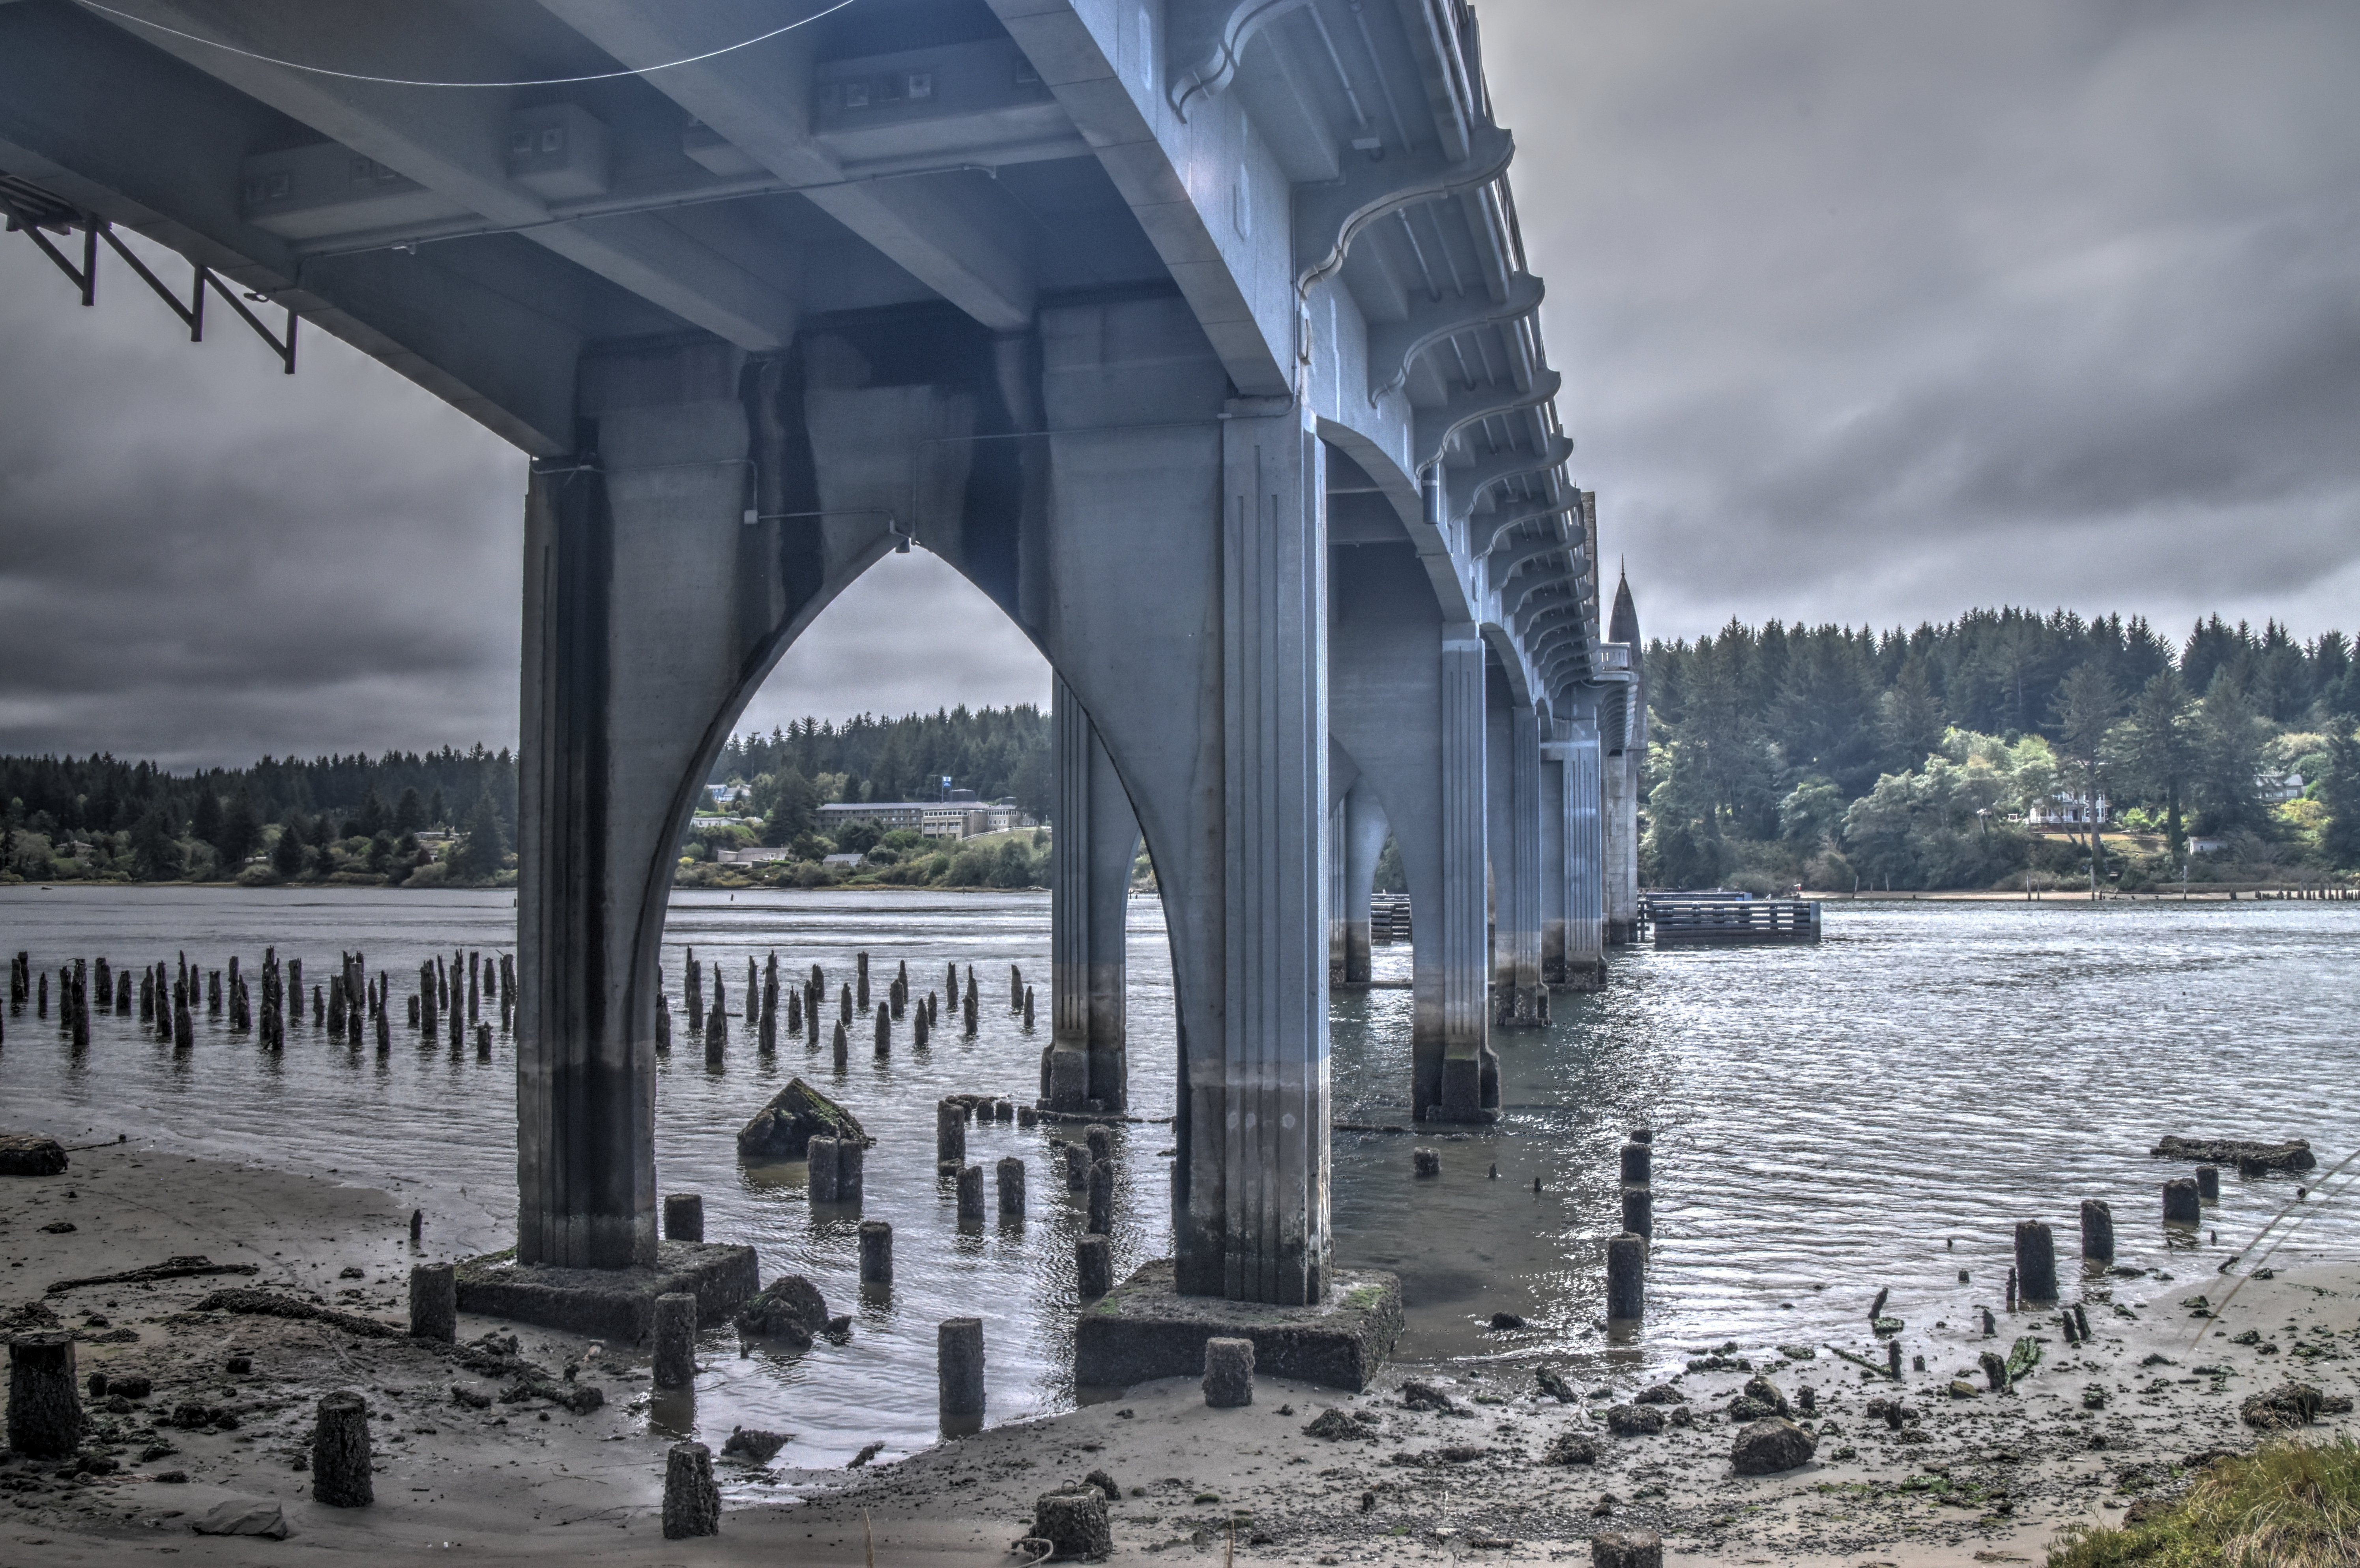

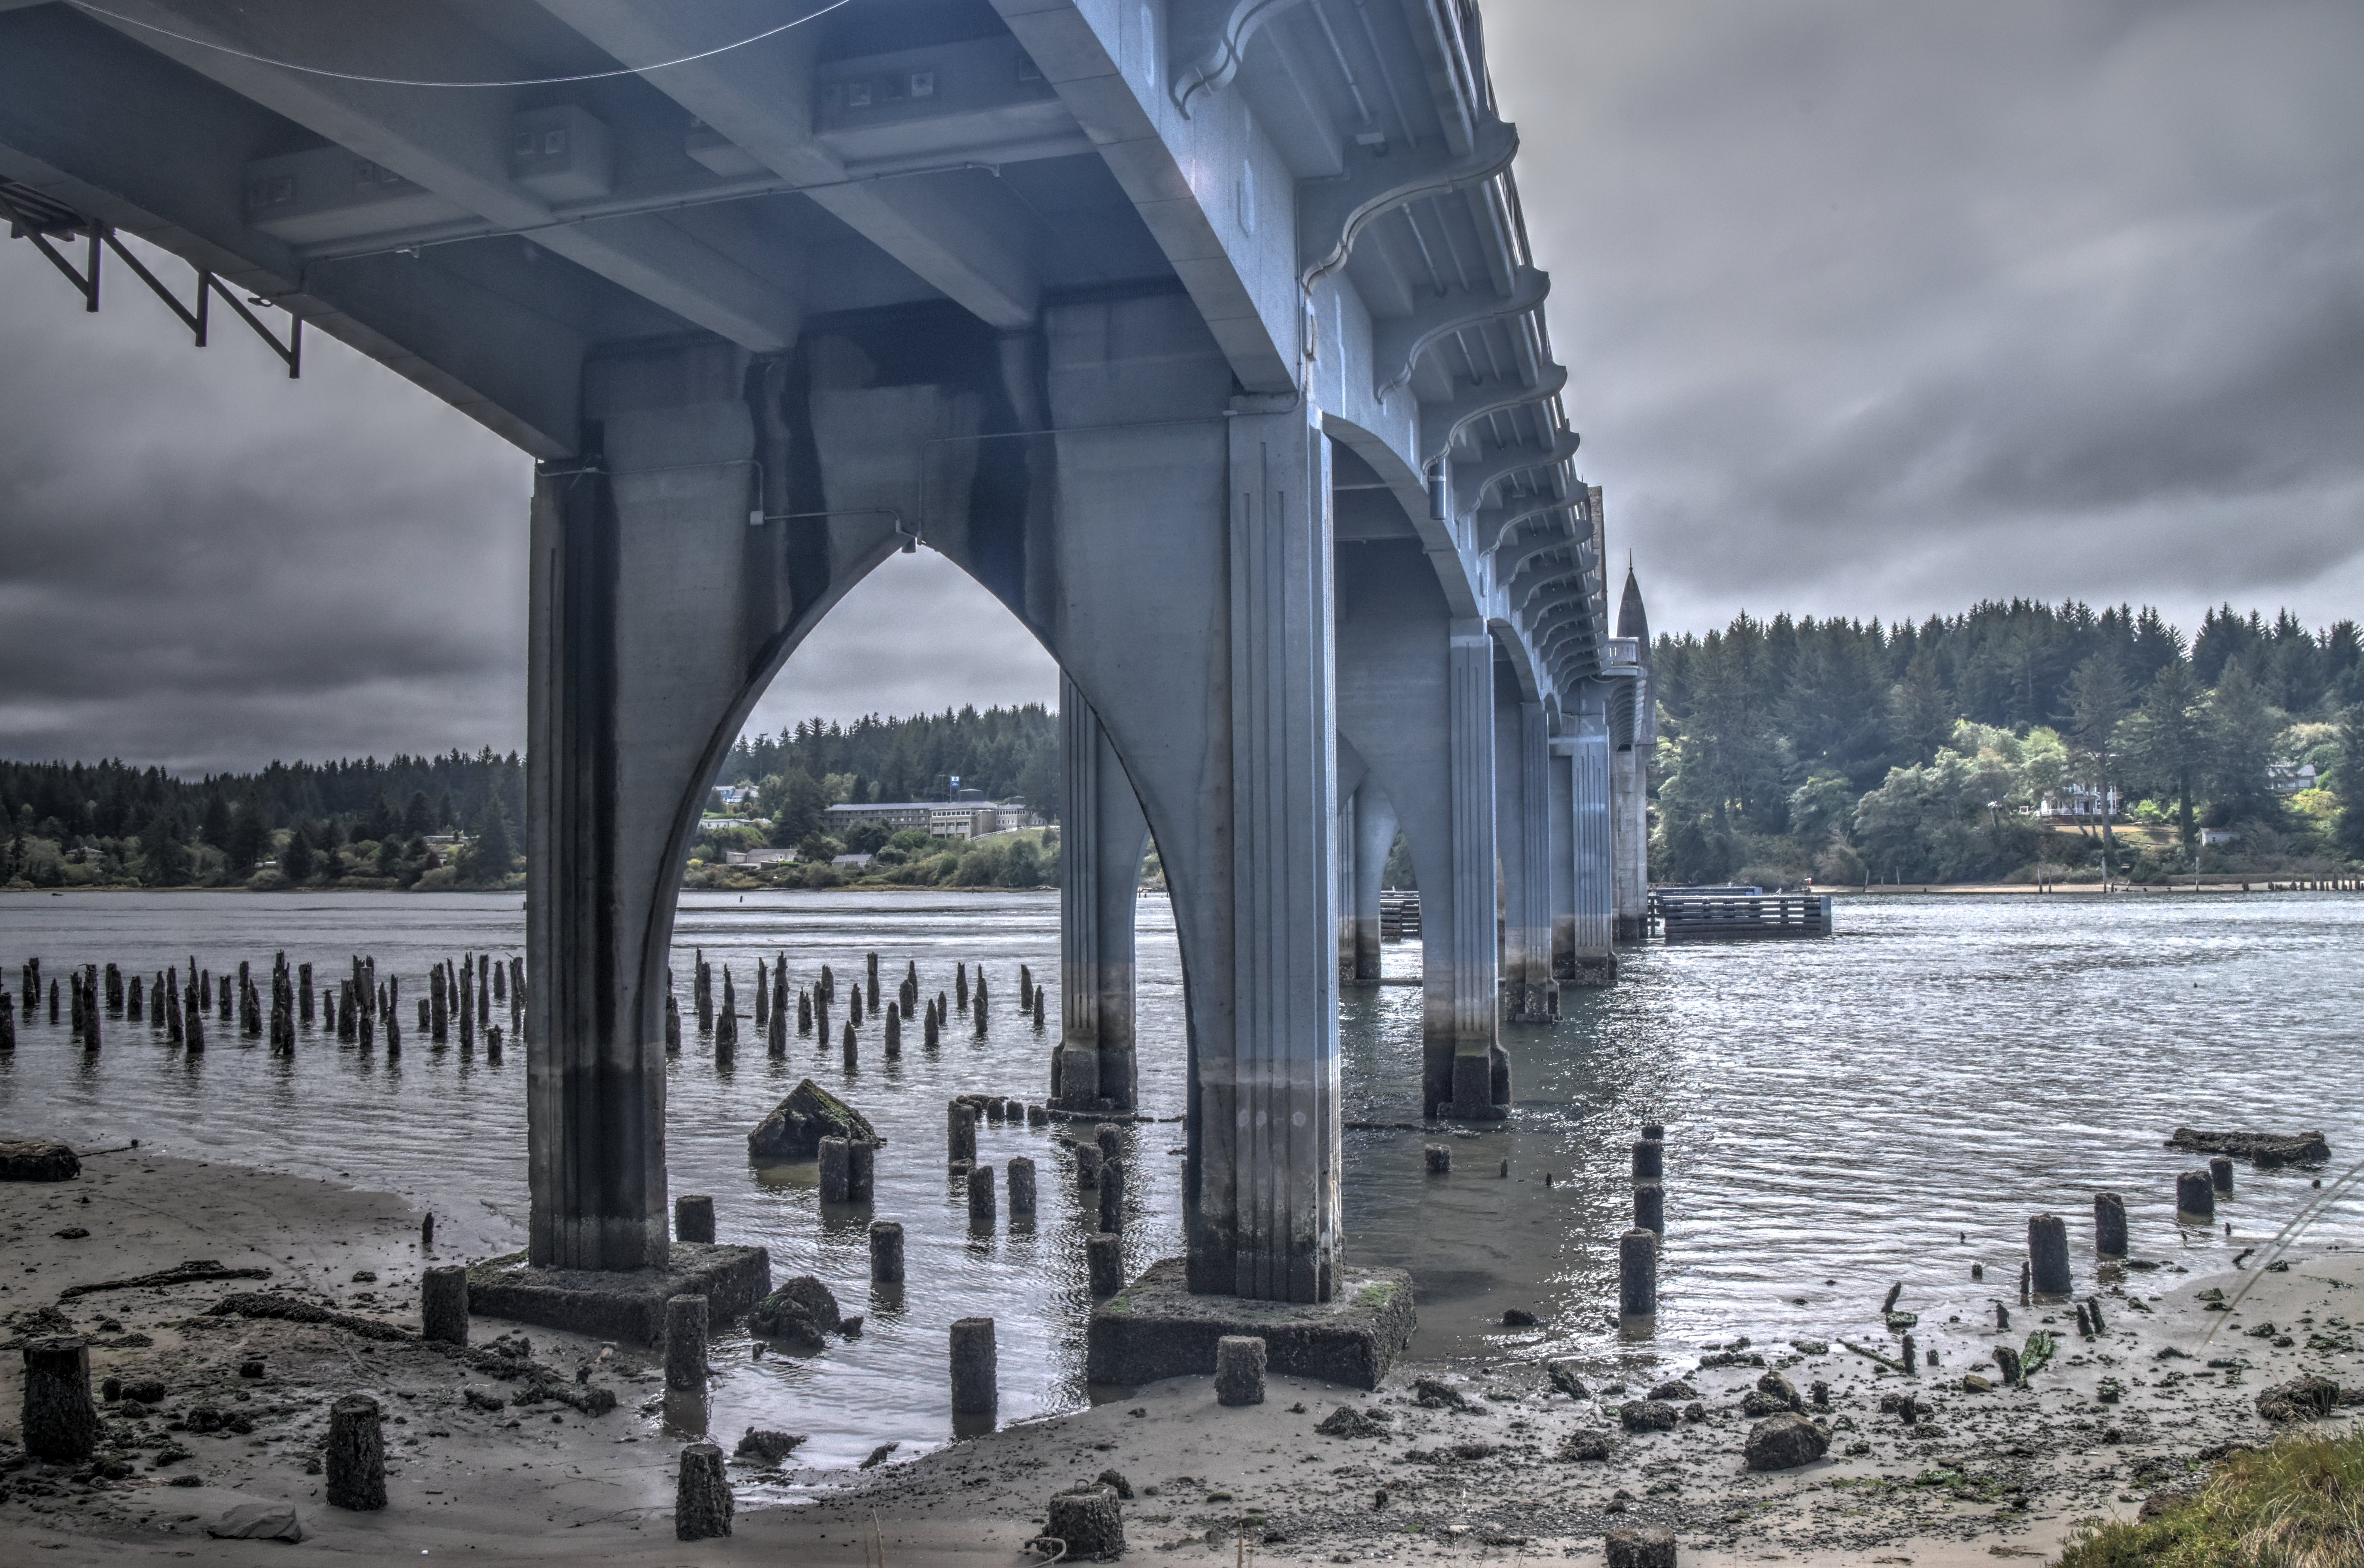


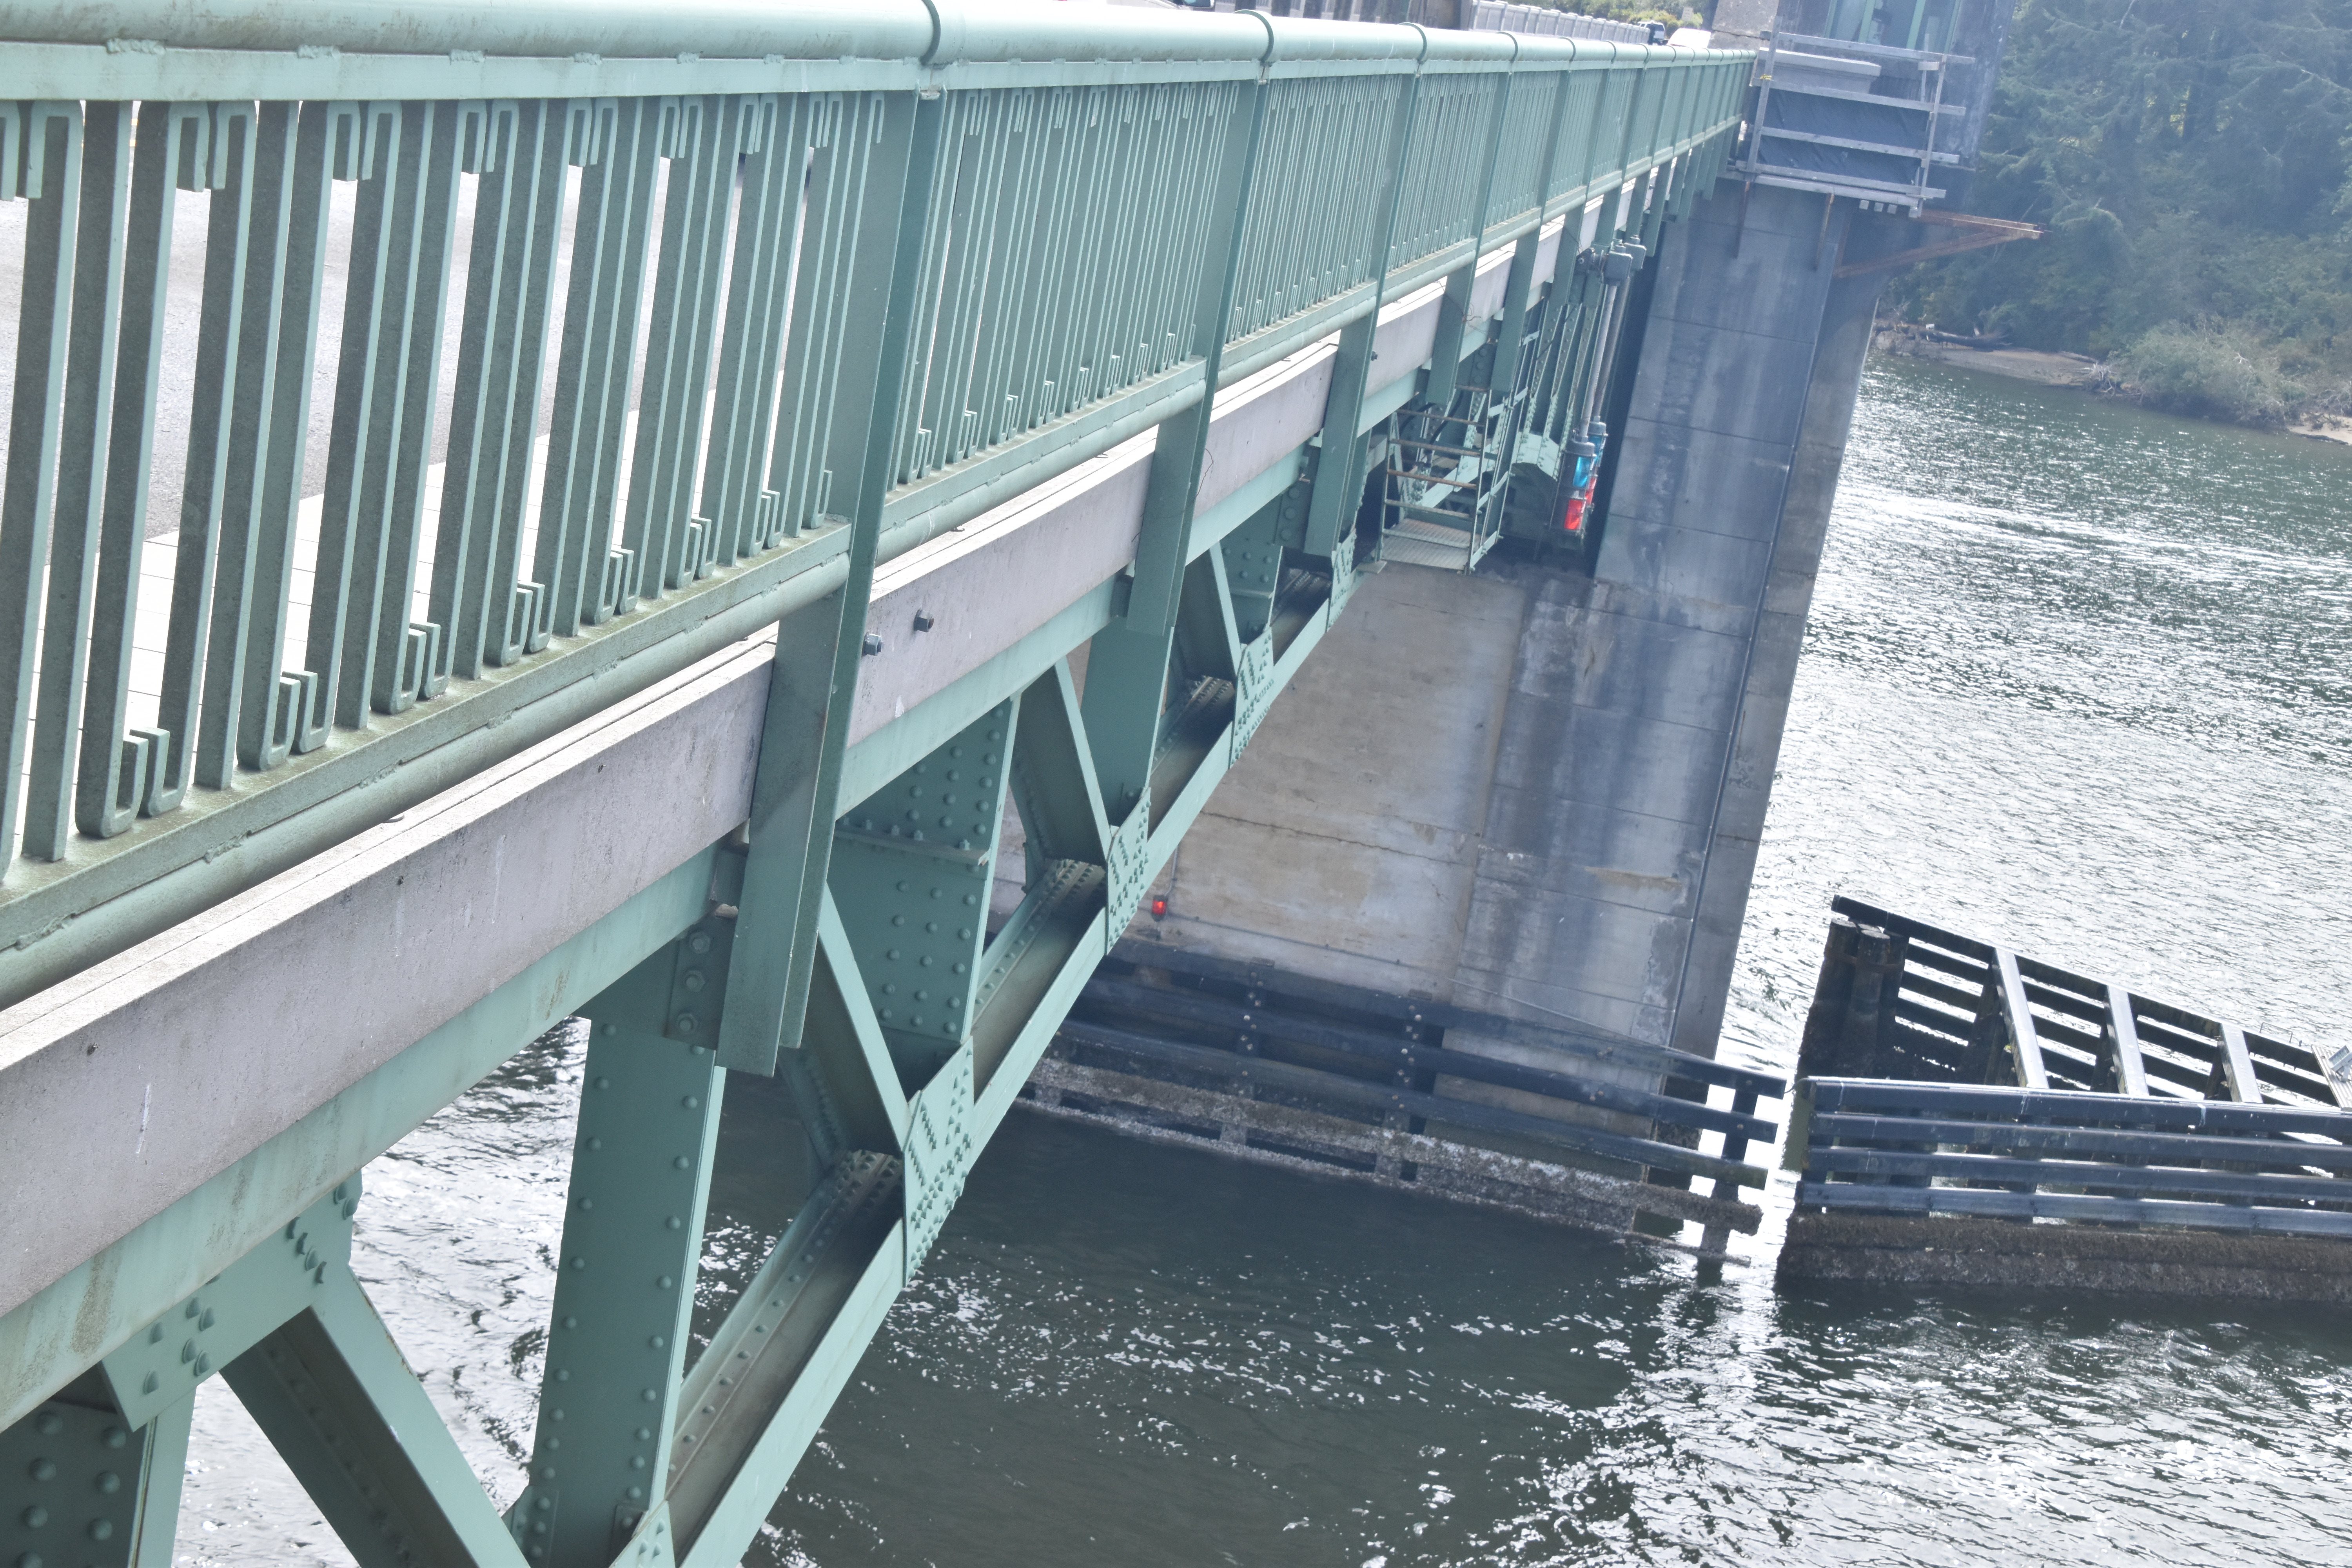
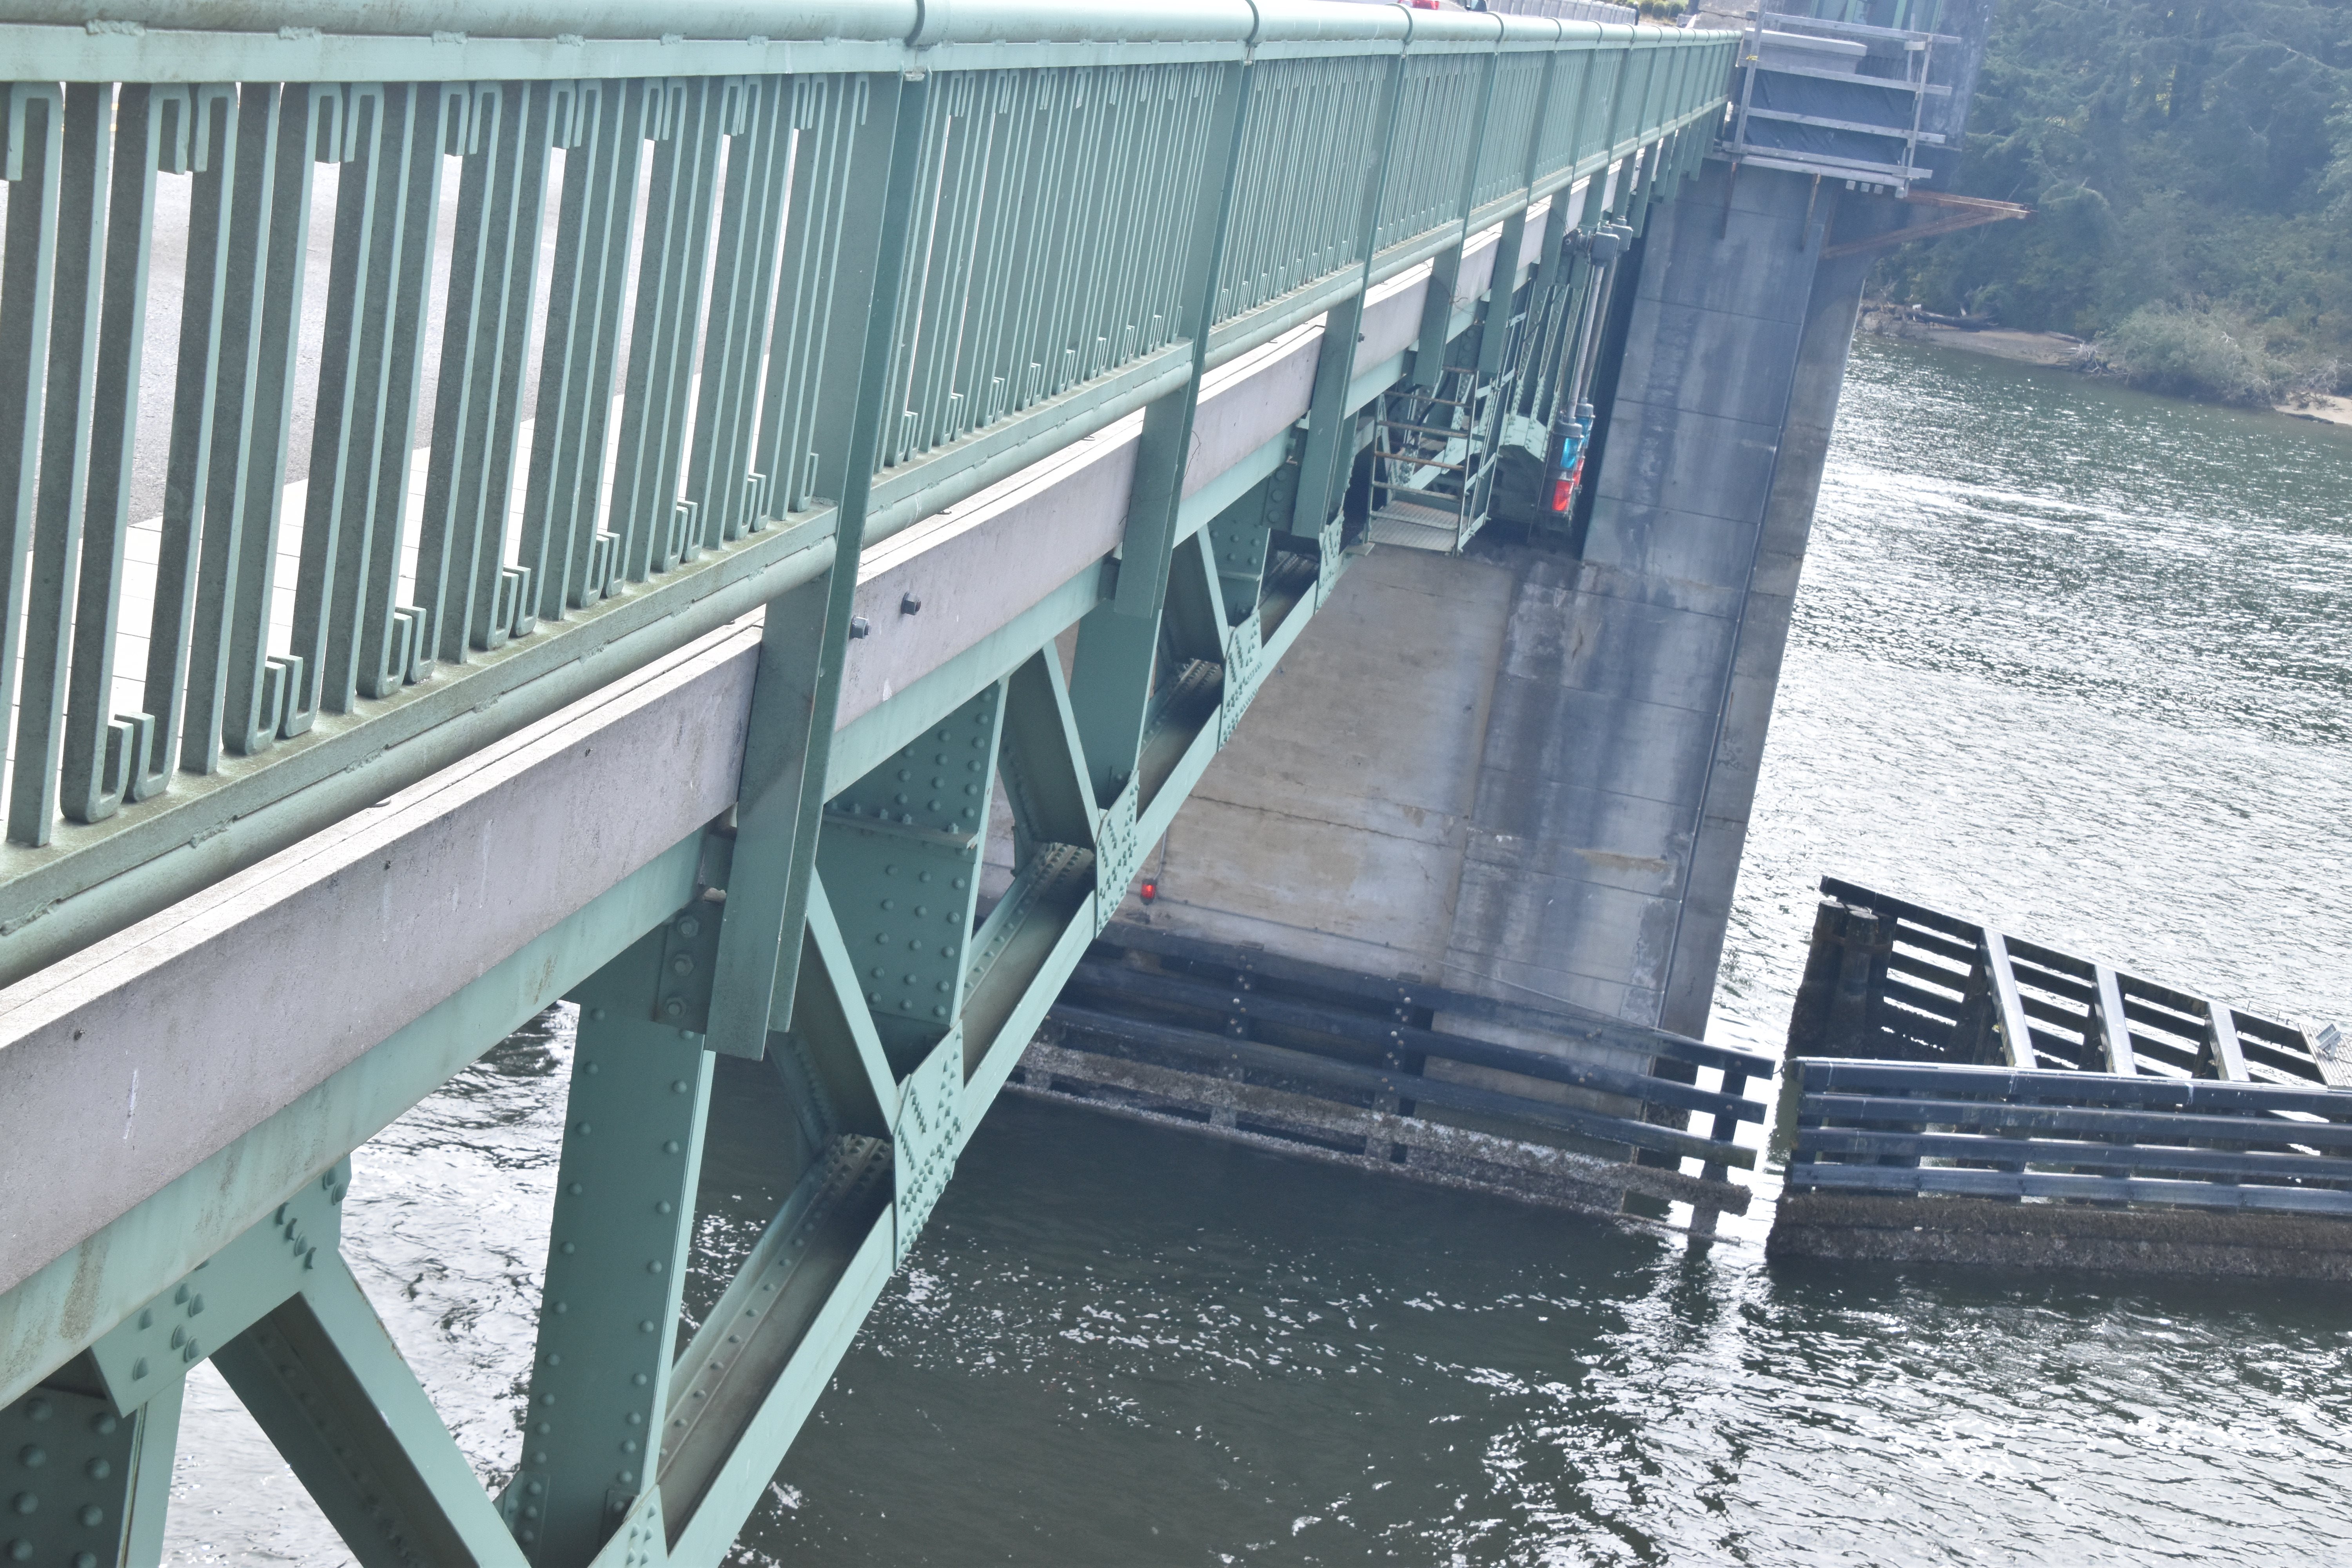
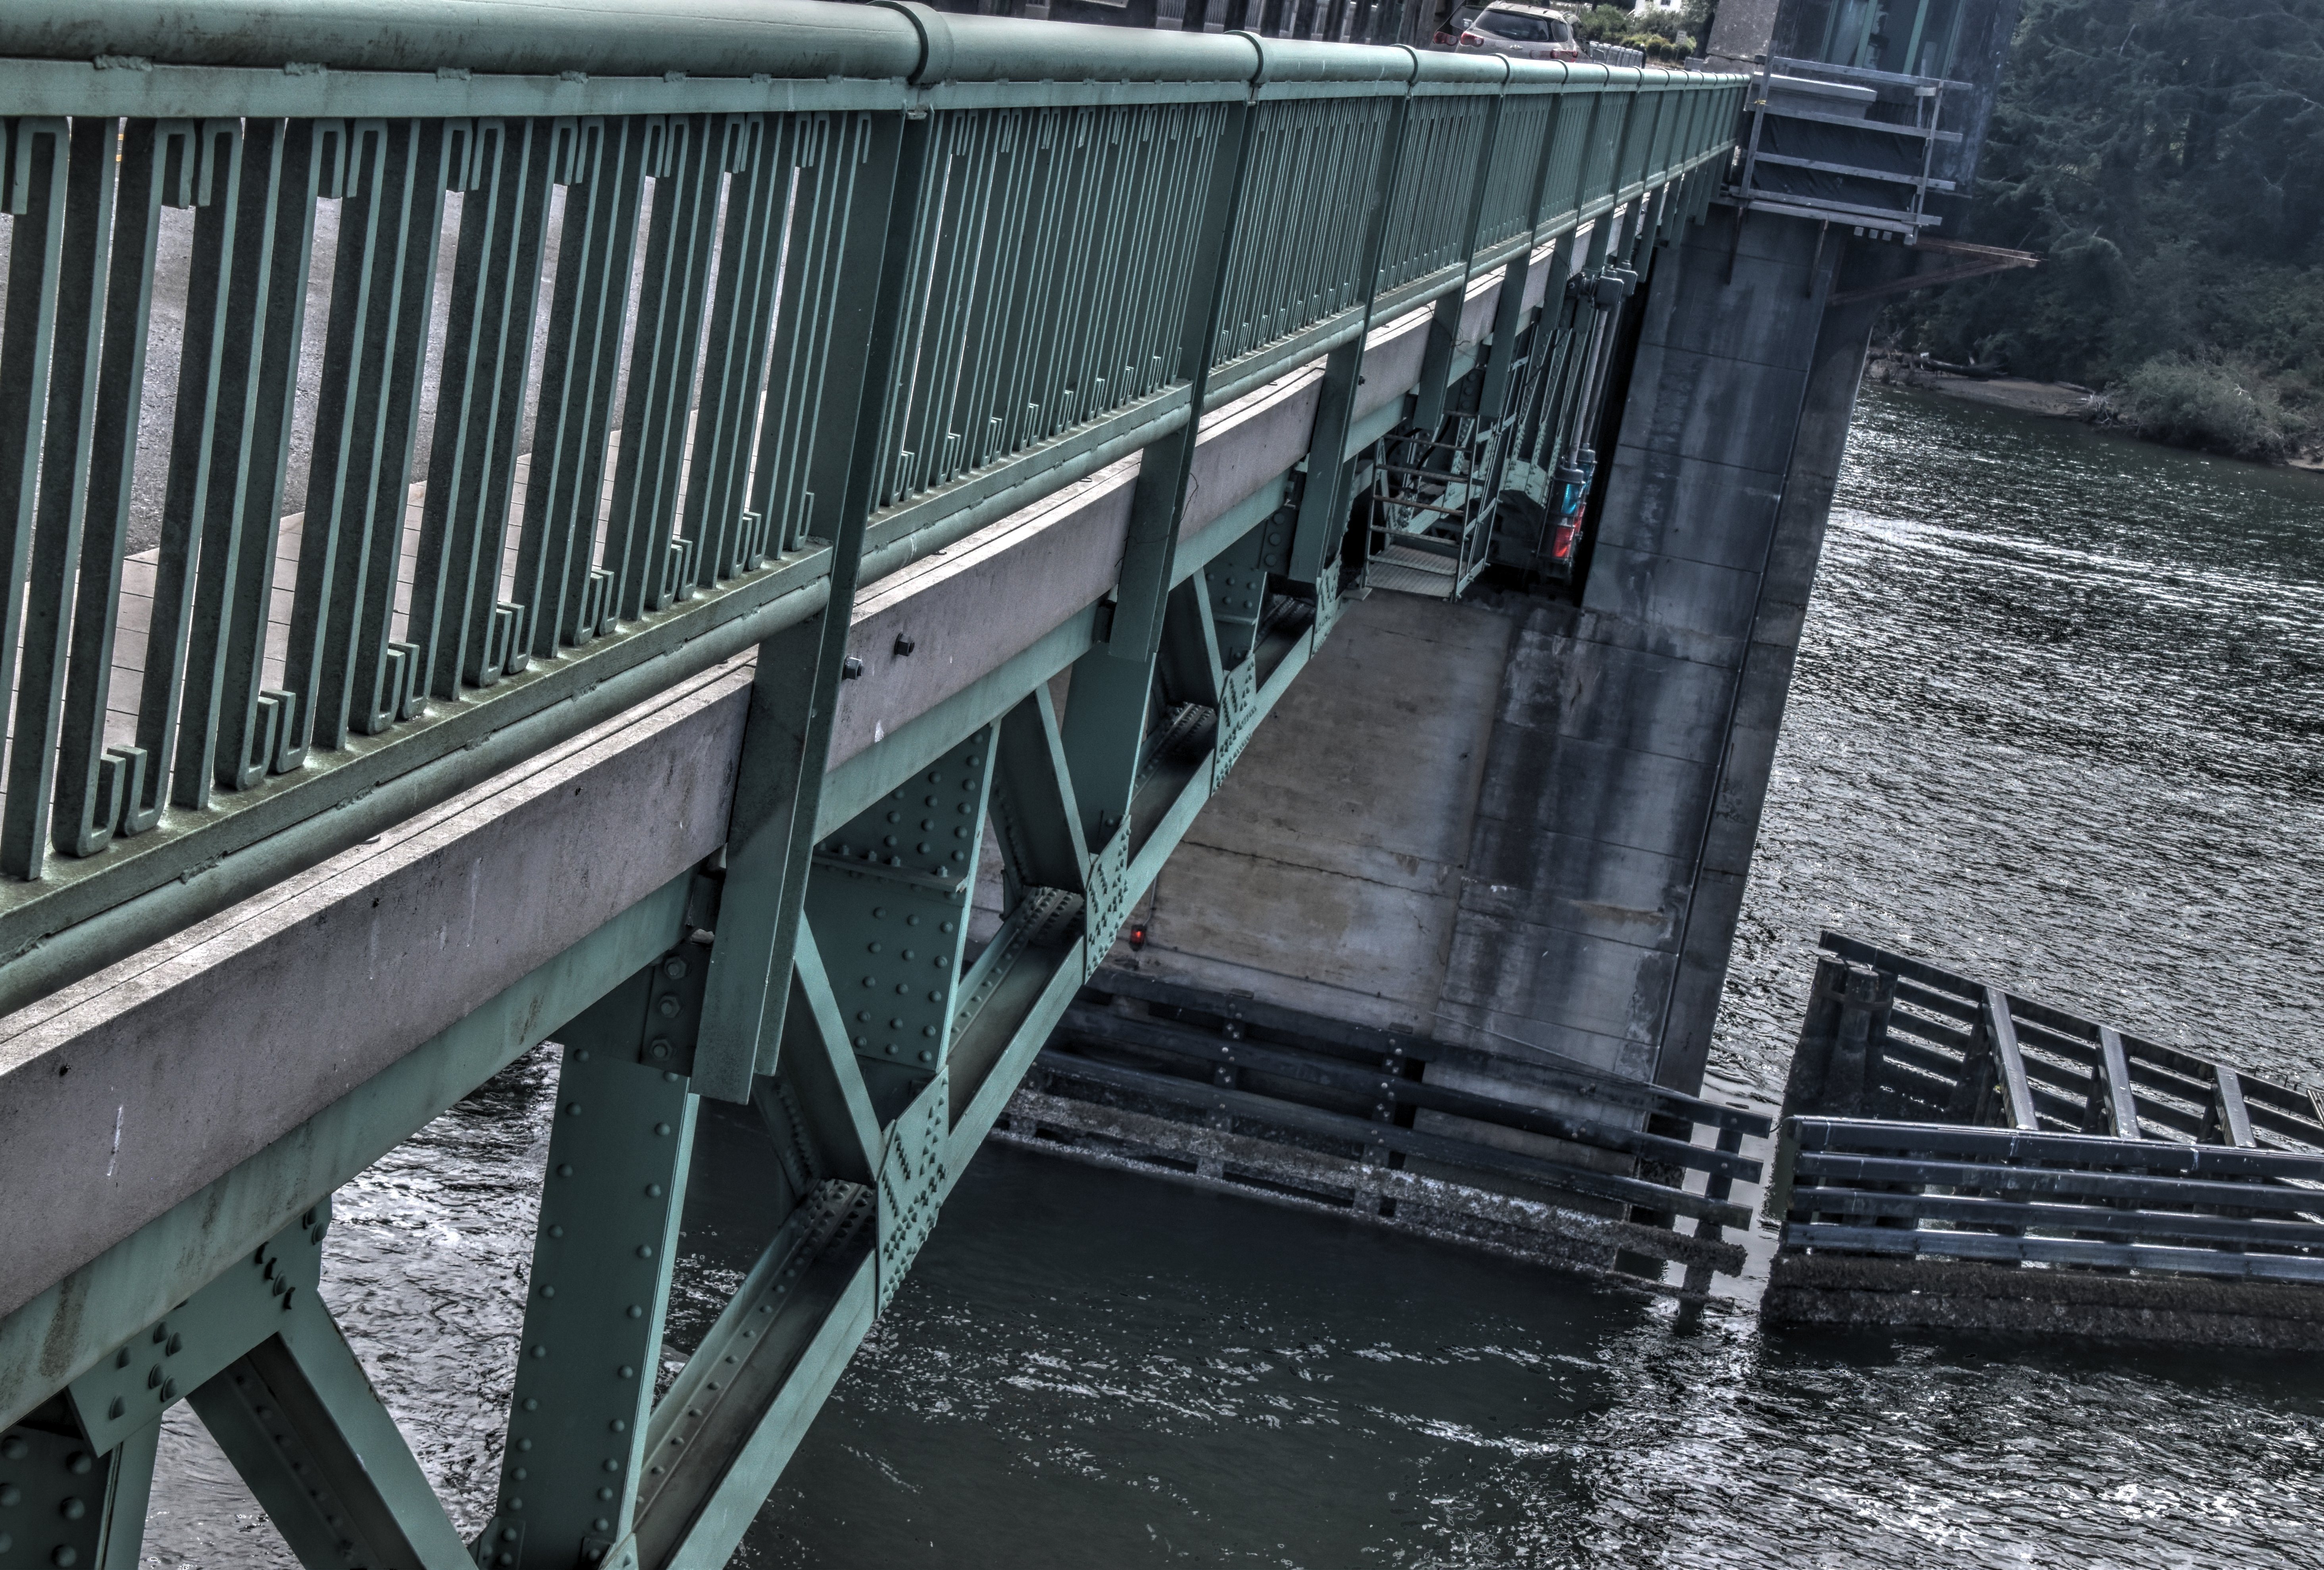
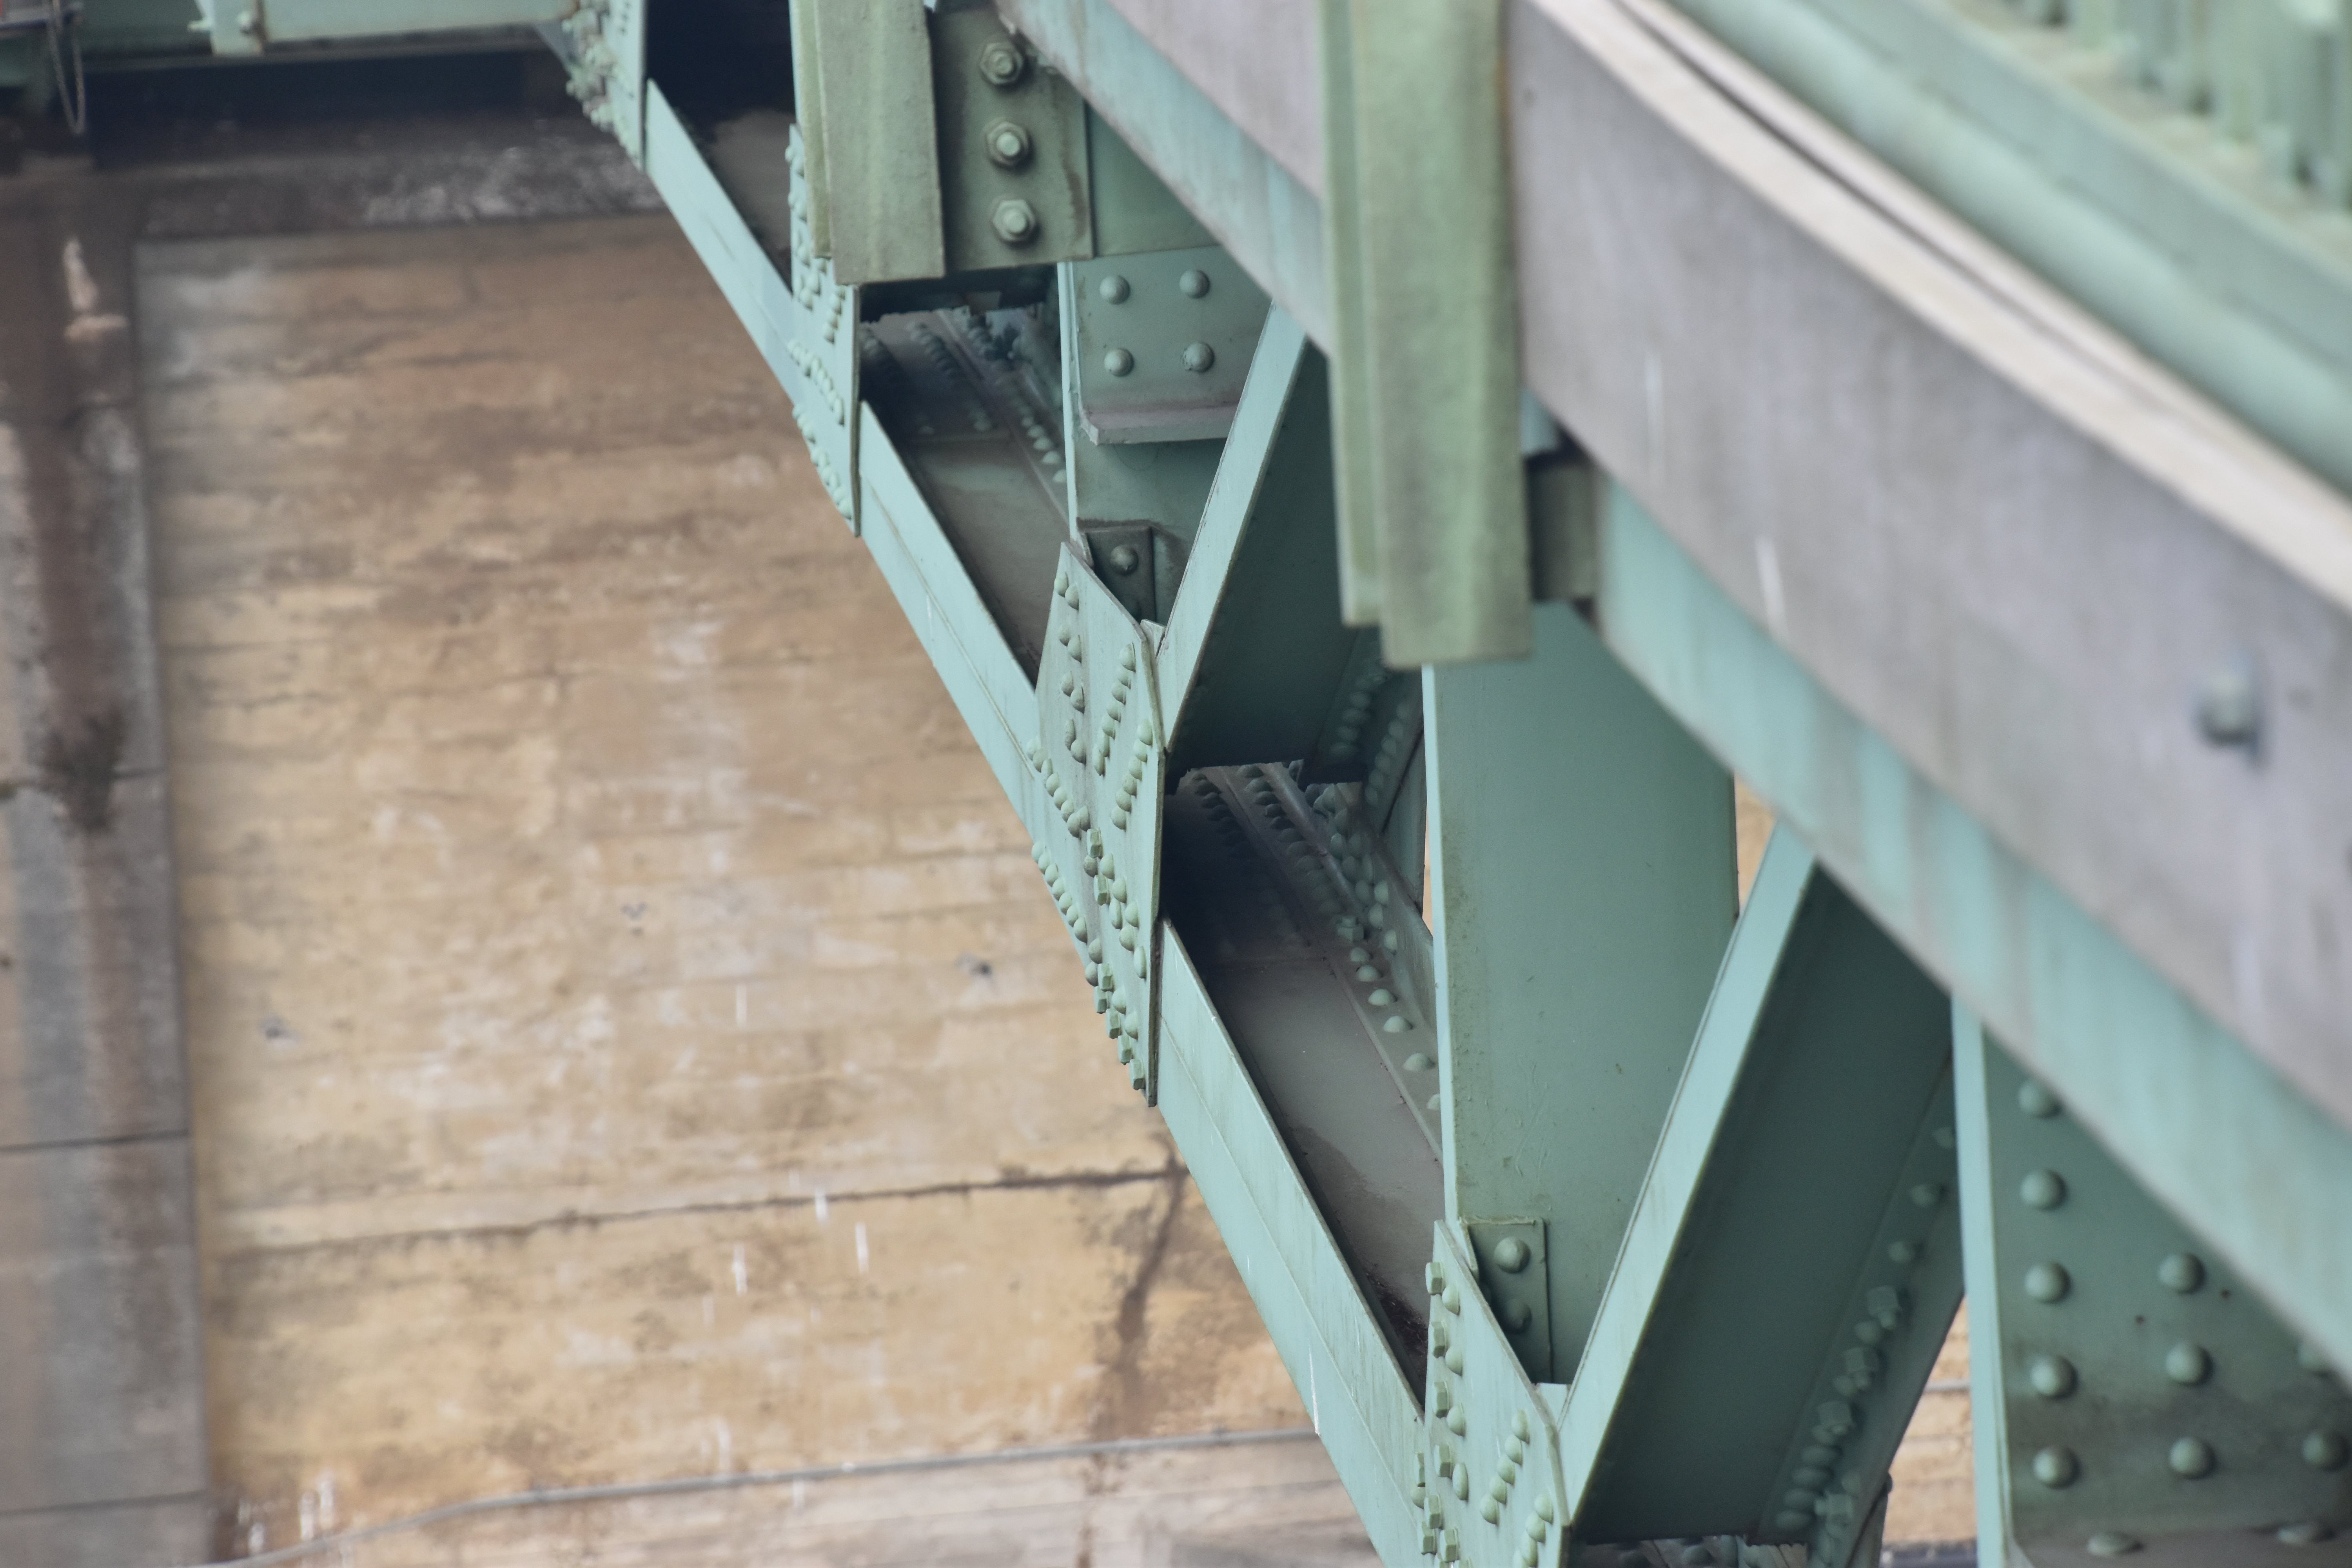
Views under approach spans.
![]()


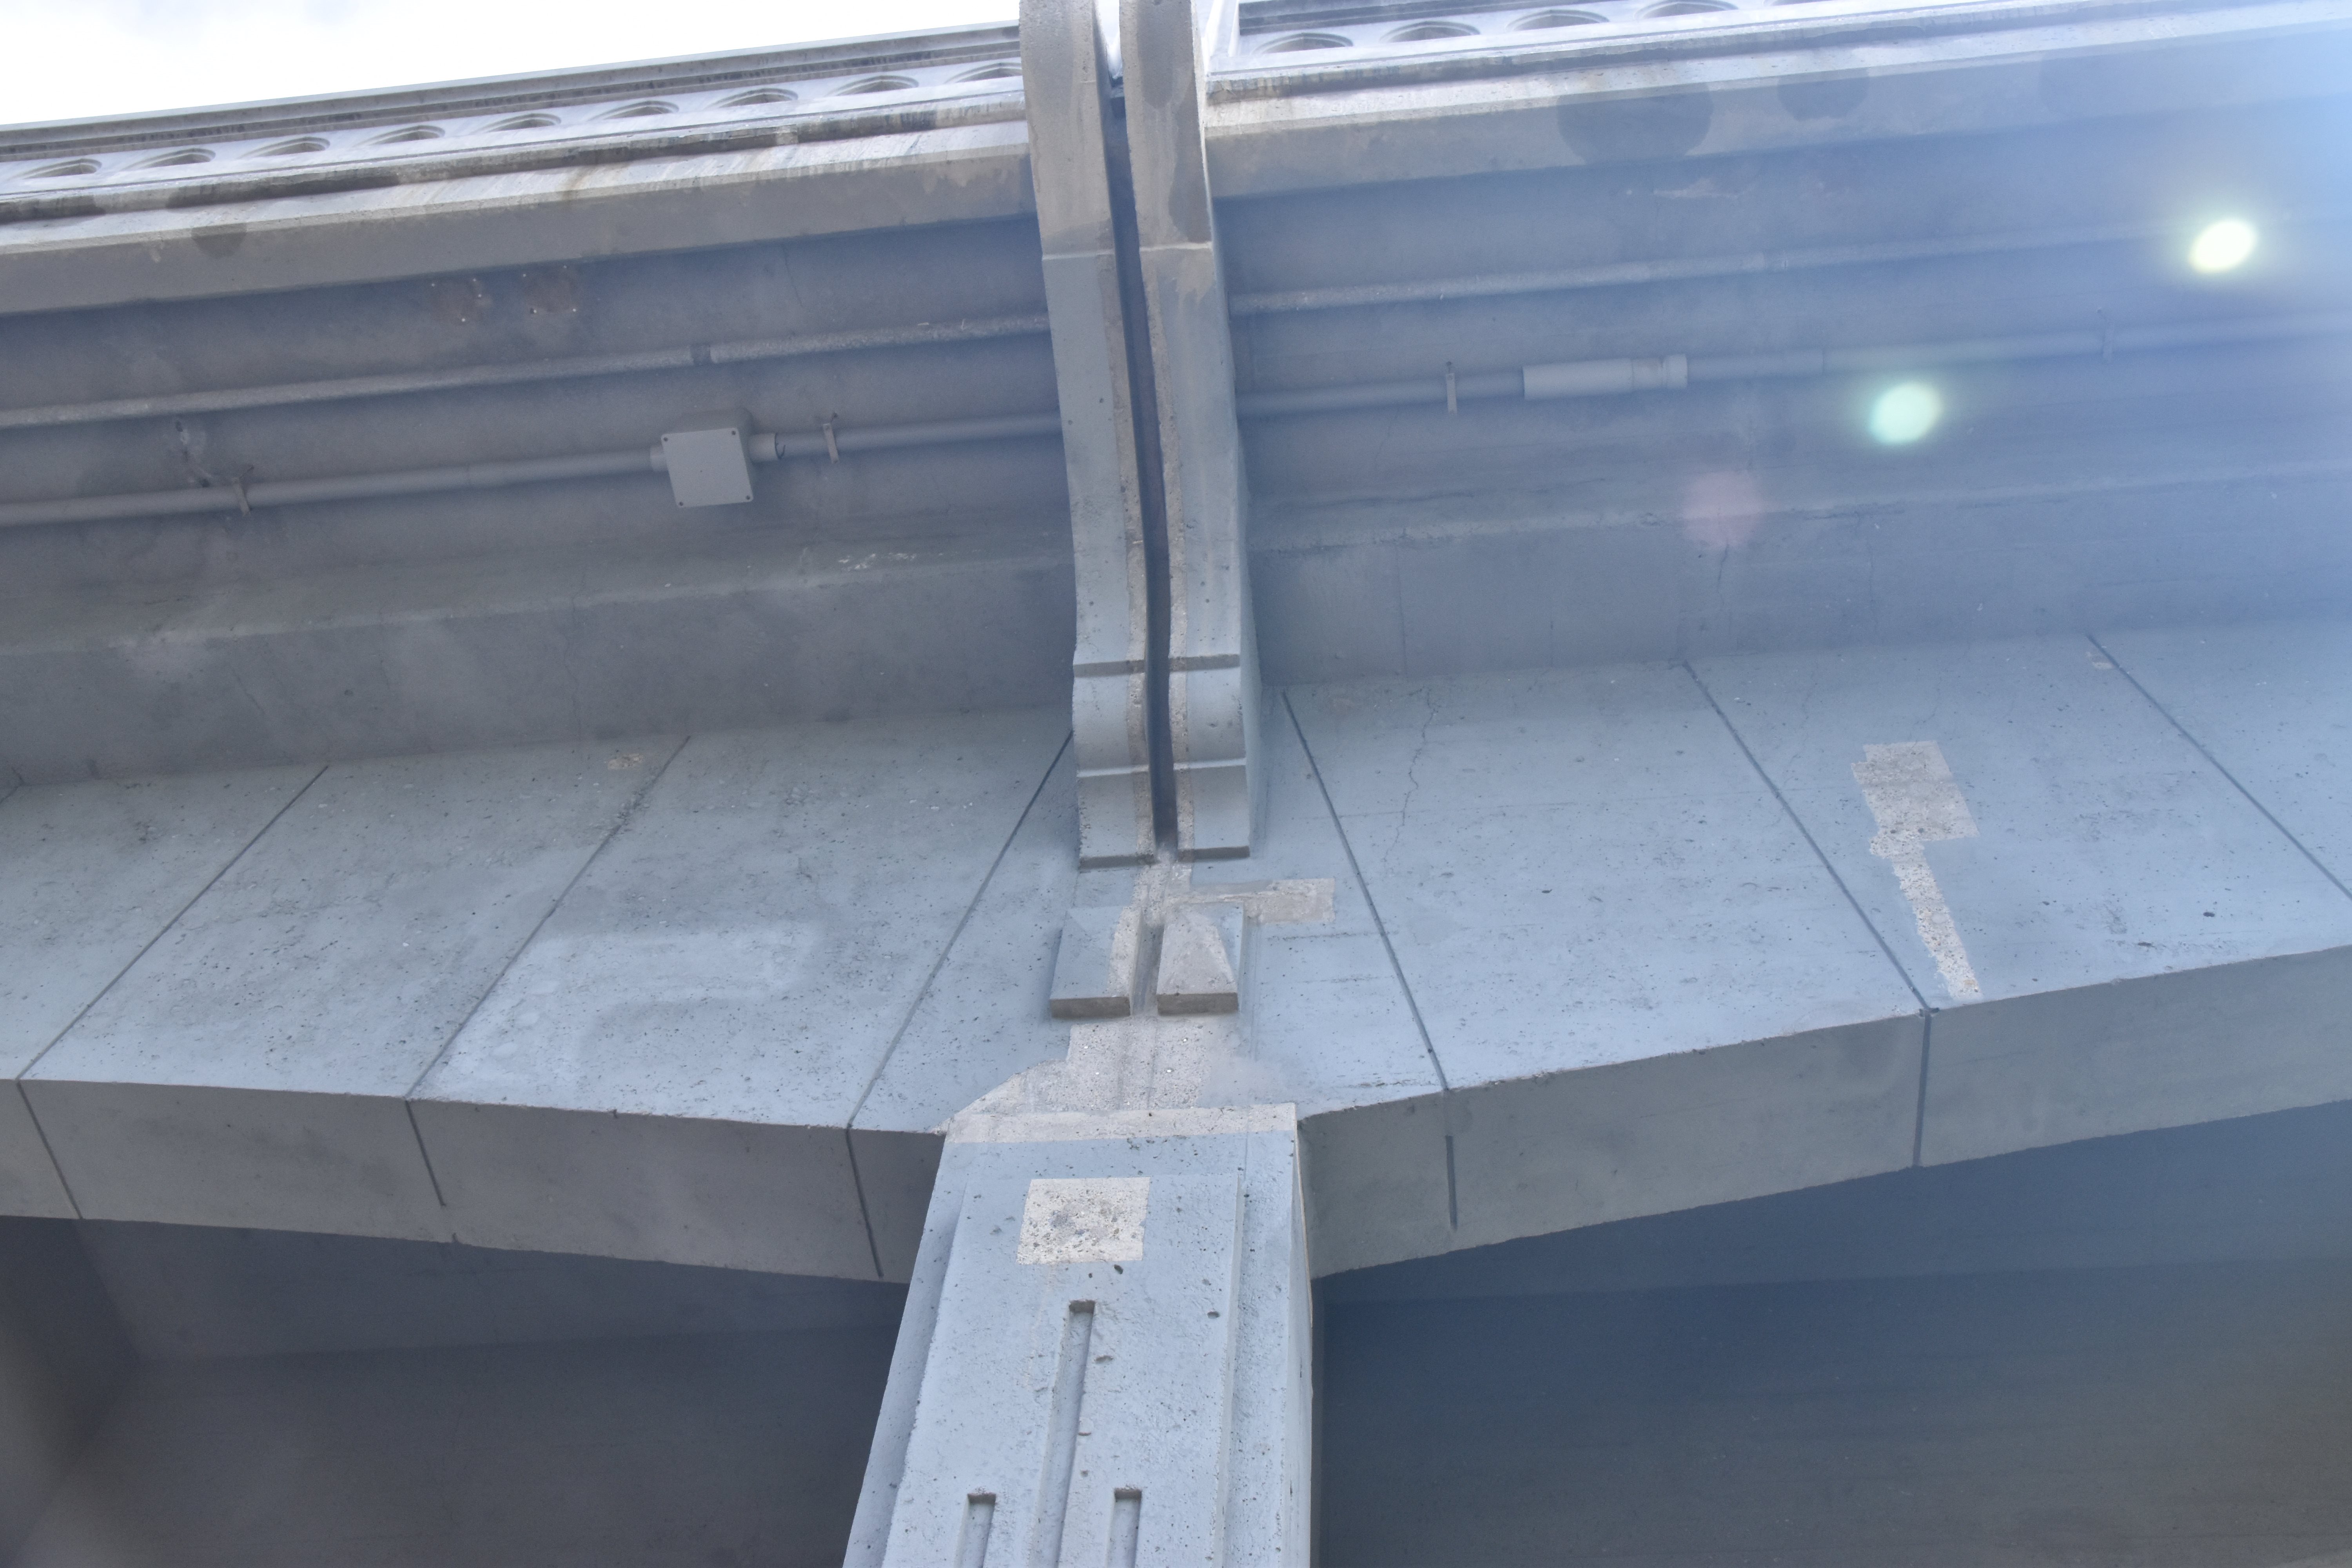

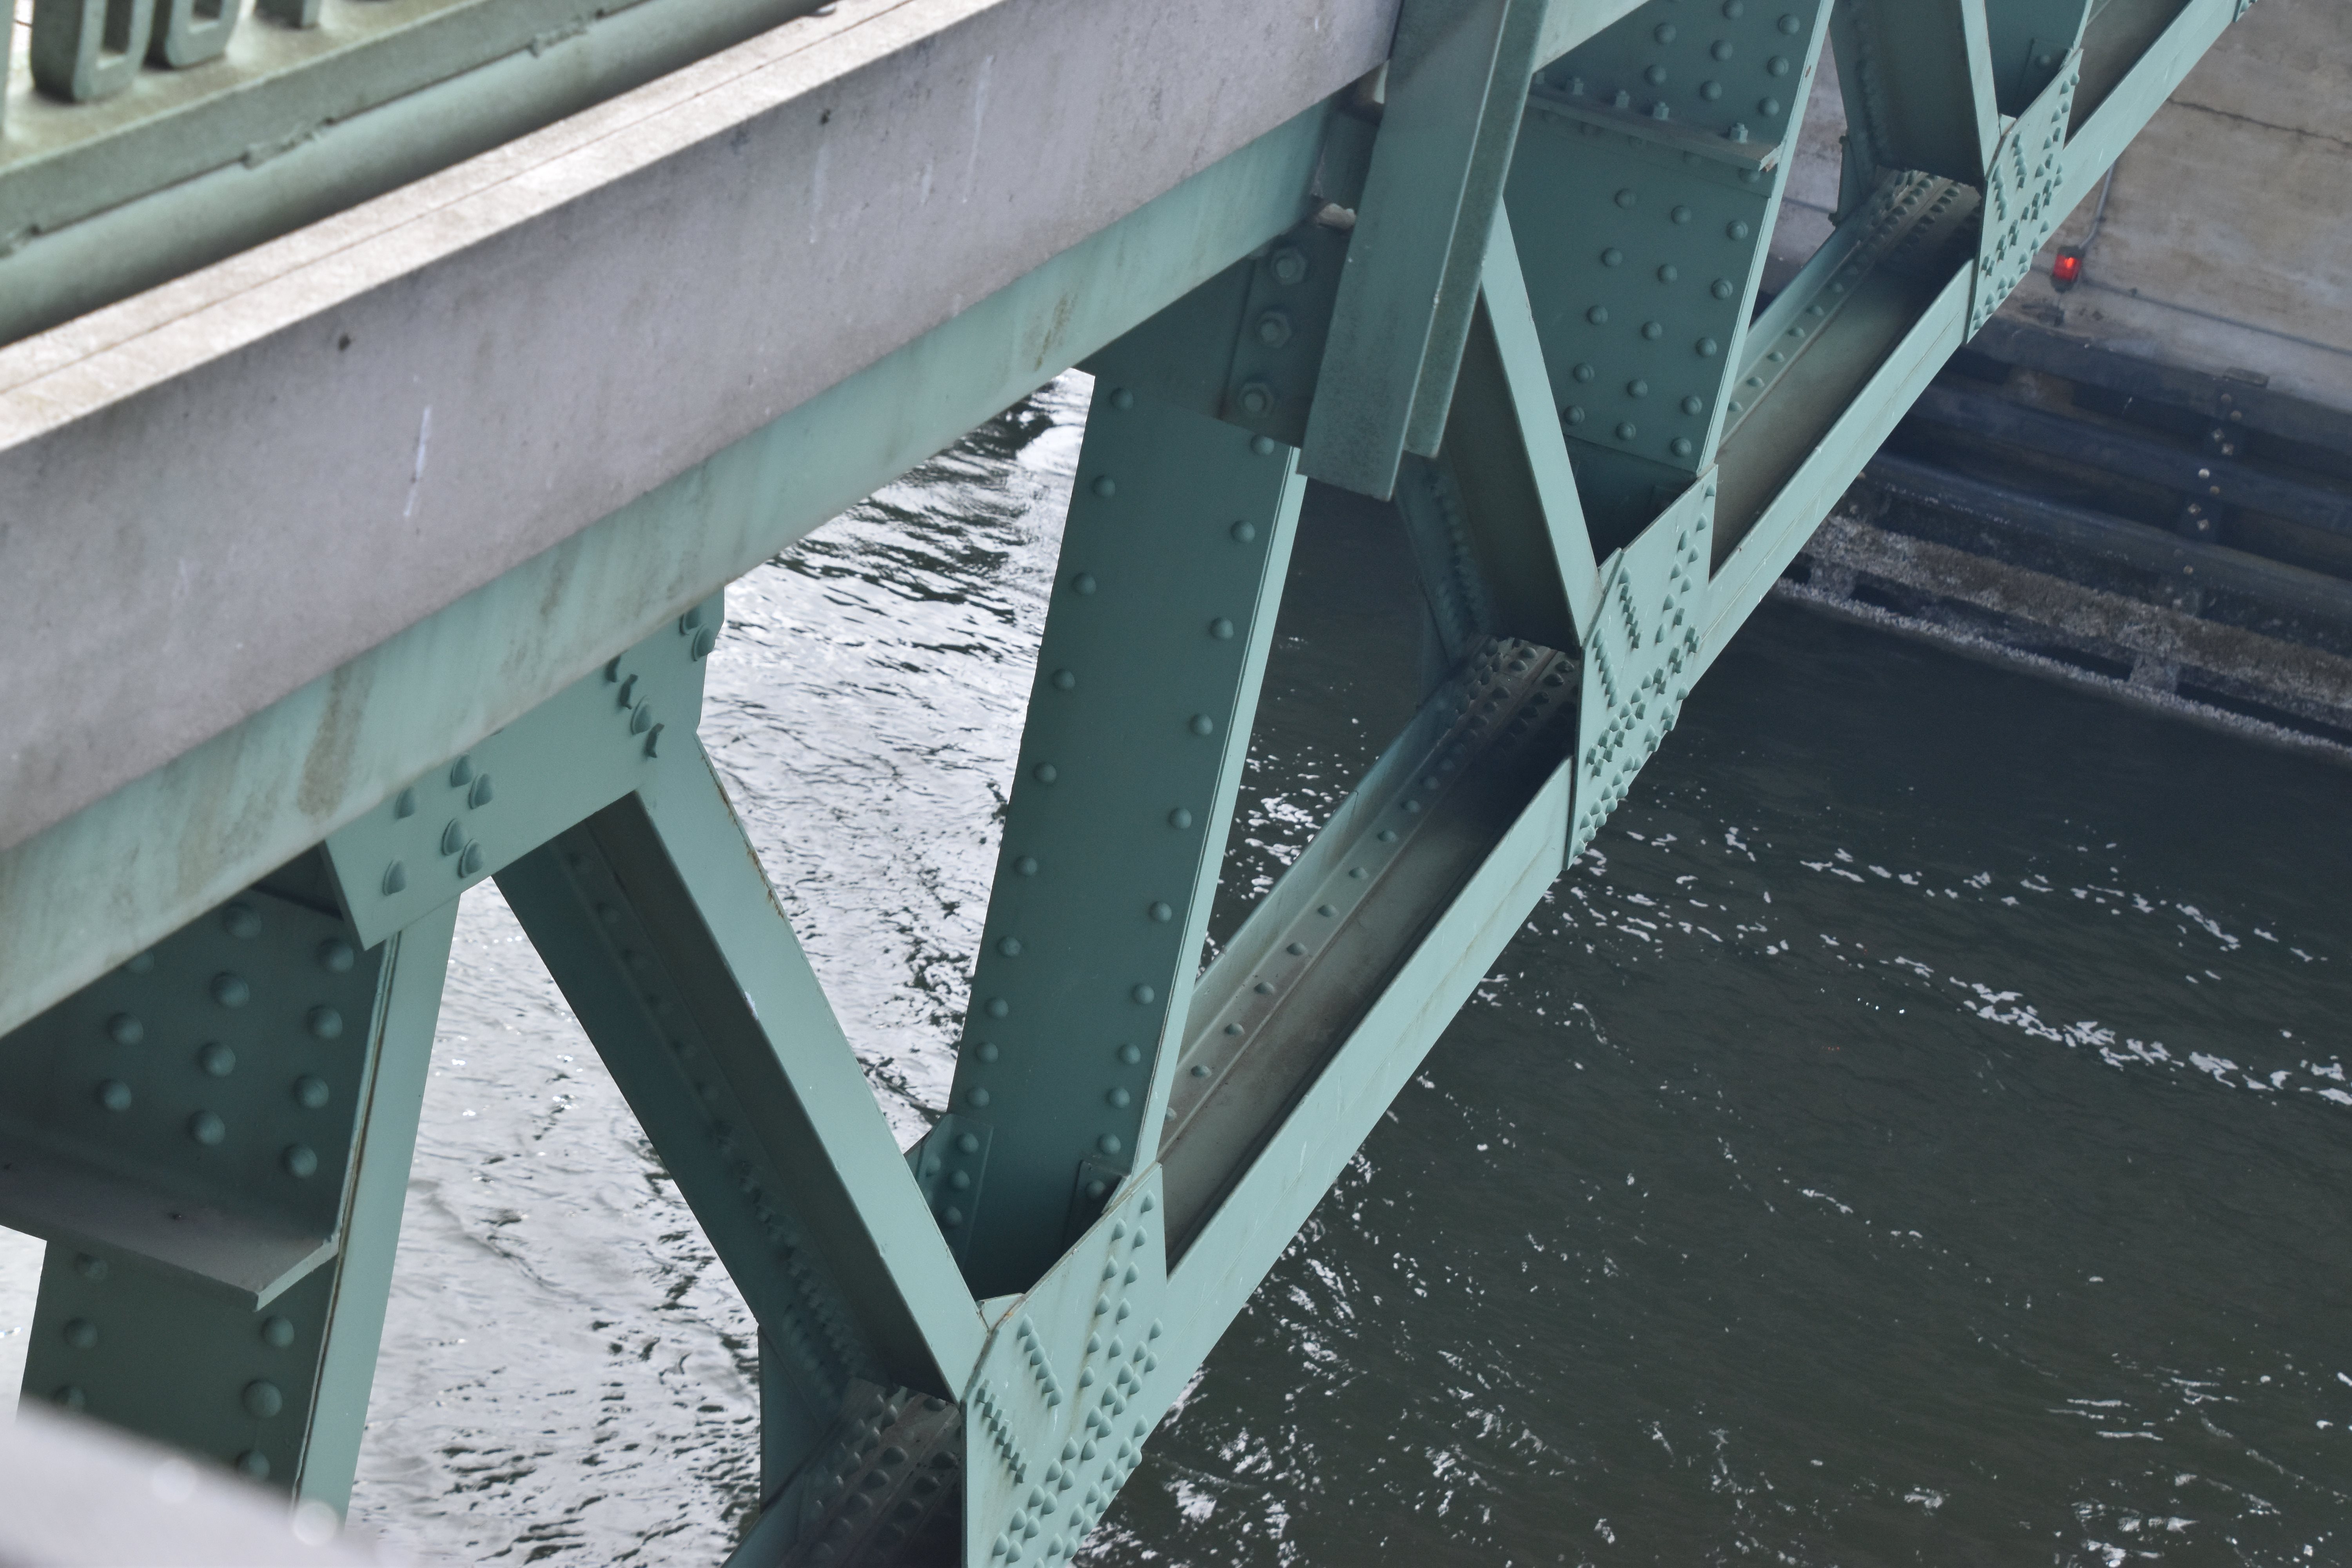
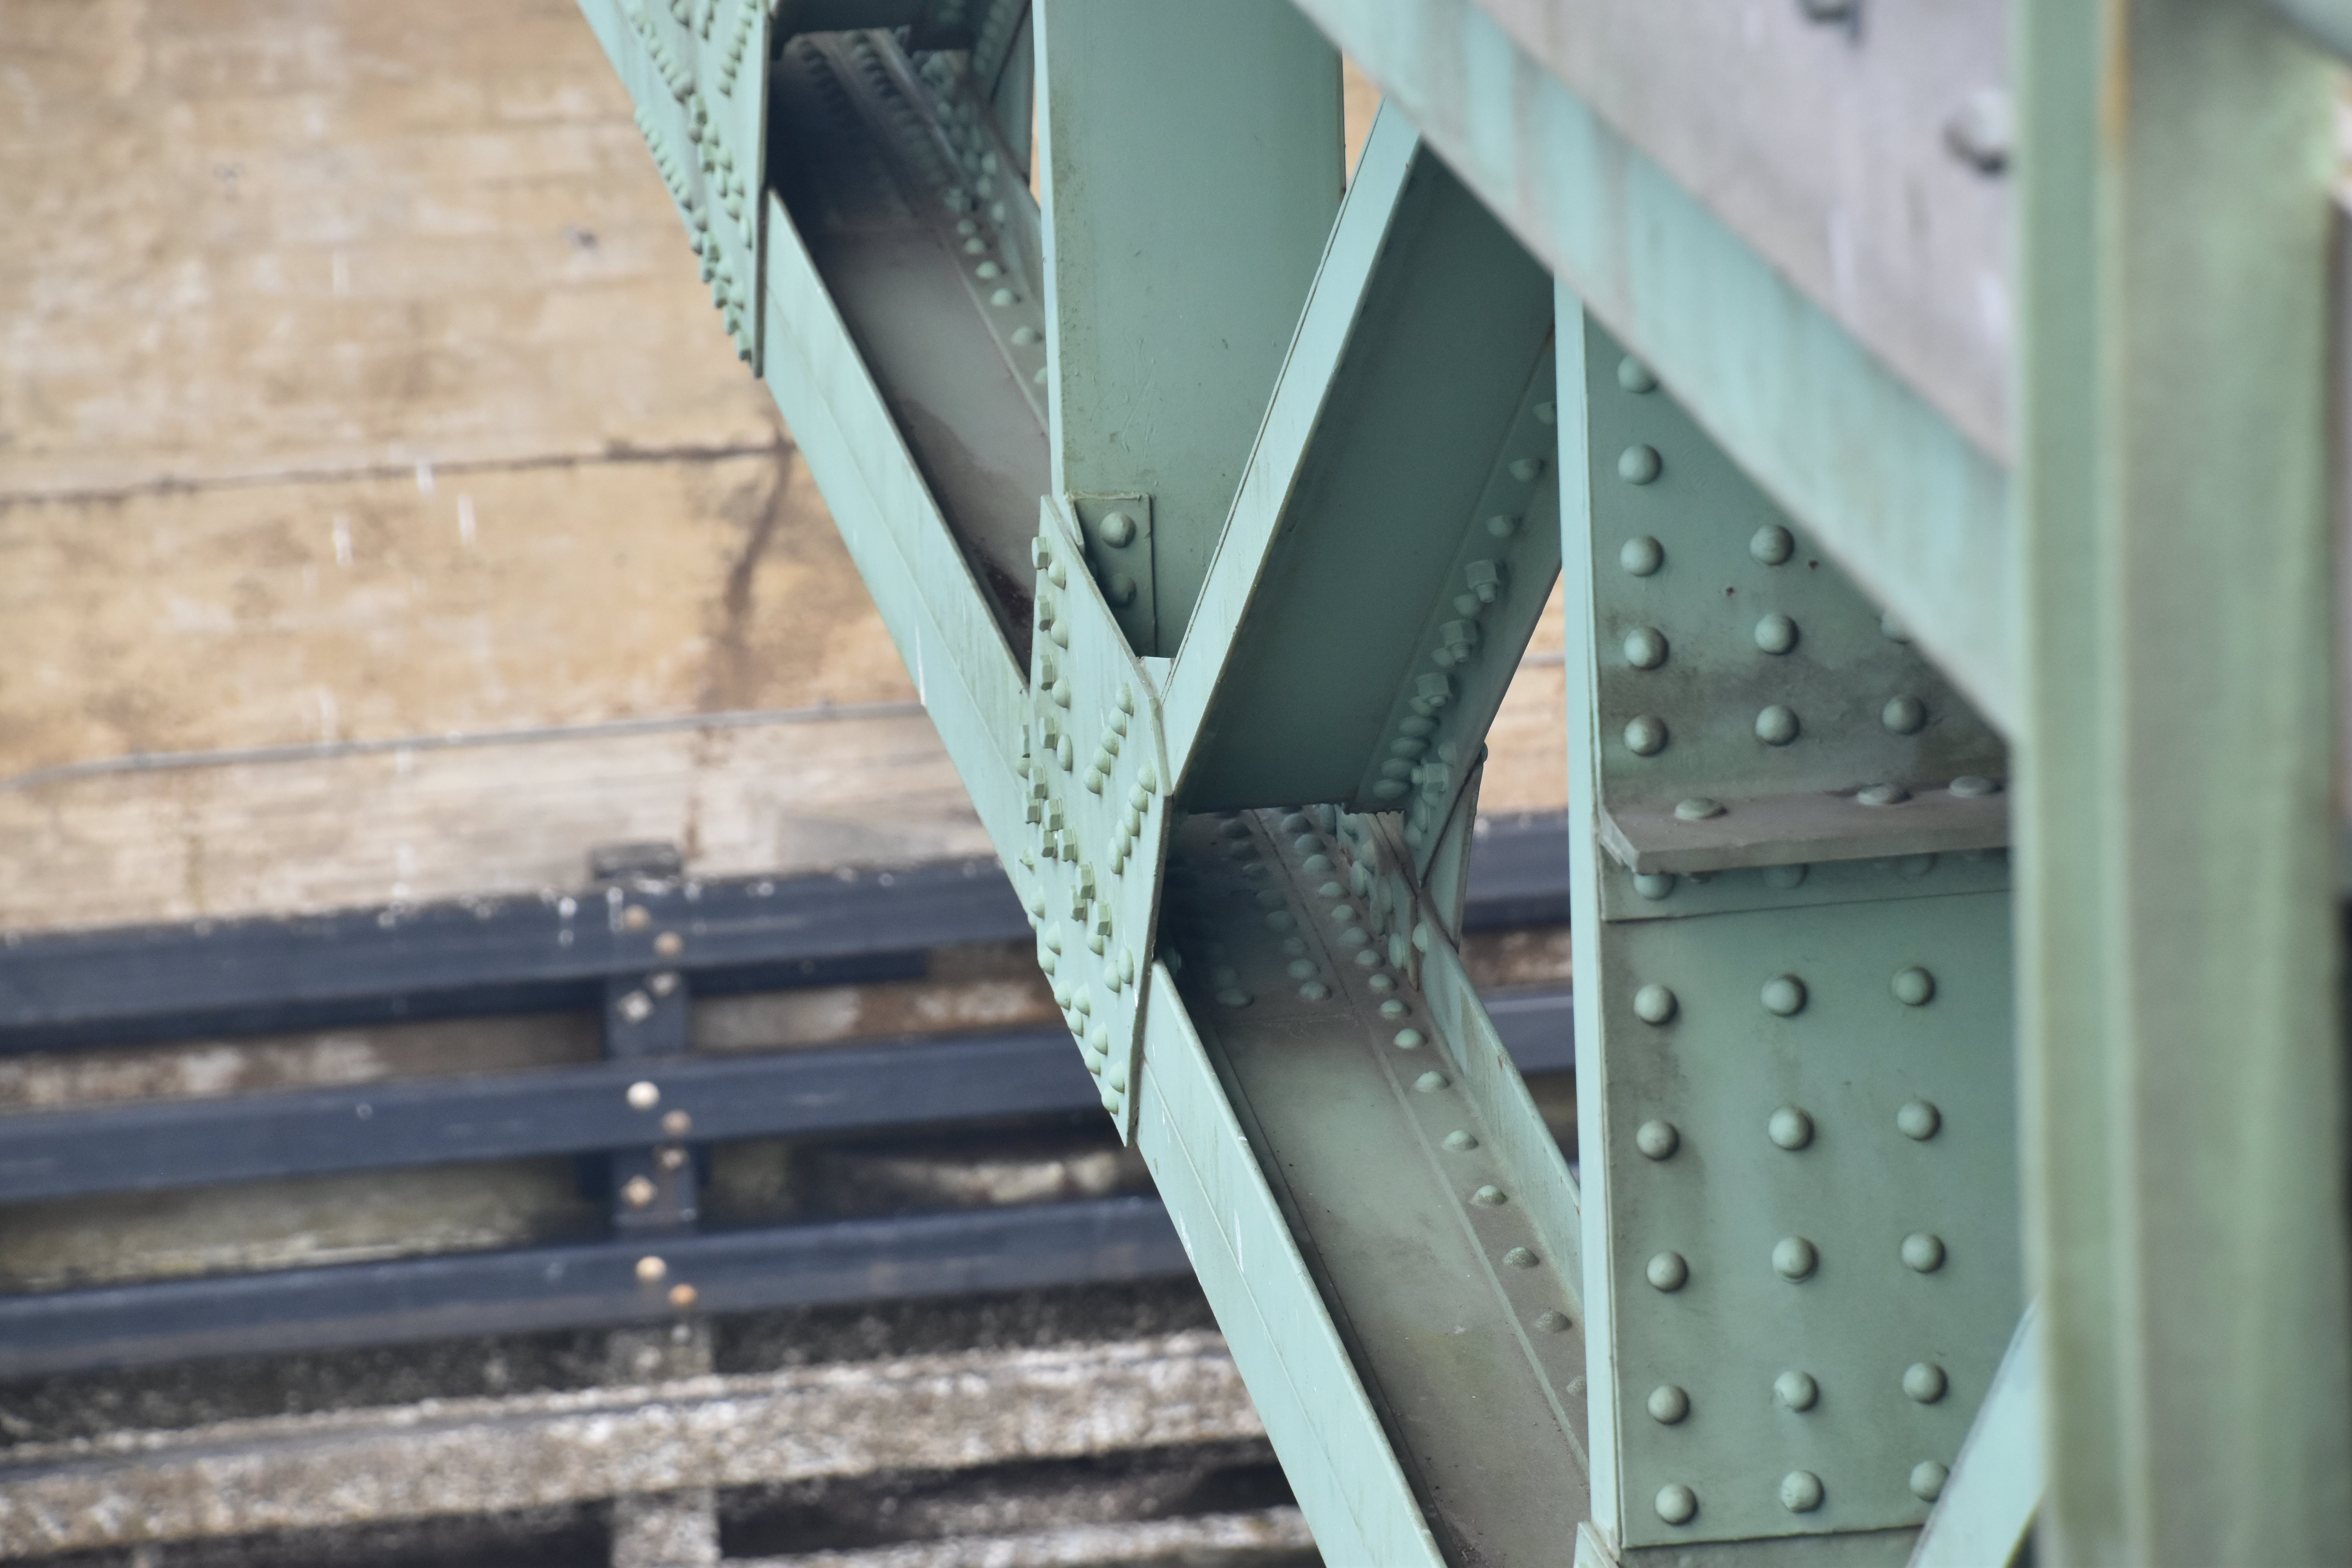
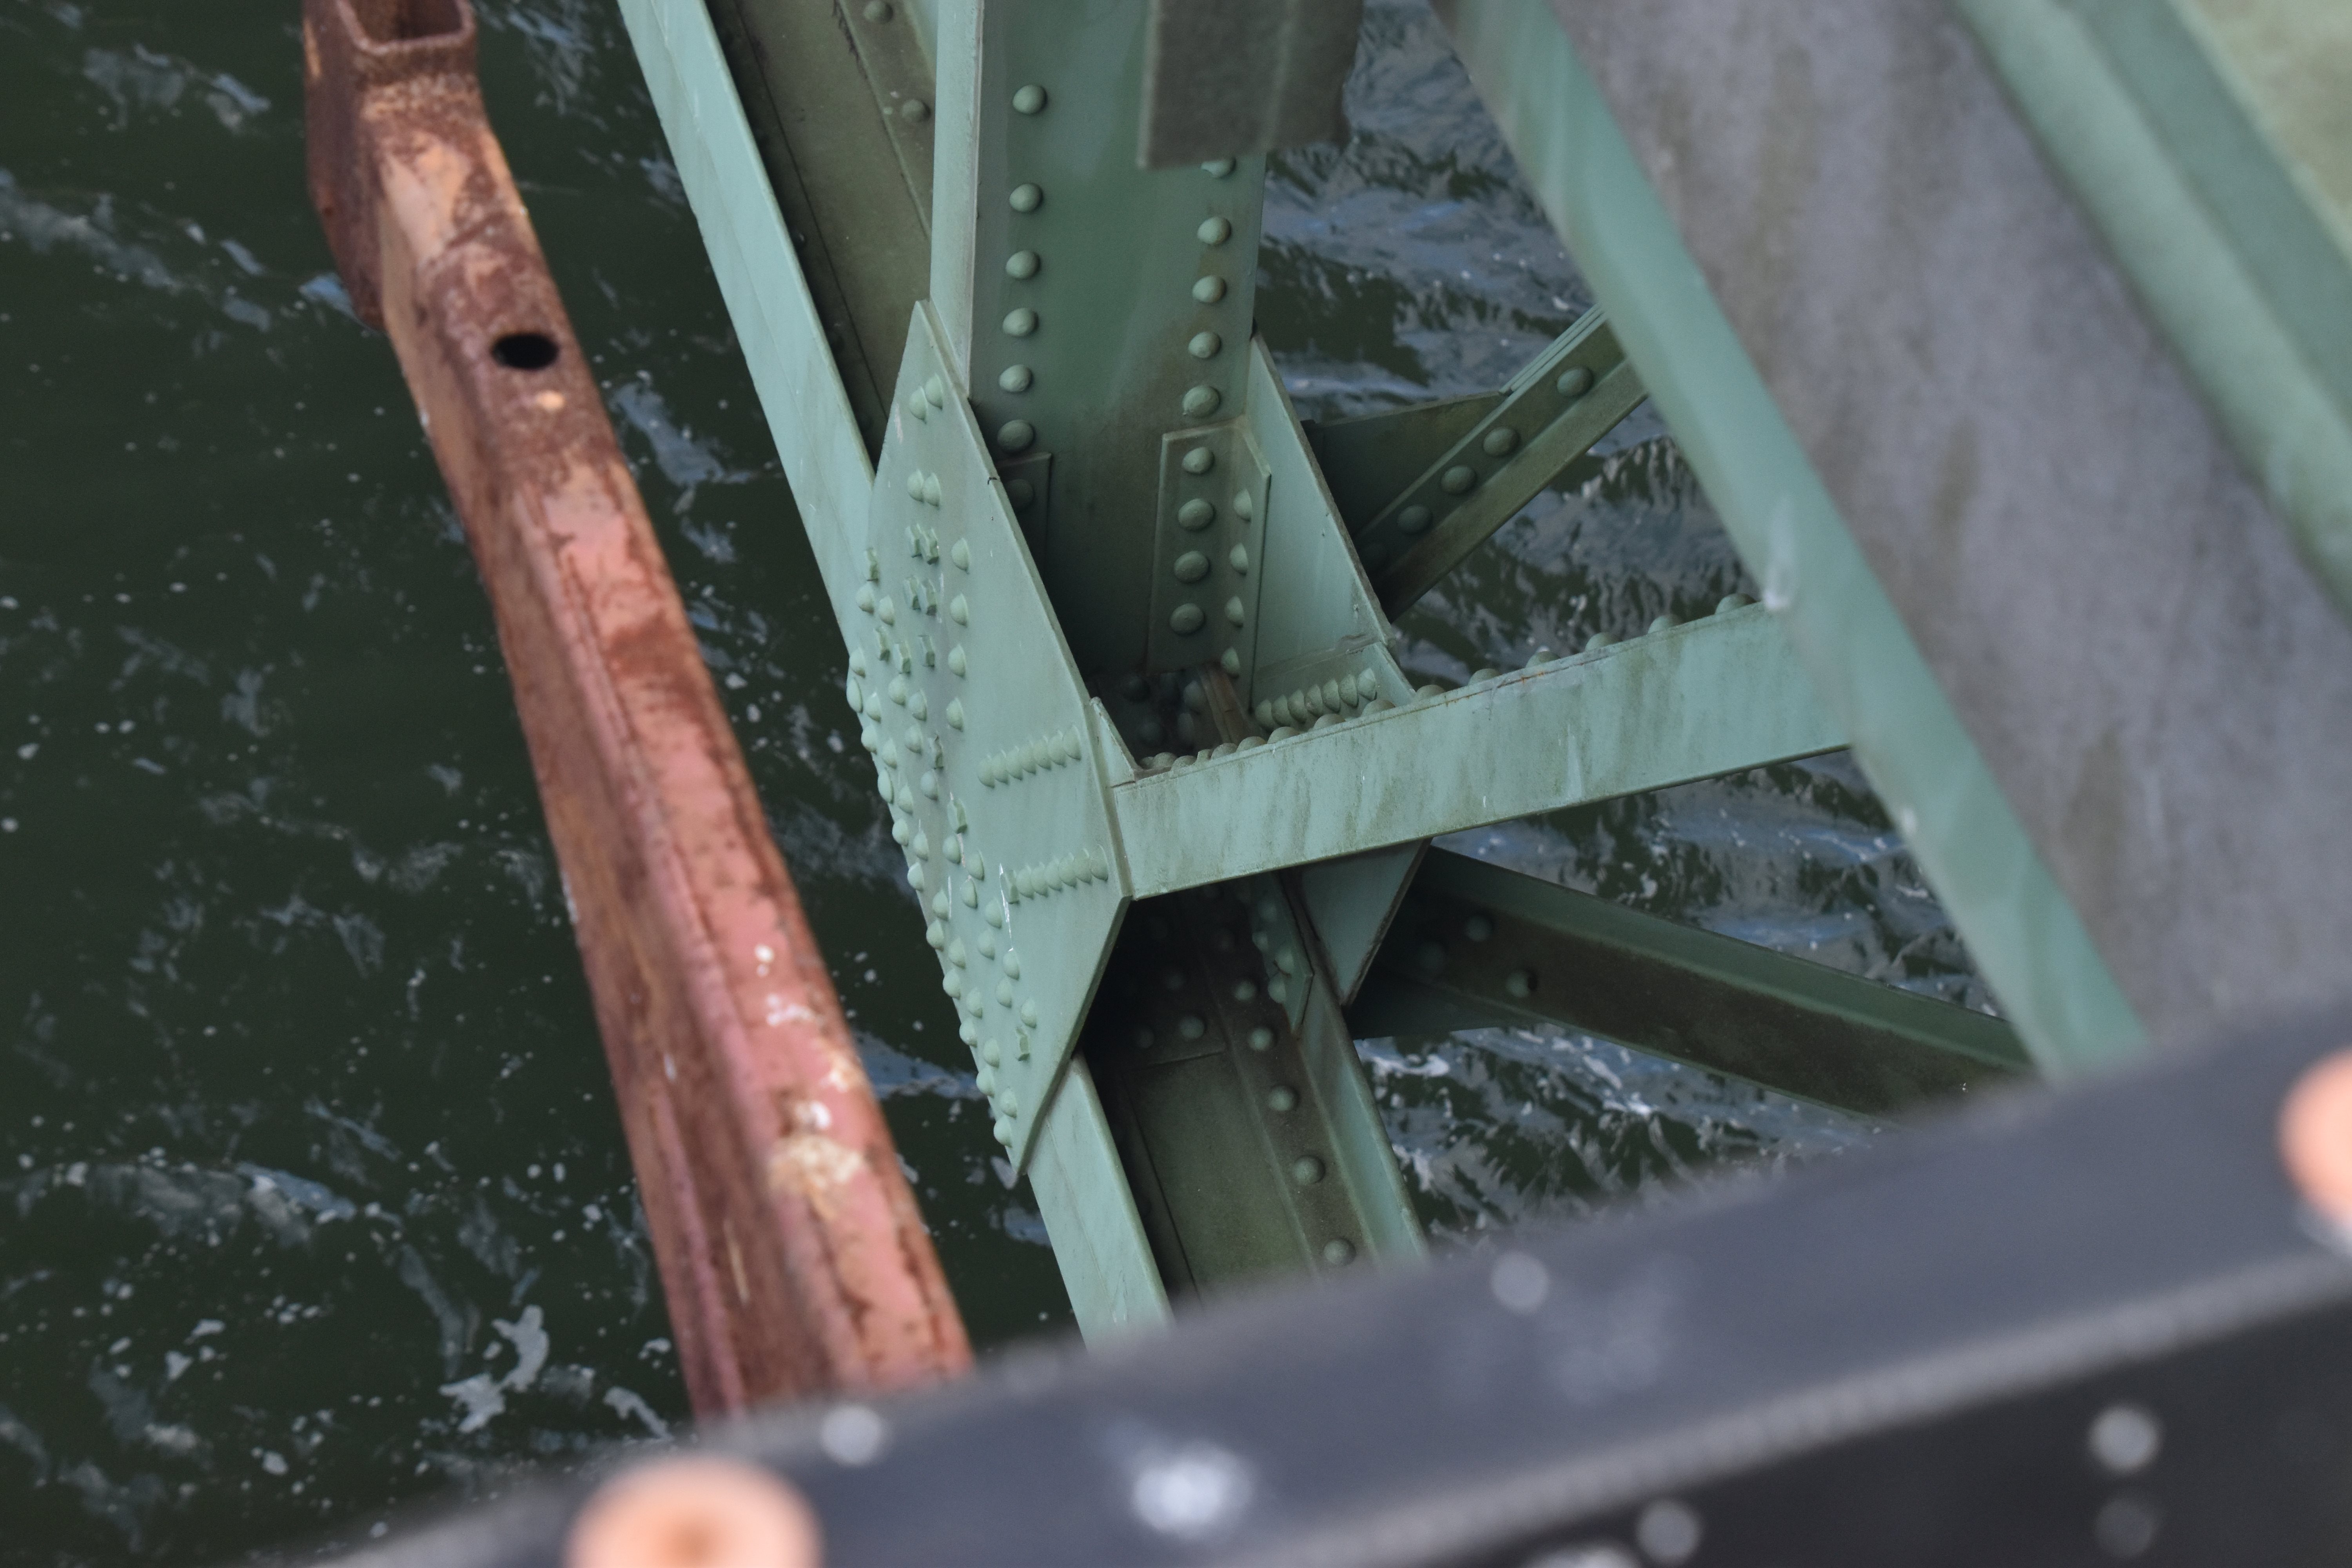
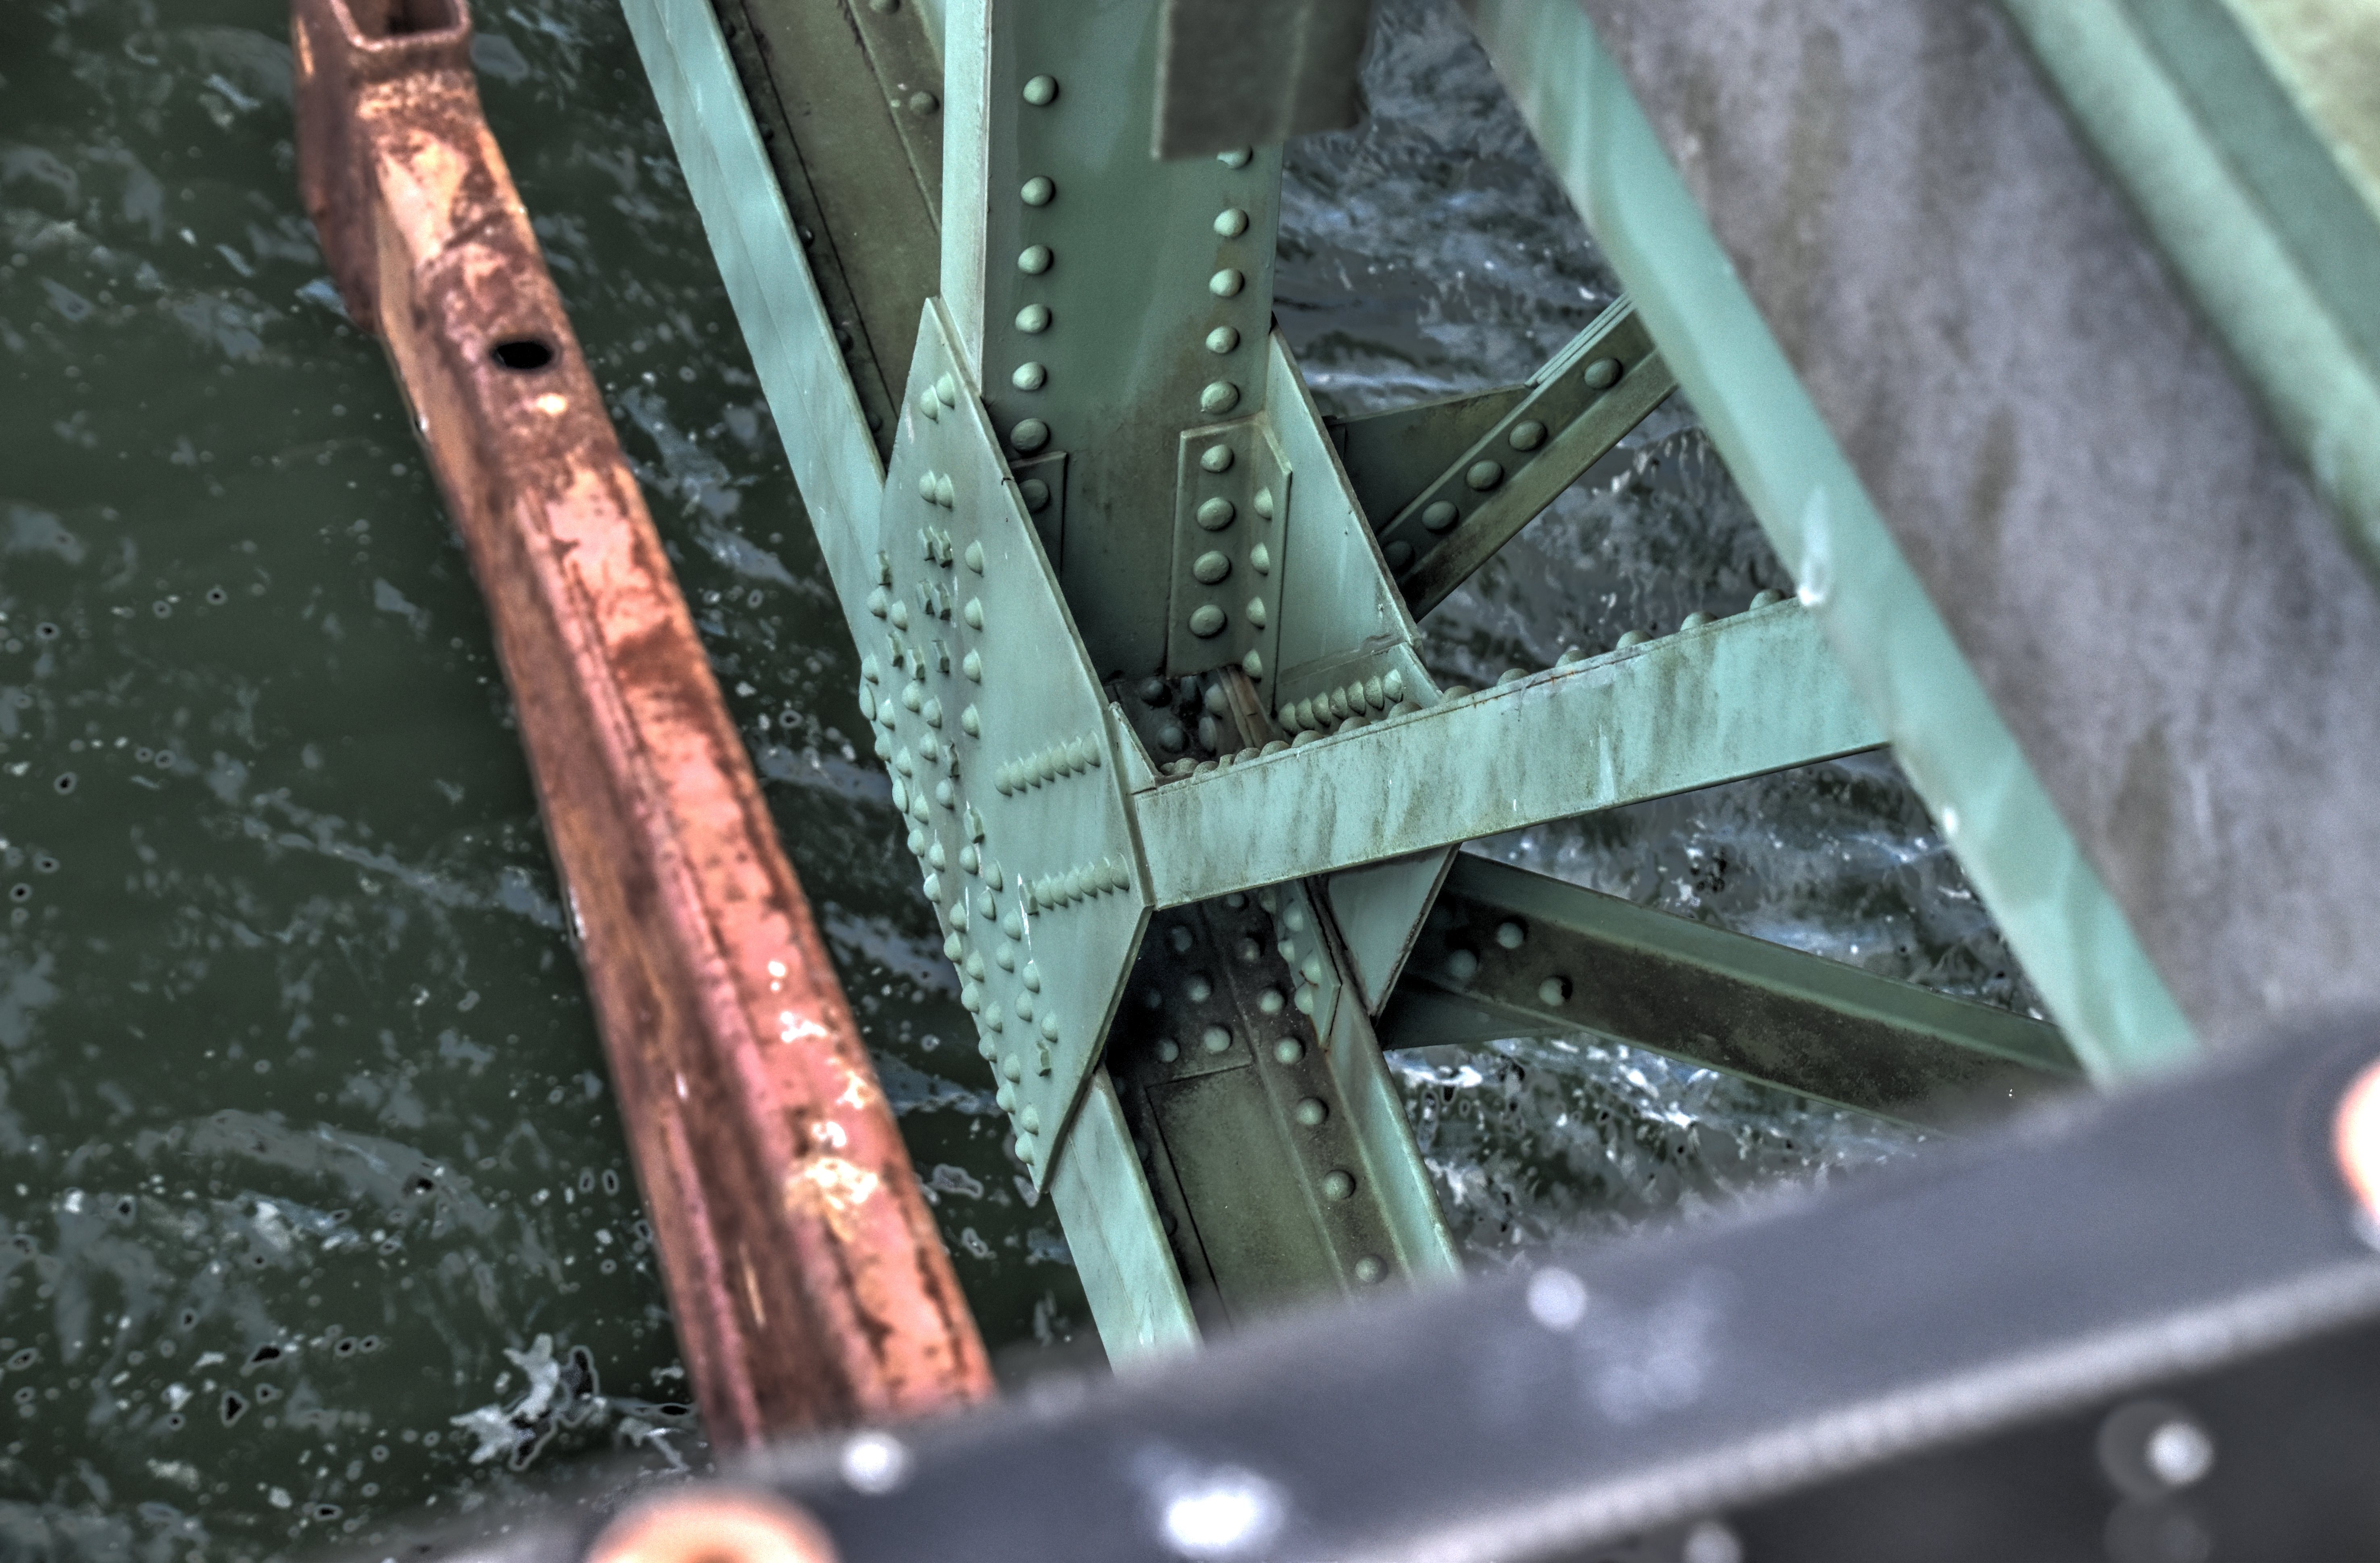
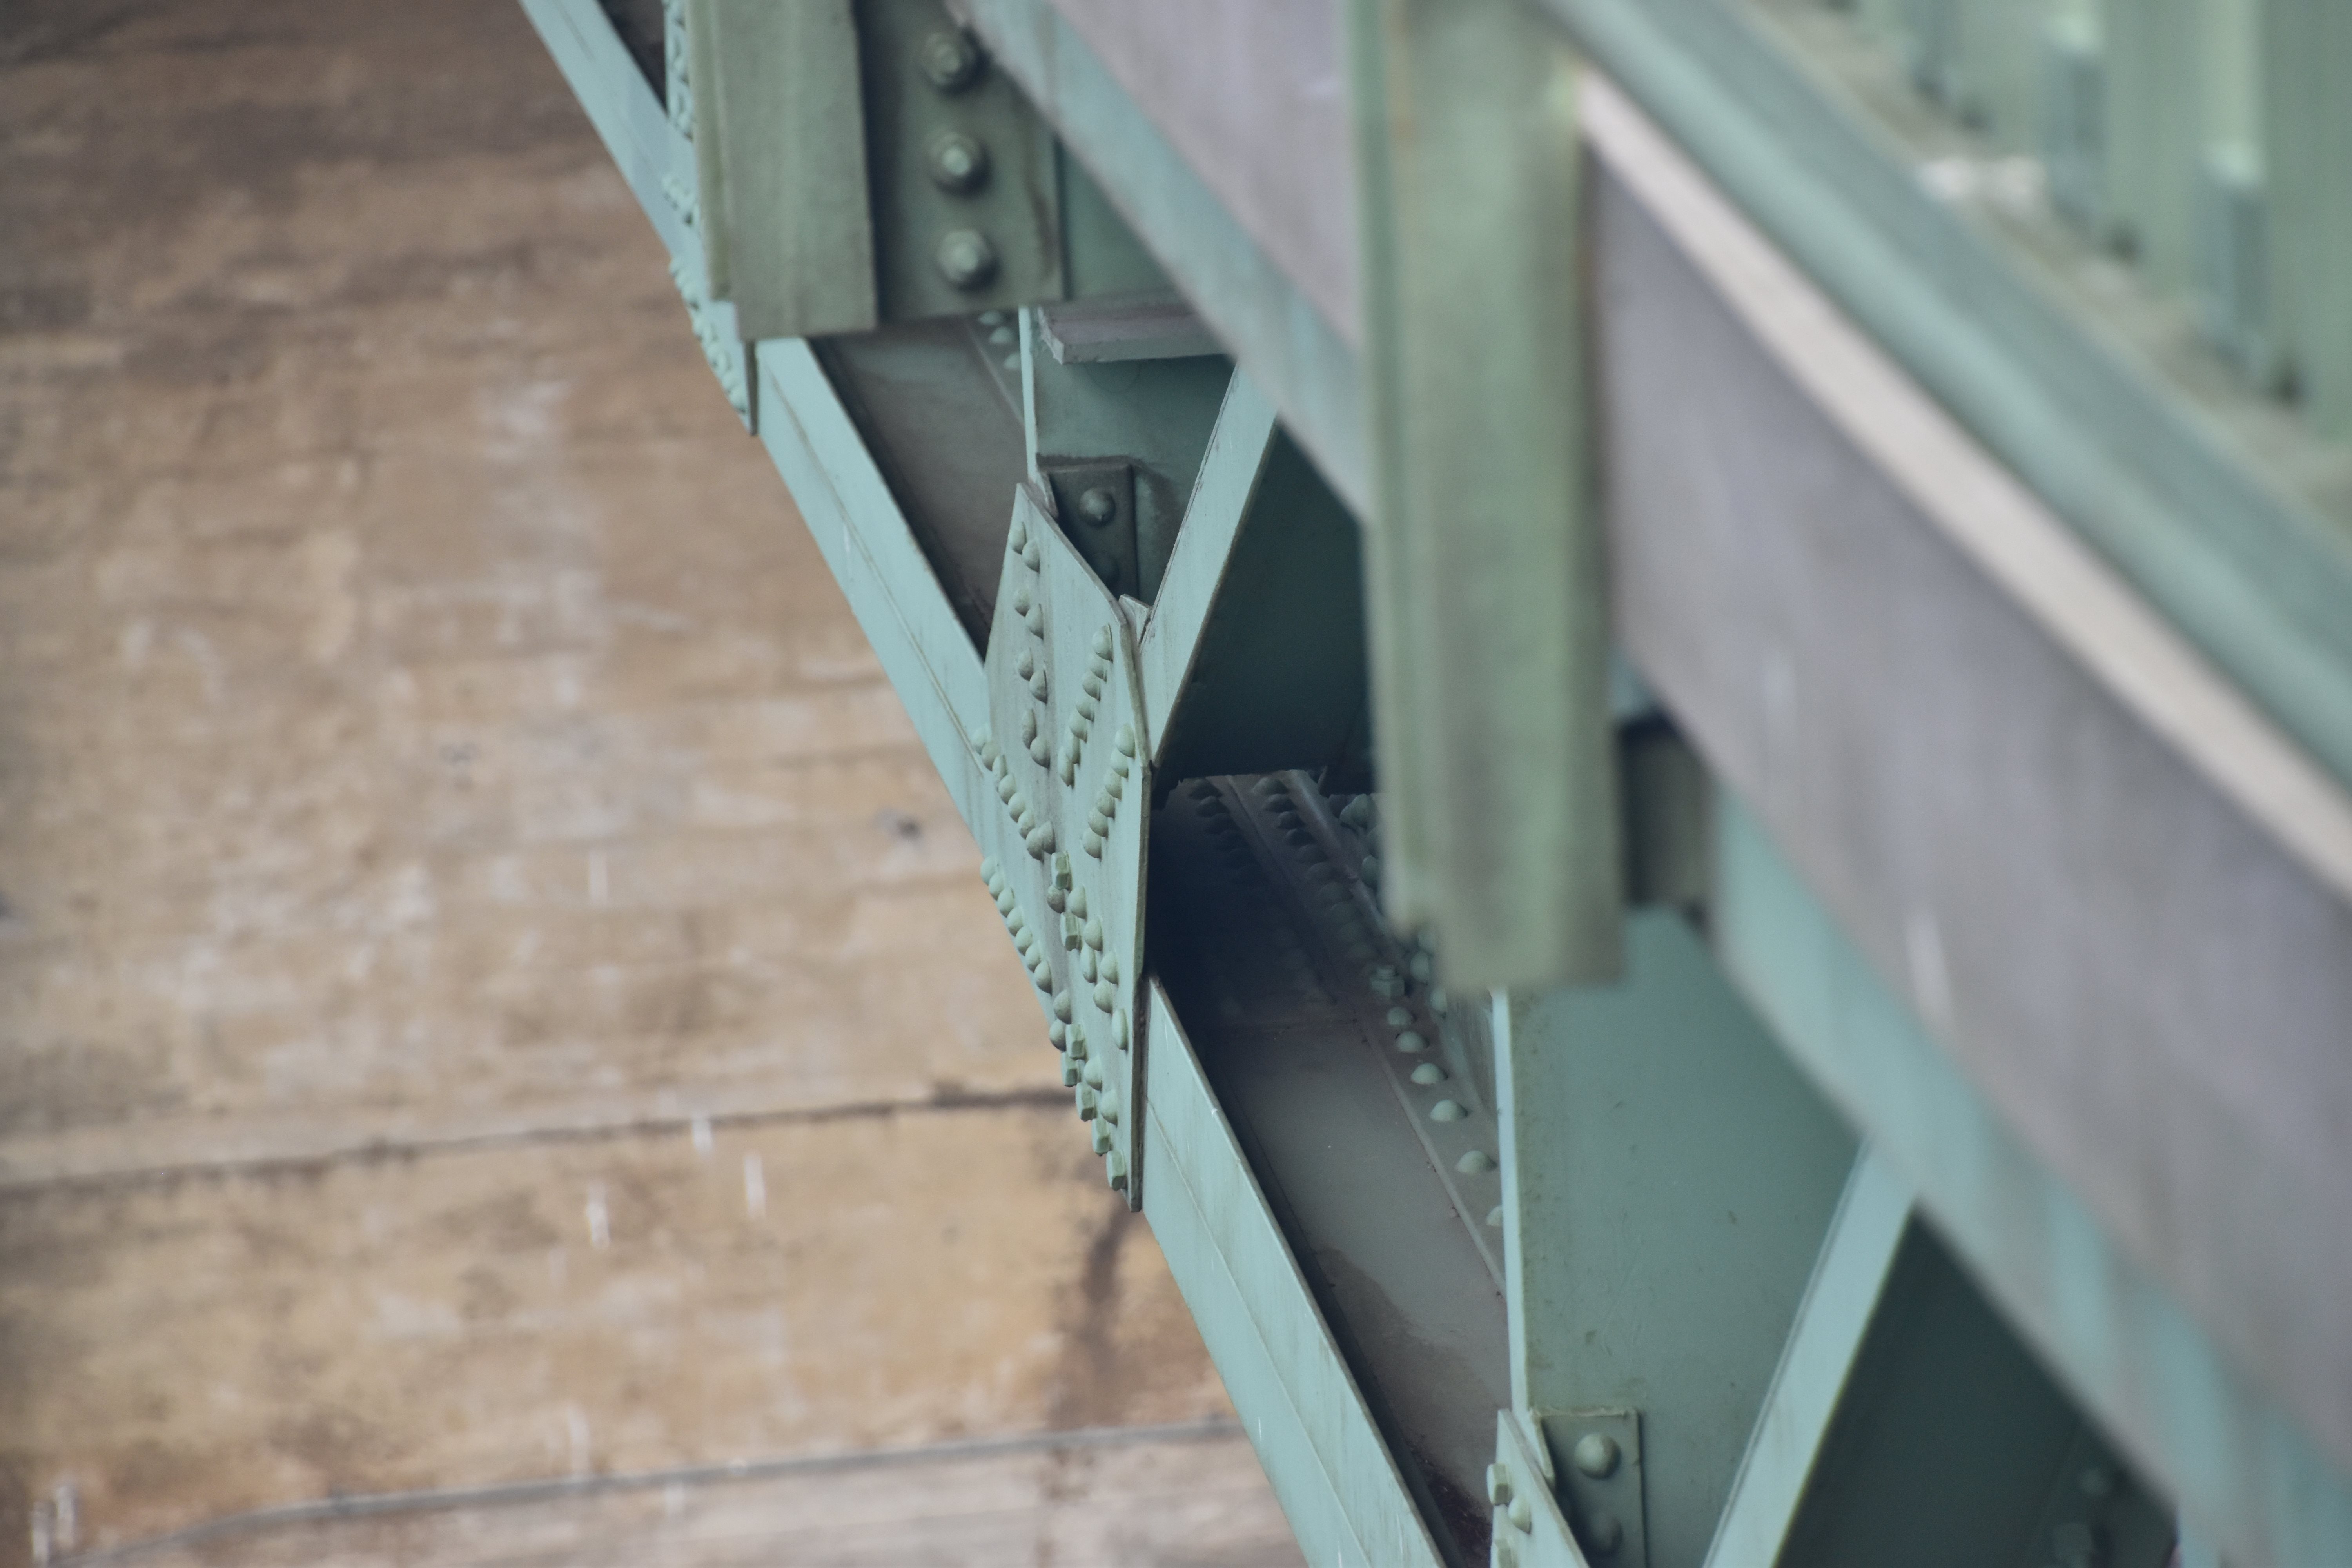
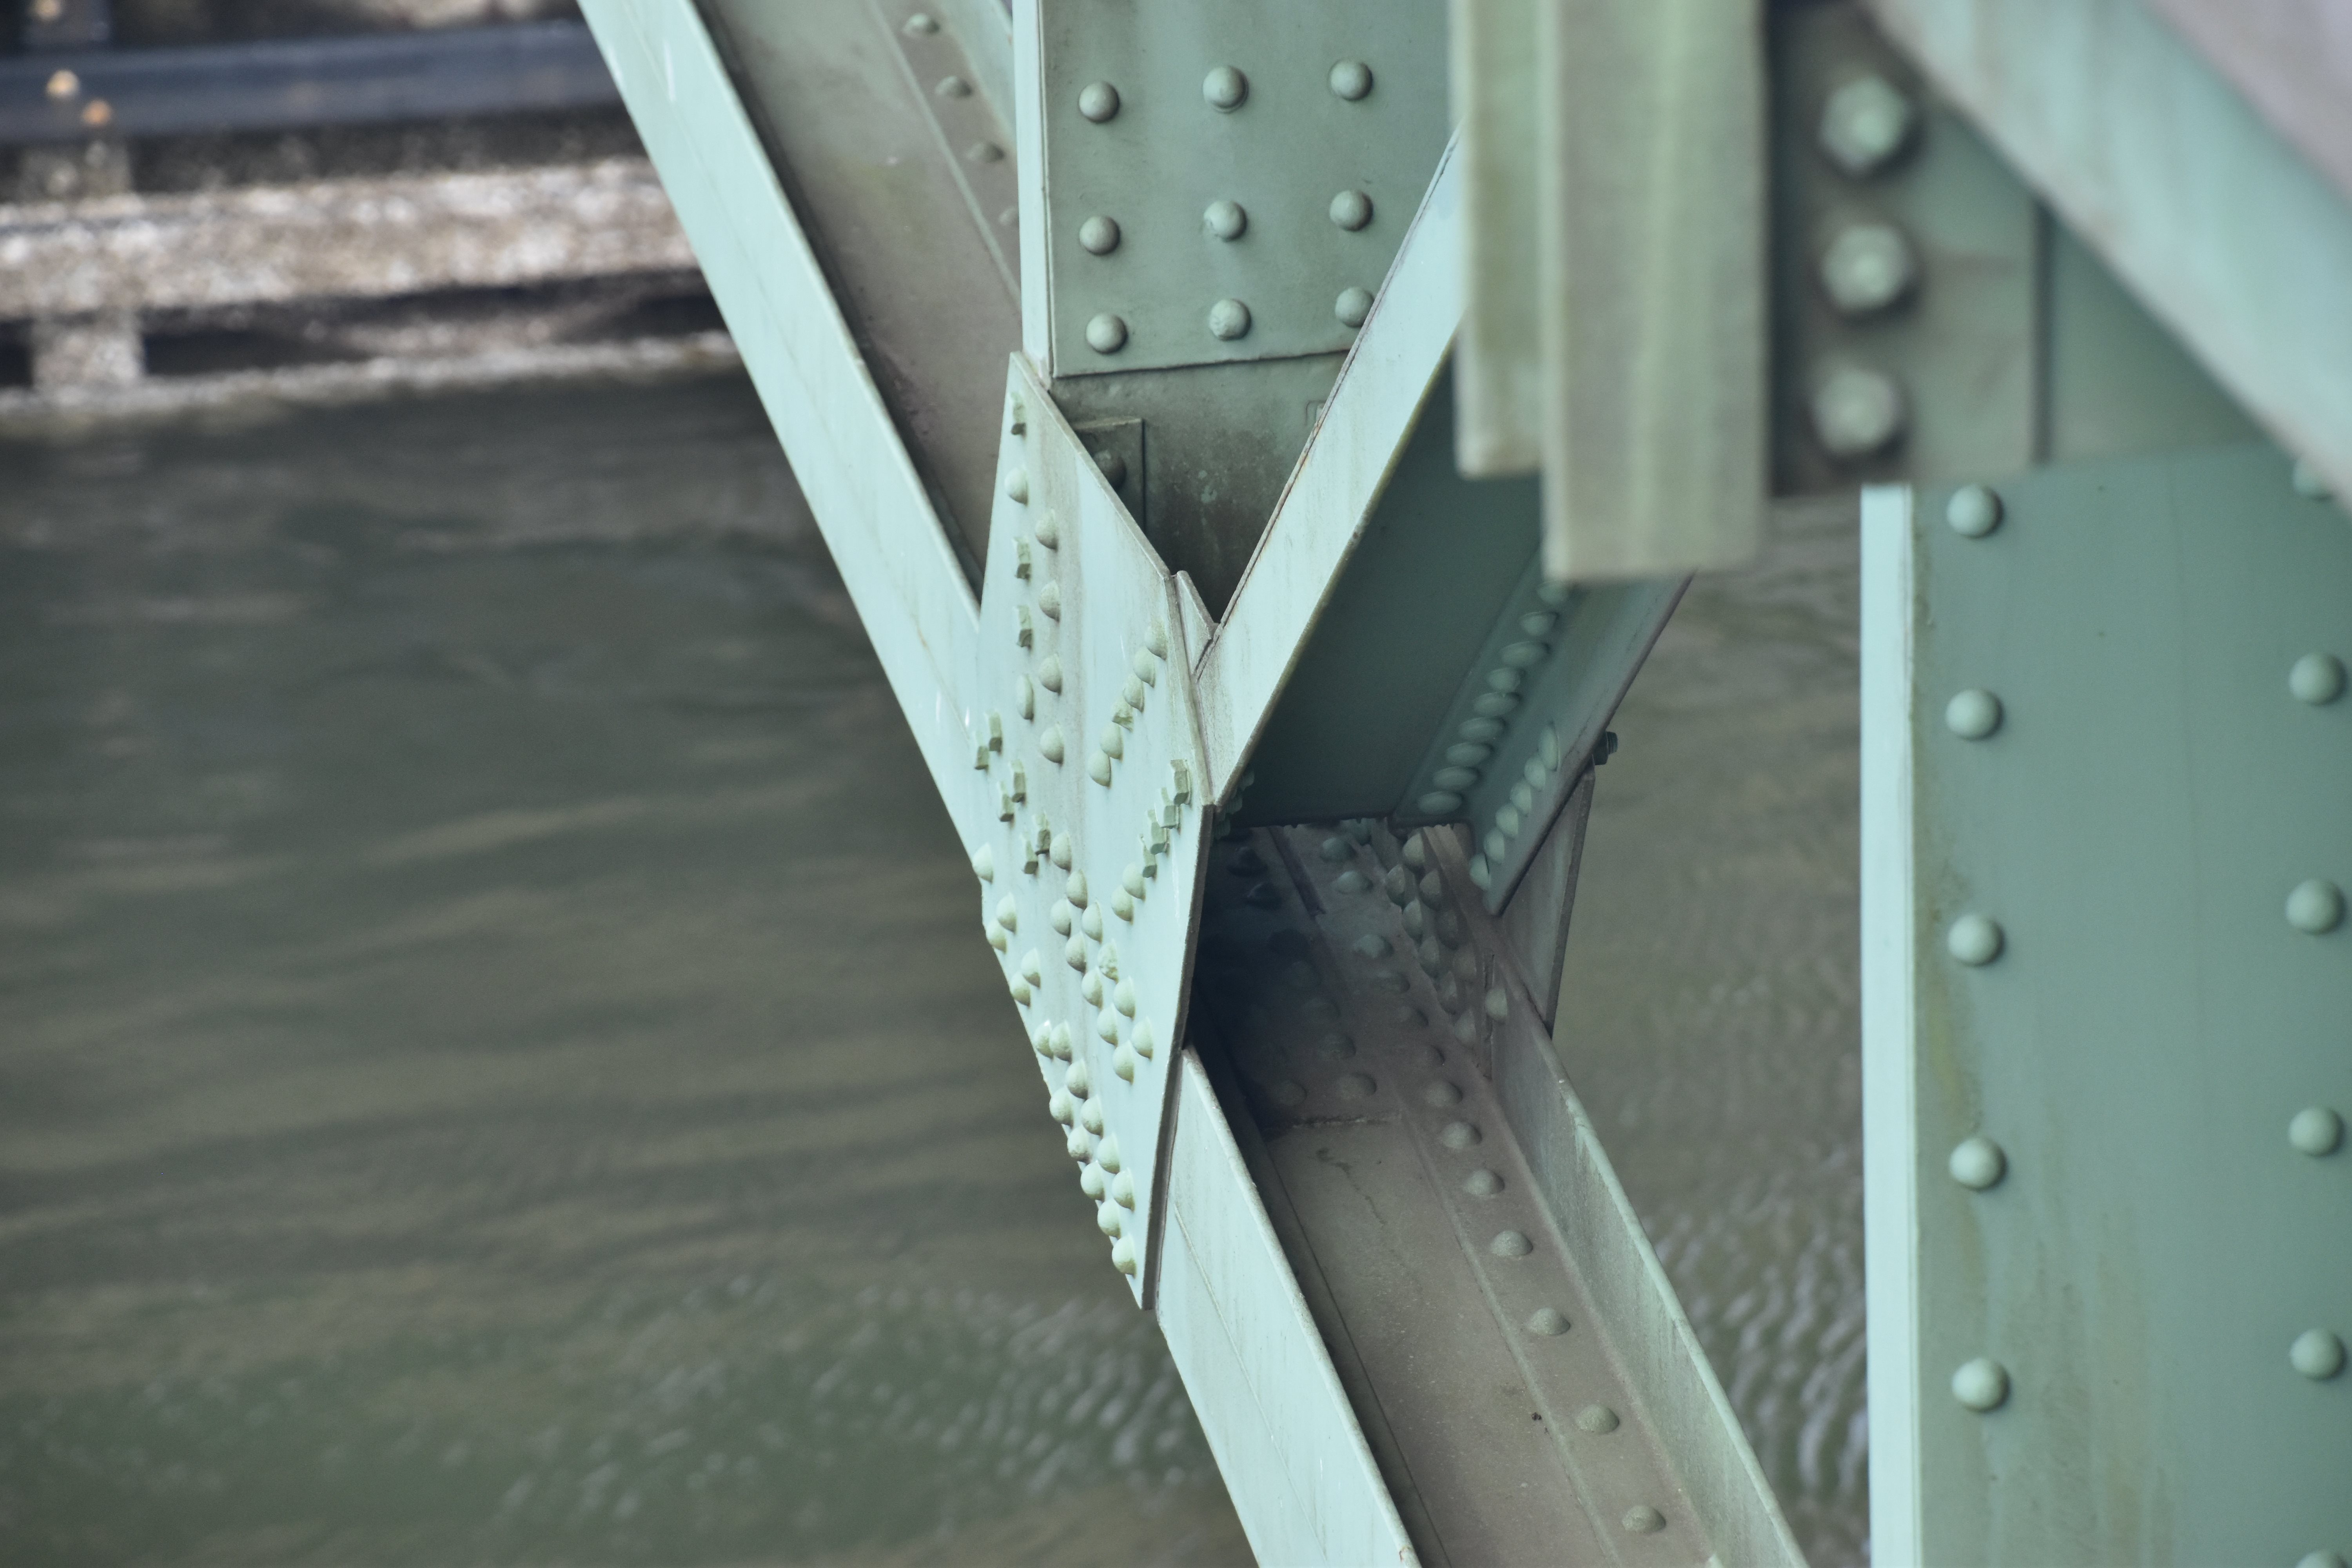
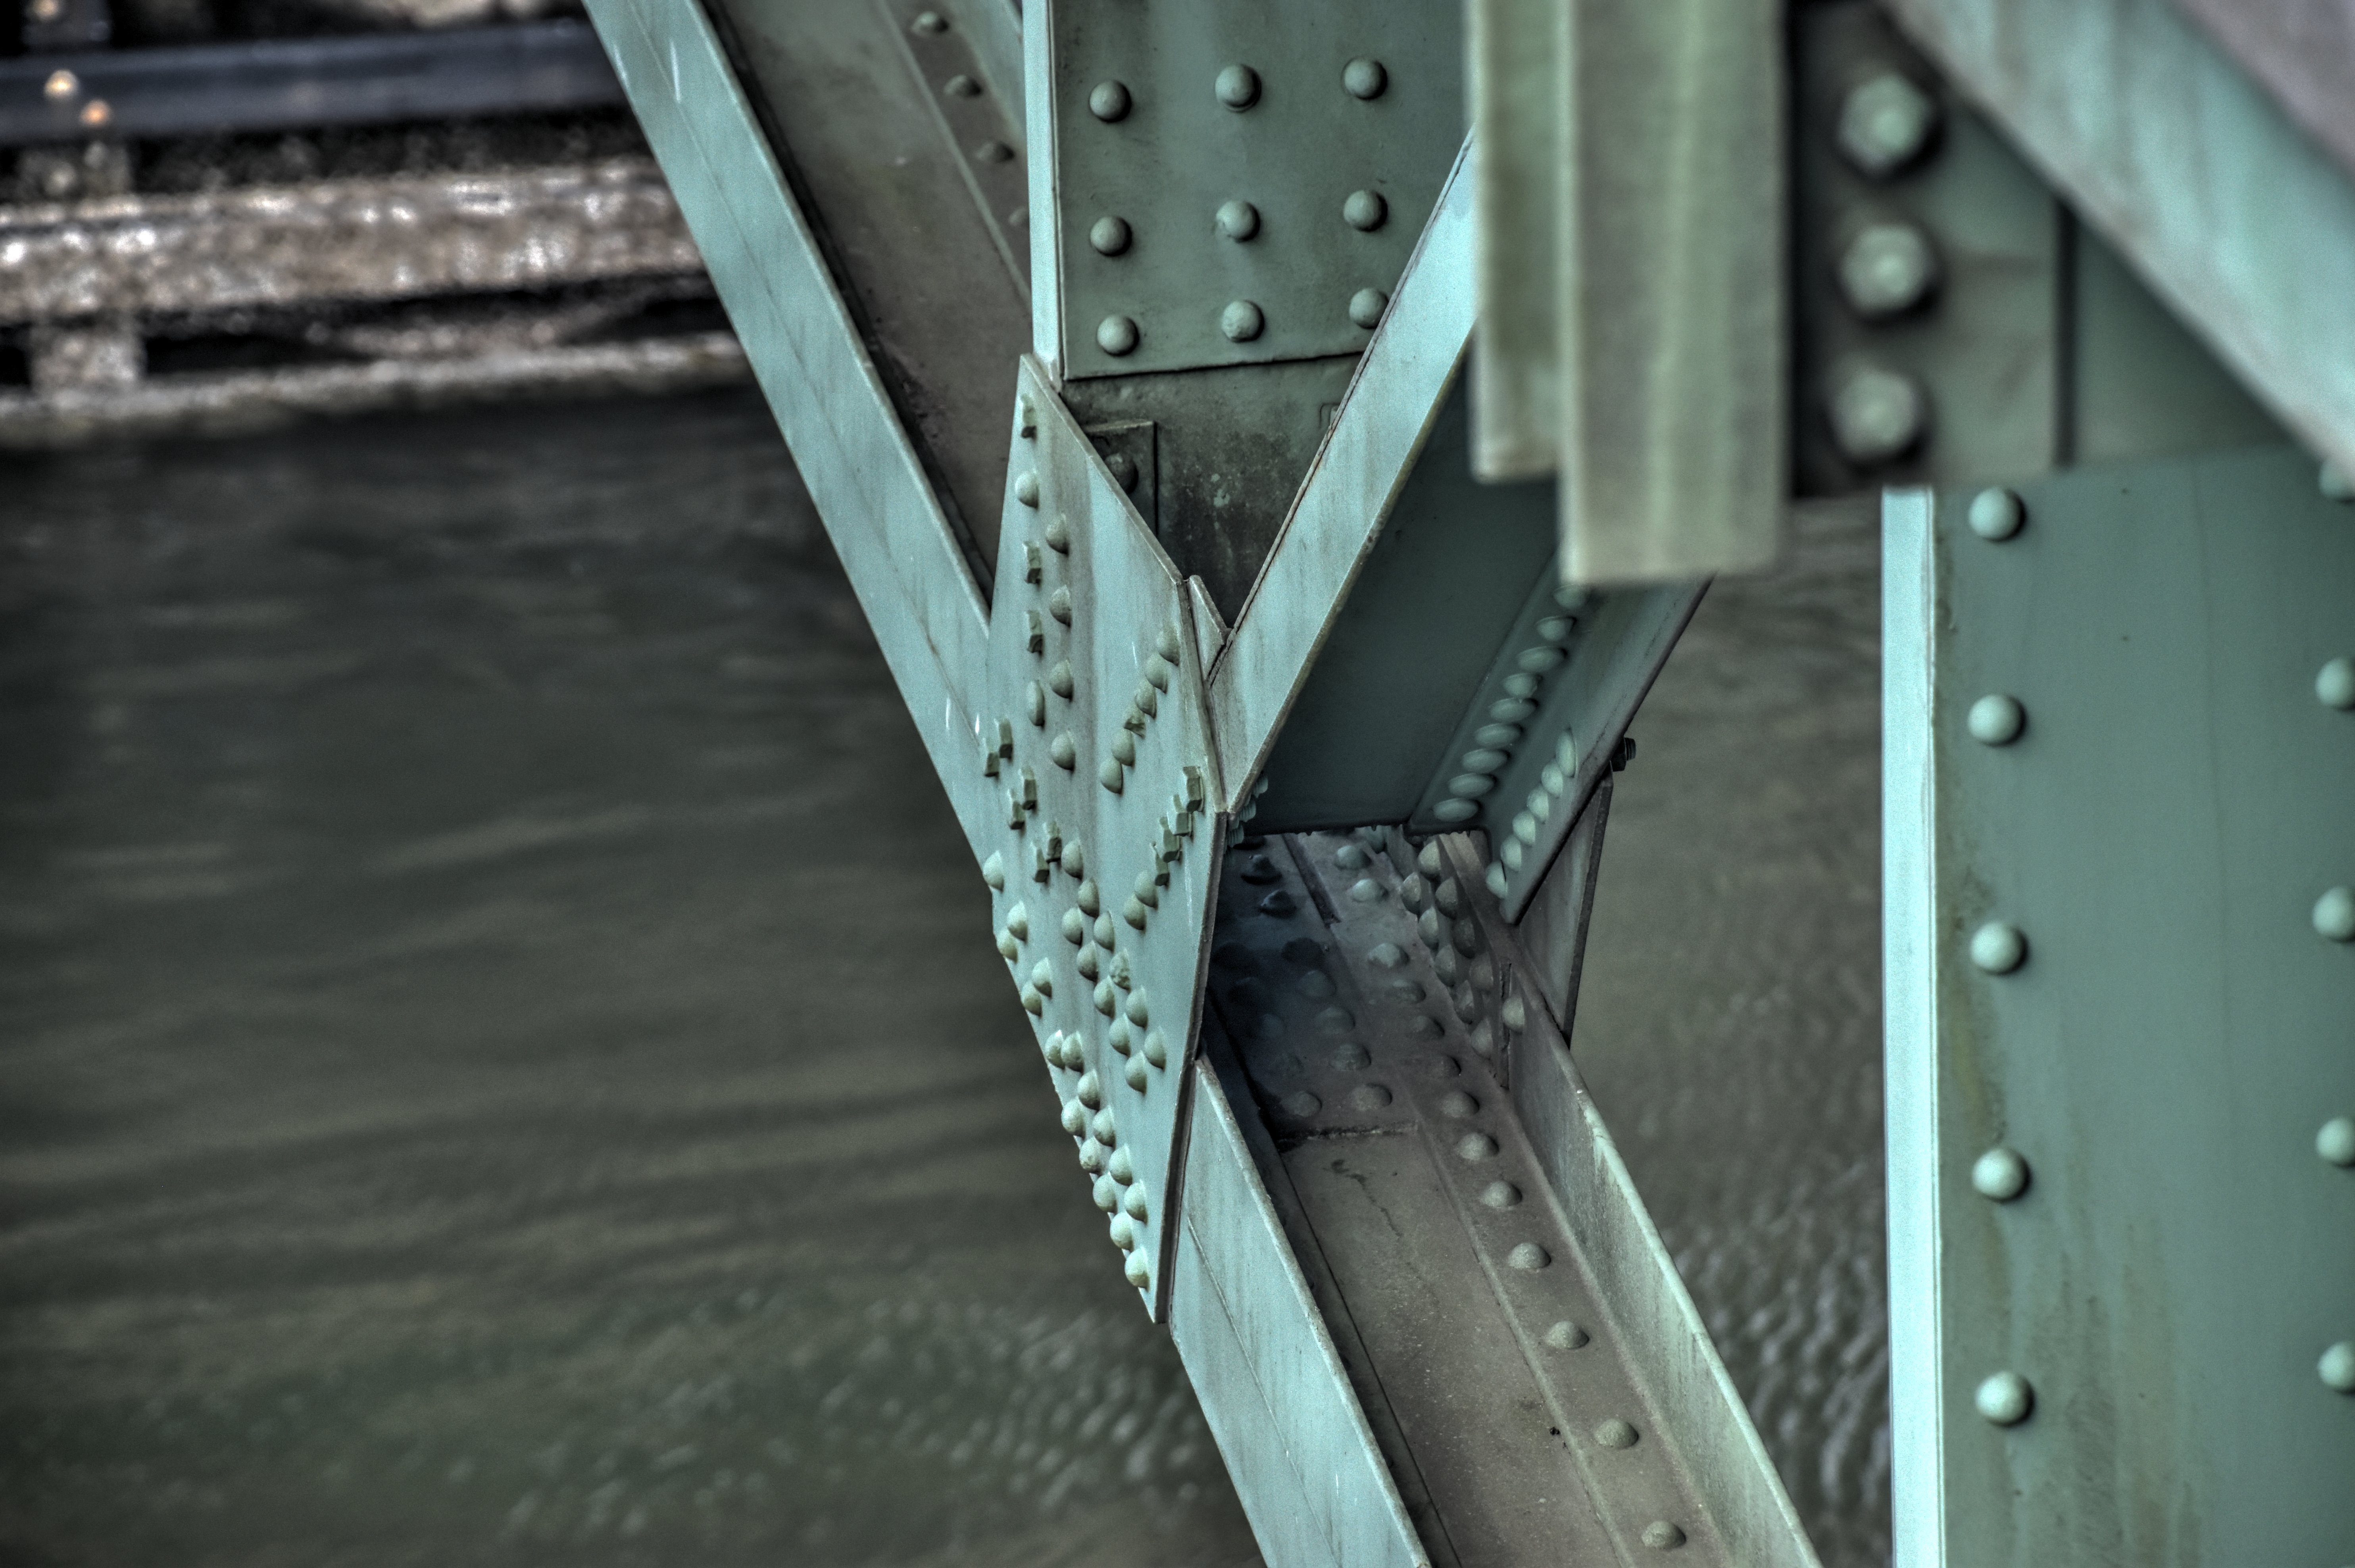
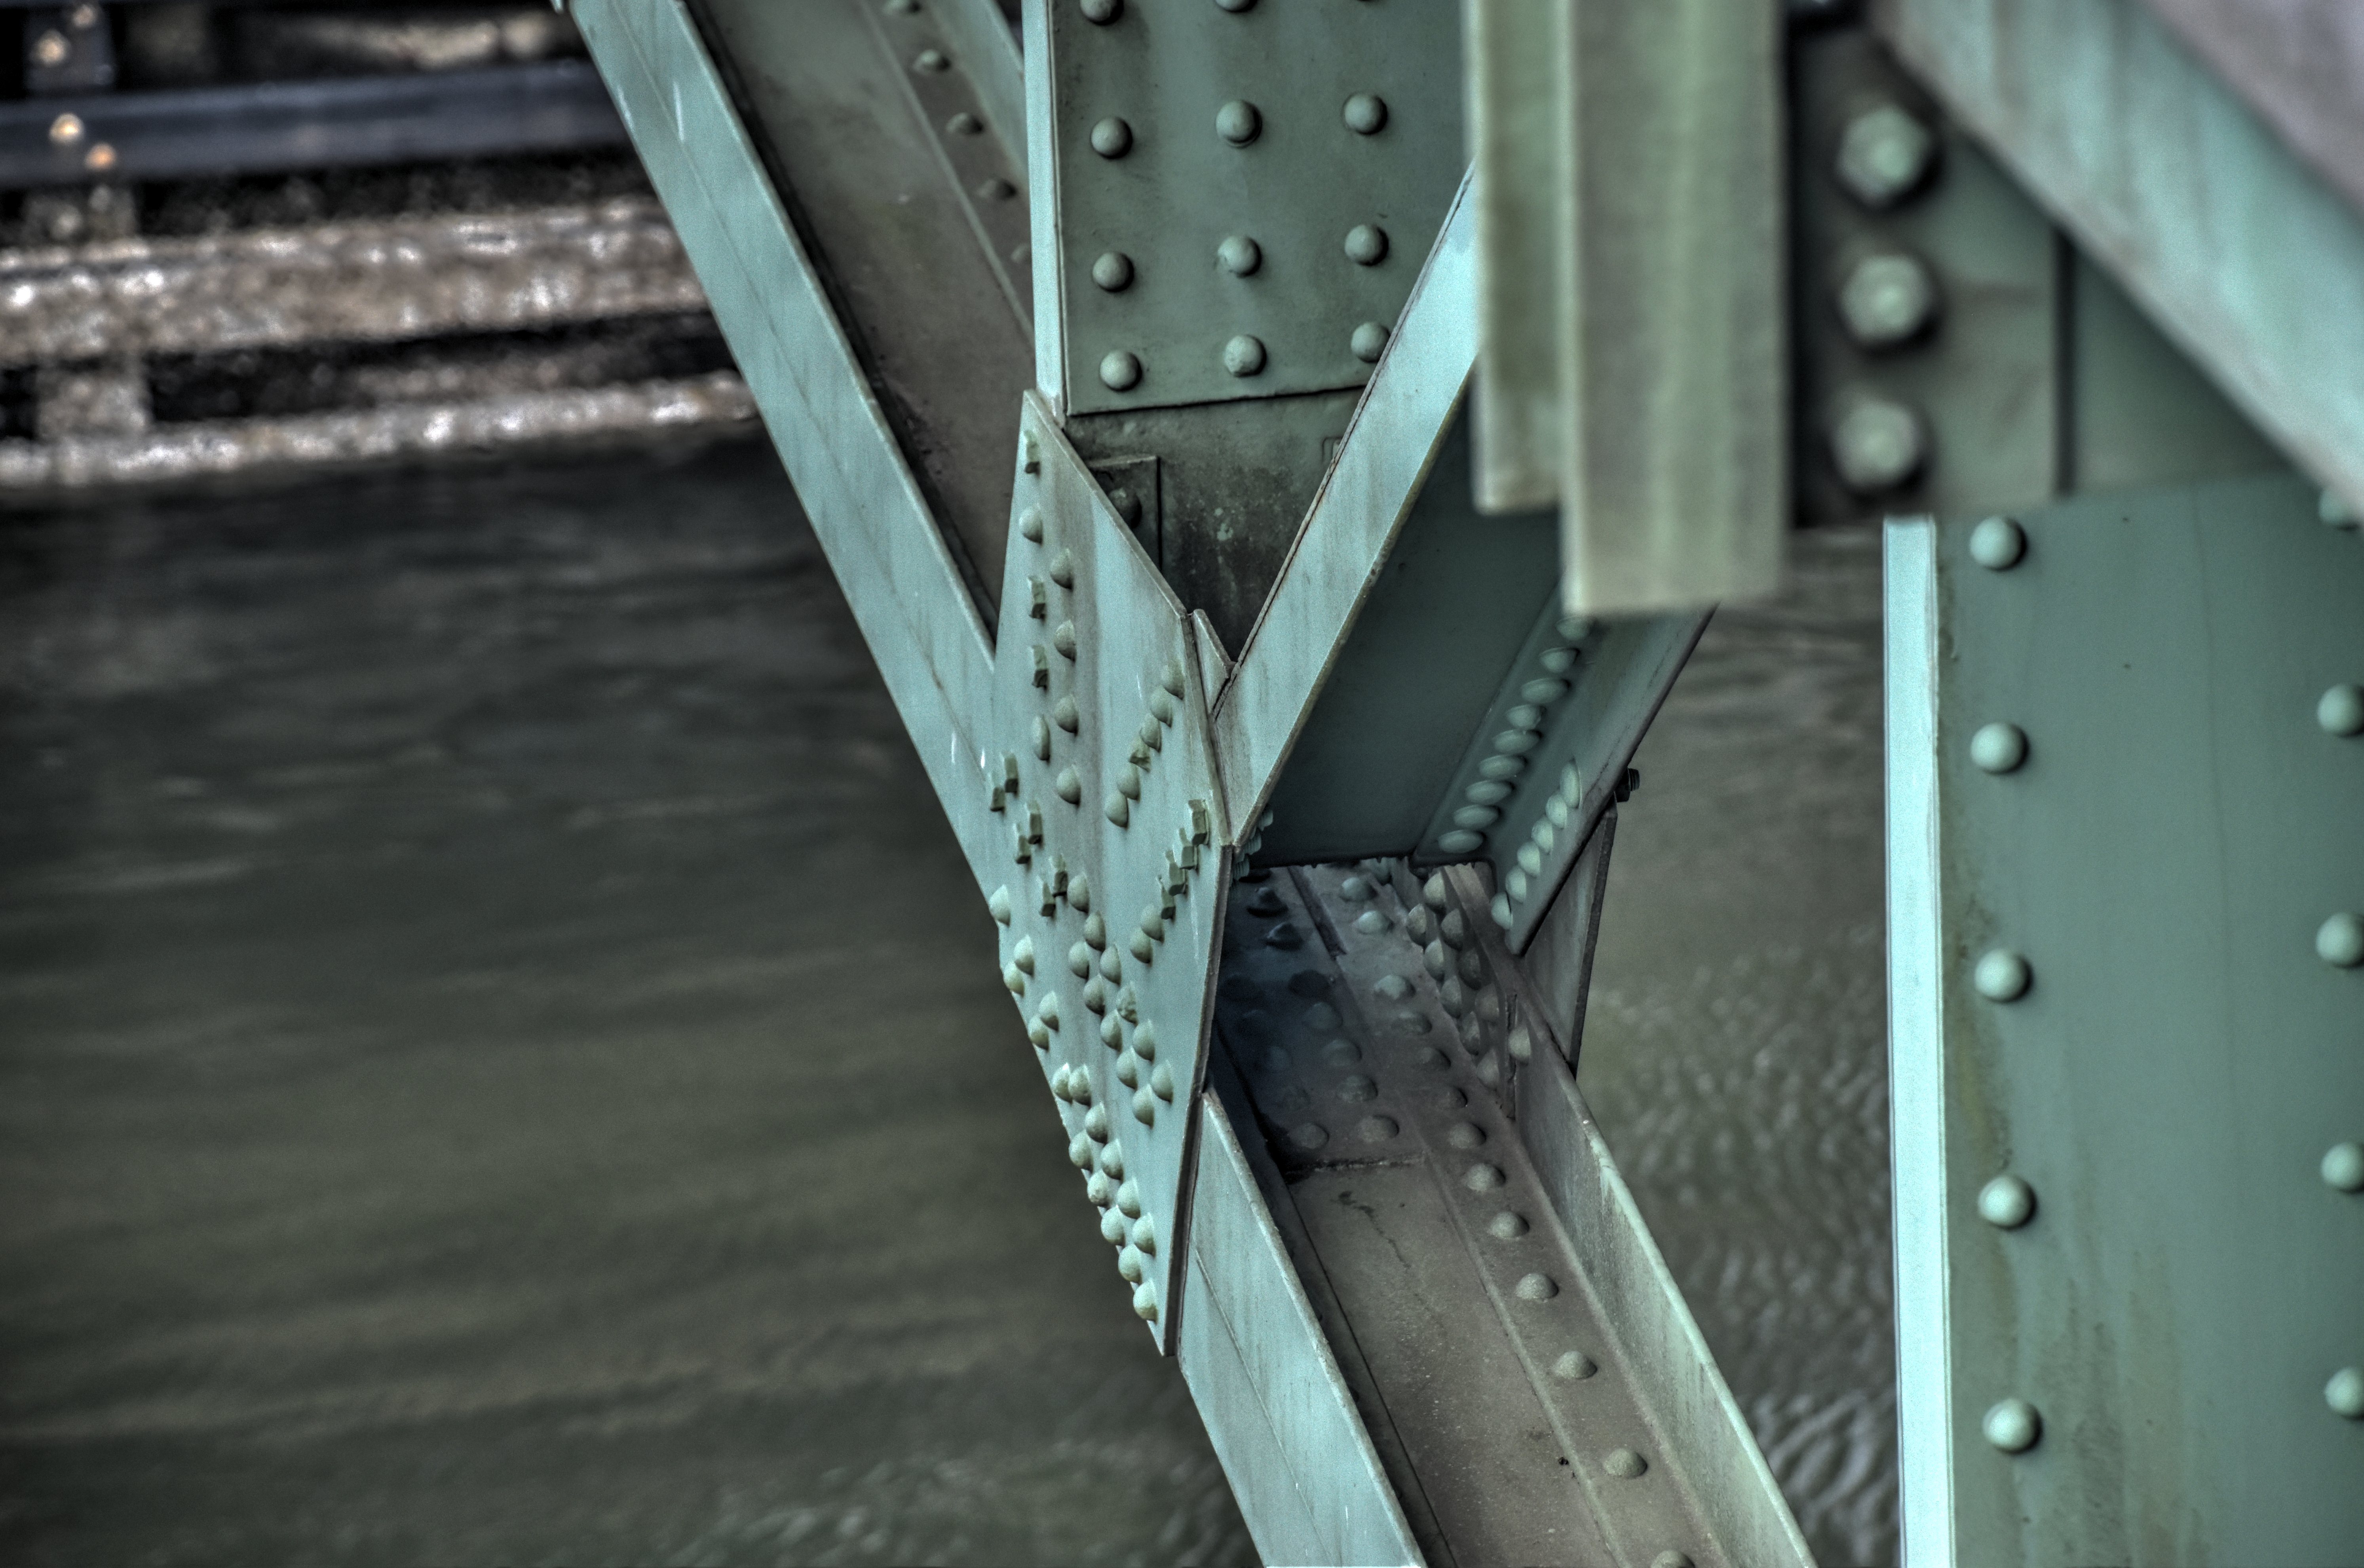
Approach span superstructure details.
![]()


View from bridge.
![]()
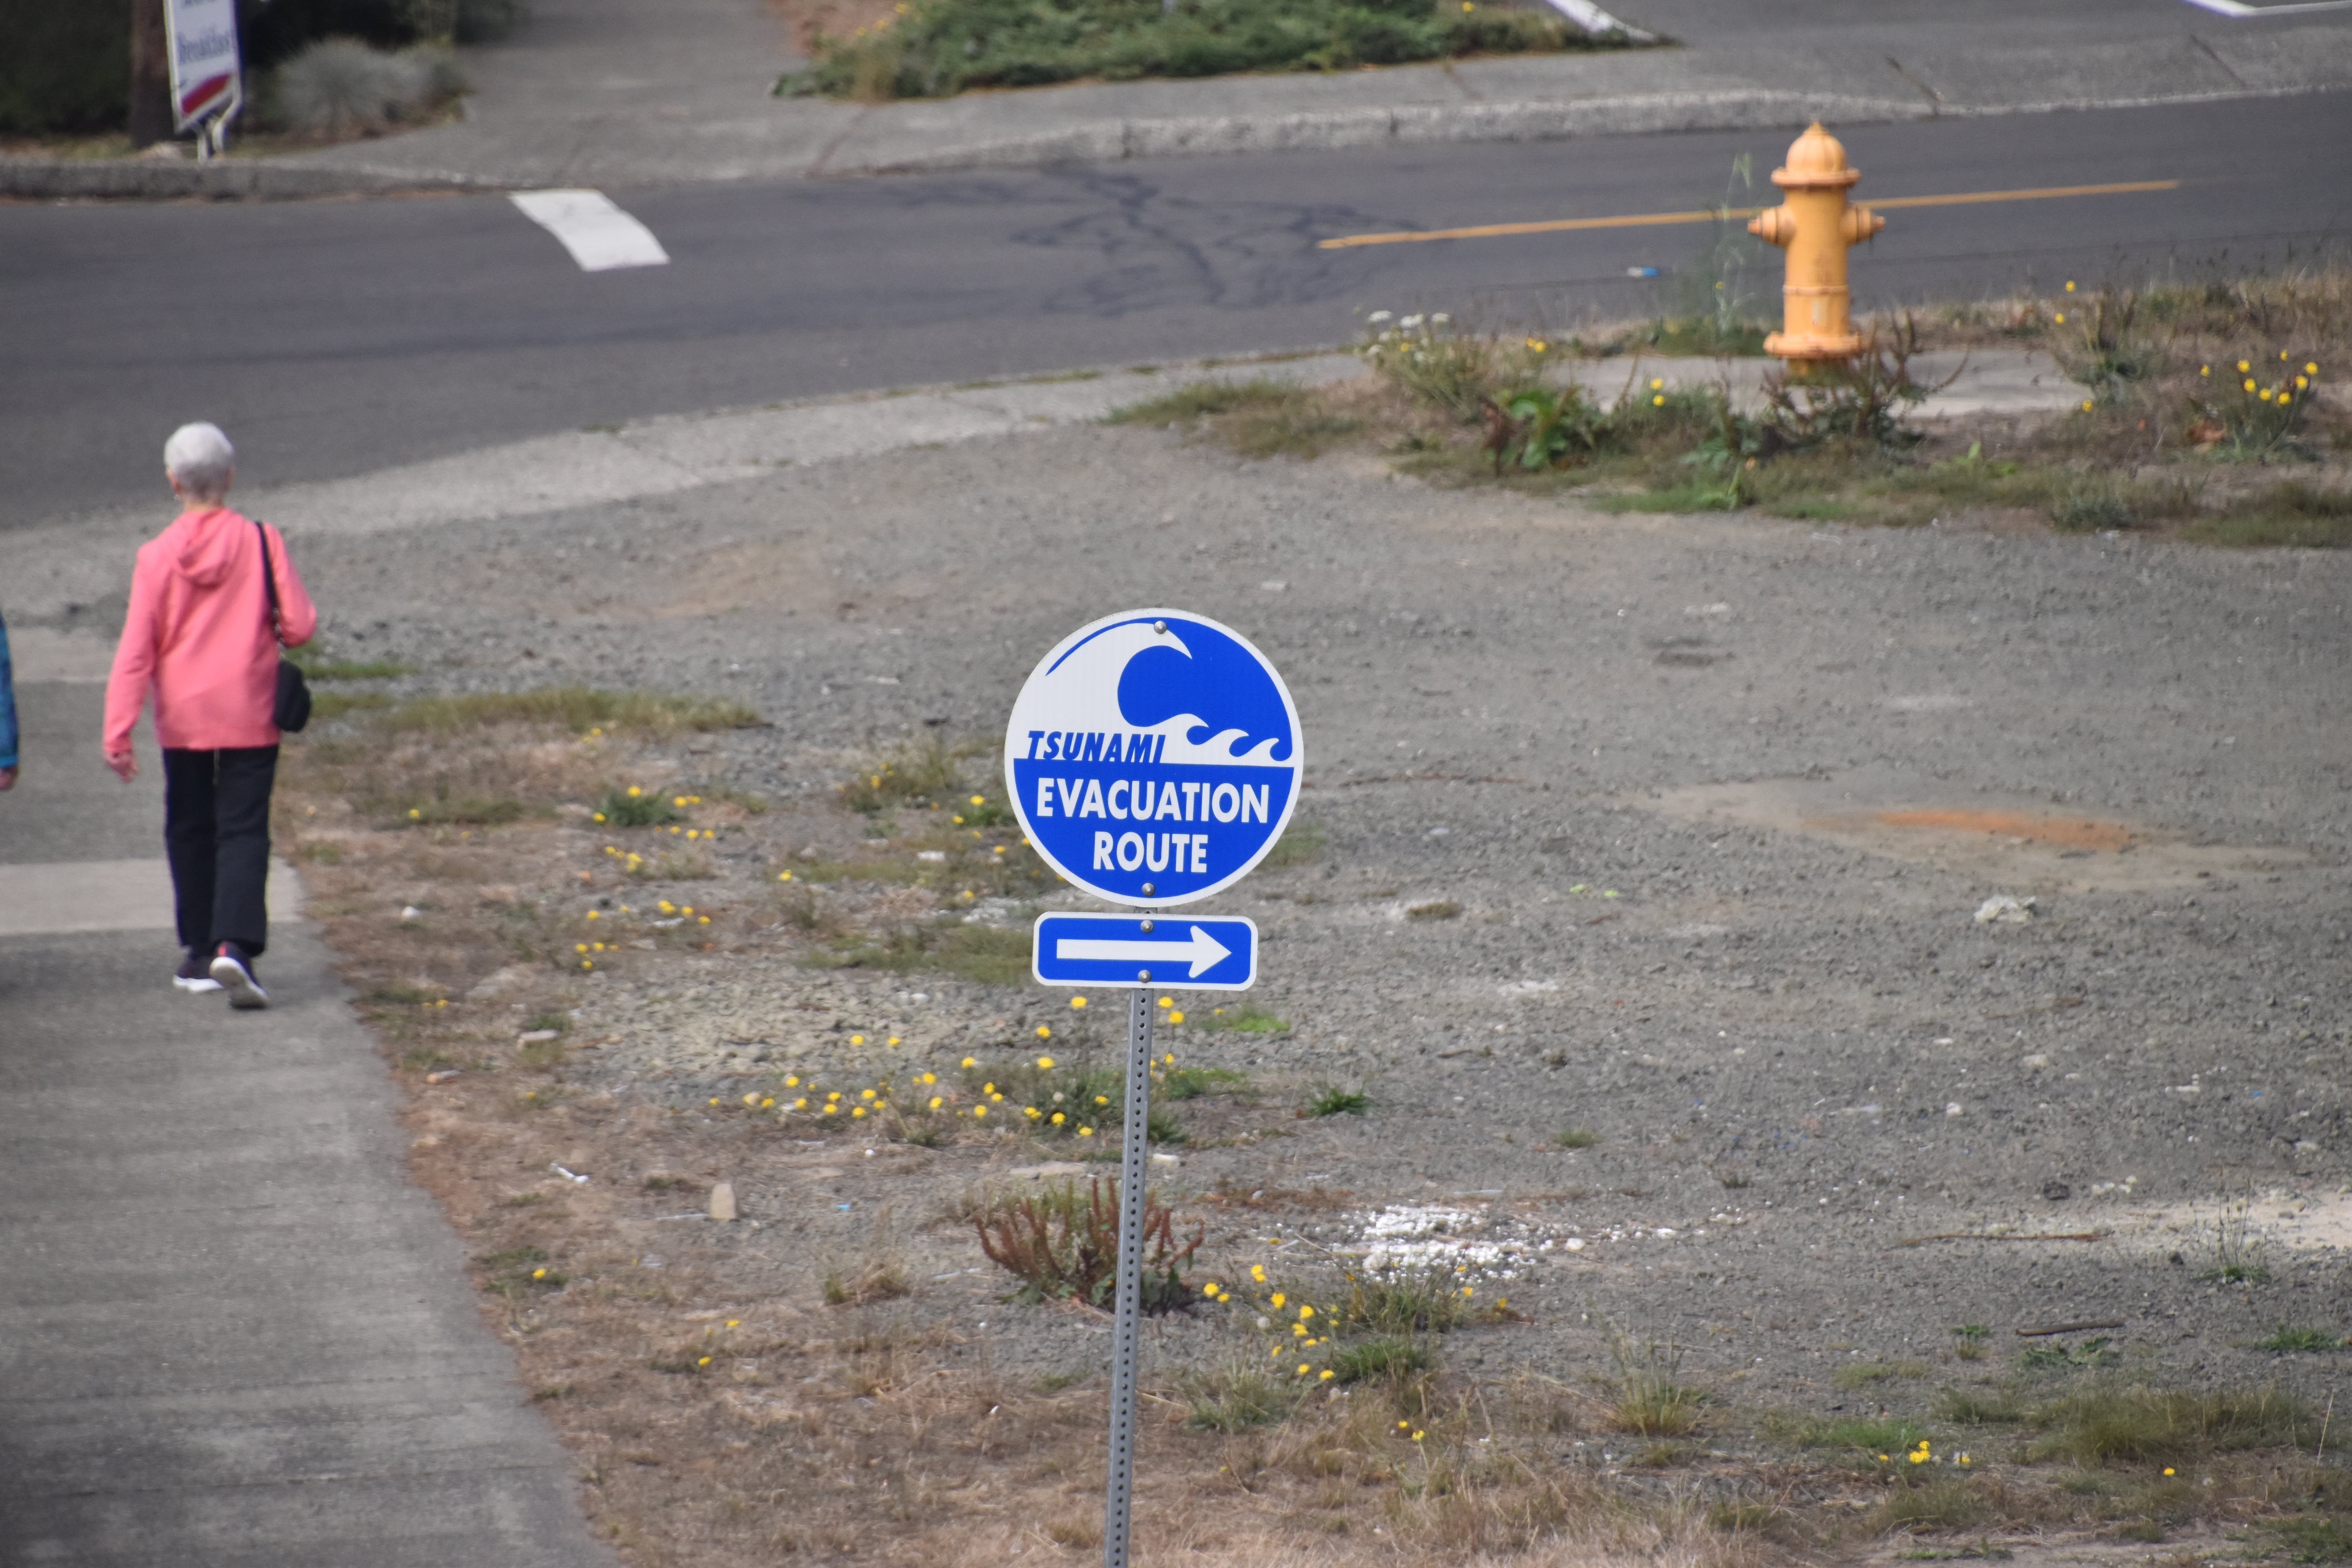

Tsunami signage near bridge.
![]()
Florence.
![]()
![]()

![]()